
Dragon Quest 6 Walkthrough - Chapter 12
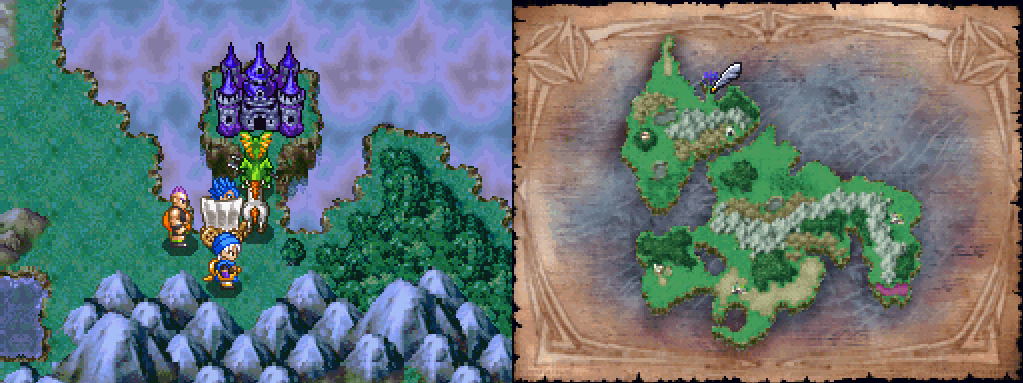
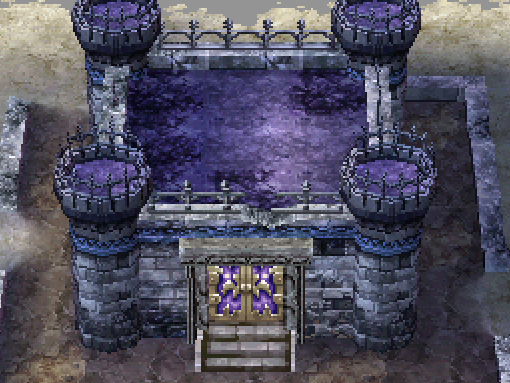
Our next dungeon and the penultimate dungeon is Gallows Moor; it's a castle on the northern tip of the Dread World (pictured above). When you approach the guard outside of the castle and speak with him you'll be entered into a boss fight with Gallows Giant. It's not too difficult of a fight, just use Kabuff and blow him up with your best attacks.
After, speak with the other giant who is outfront of the entrance and he will suggest you pretend to be prisoners at first while you gauge the situation. This dungeon is a real pain when it comes to story progression, there are a few NPCs that you need to speak to between each scene to advance the plot forward. I'll provide you with the location of each one as well as a screenshot, getting to them from where you are will be up to you.
1. Sneak out of your cell and go directly north down the stairs. Talk with Captain Blade here to get the Guard Uniform.
2. Return to the same area where you entered Gallows Moor and speak with the guard next to the stairs (pictured below)
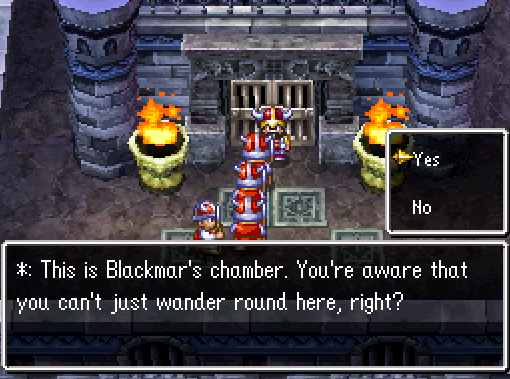
3. Go upstairs and outside to the guard standing at the gate between the two torches (pictured below) speak to him. This is the entrance to Blackmar's chamber.
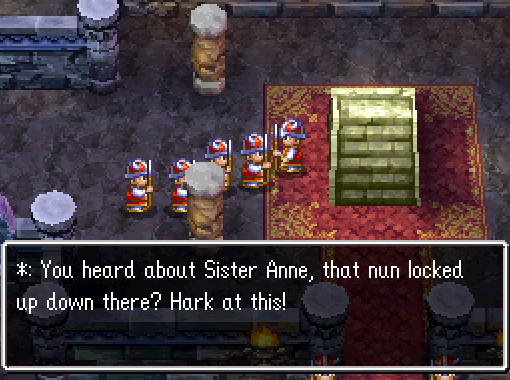
4. Go to the area with all of the prisoners (there is a graveyard here and a pub). Take off your Guard's Garb then speak with Patricia, an old lady at the bar. Tell her Sister Anne is to be executed.
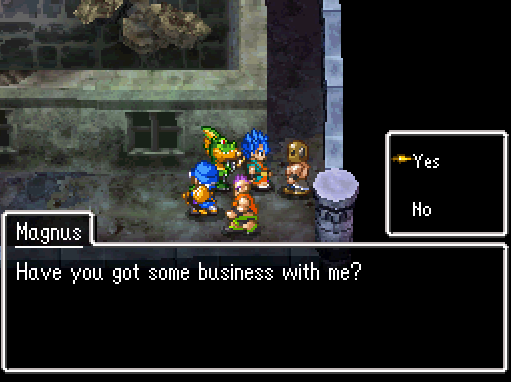
5. Speak with the merhcant in green just north of the pub (pictured below)
6. Talk to the guy in the alley just south of the pub (pictured below)
7. Go north and talk to the merchant we just spoke to but this time standing behind the counter
Guard next to the stairs by the entrance of the castle (#2) and guard outside Blackmar's Chamber (#3). Speak to both before talking to Patricia.

Patricia is the barkeep in the pub near where your Cell is (#4).
The merchant north of the bar that we have to speak to twice (#5 & #7) as well as Magnus south of the bar (#6).
Once you've spoken with the merchant behind the counter, attempting to leave this area will trigger a scene. After the scene is over you'll have to fight two prison guards followed by a boss encounter. You can't win the battle with the boss so just wipe and you'll end up back in your cell once it's all over.
You'll awaken the next morning and the prison will be in the middle of a revolt. Speak with the guard who is sleeping next to your prison door to trigger another scene. When you're ready to continue with the story go to the northern end of the room with the merchant and Magnus, both of which we talked to earlier. Here you'll find a man by the name of Erdrick standing by a gate in front of a crowd of people. Talk to him and he'll give you the Jailor's Key as well as 4 Seeds of Strength.
If you need to exit the dungeon now to mess with your party you're now able to do so. Otherwise, head up to Blackmar's Chamber and inside to challenge him.

Blackmar can be a challenging fight if you're not high enough level. Kabuff your party to boost your defense and focus on taking out the Dragooner enemies each time they're resurrected by Blackmar. Dragooners can summon Cureslimes which can use Fullheal on the boss. What I did for this fight is basically just spam my strongest AoE attacks when the Dragonner enemies were alive and focused down Blackmar when it was just him.
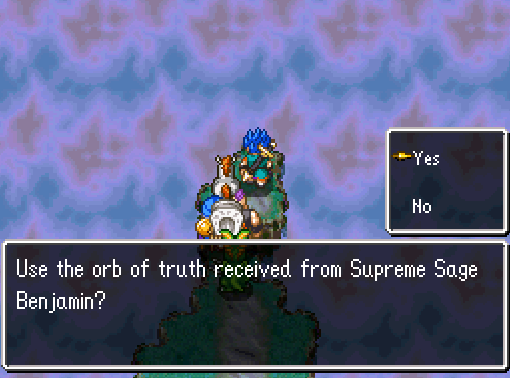
After the fight you'll want to return to your prison cell and go north across the damage floor again. The door here will be open and you'll be able to free the man bound to the wall with the Jailor's Key. Watch the scene, during which you'll receive the Orb of Truth which is a very important item required for story progression. After the scenes the entire castle will be turned to stone or into animals (why didn't they escape when they had the chance?).
When you're ready to proceed with the story exit the castle and go to the northern tip of the Dread World (pictured below). You will be prompted to use the Orb of Truth in this location to proceed to the final part of the Dread World.
Tip: After using the Orb of Truth the area you enter is the best location to grind in the entire game because you can encounter Metal King Slimes here. Check out my Metal Slime Grinding Guide for more information on the best ways to kill them.
In this next area you will want to go to the northeast which is where you will find the Prison of Sorrow. You'll find Benjamin's brother inside here bound to the wall surrounded by a spiked floor. After you speak with him Zoom out of this location and over to Gallows Moor, return to Benjamin in the basement and speak with him.
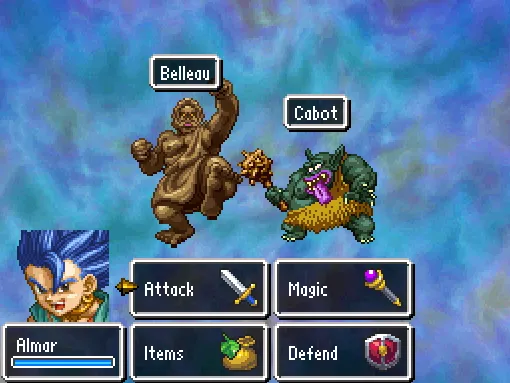
Bring Benjamin to see his brother and you'll be thrown into a boss fight with Belleau and Cabot. I'd recommend taking out Belleau first since he has a healing spell and is the more annoying one. You should know the drill by now, Kabuff your group at the start of the fight to boost your defense and just throw everything you got at them. A tip I haven't given you before is to use your Party Tactics, the AI in this game is exceptionally good.
With both of these bosses defeated you'll want to speak with the two brothers for a scene after which the path to the final dungeon will be open as well as a hole in the ground. You will also gain a Zoom location for the Prison of Sorrow. The hole in the ground leads back to the Real World and is a faster route than the Lagoon near Despairia.
North of the Prison of Sorrow is the final dungeon of the game and our next destination when you're ready to continue with the story. If you want to jump right into the final dungeon continue to the next chapter in this guide.. Otherwise, below you'll find links to all of the optional content and side quests that you can complete now before doing the final dungeon.
Check out Chapter 7 of my Walkthrough for map locations of every optional spot to explore in the Real World and Underwater. As for the side quests and optional characters that are available for you, they're all listed below.
Château de Sass Side Quest Guide
Amos Optional Party Member Side Quest
Goober Optional Party Member Side Quest
Kingsley Optional Party Member Side Quest
Where to find Goowain Optional Party Member
Where to find Healie Optional Party Member
Where to find Lizzie Optional Party Member
Where to find Spot Optional Party Member
Vocation Permanent Rewards
These are the passive & permanent rewards that you will get when mastering a Vocation. You'll keep these boosts even when switching to a different Vocation. Once you reach level 5 in every Vocation you'll receive a Gospel Ring from the priest in Alltrades Abbey as well which will allow you to avoid encounters. You do not need to reach level 5 in every Vocation on 1 character, it can be done on multiple characters.
Gladiator: +20 Strength
Armamentalist: +20 MP
Paladin: +20 HP
Sage: +20 MP
Ranger: +20 Agility
Luminary: +15 Style (or 20)
Hero: +40 MP
Dragon: +20 Strength
Liquid Metal Slime: +100 HP
Continue to Chapter 13 - Mortamor's Lair