
Dragon Quest 6 Walkthrough - Chapter 13
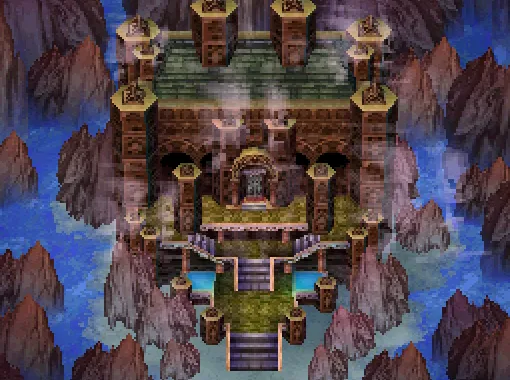
The final dungeon of the main story in Dragon Quest 6 is Mortamor's Lair (pictured above). In order to easily reach this location enter the Dread World and Zoom over to the Prison of Sorrow then go north. Compared to most of the end game dungeons you come across in Dragon Quest, this one is actually quite straight forward.
Sliding Arrow Puzzle Treasures: Mini Medal & Demon Spear
In the room with the arrow puzzles on the floor you'll find a Mini Medal by dropping down any of the many areas that have a hole in the floor. The Demon Spear is in the northwestern most treasure chest in the room and the stairs to the next floor are in the northeast. The north-central staircase will lead you to a room with an HP/MP restore shrine; remember this location if you need to heal before the final boss.
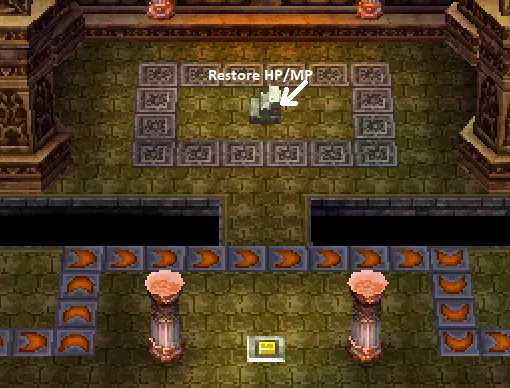
Stairs that lead to an HP/MP Shrine near the arrow puzzle.
On the next floor of Mortamor you will find arrows you can step on that will bounce you to a nearby platform. In the northern portion of this area you'll find a treasure chest with a Golden Tiara and in the southern portion a chest with a Seed of Life. The room itself isn't too big and it only takes a little bit of trial and error to learn how to navigate the puzzle.
Bouncing Arrow Puzzle Treasures: Seed of Life (mimic) & Golden Tiara
The stairs to the next area are in the northern portion of the room with the bouncing arrows, near the chest that gives you the Golden Tiara. When you go down the stairs you'll find yourself in a small room with a switch, step on it to raise the floating box you're in to the next floor of the dungeon, then proceed up the stairs.
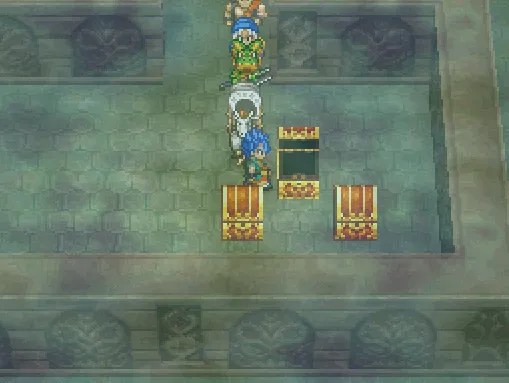
You'll find about a dozen doors in this next room with a lone chest in the upper right portion of the area. Open the chest to receive a Dragonic Dilligence item and go through the door way to the left of the chest (pictured below). This is the correct route to progress to the next area.
In the next room you'll find a foggy maze puzzle (pictured above) that is very straight forward to navigate. Every 5 or 6 seconds the fog will temporarily lessen, as seen in the screenshot above, use this opportunity to plan your route. You'll find 3 treasure chests in the middle of the room but the real prize is the treasure at the northern end of the room, a Metal King Sword!
Hazey Room Treasures: Mini Medal, Princess' Robe, Seed of Life (mimic) & Metal King Sword
The door at the northern end of this room will take you to the room with the final boss of this dungeon. Prior to going through the door and facing Mortamor I would recommend using Evac and returning to the HP/MP restore room at the start of the dungeon. Depending on the current levels of your entire team you should also take some precautions for the fights ahead.
Yggdrasil Leaves (purchased from any Casino) as well as Kerplunk Bracers (Turnscote or Port Haven Casino) are two of the best items you can load up on. Yggdrasil Leaves work as a Kazing ability, a 100% chance to resurrect a dead person with full life.
Kerplunk Bracers do technically the same thing as the leaves, just differently. When a character dies with the Kerplunk Bracer equipped they'll resurrect everyone else in your party and the accessory will break. You can equip these items during combat through the menu and use them to prevent full wipes on your team. These two items are abused by speedrunners in this game to beat the final boss while you're still only in your 20s.

Mortamor has a total of 3 different forms that he will use throughout this fight. You'll have access to your Wagon during this fight which means you'll be able to cycle through 8 characters in total which is very useful if you're underleveled. Healie is likely the only character that you'll have in your party at this time who uses the Omniheal ability which is basically a Fullheal that hits your entire group + Wagon. Keep this in mind as it'll be extremely useful during this fight.
Tip: Use the 'Summon' Sage ability to give yourself an additional party member during the fight.
Tip x2: Show No Mercy & Focus on Healing are great Tactics to set your party to for this fight. The AI in this game is exceptionally good and will use items out of your inventory as well as attack the boss with your strongest attacks that the boss is also weak to. I almost never use 'Follow Orders' on my entire team since it takes too long to go through the Menu for each character and the AI plays them the same way I do.
Mortamor's First Form: He occasionally attacks twice and will use a lot of AoE magic spells along with Disruptive Wave. Keep your party fully healed and try to save as much mana as you can for the next two phases.
Mortamor's Second Form: Much like before he will occasionally attack twice during the same round. Instead of magic he'll be using mostly melee attacks during this round as well as buffing himself and debuffing you. If you have Disruptive Wave (Hero ability) use it on Mortamor each time he uses Oomph on himself and make sure you always Kabuff your group when he Kasaps you. Mortamor will not use Disruptive Wave during this phase.
Mortamor's Third Form: For the third and final form of Mortamor you'll be facing his head as well as two hands. The most important thing you need to know for this phase is that the Left Hand has Kazing and Right Hand has Zing. For this reason you'll need to kill both hands at relatively the same time, or kill the Right Hand first and the Left Hand as quickly as you possibly can after.
Tip x3: Swap Ashlynn out of your Wagon during the 3rd phase to Magic Burst the boss for a lot of damage. Then put her back in the Wagon cause she sucks and dies very easily.

Mortamor's third and final form.
If Mortamor proves too hard for you either refine your strategy or do some Metal Slime Grinding and return here once you're leveled up. After defeating Mortamor there will be a scene after which you'll gain control of the Hero again in front of King Zenith. For the final part of the game you need to go from town to town talking to each important character from the game's story.
The whole ending sequence is on rails so there isn't really any guidance needed. Sit back and enjoy the ending of Dragon Quest 6! Don't forget to save your game after the credits roll so you can load up your save file and access all of the post game content!