Golden Sun: The Lost Age - Walkthrough Chapter 4
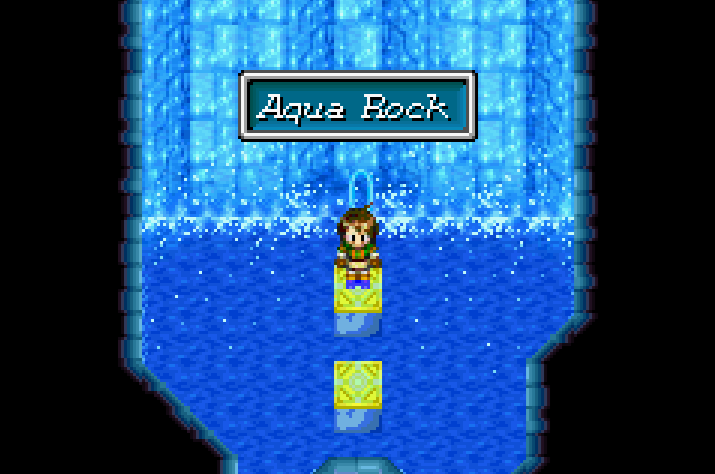
We've just made it to Aqua Rock, a dungeon on the small island that's just south of Apoji Islands. In the first part of this dungeon you'll find a lot of water that works the same way as the fast moving sand that we encountered in Yampi Desert. You'll want to run diagonally as you move through this water to avoid being swept downstream. The same is true when you are climbing the wall and trying to avoid the water as it falls down.
Our destination is the top left portion of this area which is where you'll find two red statues and a pillar that we can Move with Psynergy. What you want to do is push the pillar over to block the left moai statue then climb around the wall to the other side of the pillar. Move the pillar again - this time over to the right hand side where you can use it to block the other statue. Confused? Our overall goal is to move the pillar all the way over to the right statue to block the water stream. Stopping the water lets us climb up the route it spits water on and gets us to the next screen.
The next floor is kind of weird, you can't cross the tiles in the water - what you need to do is actually fall down the waterfall in the bottom right of the area. Check out my screenshot below to see the area that I am talking about. Listen to my advice from before, you'll want to run diagonally & up across the water. This will get you the most distance when running across the water.
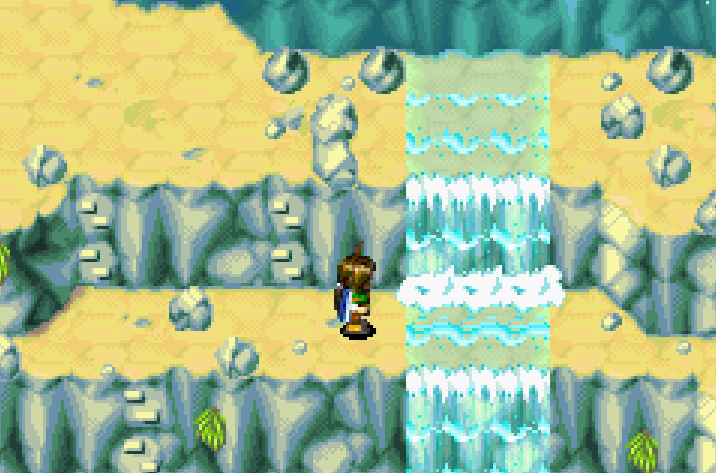
Run up and diagonally through the water to get as much distance as possible
Keep running up and diagonally when you slide down into the next screen so that you can loot the chest with a Nut inside. Our reward for that was a Nut, hmm. Fall down the waterfall near this chest to reach a new part of the dungeon, keep going down and you'll find a gray statue that is inactive (no water coming out). You'll want to use your Douse Psynergy on the statue to activate it and create a new stream of water. Ride this stream of water down to reach another new part.
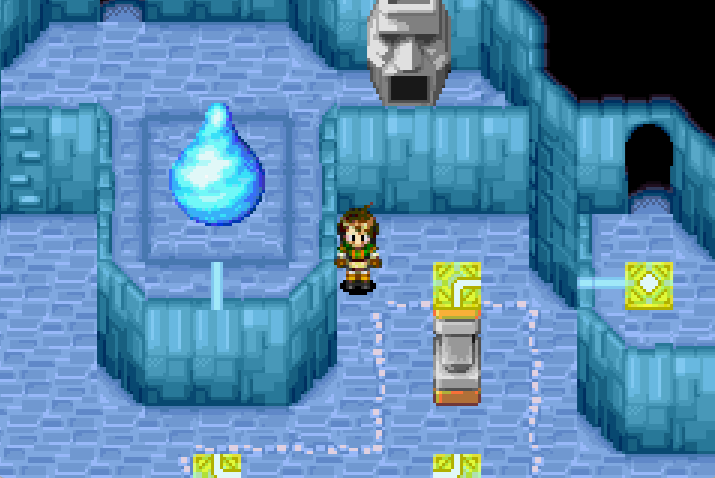
Follow the linear route to reach another large blue water droplet, much like the one in Apoji Islands from earlier. Use the Douse Psynergy on it and then head over to the climbable wall to the left of this statue. Take the left route first if you want an Elixir. To continue with the dungeon use the route on the right, push the pillar to make a shortcut and then ride the waterfall up into a new area.
In this new area you'll want to push the two blue stones into the river and then cross the river at the northern most end if you want the chest with an Oil Drop inside. Continue up the climbable wall on the right to the next screen, here you'll find 3 puddles you need to use the Frost Psynergy on. Jump across the two frost pillars in the north and loot the Mist Sabre from the chest. Go across the southern frost pillar to the next screen and use the Douse Psynergy yet again on another large blue water droplet thing.
Watch the scene and follow the water down to the area below you. You'll find a whirlpool thing here which you can reach by jumping around the stones in the lake. Hop inside to enter into Aqua Rock (Interior).
Now that we've finally made it into Aqua Rock you'll want to follow the linear path further into the dungeon. You will eventually come across a large room with two vents, two pillars and a chest that you can grab. The chest above contains a Vial which you may consider not worth your time to get, if you do want to get it then follow the step by step list that I give below. If you don't care about this item simply block both air vents with the pillars to get by then continue on.
Two Vents, Two Pillars 1 Chest Puzzle:
1. Move the left pillar in front of the vent so that you can pass by
2. Move the left pillar as far as it can go to the right
3. Place the right pillar in front of the vent so you can pass
4. While standing on the far side of the vents use your Move Psynergy on the right pillar to push it towards the center
5. Climb up the wall and jump from one pillar to the other, this will put you on the ledge with the Vial.
In the next room you'll find a large brown pillar next to a green statue that's spitting out water. Use your Move Psynergy on the pillar to push it in front of the statue and cut off the flow of water. Climb down the ladder and use the Frost Psynergy on the 3 puddles to turn them into frost pillars then jump across them to reach the next area.
The path will fork in this next area with one route going north and another south. Follow the southern route to find a dead end with a chest that contains a Crystal Powder. At this same fork when you go north you'll be lead directly to a large blue water droplet statue just like before. Just like always you'll want to use your Douse Psynergy on it to activate it. This will make some stars appear throughout the water in this room, follow them and you'll be able to run across the water to a new area.
For the next room you'll want to use the Move Psynergy on the large pillar to block off the vent on the right. This will let us get by and into the next room which is shown in my screenshot below.
All we can do in this room for now is to move the top pillar right once and down once. The position you see it at in my screenshot above is the same position it should be for you. Once you've done that you'll want to use the Douse Psynergy on the statue then on the large tear drop. This will activate the star sparkles on the water again and let you run across them.
Continue forward through the dungeon along the linear route until you reach a large waterfall. You'll pass through a few rooms to get here but the route is straight forward. In the room with the waterfall there will be a chest that contains a Tear Stone. To reach this chest you'll have to get next to the left pillar and push it to the right using the Move Psynergy. Once you've done this jump across the two pillars to reach the chest.
Exit this room in the southeast through the doorway and you'll come to a room with multiple exits and tiles you have to jump across in the middle. All of the exits will lead to dead ends for right now except the one on the left side of this room, so head through that exit. Inside this room you'll want to use the Douse Psynergy on the large gray statue and then jump around the tiles to reach the doorway in the north.
Our next room is another puzzle room (pictured below). If you want to get the chest that contains a Water of Life item then you'll have to solve this puzzle one way first, exit the room and then return again to advance. I'll share with you both methods below.
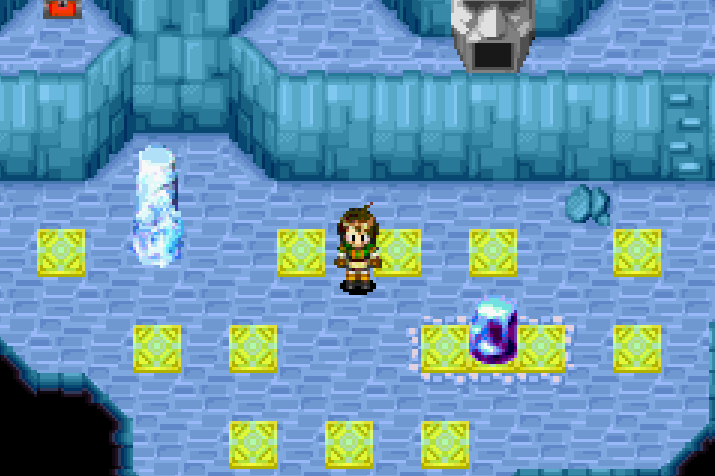
Move the objects into the same location you see in this picture to reach the chest with Water of Life inside.
In order to get the treasure chest that has a Water of Life you'll want to arrange the objects the same as my screenshot above. The blue stone must be in the middle of the platform and you need to use Frost on the puddle. Once you have things aligned properly use Douse on the statue to fill the room with water and grab the chest.
When you want to advance to the next room you will want to ignore the puddle and push the blue stone onto the left-most tile. This will give us access to the doorway in the north. Follow the linear path to reach a familiar room where you'll use your Move Psynergy on the large pillar to push it over twice and create a shortcut. Continue north to another room where you will push another large pillar into the proper spot. This will give you access to a fork in the road where you'll want to go north to the next area.
Climb across the rope and jump across the right-most path of tiles to reach another puzzle room in the south. One look at this room and you can tell that it's going to be the most difficult puzzle you've done so far in this dungeon. Thankfully though you have me to make this entire puzzle much easier for you. When you arrive each of the three pillars you can move will be aligned in a row for you.
Let's call these pillars (from left to right) 1 2 and 3 - in that order. Pillar 1 is closest to the large blue drop, pillar 2 is right next to it and then you have a pillar you can't move inbetween pillars 2 and 3. If my directions are confusing to you just use the screenshot below and match up the design on top of each pillar in your game with the design of the pillar in the picture. The direction of that L doesn't lie!
Pillar 1 gets moved to the top left of the area, pillar 2 gets put where pillar 1 used to be and pillar 3 is moved into the bottom middle. The right spot for pillar 3 is right where the indent occurs, the final tile you can keep it on at the bottom.
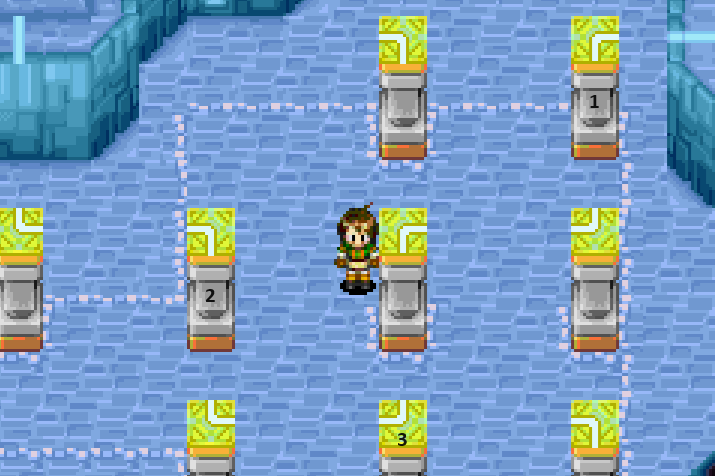
Move all 3 pillars into the same location you see in this screenshot to advance
Just like we always do, once you've solved the puzzle you'll want to use Douse on the statue and then again on the blue rock to fill the room with water and activate the stars. Assuming that you aligned everything the way that we talked about you'll be able to run across the stars and make it to the exit. Follow the linear path to a room where you will push a pillar down below to make two paths, one you jump across and one you climb down. Jump across and go through the door.
The easy to reach chest in this room is actually a Mimic and it will drop a Potion. Why did the loot suck in this dungeon so much? The next room will have a large crystal you can interact with to regain some PP if you'd like. Continue south of this room to another large blue crystal which you can use Douse on. There are a few goodies we can grab now, the left path has a Lucky Pepper and an Aquarius Stone. We need this stone to complete the dungeon so make sure you get it.
Follow the star path on the right this time down south to the exit in the bottom right of the area. There will be two doors here, you want to take the one on the left. In the next room you'll see a statue, jump across the tiles in the middle of this room to reach the same room shown in the screenshot below.
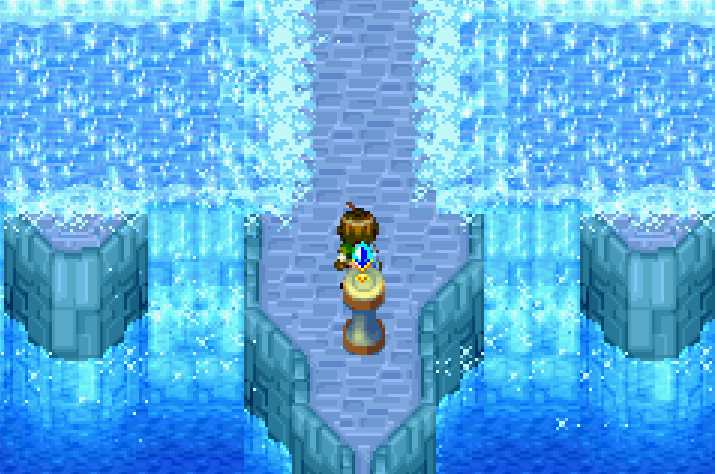
Place the Aquarius Stone onto this pedestal to open up the path to the north
When you interact with the pedestal you'll be given the choice to put an item onto it. Use the Aquarius Stone that we got from the chest in the previous room to open the path to our reward. Follow the path into the dungeon and you will find a tablet, interact with it for the new Psynergy Parch. You'll have to use Parch to escape this platform, we'll also be using it to get some items and a Djinni too!
Remember that chest we've passed a few times in this dungeon that was under water? You pass right by it when you exit this room to the south, use Parch on the water and climb down to get it - it's a Rusty Sword! This can be forged into Robber's Blade at the Blacksmith in Yallam. When you climb up the wall south of this chest you'll find the dungeon's exit. Before you leave though you'll want to get the Djinni.
Now that we know Parch we can get a Djinni in this area, check out my Djinni Locations (Part 3) for instructions on how to find him and some helpful pictures. Once you grab this Djinni we're done here so you can use Retreat on Felix and bounce. The next quest for our characters is to acquire the Center Prong from the frozen continent in the south.
Tundaria Tower - Center Prong
Hop onto your ship and sail south to the snowy continent. Ingame this is called the Tundaria Continent but the easiest way to explain it is "snowy continent". You have to land on the far eastern end of this continent and travel all the way west across it. You can find the Tundaria Tower dungeon on the northern end of the land mass all the way to the west.
There is actually a Djinni that you can encounter on the World Map nearby this dungeon, if you never came out here to get it previously check out Djinni Locations (Part 2) for more information about where to get it.
When you enter Tundaria Tower head inside and use the Parch Psynergy on the pool of water to your right and the pool of water to your left. Go down the stairs on the right and enter the door - follow the southern path until you reach a fork in the road with two exits.
Take the northern exit and run along the path above the ice to reach the chest with 365 Coins inside of it. Slide across the ice and continue through the dungeon to reach another ice puzzle, this one you'll have to actually plan your way through. Step onto the ice and then go up, left and down. From here you can shoot across to the other side of the puzzle which has the exit and loot. The chest in the top right corner of the area contains a Mint which gives you a permanent boost to Agility.
If you choose to get this chest you'll have to exit the puzzle on the right and return to the other side that we entered from. There is no way to get this chest and exit through the door we need at the same time. Regardless of your choice, exit through the door in the center of the room when you're done. The next room you come to will have 3 different routes for us to take, each of their destinations are marked in the screenshot below so that you know what goes where.
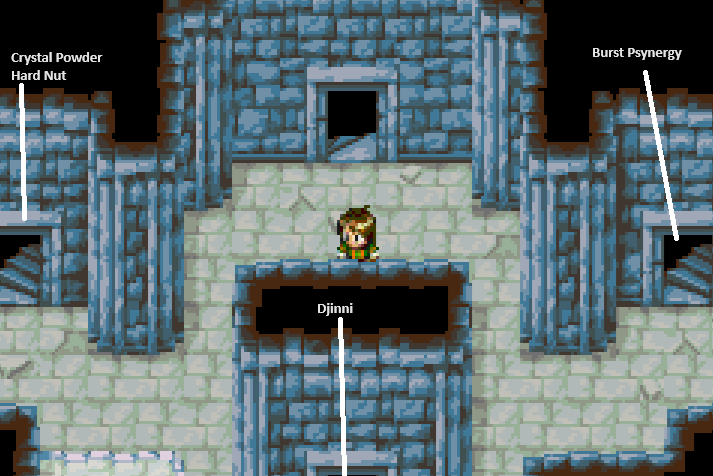
Click to enlarge any of these pictures
We will use this room as our central room - it's the spot we come back to each time we finish one wing. First let's do the exit on the left, in this section you will have to use your Pound Psynergy to smash pillars and clear a path. In the first room you'll smash a pillar to clear the route and in the second room you'll smash the pillar on the left to clear a route to the first chest with a Crystal Powder. Jump across the other two pillars for the other chest with a Hard Nut.
Return to the fork in the road pictured above and this time you'll want to get the Djinni. Like always I am going to suggest you check out my Djinni Locations (Part 3) for more information on how you can get him. Once you get the Djinni you'll want to return to the room shown above and go right this time. This route is marked Burst Psynergy on the picture above.
Follow the linear route through the first room to reach a large open room with multiple pillars that you can move and columns you can pound (pictured below).
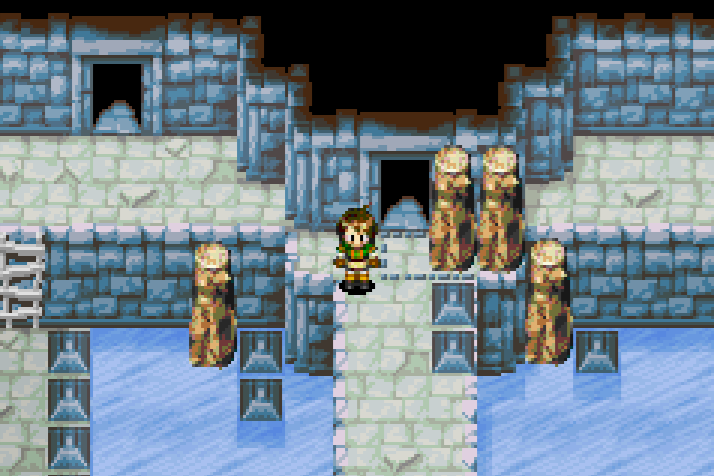
Follow my step by step instructions below to advance through this room
Our goal in this room is to move the pillars around on the right and left hand sides; this will give us access to the pillars blocking the door and allow us to move them one at a time until the route is clear. To advance through this room follow the steps below.
1. Use the Pound Psynergy on the right and middle ice columns
2. Move the pillar on the right using Psynergy Down, Left and Up
3. Climb up the ladder on the right and pull the pillar towards you using the Move Psynergy
4. Head over to the pillar on the left side and Move that Left, Up and Right
5. Climb up the ladder on the left and jump from the pillar to the doorway, push the final pillar out of the way and you can pass
After you unblock the doorway and enter follow the linear path until you reach a room with an ice wall and a circle of stones around it. Like always, whenever you see a circle of objects like this in Golden Sun you'll want to use the Reveal Psynergy. Continue along the linear route to reach the top of the tower. Use your Move Psynergy to push the pillar out of the way and grab the Burst Brooch at the top.
Equip the Burst Brooch on whatever character you'd like, we'll be using it a few times before we leave the dungeon to collect the prong we came here for and some optional loot. The first thing you'll want to use the Burst Psynergy on is the cracked looking door on top of the tower. This will blow the door up and give you a much needed short cut. Once you're back inside of the dungeon I recommend you use the Retreat Psynergy to go back to the entrance.
From the entrance you'll want to go directly north to reach the ice crystal shown in my picture below. Use the Burst Psynergy on this ice crystal and you'll be awarded the Center Prong. Now that we've got this item we're finished all of the mandatory things we need to do inside of this dungeon.
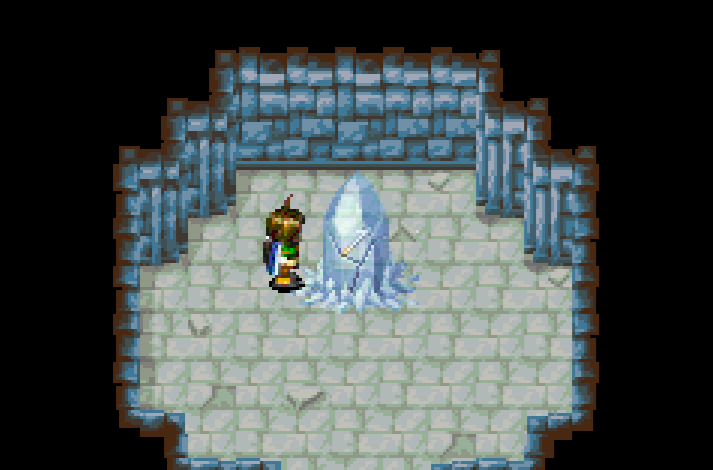
Use your Burst Psynergy on the crystal to destroy it
Before we leave though, we should collect some optional loots. Exit the room we got the Center Prong in and go down the stairs on the left then through the door. The path will split here so you'll want to go left - it will lead you to a cracked ice wall that you'll need to use Burst on to clear a path. There will be another fork in the road after this and in one room you'll find Vial and Lightning Sword. The other room will contain a Sylph Feather and a Lucky Medal.
With all of that out of the way we're officially done with this dungeon. Before we continue with the main story though I strongly recommend you visit the Blacksmith in Yallam again because we have tons of items that he can craft and turn into better items for us. For more information about this I recommend you check out my Taopo Swamp/Yallam Side Quest Guide as well as the Sunshine Blacksmith Wiki page.
If you've been following my guide up until this point we've collected two prongs, the right one and the center one. We have a single prong left to collect, but before we do there is a dungeon that we need to complete first - Gaia Rock.
Continue to Golden Sun: The Lost Age - Walkthrough Chapter 5
Return to Golden Sun: The Lost Age - Walkthrough Chapter 3

