Golden Sun: The Lost Age - Walkthrough Chapter 3
When you progress up the first few stairs in Kibombo Mountains you'll get a short scene with some Kibombo Warriors. Getting spotted in this dungeon will result in you getting ejected back to the entrance and the puzzles getting reset - for this reason you'll want to avoid being seen.
The first puzzle for you to solve is on the right hand side of the NPC, you'll see two crates and some vines. Align the crates so that you can jump across them and then climb the vines; this will let you pass overhead of the first NPC on lookout. For the next NPC you'll need to stand behind the crate and push it to avoid being seen, climb the vines and continue to the rope that you can use Lash on to create a path. Just north of you will be a chest with a Disk Axe weapon inside that you can give to Felix.
If you decide to get the chest move the other crate just like we did before to prevent the NPC from seeing you. It's kinda funny because you literally box him in with two giant crates, apparently he doesn't notice moving crates? Climb across the rope that you used Lash on and go south to push a pillar and create a new short cut. Go north to continue with the dungeon.
For the next part of this dungeon you'll have to climb the vines and push the crate on top of the NPC that patrols this area. The best strategy here is to push the crate into position then wait until the Kibombo Warrior walks below you - then push!
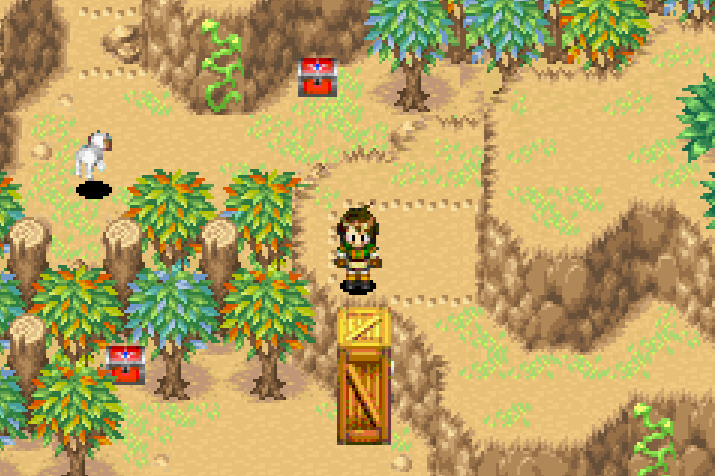
Trap the Kibombo Warrior inside of the crate to get the chest and proceed with the dungeon!
You'll find a Power Bread inside of the chest which will boost the max HP of the character that eats it. I personally chose Sheba since she has the lowest natural HP. Above the Kibombo Warrior that we trapped inside of the crate you'll find a dog that runs between two different locations; much like with the other guy we have to trap this dog to proceed.
If you trap the dog in the upper half you can collect the chest which has a Tear Stone inside of it but you'll have to leave the area to reset it since we can't proceed with the dog in this part. To proceed with the dungeon you'll want to trap the dog in the southern half where the chest is. The Tear Stone is an item worth getting since it can be forged into useful equipment, check out the Tear Stone Wiki Page for more info.
Note: You can also use the Tremor Psynergy on the box that has a bone on top of it in this area to distract the dog. If you explore the cave entrance right next to this box you'll have to do this when you exit otherwise you'll have to re-do the previous puzzle.
To continue with the story use Whirlwind on the leaves blocking the cave entrance in the top right and enter inside. From here it is a linear route to the dungeon's exit, along the way you'll pass by a Jupiter Djinni but there isn't anything we can do about him for the time being (we'll be back for him though, don't you worry).
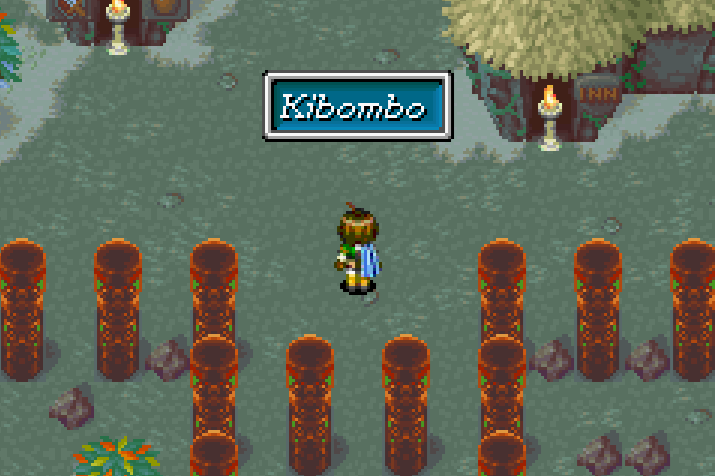
Once you find yourself back on the World Map you'll want to travel north of Kibombo Mountains. As you get close to the town of Kibombo you'll notice the whole screen getting darker; you know what this means don't you? Someone must have collected all of the Dragon Balls and is summoning Shenron!
Enter into Kibombo and go to the southwestern portion of town to find a rope that you can use Lash on. This will give you access to a linear path that lets us avoid the townsfolk who are congregating in the north. Follow the route around until you hit the puddle at the end of the pillars up north; use the southern pillar in this area to jump to the roof of the nearby buildings and use the roof to jump to the cliff edge.
From here you'll want to travel north into the next area for a scene. When the scene is finished continue north just a tad bit more to find Piers again and trigger another scene. Use the Move Psynergy on the pillar after the scene for another one - during which Piers will join your party and become your permanent fourth member! Piers brings with him Shade and Spring, two Djinn.
Continue behind the Gabomba Statue to trigger yet another scene. During this Kraden will point out the X marks on the ground and your character will automatically use Scoop on all of them. When the scene is finished backtrack a little bit to the vines we climbed down and use Scoop on the X mark here to uncover a ladder. Climb down and you'll find yourself inside of the Gabomba Statue.
The first part of this dungeon is a piece of cake - follow the linear route and you'll find a ladder that you can climb up into a set of rotating cogs. When you climb up the ladder it will force you through the rotating cogs and you will be unable to go back through them the same way. This mechanic will be used a few more times throughout this dungeon so get used to how it works now.
In the next room you'll find a maze of sorts, the southern chest is a Mimic (drops Hard Nut when defeated) and the northeastern chest contains a Bone Armlet. Continue up the ladder to a room that's filled with many different cogs and gears, all of which are currently rotating. In the northwestern portion of this room you'll find a rope that you can use Lash on, when you connect this rope to the gear nearby it will stop all cogs/gears in this room from rotating.
Note: You will need to use Lash at the right moment to successfully attach the rope to the cog. Wait until the nail is in the bottom right portion of the cog before using the Lash Psynergy.
Before you exit via the ladder in the north use Lash on the other rope too since it will make a shortcut for us. In the next room you'll notice there is a Venus Djinni but we can't get to him from where we are now. Exit this area via the ladder in the north and continue deeper into the dungeon. As you make your way through the dungeon you will eventually trigger a scene with a mouse (pictured below).
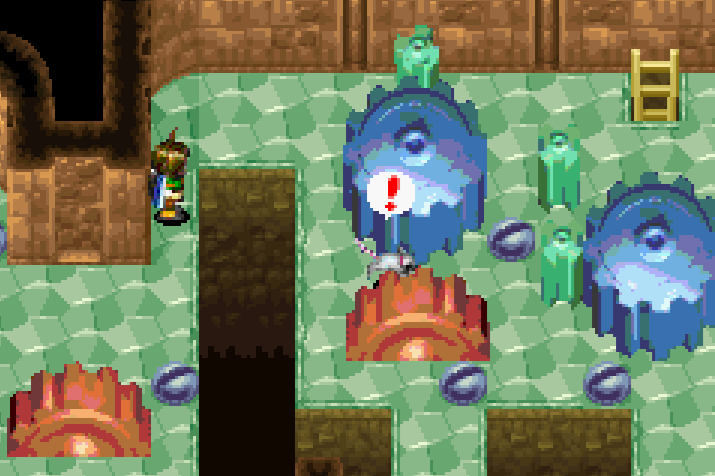
The mouse will show you how to climb across the gears in this part of the room
Pay attention to the mouse because it will show you how to jump across all of these gears which will allow us to capture the next Djinni and advance through the dungeon. Before we follow the mouse though you'll want to continue along the linear route that we are already following. This route will lead you down some ladders and to a maze where you'll find a large cog that's flashing colors between brown/green. Next to this giant cog you'll find two pillars which should look familiar (we've used the Pound Psynergy on pillars that look just like this before).
Use your Pound Psynergy on the pillar next to the flashing cog and then backtrack through the dungeon to the area that you saw the mouse. This time you will want to follow the route that the mouse took and go down two ladders to reach the same room with the large flashing cog. Use the Pound Psynergy on the other pillar next to this cog and you'll trigger a big change in the dungeon! Now that we've lowered both pillars the cogs in this dungeon will change the direction that they rotate. This will open up new paths for us - including the path that leads to the next Djinni, Steel.
Like always I will recommend you check out my Djinni Locations (Part 2) Guide for more information about how to get Steel. When you're ready to continue with the dungeon return to the room that you saw the mouse in earlier and go up the ladder in the southern part of the room. Previously we were unable to pass through this room but now that we reversed the rotation of the cogs we can!
Continue through this room and go up the ladder to reach a new room with a small Gabomba Statue in the northern part. There isn't anything we can do here for now so continue up the next ladder for a scene with the village of people outside. During the scene you'll get a clue of how to solve the next puzzle.
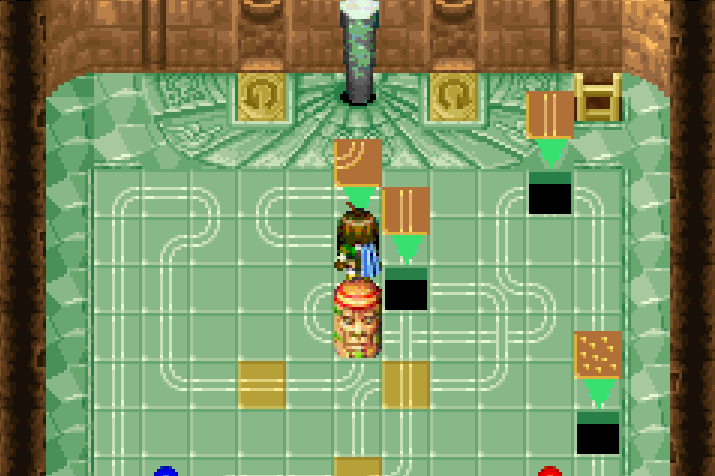
This puzzle is different for every play through of the game so I can only give you tips and tricks about how to solve it, I can't solve it for you.
For this puzzle what you need to do is use the Pound Psynergy on the pillar in the north to elevate all of the blocks. Once you do this you'll want to use the arrows next to this pillar to rotate the blocks and then use Pound to place these blocks where you need them. You get as many tries as you want to do this puzzle, just watch the route that the sparks travel and align the blocks you need accordingly.
When you're successful it will trigger a scene with everyone outside and Akafubu will enter inside of the statue. You'll have a short scene with him after which you'll want to follow him further inside to the room with the item that we need. Try to grab the Black Crystal from the statue and there will be another scene during which you'll learn of an additional treasure that you can get. We can't get it right now, we'll have to come back later in the game.
Once you regain control of your characters you'll want to visit the shops in town and buy any upgrades that you need. I strongly recommend you buy the Frost Wand item from the weapon store (it's under Artifacts). This weapon will be an upgrade for Jenna or Sheba. When you're done in town it's time to exit and return to the Kibombo Mountains to get another Djinni! Check out my Djinni Locations (Part 2) Guide for more information on how to get Waft.
The next place that we need to visit is the Gondowan Cliffs which is on the way back to Madra (where we first met Piers). You need to get the Healing Fungus item from here which can be traded for the next Djinni, Char. Just like before, check out my Djinni Locations (Part 2) Guide for more information on how to get Char.
When you visit Madra for the Djinni you'll want to make sure you visit the Mayor's House too. Inside there will be a scene with everyone around the table, watch it and then leave. You'll be stopped by someone and given the Cyclone Chip item which lets you use the Cyclone Psynergy at will.
Note: We can finish exploring the Madra Catacombs now that we have Reveal and Frost. If you'd like to get some optional loot inside of this dungeon now would be the best time to do it. One of the items you find in the Madra Catacombs is the Moloch summon tablet! Depending on how much running around you want to do, there are many other optional treasures too which you can now reach using Frost throughout the game.
After getting the Cyclone Chip and the Char Djinni in Madra you're done with the town. Now it's time to head back to the Lemurian Ship which is located at the East Indra Shore map (pictured below). You can find this ship just south of the Dehkan Plateau dungeon on the map, if you're struggling to find this area press R to open the world map and search it northeast of Madra.
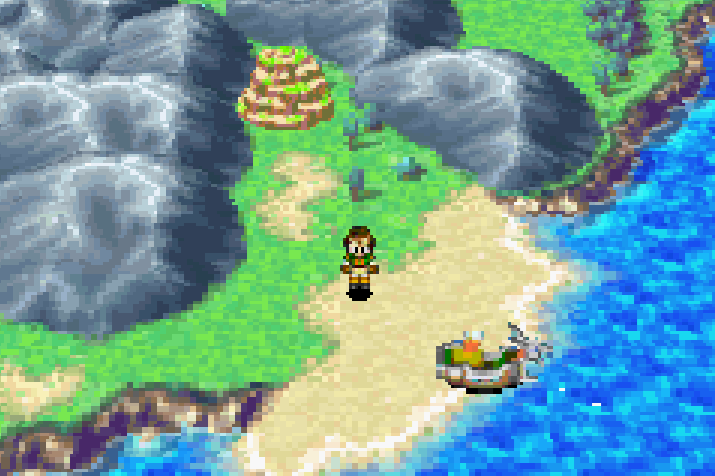
The Lemurian Ship is parked on the shore, approach it to enter
The first thing I will recommend you do upon reaching the Lemurian Ship is to freeze the puddle using Frost and collect the Cookie on the nearby ledge by inspecting the crate. Once you've got this enter the Lemurian Ship via the ladder extended into the water for a scene.
Inside of Pier's ship you will find many Aqua Jelly enemies, unlike most enemies you can actually view these outside of battle. When you defeat an Aqua Jelly it will leave behind a puddle - these puddles are required to solve the puzzle(s) on this ship. Down in the cargo hold you will find a few rooms with many different Aqua Jelly and you'll have to defeat certain ones so that we can use Frost on the puddles and create a path.
For the first Aqua Jelly puzzle you'll want to position the crate inbetween the two Aqua Jellies at the bottom of the room. Defeat both and use Frost on their puddles and you'll have a straight path across to the door. The next room with an Aqua Jelly puzzle looks a bit like an engine room. I think the only hard part of this second room is the crate that you have to position inbetween the frost pillar and the ledge above you. Below you'll find a screenshot solution to this puzzle.
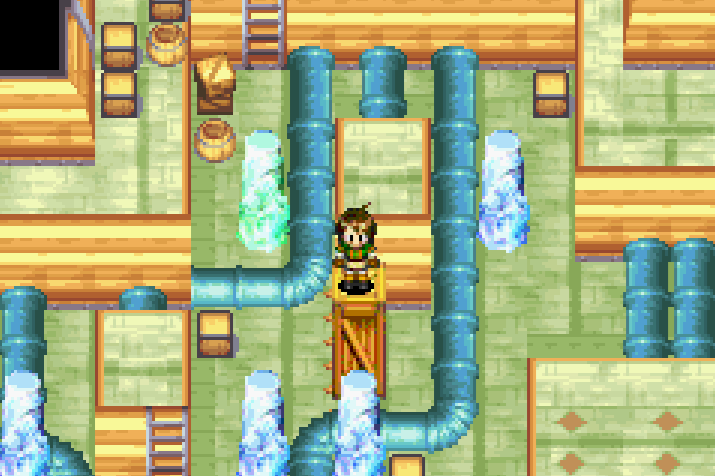
Move the crate to the same location you see in my screenshot above
Once the above puzzle is complete go through the door to enter the previous Aqua Jelly puzzle room. A new Aqua Jelly will appear for you to defeat and freeze the puddle; this will allow you to enter another door which takes us to a cargo room of sorts. In this room you'll need to jump across some boxes to reach an Aqua Jelly, interact with it for a boss fight!
Unlike before the Aqua Jellies in this room will merge into one giant Aqua Hydra. This boss isn't anything too hard, just unload on it with your strongest Psynergy (or summons if that's your thing) and he'll go down quick. Once the boss has been defeated the room will fill with water and you won't be able to loot the chest that we see. No worries though, we can get this chest later when we enter Lemuria!
Continue along the linear route to reach a room with a pillar you can push around that has an empty bowl on top of it. Push the pillar into the middle of the area it's in and use Pier's Douse Psynergy on it to fill it with water. This will open the door that leads to the real engine room, watch the scene when you arrive.
When you regain control of your characters you will be on the open sea in control of Piers boat!
Side Questin' Time!
Now that we have control of a ship the game opens up and becomes very non-linear. You can sail (almost) anywhere that you want and skip around in the game as much as you want. To progress the story we need to enter Lemuria but in order to do that we need to collect some items first.
However, before we start collecting the stuff we need to enter Lemuria we really should do some exploration and collect some Djinn. There are a total of four Djinn available to us right now that we can get before progressing the story forward. In addition to the four available Djinn there are also multiple side quests we can complete, summons we can obtain and a bunch of equipment to find.
As always it's up to you how much you want to do before we continue with the main story. Below you will find a list of all the things I think you should do now (in the order I think you should do them) before you continue with the main story. If you are having trouble locating any of these areas on the World Map I have also provided a picture to you below that shows you all locations that we can visit in this game.
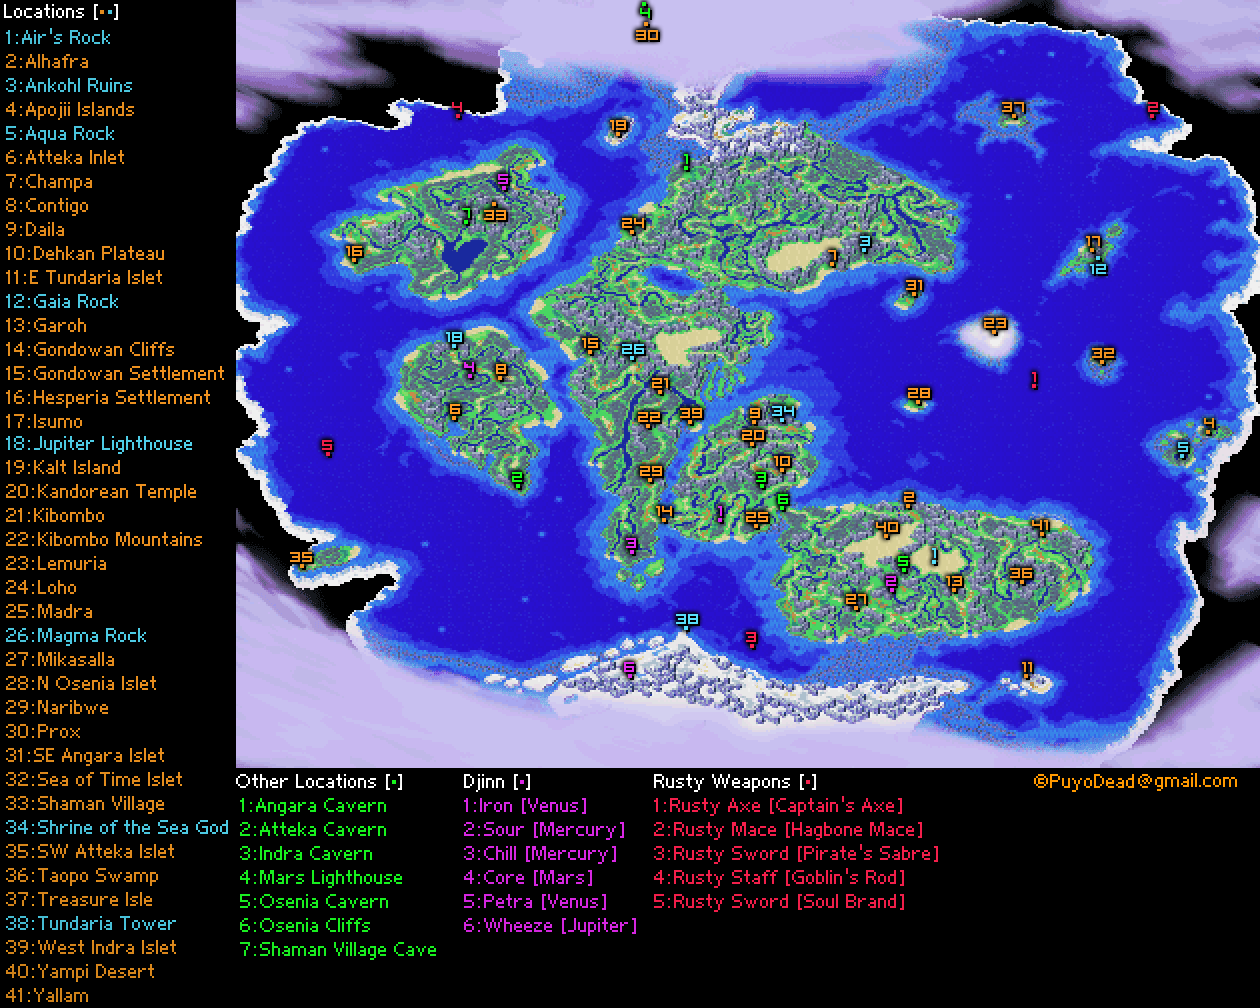
Click to enlarge this map, full credit goes to the original creator
Things To Do Before Continuing Main Story
1. Visit the Gabomba Statue again and get Mud, a Venus Djinni as well as the Tomegathericon item. Honestly, you can just get Mud from this dungeon and leave since the Tomegathericon item is kind of useless for almost all players. The only players that will get use out of this item are those who are very advanced and know the Djinn system very well. If that's you, then you probably don't even need a guide on how to get this item! Check out my Djinni Locations (Part 2) for more information on how to get Mud.
2. Go to Yallam and visit the Blacksmith, Sunshine. Sunshine can craft upgrades for you if you bring him forgeable items. You can find some items for Sunshine in the nearby dungeon, Taopo Swamp - you can also find another Djinni inside of this dungeon too named Flower. This Djinni is a very powerful one and worth getting ASAP since it can heal the whole party. The loot you get at the end of Taopo Swamp is good too once forged at the Blacksmith. For more information about how to get Flower check out my Djinni Locations (Part 2), if you want information on how to complete the whole dungeon check out my Taopo Swamp Walkthrough.
3. (Optional for now) Complete some of the Animal Item Trade Side Quest. For right now we can only do the first half of this quest, the second half can only be finished after you get the Sand Psynergy for Gaia Rock. If you'd like a brief overview of this quest check out my Djinni Locations (Part 3) and scroll down to the Djinni Meld. For those of you who would like a more verbose overview of this quest follow the link for Animal Item Trade Side Quest.
4. Get Wheeze, a Djinni whose found as a random encounter on the Tundaria Continent. Visit my Djinni Locations (Part 2) for more information on where to find Wheeze. You can also use the map above, Wheeze's location is marked on that map.
5. Ocean Rusty Weapons. There are 2 Rusty weapons we can get from the ocean. For now we can only get the two in the eastern sea but later on we can get the rest of them. I recommend you check out the Golden Sun: The Lost Age World Map that I have, on that map you'll find a few locations marked as:
1. Rusty Axe (Captain's Axe)
2. Rusty Mace (Hagbone Mace)
3. Rusty Sword (Pirate's Sabre)
4. Rusty Staff (Goblin's Rod)
5. Rusty Sword (Soul Brand)
That covers all of the optional content that we can do right now. At this point in time the game's story opens up a bit too - our goal is to reach Lemuria but in order to get there we need to collect 3 Trident parts. Each of these 3 Trident parts can be obtained in any order, the order I list them in is from easiest to hardest in terms of the mobs you will fight in each dungeon.
Trident - Right Prong
With that in mind, our first stop is the town of Daila. It's been awhile since we've been here so you may have forgotten about the puddles throughout this town. Now that we have Piers we can use Frost on these puddles to reach an item that we need for the next dungeon, Sea God's Tear. Once you're in Daila enter the temple/church in the northern part of town and use Frost on the 3 puddles in this room. This creates a path to the item we need - grab it then leave town.
Note: If Daila is still full of water for you and you can't access this item it's because you need to visit the Shrine of the Sea God dungeon to the east and help the two kids that are stuck here. We did this during Chapter 1 of my Walkthrough.
Our next destination is the Shrine of the Sea God which is to the east of Daila. We have two things to do here, the first is we have to complete a story objective and the second thing is some optional loot. The optional loot is on the way to the story objective so we'll do that part first.
Head to the part of the dungeon where you found Breath earlier in the game. If you forgot check out my Djinni Locations (Part 1) for a refresher. To the left of the arena you chased Breath around in you'll find 3 puddles that you can use Frost on. Use your Psynergy and jump across the frost pillars to reach the opening. The next room will have you jump around a bunch of pillars to reach one brown pillar that you can push down to open up a route.
In the next room you will find multiple bridges, two of them will break when you stand on them. The first thing you'll want to do is climb down the ladder, run across the water then climb back up the second ladder. On the far side of the room there will be a platform you can step on to break it. Ride it a short distance to the island, use the Lash Psynergy to connect the rope and then run around the water to climb up the ladder by the chest. You'll find the Rusty Staff item inside of this chest, this is the powerful weapon I mentioned. To make this into a powerful weapon we need to visit the Blacksmith in Yallam.
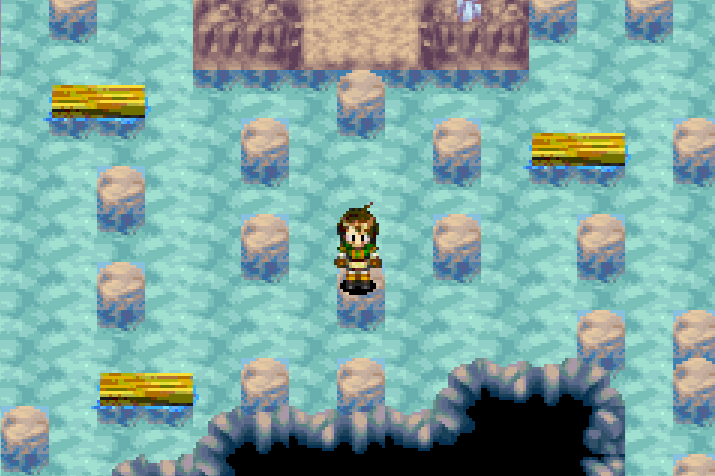
Now that we've got the weapon you'll want to run across the northern most bridge in this room, it will collapse and you'll ride it south to the next area. Here you'll find another rope to use Lash on as well as an exit we can take. In the next room use Move on the pillar downstairs to make a shortcut and exit through the northern door. This puts us into the room shown below.
You can actually access this room from a different location, you'll enter via the right hand side and you will come to this same circle but you'll be standing in an area that you can't do anything from. What you need to do in this room is use the Reveal Psynergy to uncover a rock that you can jump to in the middle. You can only jump to this rock if you're on the southern or northern sides of this circle.
Note: A good rule of thumb in the Golden Sun games when you see a ring of objects like what's shown above is to use Reveal. If you don't have the Reveal Psynergy in this game it's likely because you didn't do the Air's Rock dungeon yet. For more information on how to complete that dungeon check out Chapter 2 of my Walkthrough.
Once you jump across the rock that you revealed you'll want to use the Sea God's Tear item on the large statue to fill the room with water. This will let you ride it up to the top where you'll follow a linear path to find the Right Prong.
Use Retreat on Felix to leave this dungeon and return to your ship. Our next stop is Apojii Islands which is where we can get the next prong. You can find Apoji Islands on the eastern side of the World Map in the center portion. It's a small island with the town of Apojii Islands and the dungeon Aqua Rock.
The first thing I recommend you do in Apoji Islands is to buy the Artifact Dragon Axe from the weapon shop; this is a powerful weapon for this point in the game. In order to advance the story you'll want to use the Douse Psynergy on the large blue rain drop in town. This triggers a scene involving a few statues moving inside of Aqua Rock. You can also obtain a Djinni in this town if you have the Sand Psynergy from Gaia Rock. If you do then check out my Djinni Locations (Part 3) for more information on how to get Haze. Don't worry if you're missing this Psynergy right now as I will let you know when we get it to come back here for this Djinni!
When you're done in Apoji Islands exit town and sail a little bit south to the beach near Aqua Rock. You shouldn't have any issue finding this location since we just saw where it was in the previous cutscene.
Continue to Golden Sun: The Lost Age - Walkthrough Chapter 4
Return to Golden Sun: The Lost Age - Walkthrough Chapter 2

