
Dragon Quest VIII: Journey of the Cursed King Walkthrough Chapter 3
This guide is designed to point you in the right direction but not hold your hand throughout the entire game. Dungeons and Towns you'll be exploring mostly on your own, with my maps pointing out any treasures that are hidden in a dungeon as well as how to solve any puzzles you'll encounter that could possibly get you stuck.
Additionally depending on your own personal preference, my maps/pictures are designed to work as a guide of their own. If you'd like to skip reading text entirely while you play, you can just look at the maps for the treasure chest locations and where you need to go to advance the story forward.
Skill Point Tips: Jessica Staff (Magic Barrier 31 Points); Whip (Attack Power Bonuses); Yangus Humanity (Golden Oldies 100 Points); Scythe (Attack Power Bonuses) - Fisticuffs (Thin Air if you haven't gotten it already); Hero Courage (Holy Protection 28 Points; Omniheal 82 Points); Sword or Boomerang and Angelo Bow (Shining Shot 88 Points); Charisma (Squelch 3 Points; Divine Intervention 27 Points) and Staff
Alchemy Tips: You lose Medea and the wagon at the end of this chapter and you don't get her back until after beating Swordsman's Labyrinth... Therefore I don't have any new Alchemy recipes for this chapter.
Area Around Ascantha

When you first enter the Kingdom of Ascantha you should head straight for the town of Ascantha that way you can unlock this location for Zoom. After you do this you can either run around the town and grab the goodies/buy what you need etc or go back out to the World Map and run around collecting all of the treasure. The choice is yours.
Just south of Ascantha you'll find a few cows roaming around the fields. Interact with the cows and you'll be rewarded Fresh Milk which is used for some Alchemy recipes to make Cheese. For how large the area is around Ascantha it's rather barren when it comes to treasure chests.
Town of Ascantha
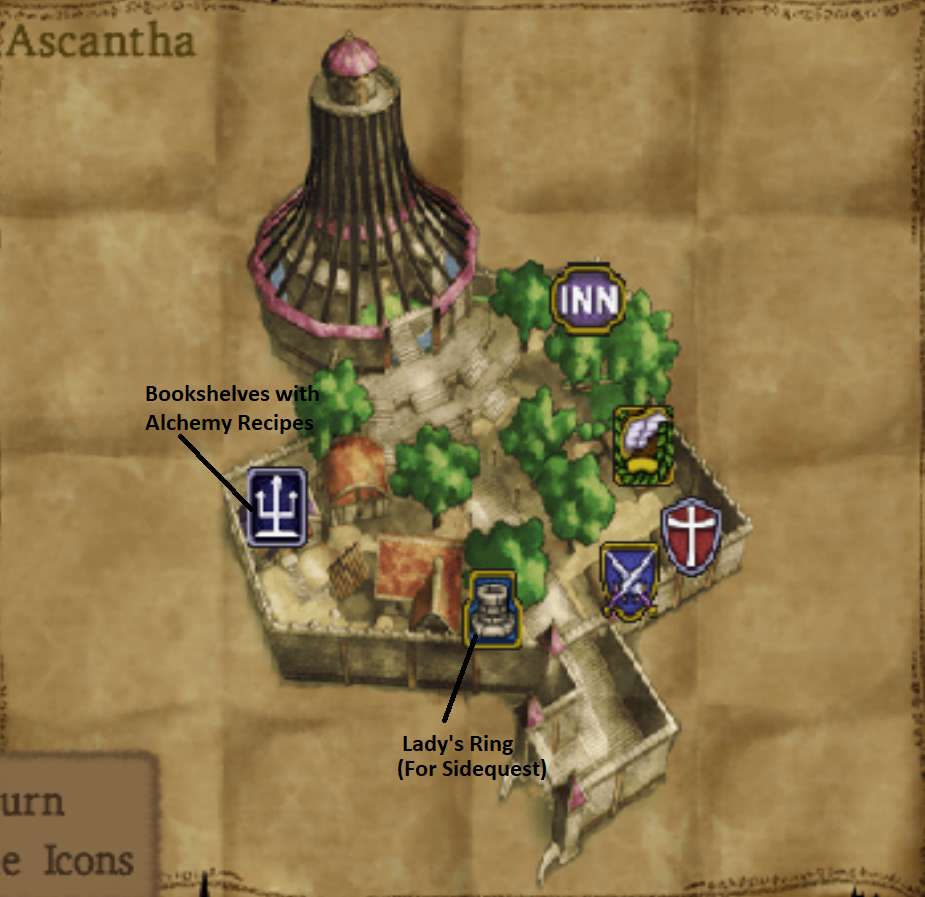
This town has a lot for you to do here. First and foremost, the well just to the left of where you enter you can go down and pick up the Lady's Ring which is a sidequest that has you travel back to Farebury to complete (just Zoom there). The nearby two houses are worth searching because they have some goodies hidden in the pots/barrels as well as in the closets.
Continue reading for more information about Lady's Ring Side quest (If you don't so this before you get the boat you can never turn in the Ring, the guy no longer appears in Farebury)
Inside the church you'll find multiple bookshelves, three of them contain Alchemy Recipes which include Plain Cheese, Stone Hardhat and Fur Poncho. From what I could see there were no pots/barrels or loot to be found outside of buildings in this town - when you're ready rest at the Inn until the evening and then head into the castle at the northern most portion of town.
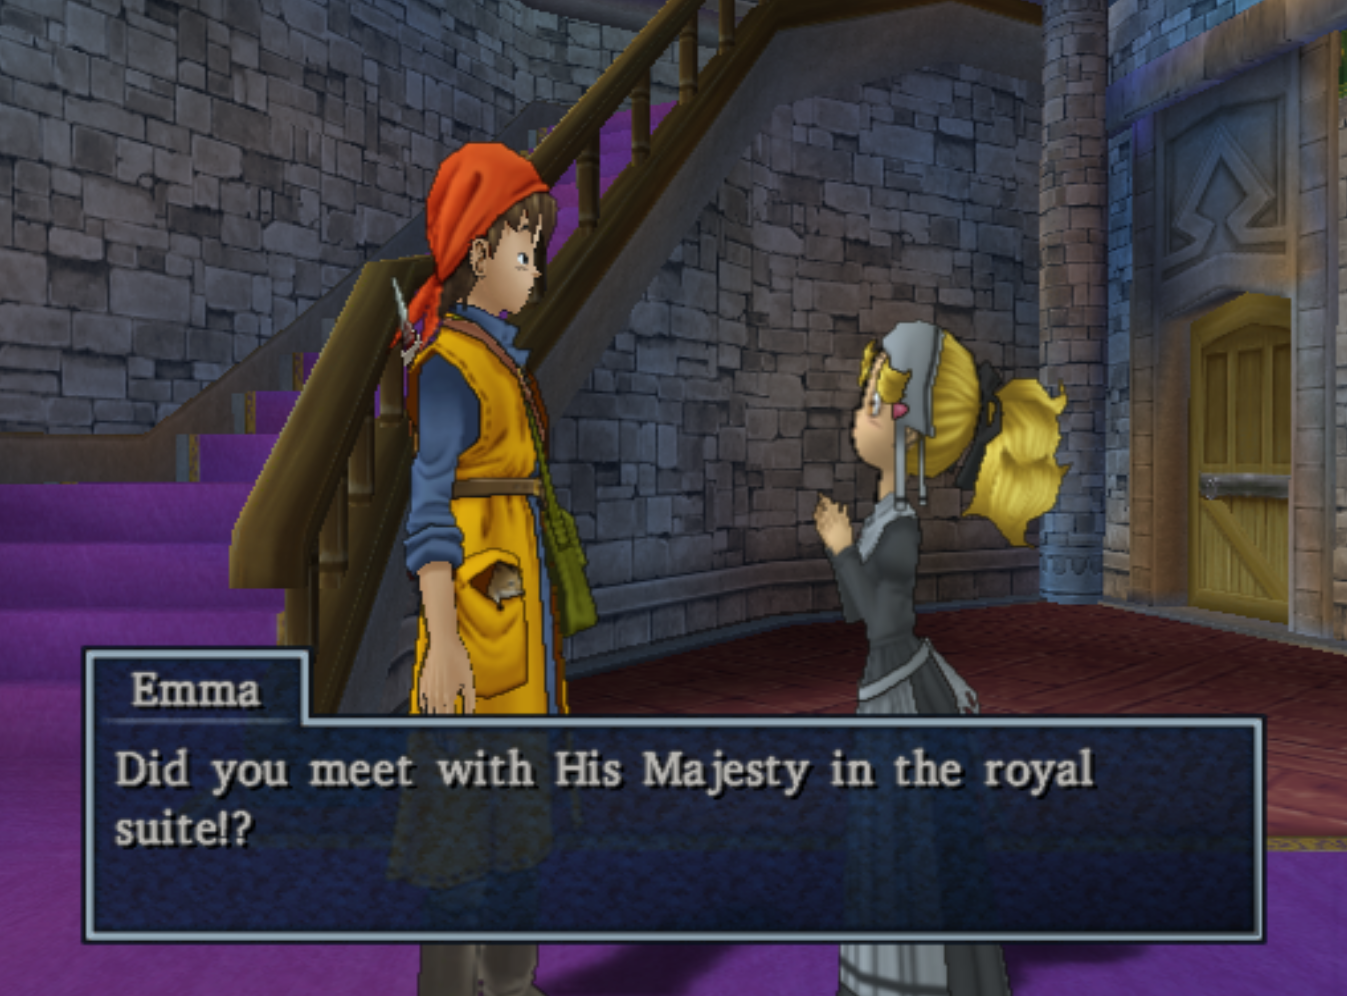
Explore the entire castle thoroughly, inside you'll find some Mini-medals as well as a few other goodies. When you're ready to advance the plot forward venture up to the 2nd and 3rd floors of the castle where you'll want to speak with the maids and the chancellor. After head up one more floor and speak with the King who is on his knees in front of the throne with his face plopped down on it.
If it isn't night time you'll be told to come back when it is night and speak to everyone again. If it is night time, after speaking with the King and trying to return to the first floor of the castle you'll be greeted/interrupted by Emma. This is the scene that's required for story progression.
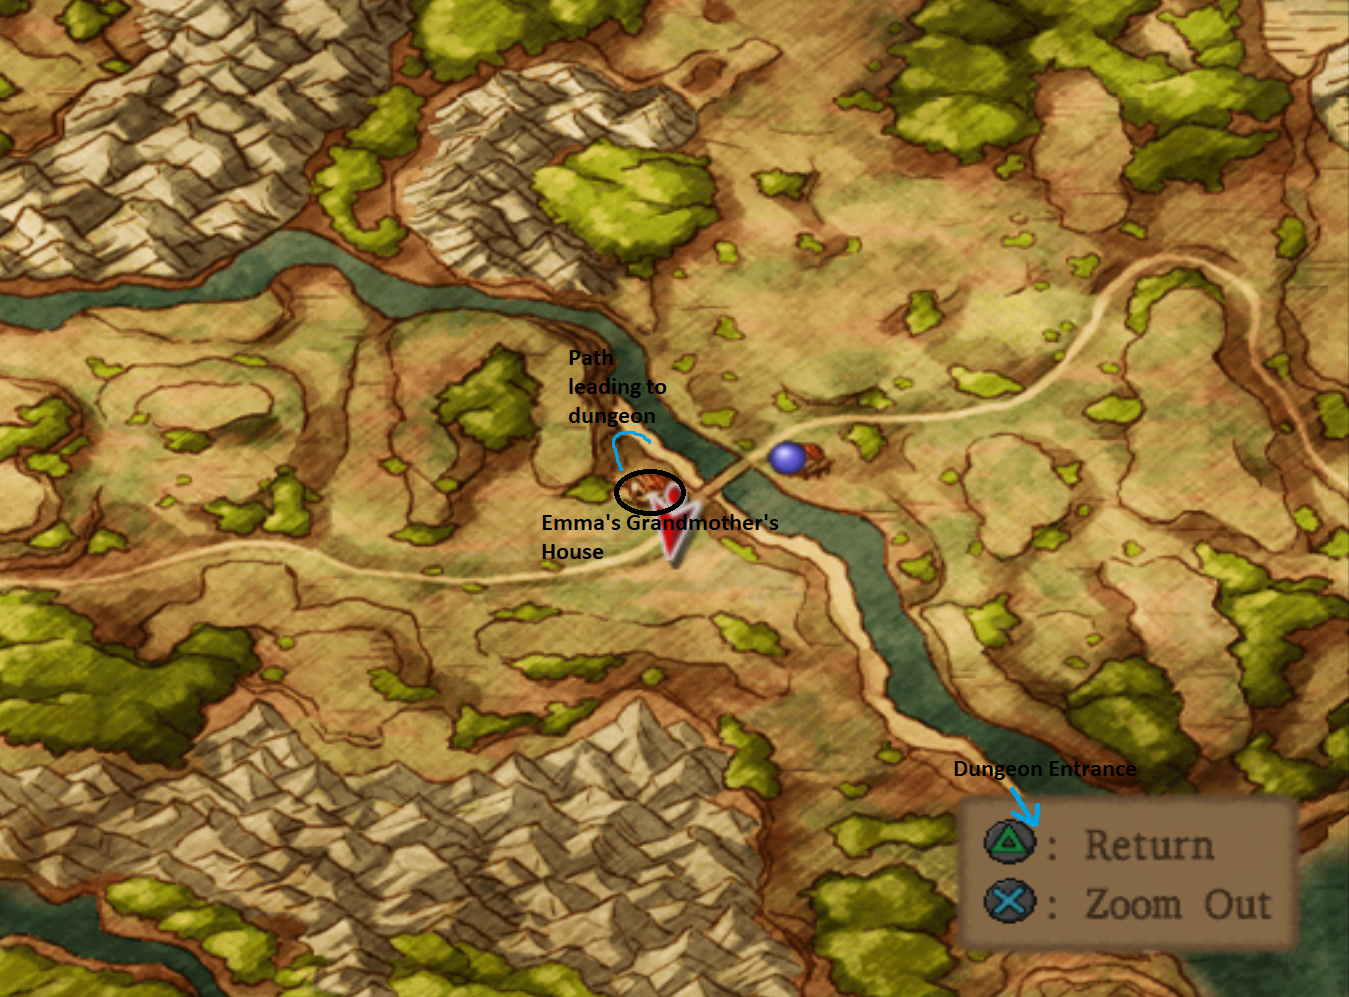
Emma suggests that you go speak with her grandmother who is found in a house next to the bridge that we crossed on the way here. Use Zoom to quick travel to Riverside Chapel and go to the house on the opposite side of the bridge. If you've never visited the Riverside Chapel on your way to Ascantha then use my map.
After you speak with Emma's Grandmother follow the path just north of her house which leads down to the beach. Then you'll want to follow the beach all the way south until you reach the dungeon that she was talking about. In the screen shot above, this route is marked by a blue line.
Wisher's Peak Dungeon
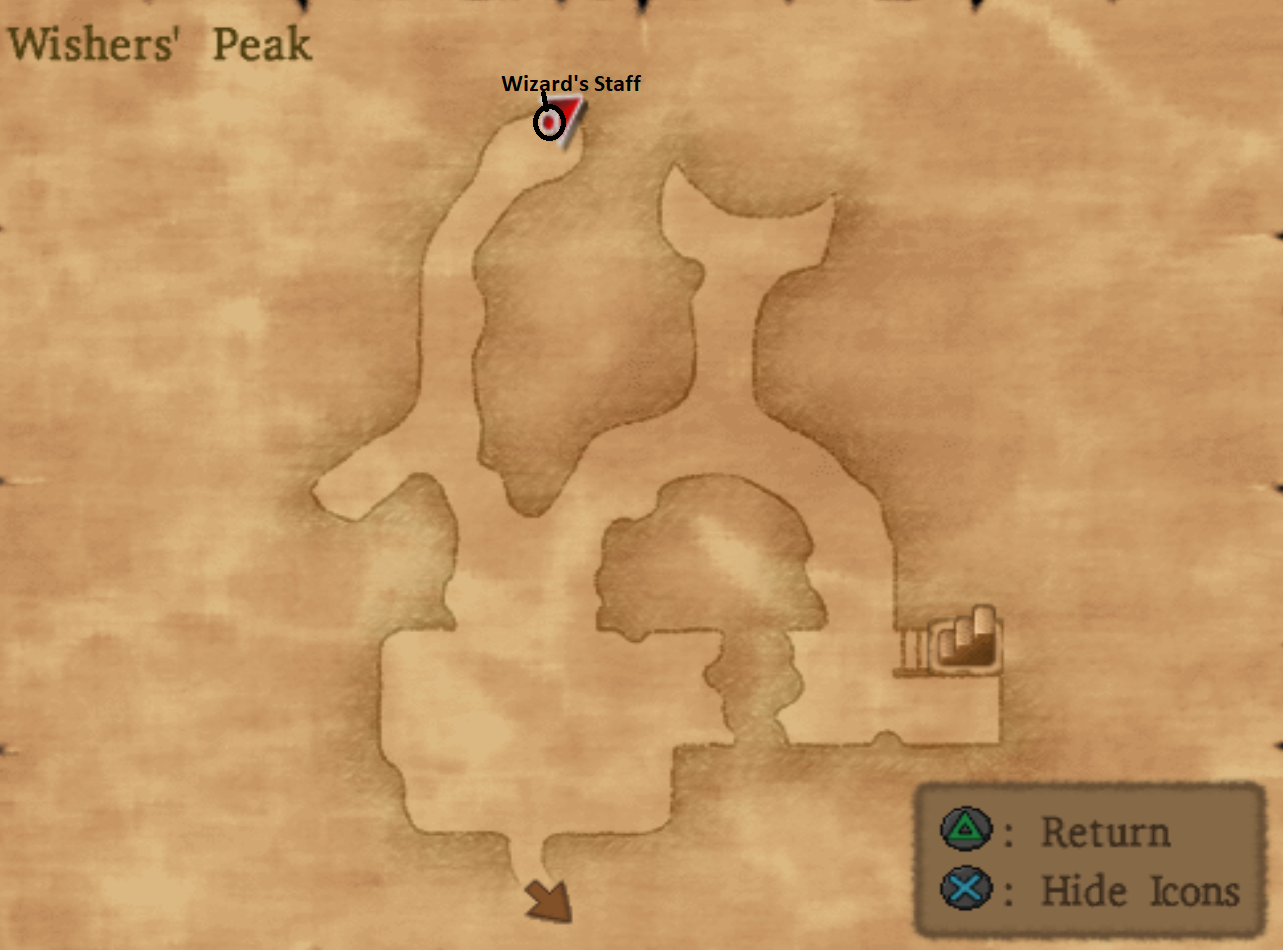
On the first floor of this dungeon there's a chest with a Wizard's Staff, you won't find the chest with the map until you travel up to the outside portion of the dungeon, which is shown in the map below. The first arrow pointing up to the stairwell down is where you will find the map.
The upwards arrow is actually a cave entrance and in there you'll find a rope to climb up (which is the same staircase down you see on the map) and one passage way which leads to a chest. Inside of that chest is the Map of Wishers' Peak.
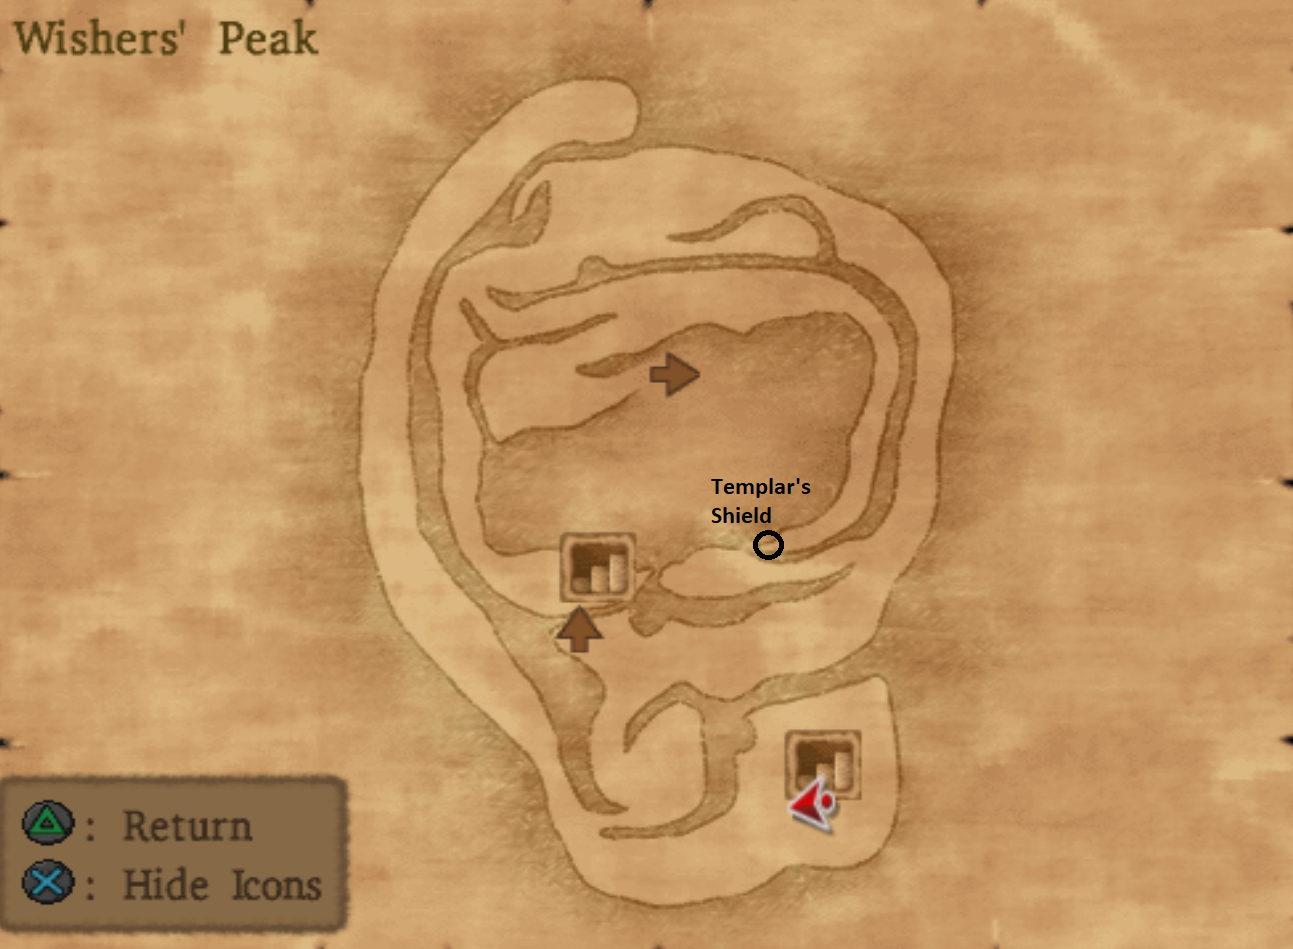
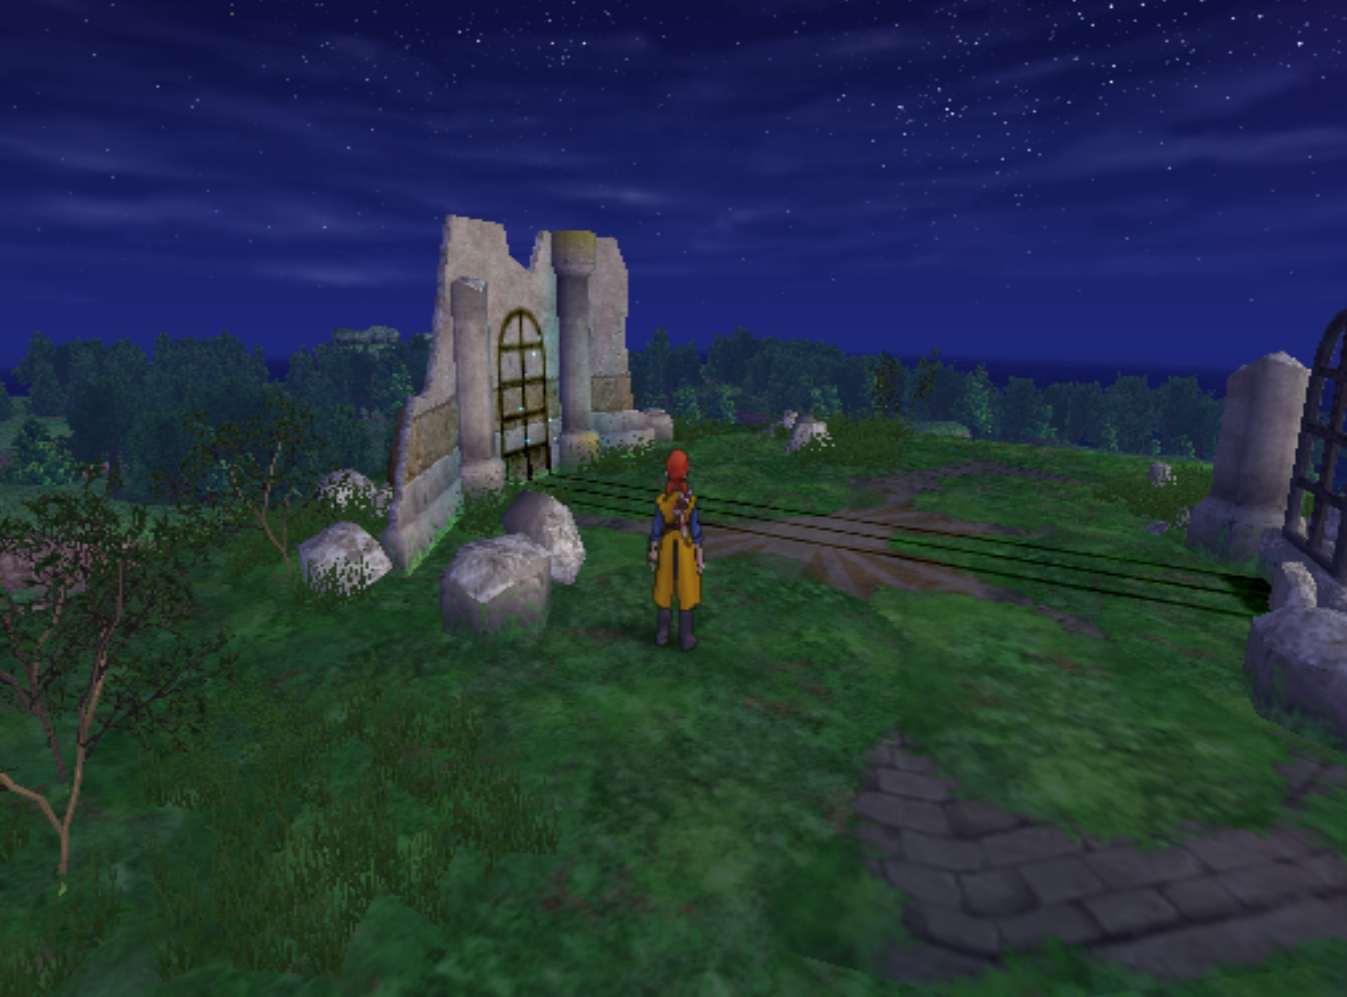
Before venturing up to the top of the dungeon I recommend you grab the Templar's Shield. It's a shield for Angelo which you can either equip or use in an Alchemy Recipe. When you're ready to progress the story forward head to the peak and wait until night. As time progresses you'll notice the mirror casting a shadow on the stone wall - if you wait long enough a cutscene will commence.
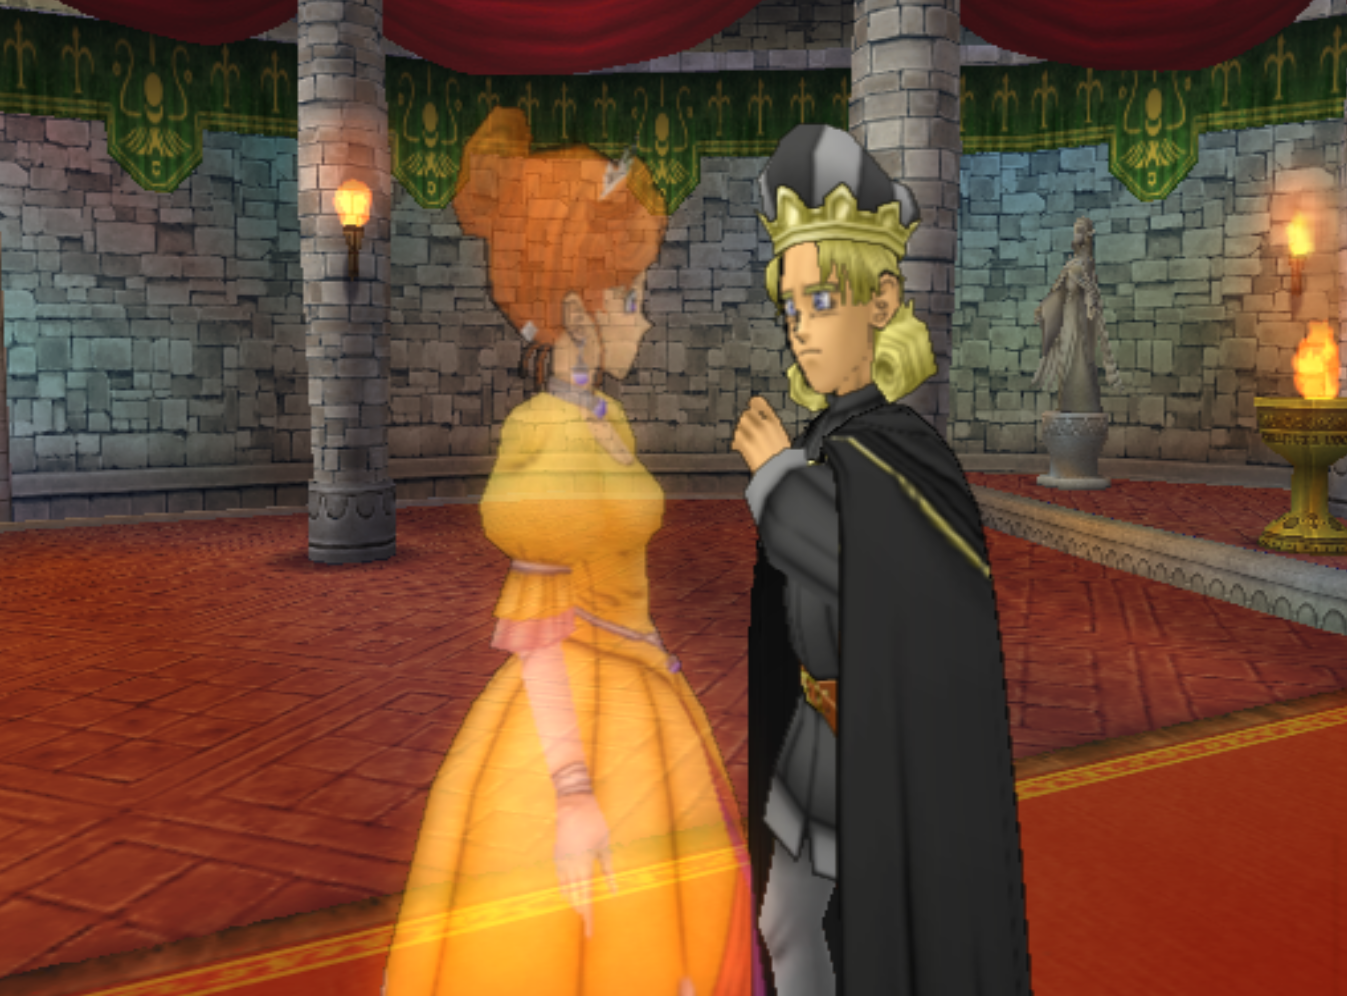
After the cutscene you can approach the shadow and interact with it to be taken to a different dimension. Here you will meet Ishmahri who joins your party and asks you to take him to the King. When you exit the different dimension you'll find yourself already in the castle. Go upstairs to where the king is and another cutscene will play out.
Once you finish having dinner with the king and everything is back to normal leave town and you'll be treated to another cutscene but this time with King Trode. During the cutscene Yangus will suggest you travel south to a town called Pickham, his home town.
En route to Pickham you'll pass two buildings, the first one is the Lakeside Cabin which is next to the lake by Wishers' Peak. You can Save, Ressurect and use the Inn at this building if you need any of these things. Additionally there is a bookcase in this building too which upon inspection will teach you another Alchemy Recipe.
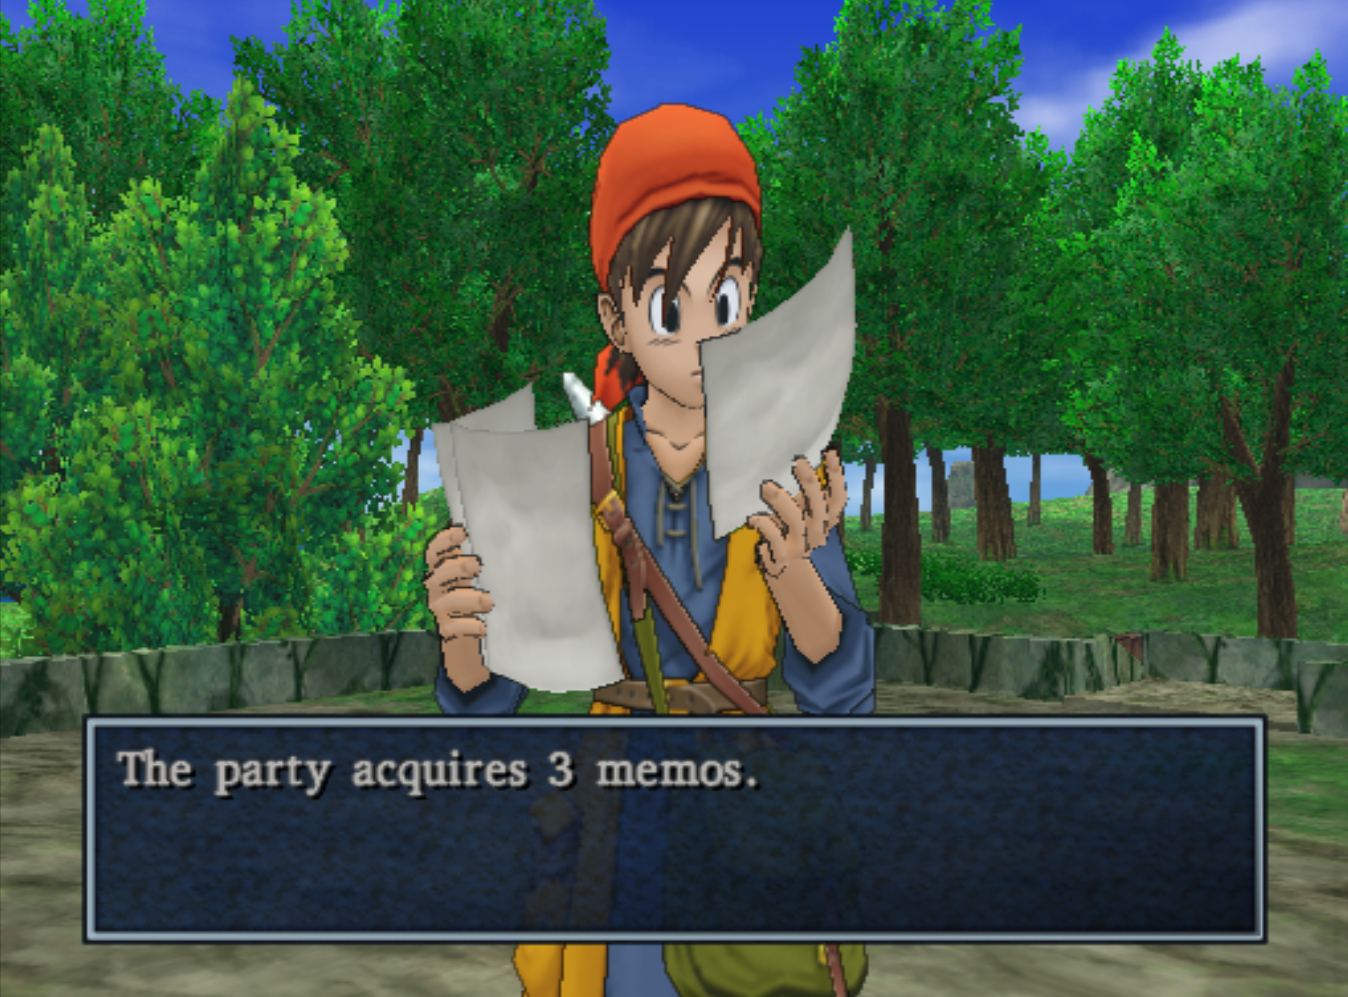
A bit further south you'll find Morrie's Place which is the home to the Monster Arena Sidequest. When you arrive at this building the door will be locked but you'll witness a quick scene showing you Morrie up on his roof. Head up to the roof and talk to him and he won't say anything until you try to leave. Return to him and speak with him again (what an irritant) and he'll finally give you three memos which is the start of the sidequest.
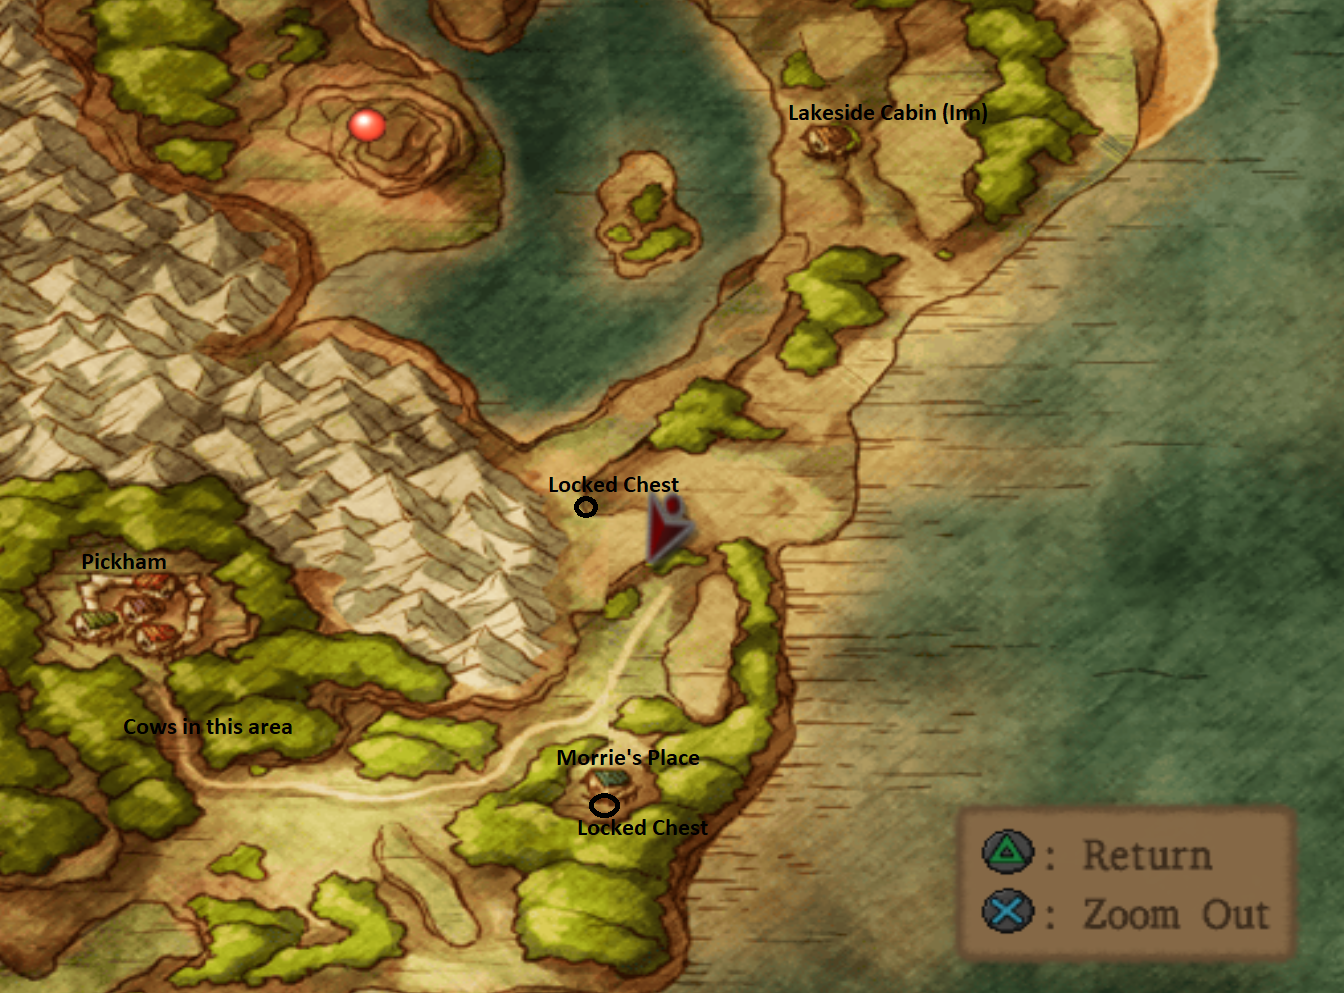
With memos in hand head over to the town of Pickham northwest of Morrie's place. Once you enter Pickham you won't be able to leave this town until you advance the plot forward. Pickham is a very big town too so it's going to take a bit of time to explore it all. If you want to do something outside of this town first - do it before entering.
Town of Pickham

Out of all the previous towns we have come across this is by far the worst one yet. Pickham has about a dozen different buildings and two floors, since you can run across the rooftops to gain access to buildings you otherwise wouldn't be able to. I'm not going to explain in detail where all the goodies are in this town because it would take far too long - only tip I will give you is be sure to check the bags hanging on the walls in some buildings too.
Pickham is also the first town you come across that has a casino. If you're standing at the town's entrance, the Casino is the building to the left. In here you can exchange Gold for Casino Tokens and then gamble those tokens or exchange them for prizes. When you're ready to advance the plot forward head to the building in the center of town which you access from the roof, this is Brains' House.
Yangus will point out that Brain isn't here at which point you'll want to go to the tavern in the northern most portion of the town. This is where you'll find King Trode. Speak with King Trode and then exit the pub, you'll notice that Medea (his horse) is missing! Now you have to figure out who stole Medea, the building that the thief Mitts is in, is marked on my map above as well. Click on the image to enlarge it if you need to.
Speaking with Mitts will advance the story again and now you have to go to the second bar in town (southeast portion of town) aka not the bar you found King Trode in. Inside this bar speak with the barkeep to gain access to the back room. In here grab the Mini-medal from the closet and speak with the only guy in the room. He tells you that he already sold Medea to someone named Red who Yangus knows.
With this, you can finally leave town. Your destination is southwest of Pickham, Reds' house is on a small lake surrounded by water. It's impossible to miss. On your way to Reds it's recommended that you collect all the treasure chests nearby - you can even take out the Squiggley Squiggler enemy which is part of the Monster Arena side quest!
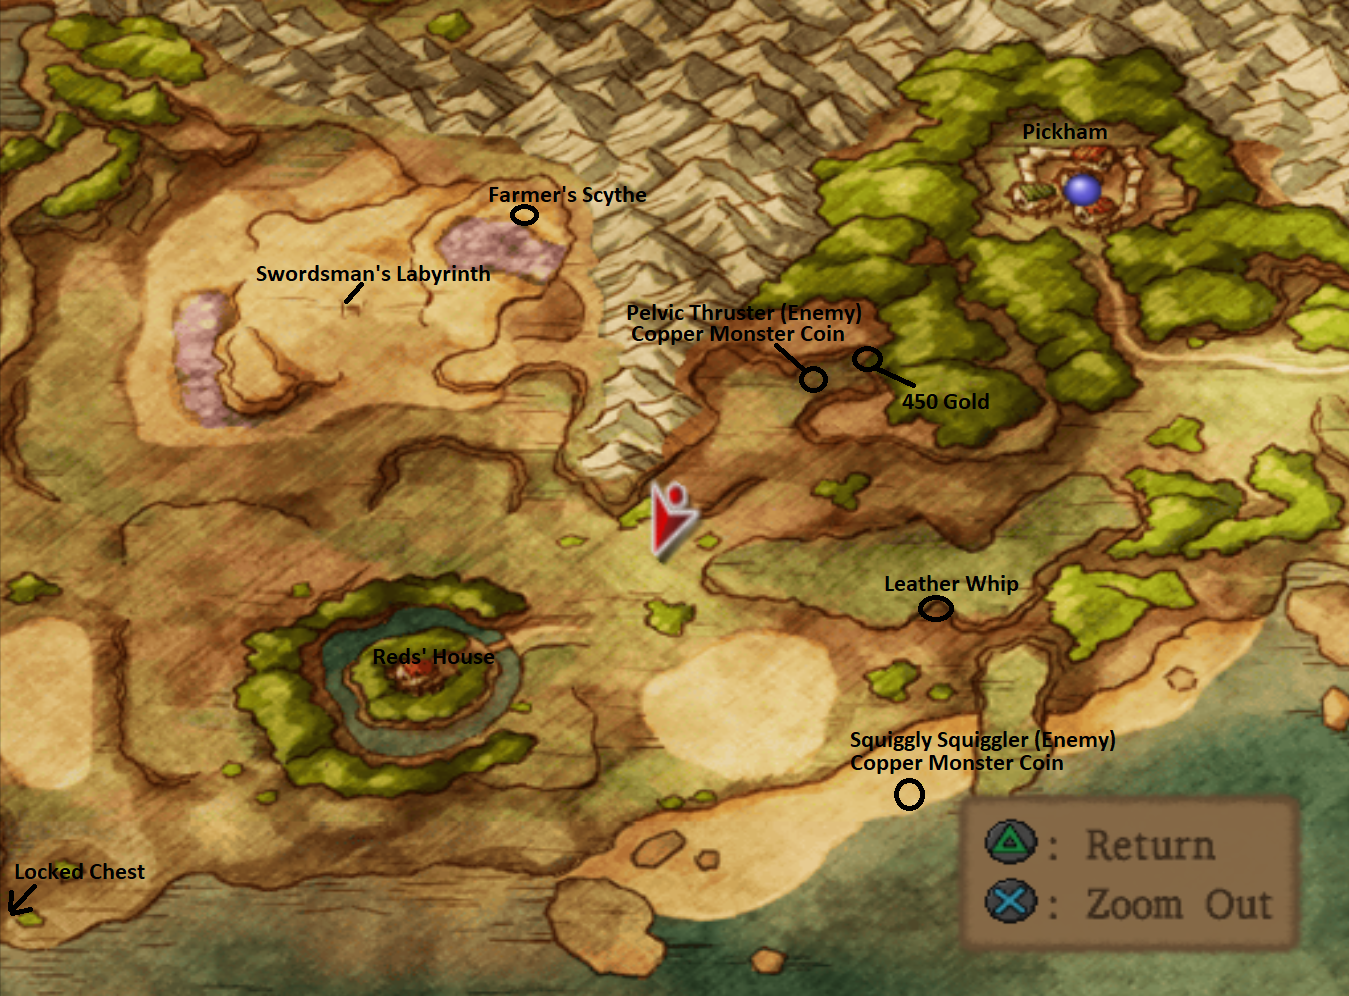
When you decide to go to Reds house be thorough in your search - there's two Mini-medals for you to find here as well as a Hairband. Speak with Red and she tells you if you bring her back the Venus Tear she'll give you Medea back. The Venus Tear is found in the Swordsman's Labyrinth, a dungeon just north of Reds' House. As you could probably already imagine, this is our next stop!
Continue to Walkthrough Chapter 4 (Swordsman's Labyrinth, Hilltop Hut and Castle Trodain)
Continue to Walkthrough Chapter 5 (Ascantha, Land of the Moles, Mole Hole & Side Quests)