
Dragon Quest VIII: Journey of the Cursed King Walkthrough Chapter 2
This guide is designed to point you in the right direction but not hold your hand throughout the entire game. Dungeons and Towns you'll be exploring mostly on your own, with my maps pointing out any treasures that are hidden in a dungeon as well as how to solve any puzzles you'll encounter that could possibly get you stuck.
Additionally depending on your own personal preference, my maps/pictures are designed to work as a guide of their own. If you'd like to skip reading text entirely while you play, you can just look at the maps for the treasure chest locations and where you need to go to advance the story forward.
Skill Point Tips:Jessica Staff (Acceleratle 3 Points); Whip (Twin Dragon Lash 23 Points); Yangus Fisticuffs (Thin Air 42 Points); Humanity (Heals); Hero Courage (Zoom & Other Spells); Sword or Boomerang
Alchemy Tips: Bronze Shield, Bronze Armour, Bunny Ears, Iron Axe, Snakeskin Whip, Stone Hardhat, Reinforced Boomerang
Peregrin Quay
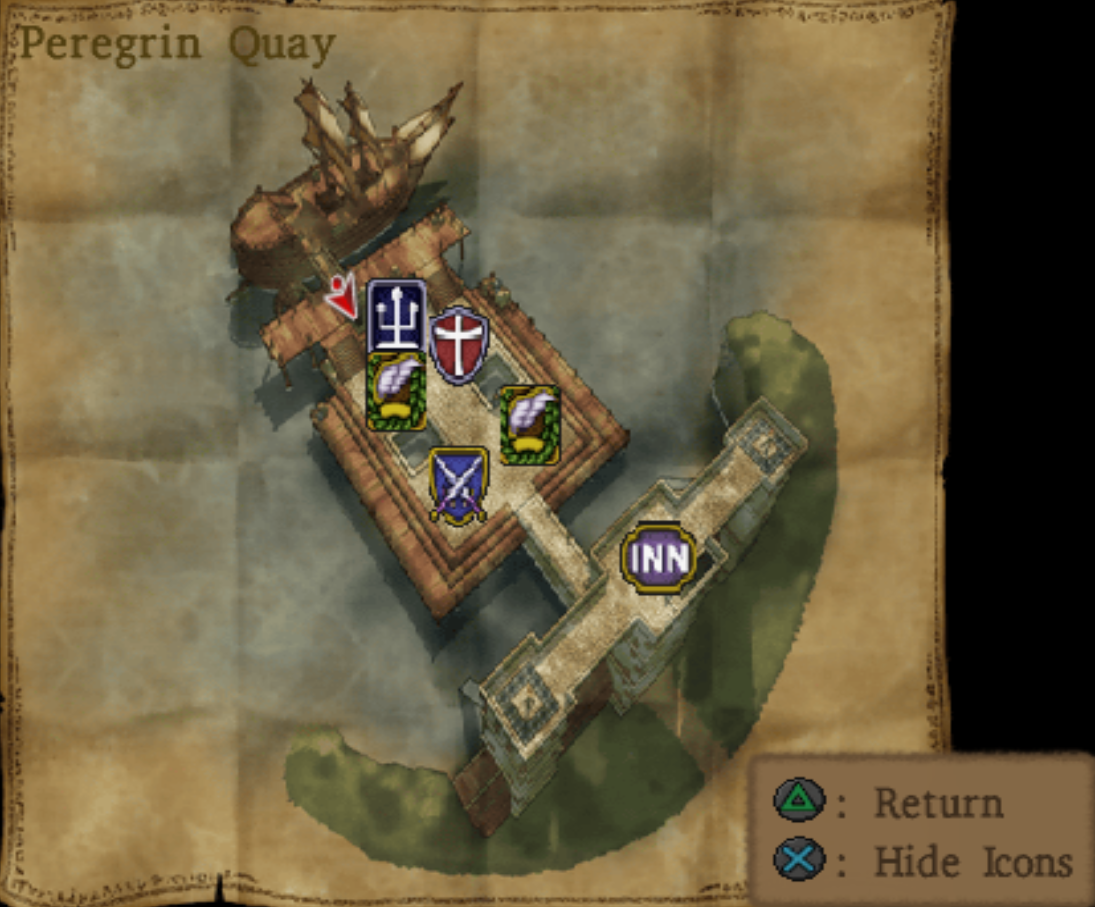
When you arrive in town smash all the barrels and pots that you find in the main area - there's plenty of them surrounding all of the vendors in the area. When you're done with the property damage head into the Inn and inspect the closet in there to find a Seed of Magic. In addition to the Seed of Magic you'll find a bookshelf in the Inn, inspect it to find a book which teaches you a new Alchemy recipe.
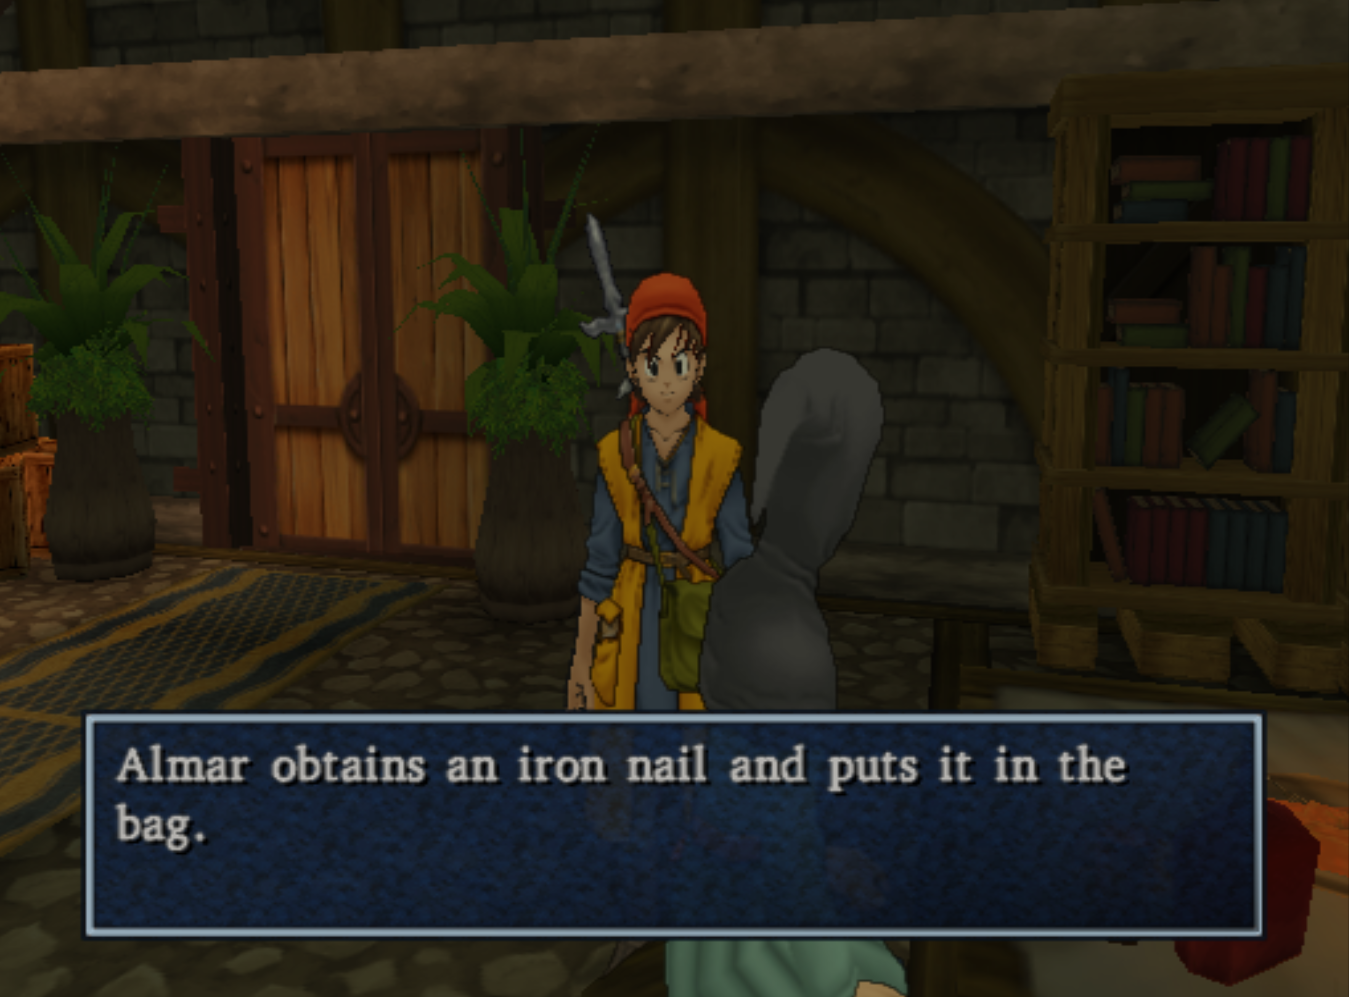
Stay a night at the Inn to rest up and when you're ready to leave head out the opposite side that you came in to trigger another scene with King Trode. He tells you about Alchemy and suggests looking around for some new recipes. Right next to the bookshelf where we learned the previous Alchemy Recipe you'll find a man in a hood. Speak with him and he'll give you an Iron Nail as well as tell you that this nail used to be his lock pick. He also drops an additional hint that you might want to mix it with something to make it into a usable object.
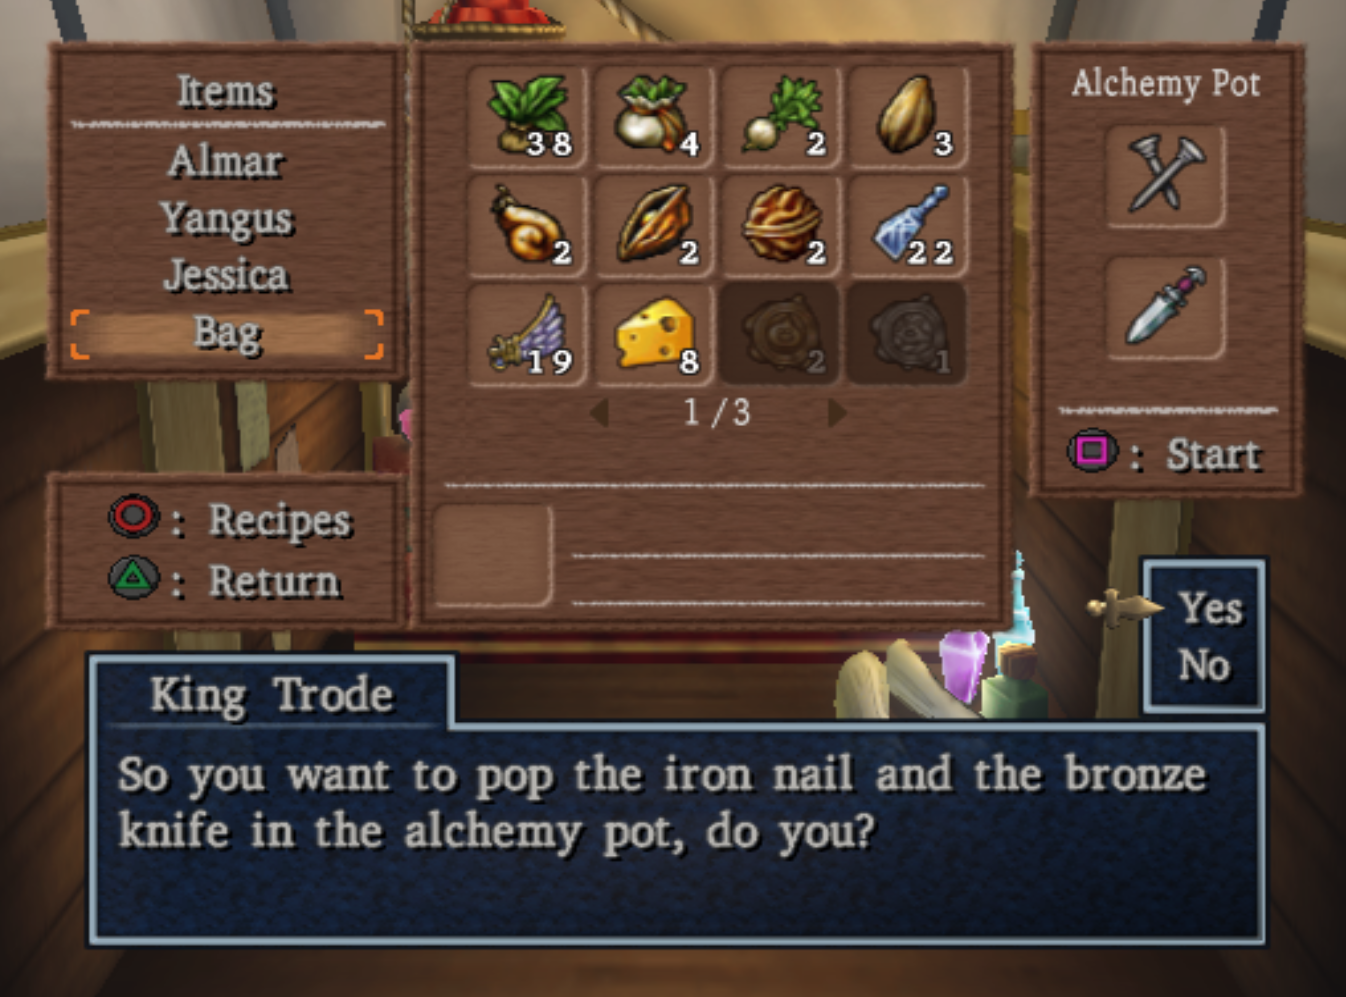
With the Iron Nail in hand head back outside and King Trode will be there to greet you again. He'll tell you to try a recipe now - you'll want to ignore the Medicinal Herb recipe and instead go straight to the main recipe we wanna craft - Thief's Key! Open the Menu, scroll over to Misc and scroll down to the Alchemy Pot option.
Pick the Iron Nail and Bronze Dagger ingredients to combine together which will make the Thief's Key. You won't get the key right away, each Alchemy Pot combination takes a bit of running around which leave you with two options. You can run around and fight some random battles as you wait or use Holy Water and avoid random battles waiting for the recipe. When the Alchemy Pot is finally ready you'll hear a ding noise in game.
Farebury Thief's Key Locations:
1) Back door of the weapon shop (Cypress Stick + Dagger)
2) Back door in the Church (Mini Medal)
3) Southeast of Farebury along a hill on the World Map (Mini Medal)
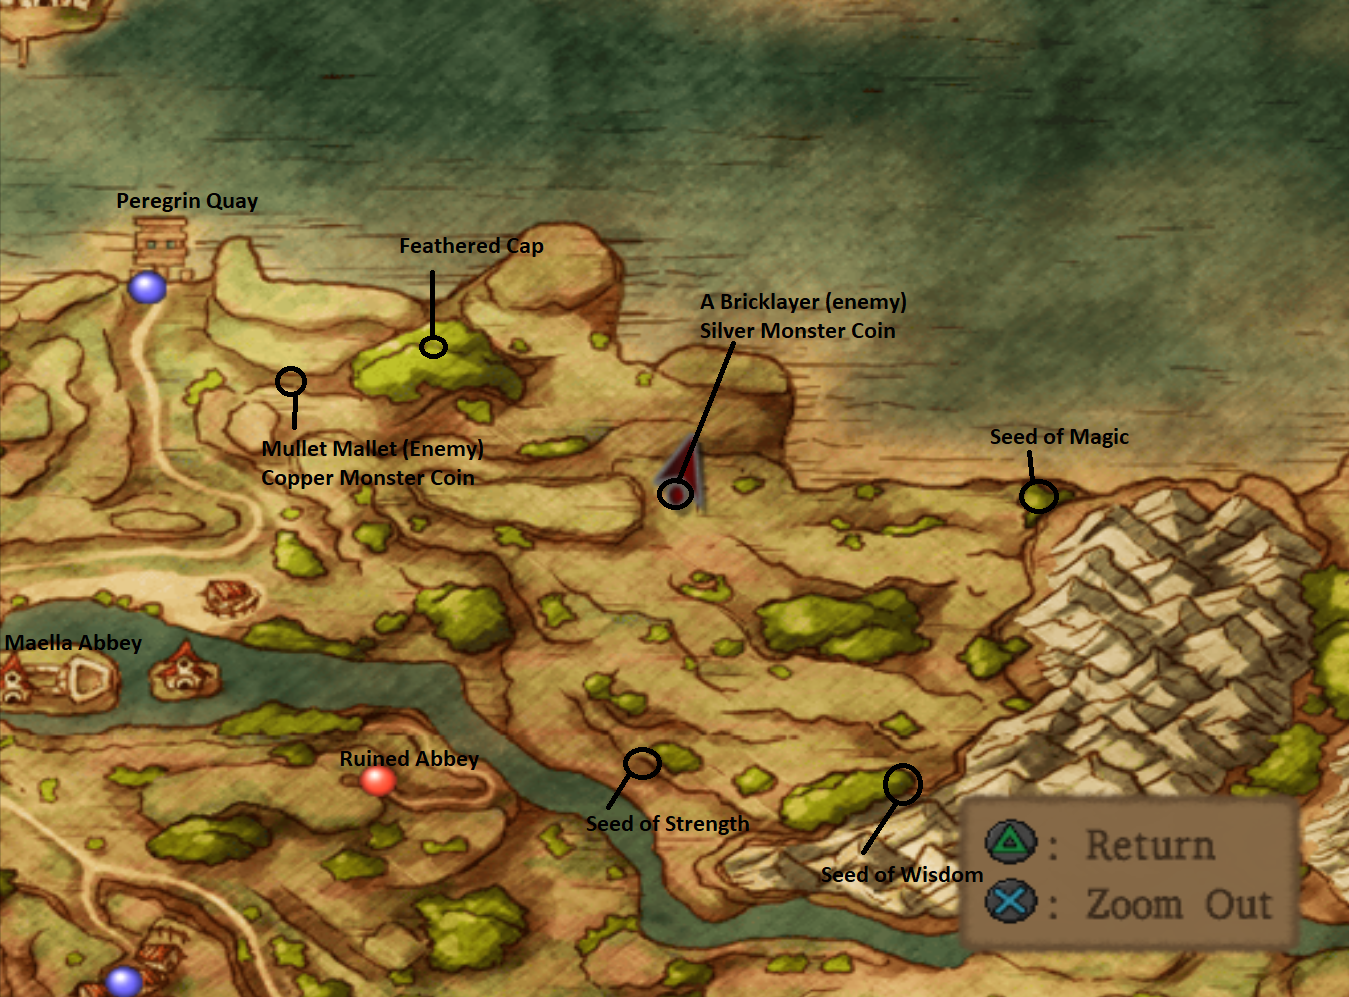
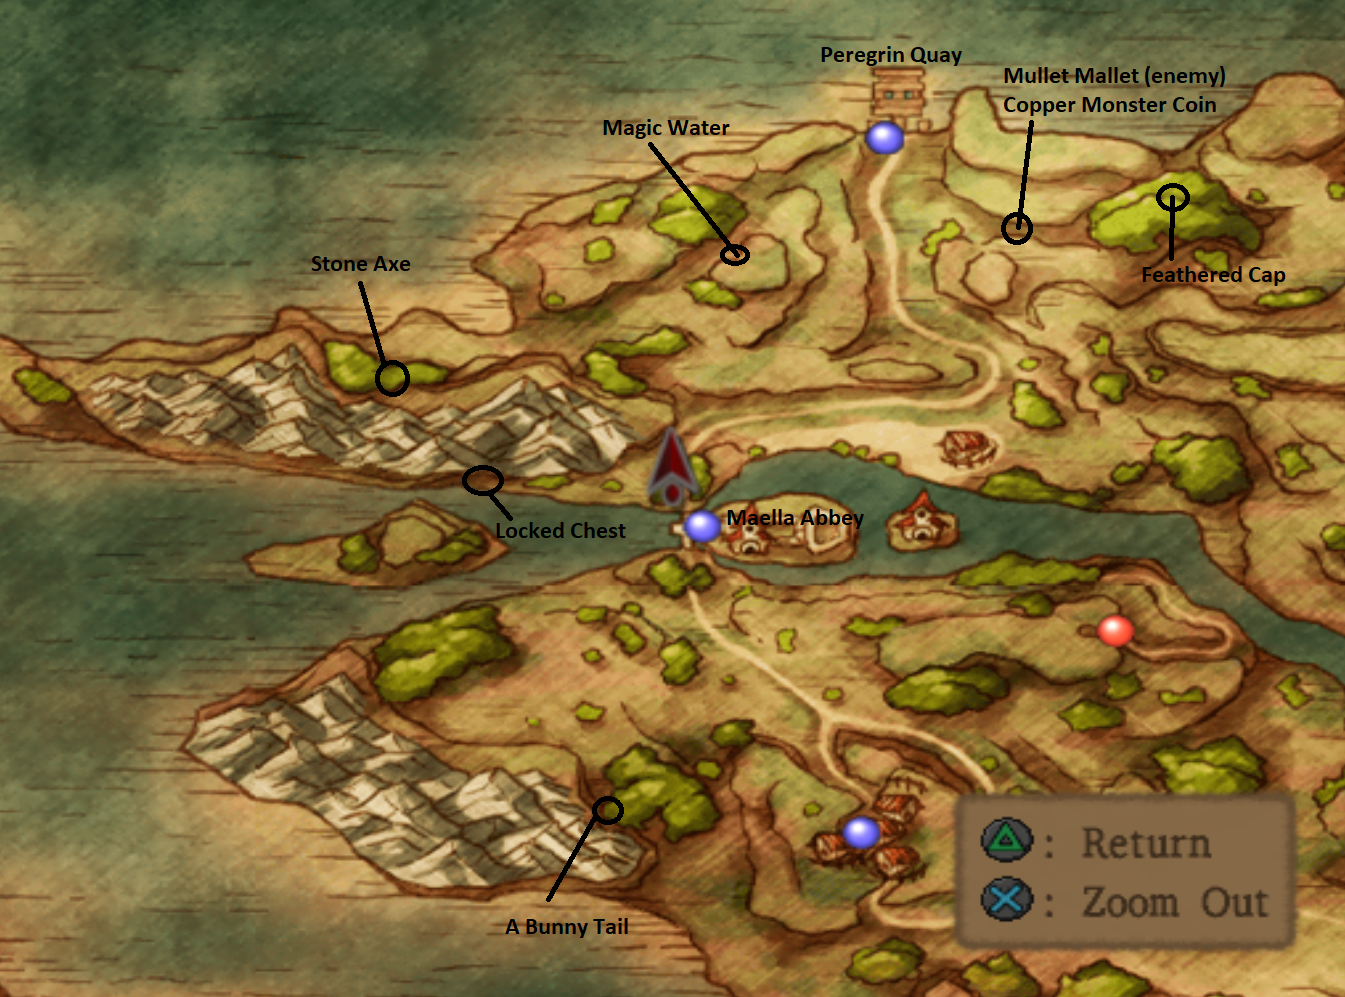
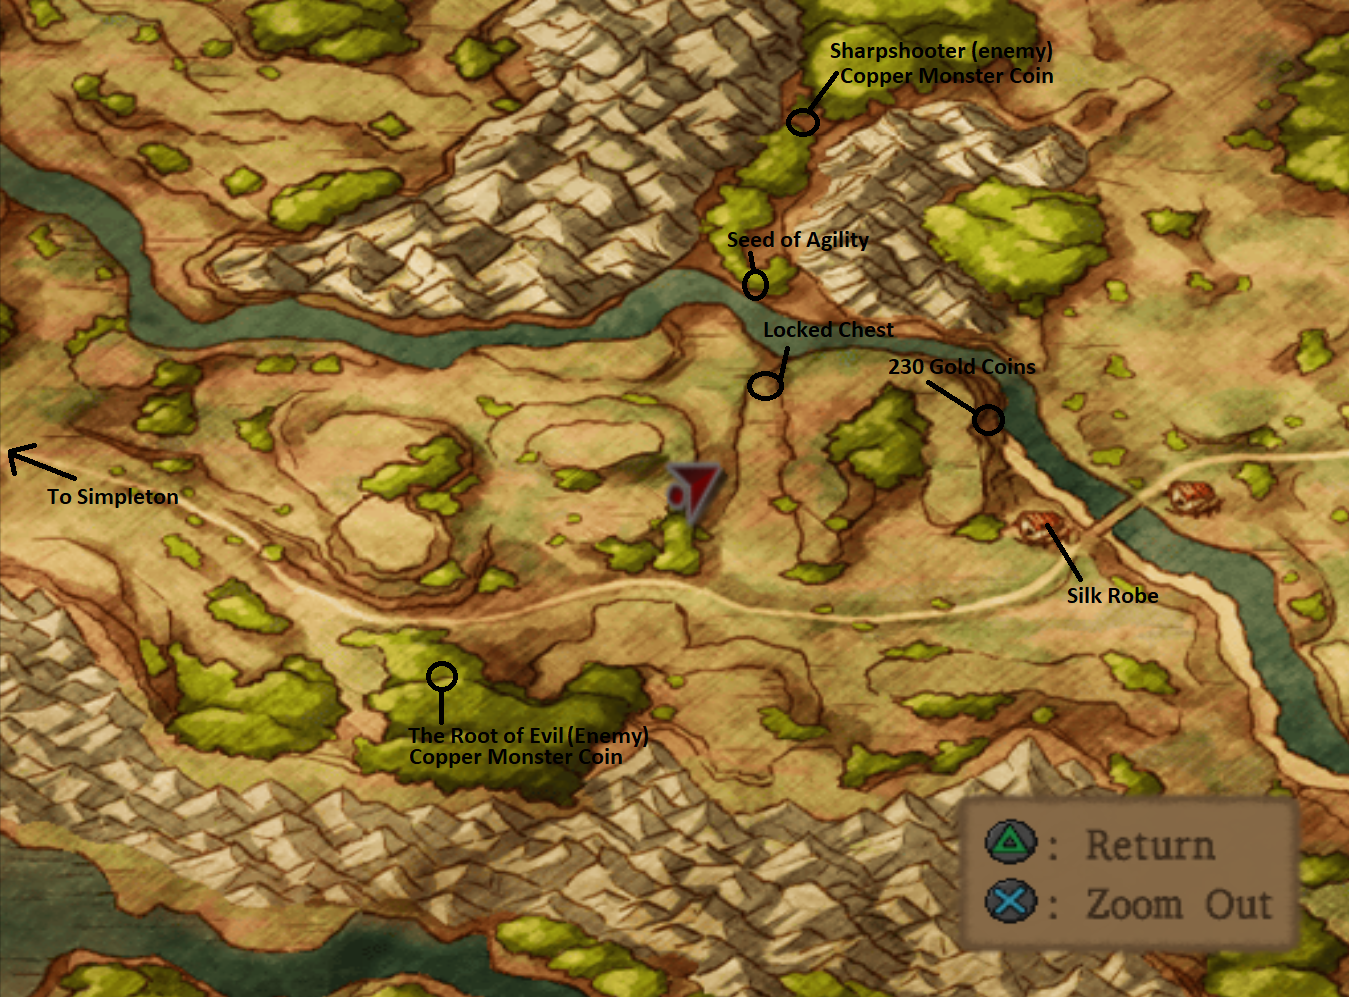
On the World Map outside of Peregrin Quay you'll find tons more treasure chests scattered across the land. It's up to you whether or not you want to run around and collect them while leveling up your characters. Some of the chests will be locked and unless you have the Thief's Key you won't be able to open them either - which is even more incentive to make the key!
Follow the path leading south from Peregrin Quay when you're ready to travel to the next town, Maella Abbey. If you'd like to run around and collect all the treasure chests on the world map, use my screenshots below for guidance.
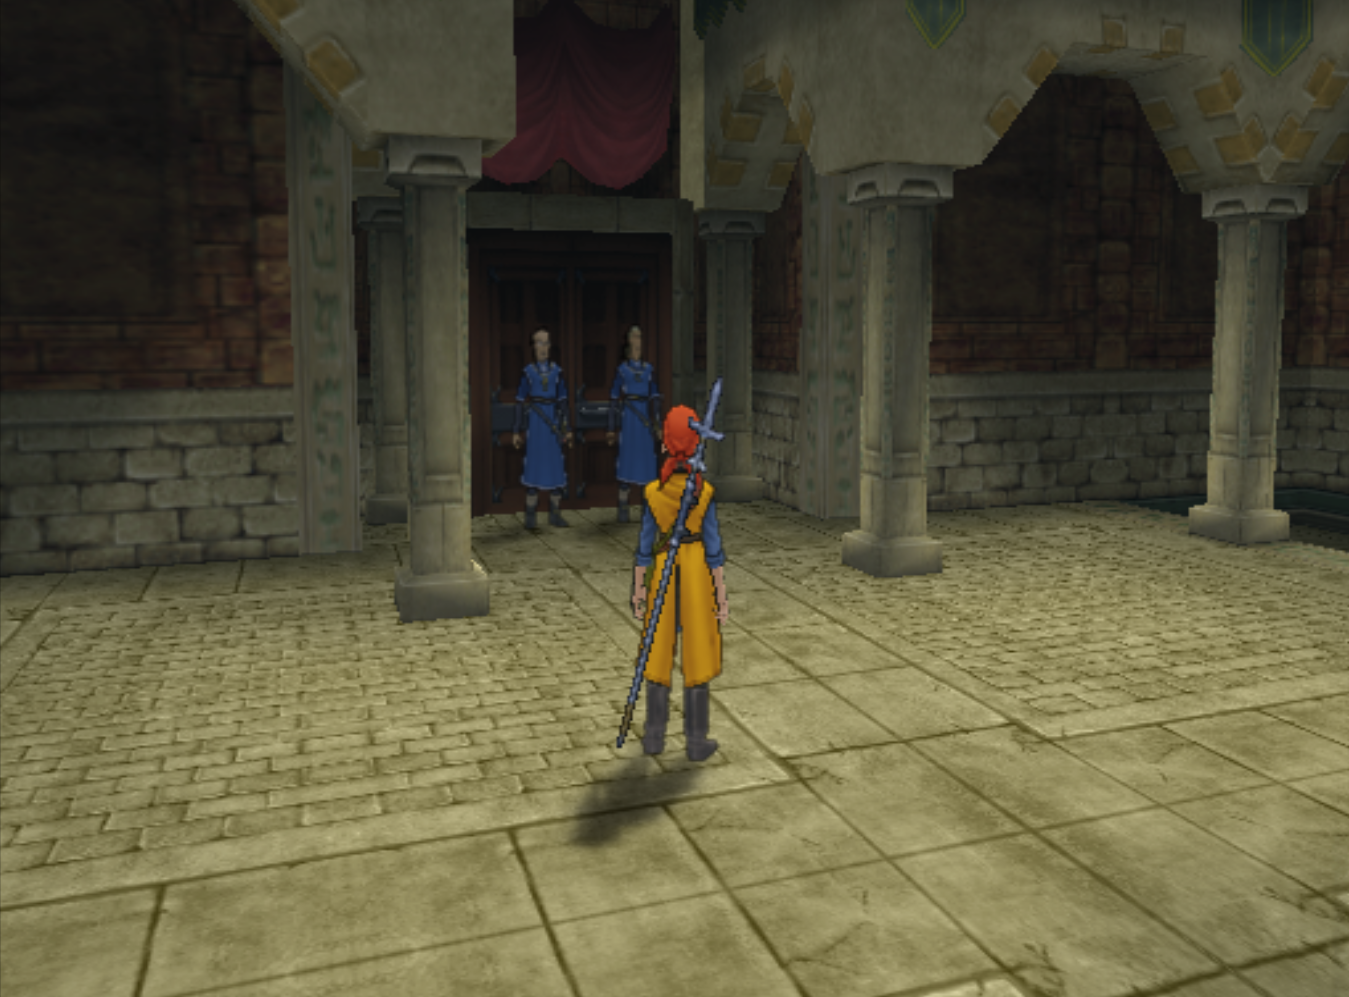
When you're ready to advance the story forward speak with Marcello inside of Maella Abbey. The scene with Marcello is triggered by speaking to the two guards in the back of the Alley guarding a door, these guards are shown in my screen shot below.
Maella Abbey Loot:
Holy Water (In a barrel)
Mini Medal (In the Kitchen) - can't access till 2nd time visiting
Mini Medal (Outside in the back) - can't access till 2nd time visiting
After the scene with the guards head south out of the Abbey - in the opposite direction that you entered from. Again, following the path from the Abbey will lead you straight to the town of Simpleton. On the way to this town you can make a small deviation from the path to open a treasure chest with your Thief's Key for Bunny Tail.
Simpleton
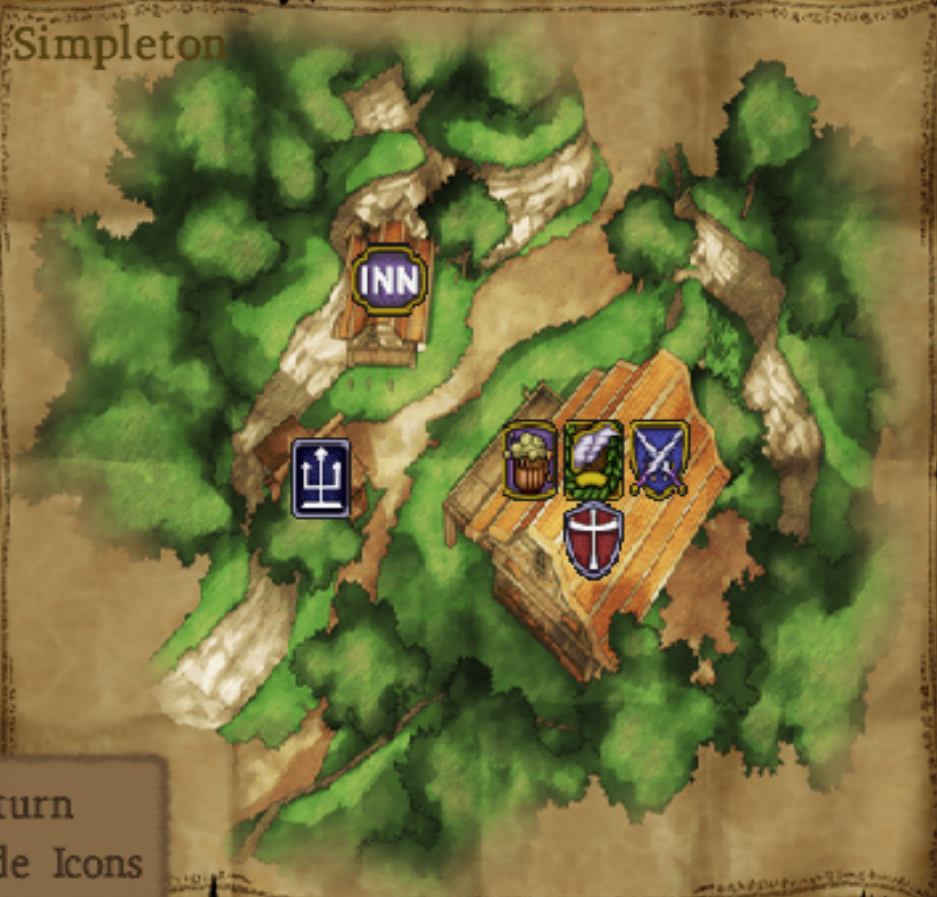
Simpleton is a very small town with=out much to do there. Upstairs in the tavern you'll find some barrels you can break which will give you a Mini Medal and some gold. Also, sitting at the tables in the bar are shopkeepers, I am assuming they live at the bar since all this town has is a church and a bar - poor sods.
When you're ready to advance the plot speak with Angelo downstairs, he's the man in red sitting at the table.
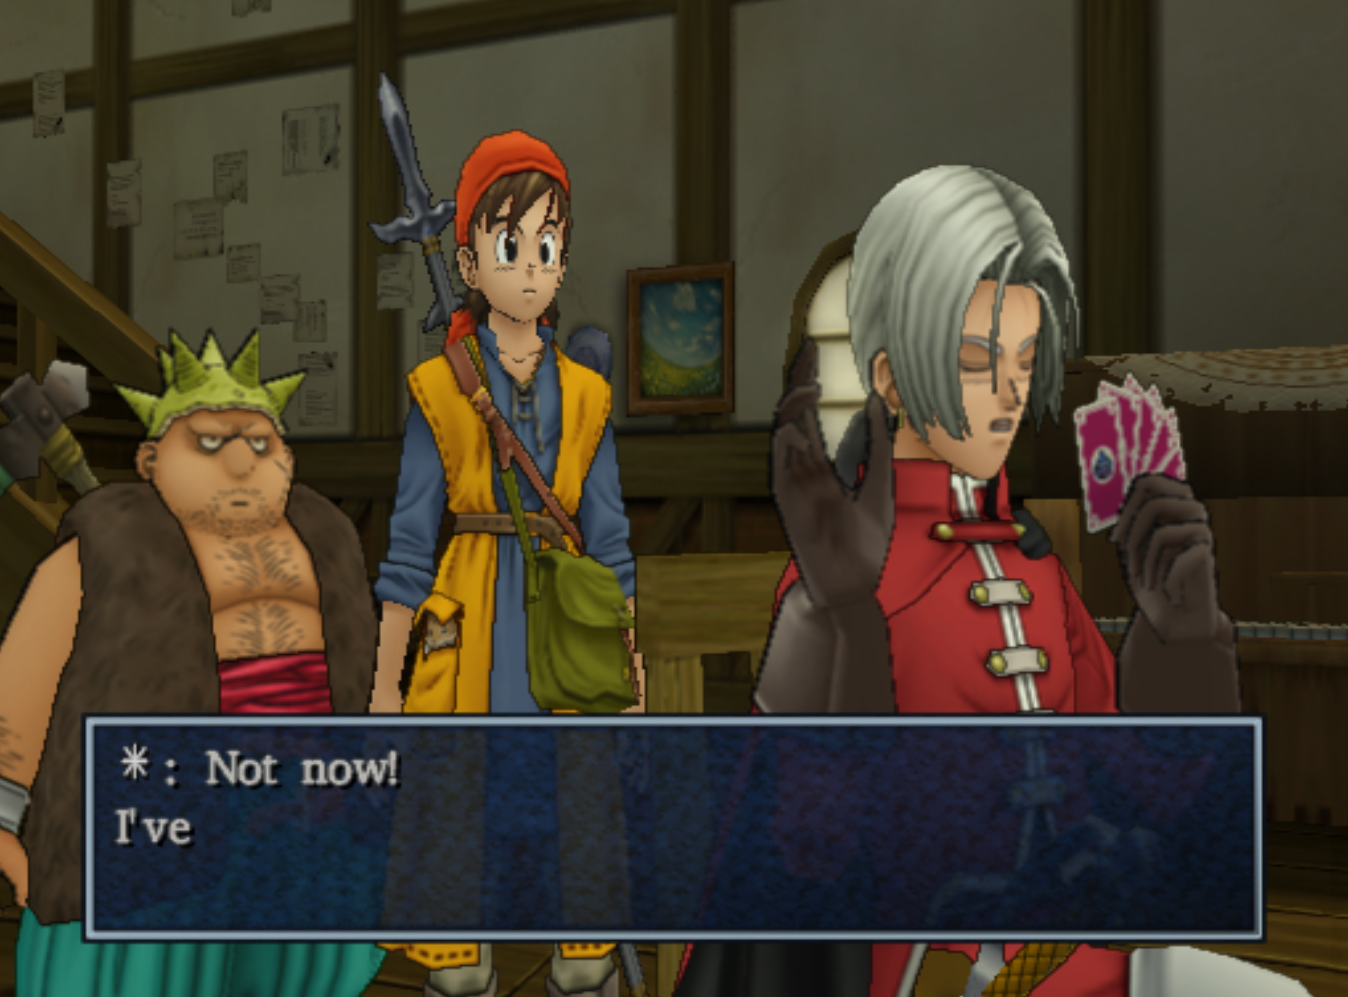
Yangus and Goku speak to Angelo.
Cutscene commences, Angelo flirts with Jessica and gives her a ring, asking her to come visit him at Maella Abbey. You guessed it, return to Maella Abbey and speak to those two guards, they'll let you through this time and you'll want to head over to the room with Marcello and Angelo in it for some more cutscenes. They're downstairs in the prison/torture room.
After the cutscene you'll want to travel back upstairs and to the outside area which has a bridge that's guarded by two soldiers. Speak with them and they'll tell you about a jester that just came through - everyone comments that they don't feel right since seeing him and it was eerie. Head back inside and Angelo will confront you asking for help.
Do as Angelo says, exit the Abbey as if you were heading towards Simpleton, follow the river east keeping the abbey in view; on your way east you'll bump into A Hollow Knight enemy running around on the world map. He's one of the rare enemies that drops a copper monster coin - avoid him if you're lower level but chances are you can handle him no problem.
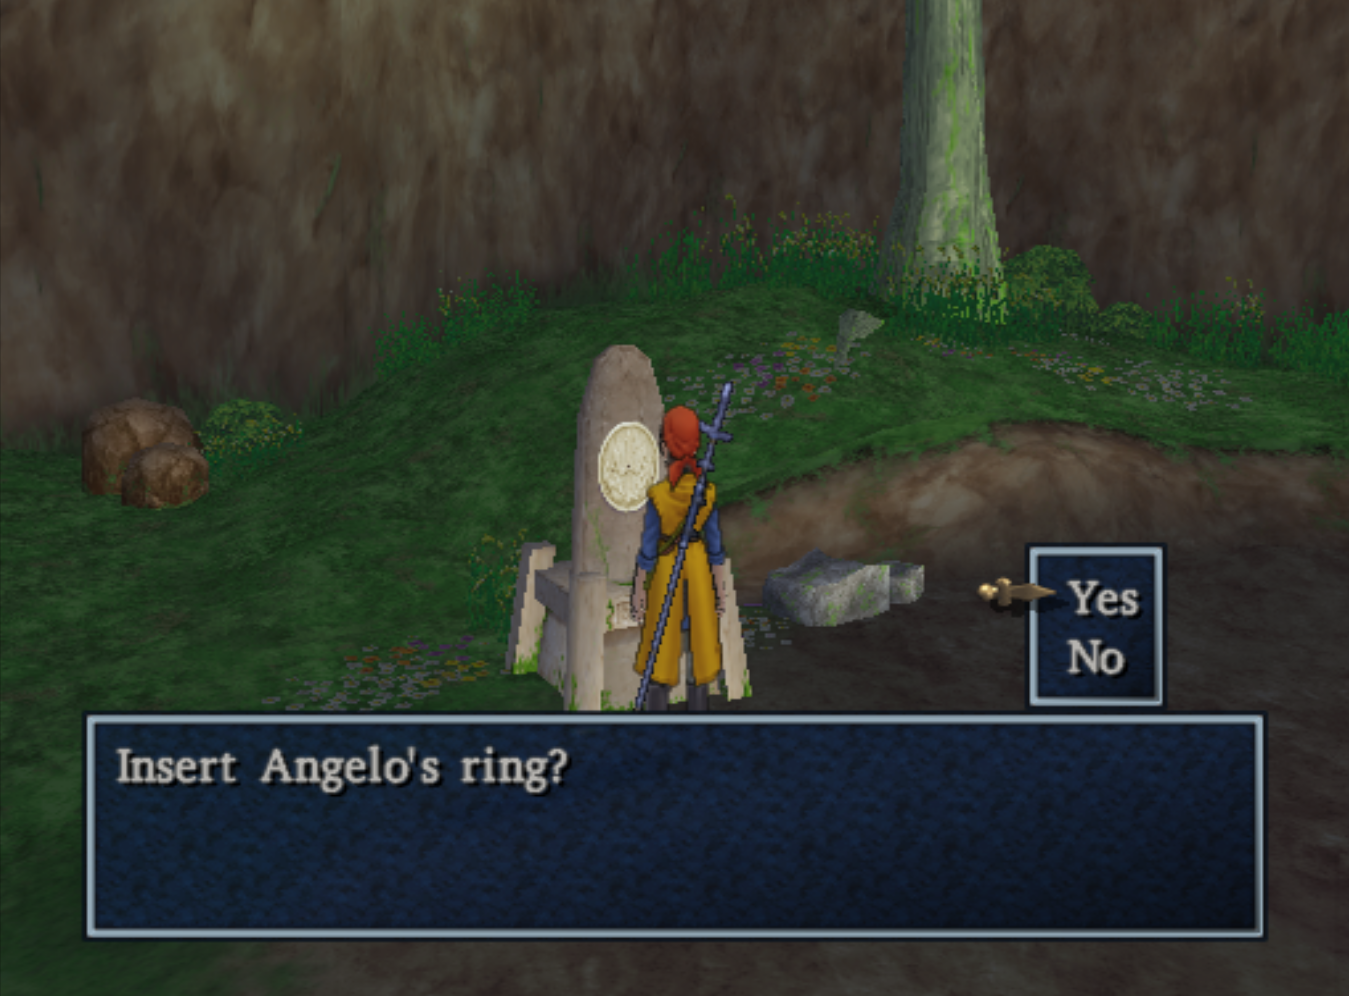
The path will circle around the hill and lead you into a crevasse between the hills. In this alcove you'll find a large podium, shown in the screen shot below. Insert Angelo's ring into it like he told you to do and a staircase will appear nearby. This takes you into the Ruined Abbey dungeon.
Ruined Abbey Dungeon
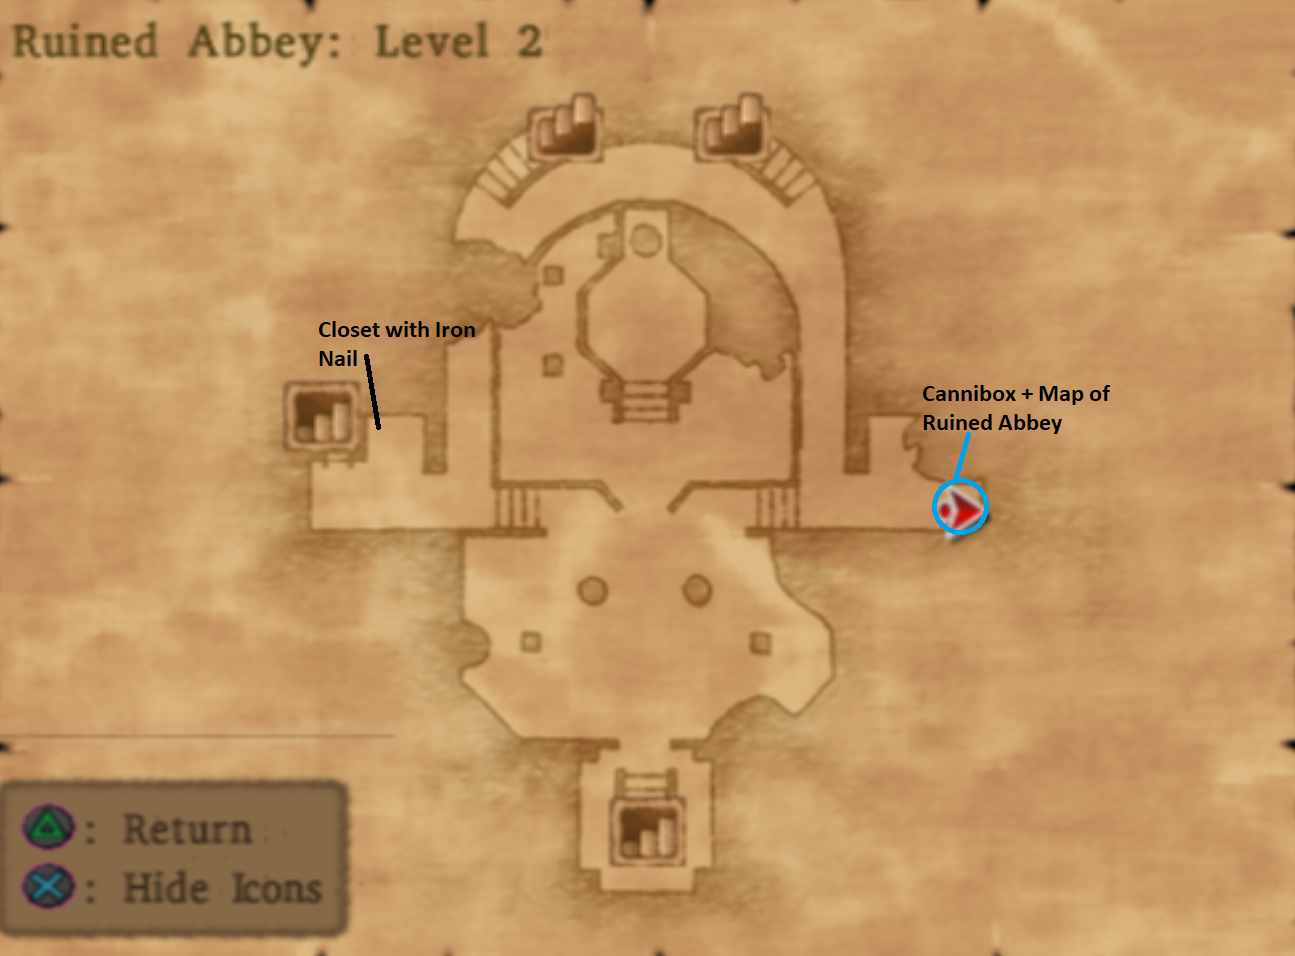
Ruined Abbey Loot:
Map of Ruined Abbey
Iron Nail
Mini Medal
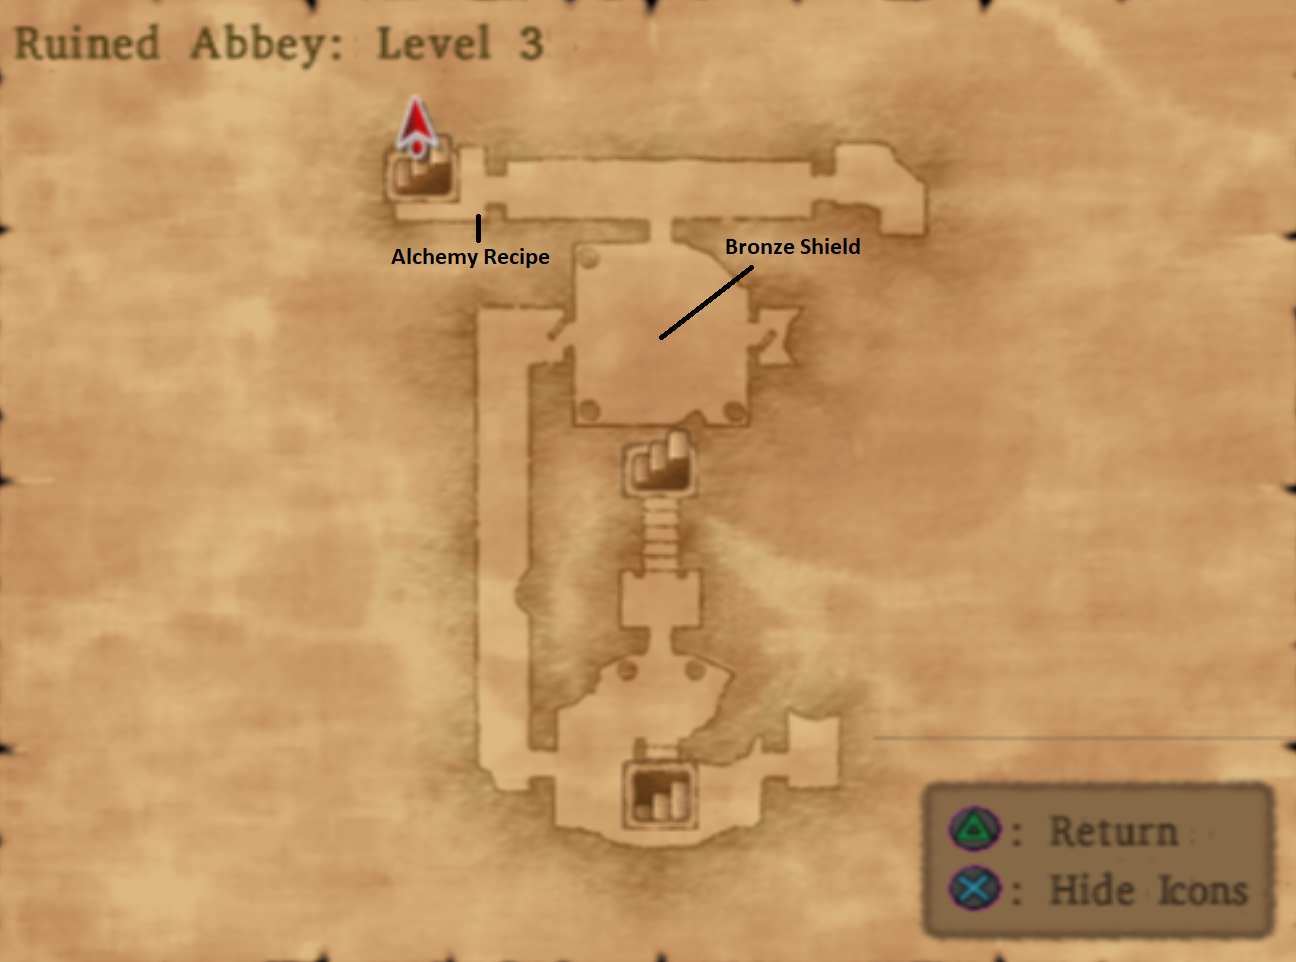
Bronze Shield
Mini Medal
Waterweed Mould
50 Gold Coins
Mini Medal
This whole dungeon is much more straight forward than the last one we did, use my maps below for locations of all the treasures you can find throughout the dungeon. Be prepared for the boss fight at the bottom of the Ruined Abbey on Level 3. A Tortured Soul is the boss you'll be fighting off against and he's the toughest enemy you've faced yet.
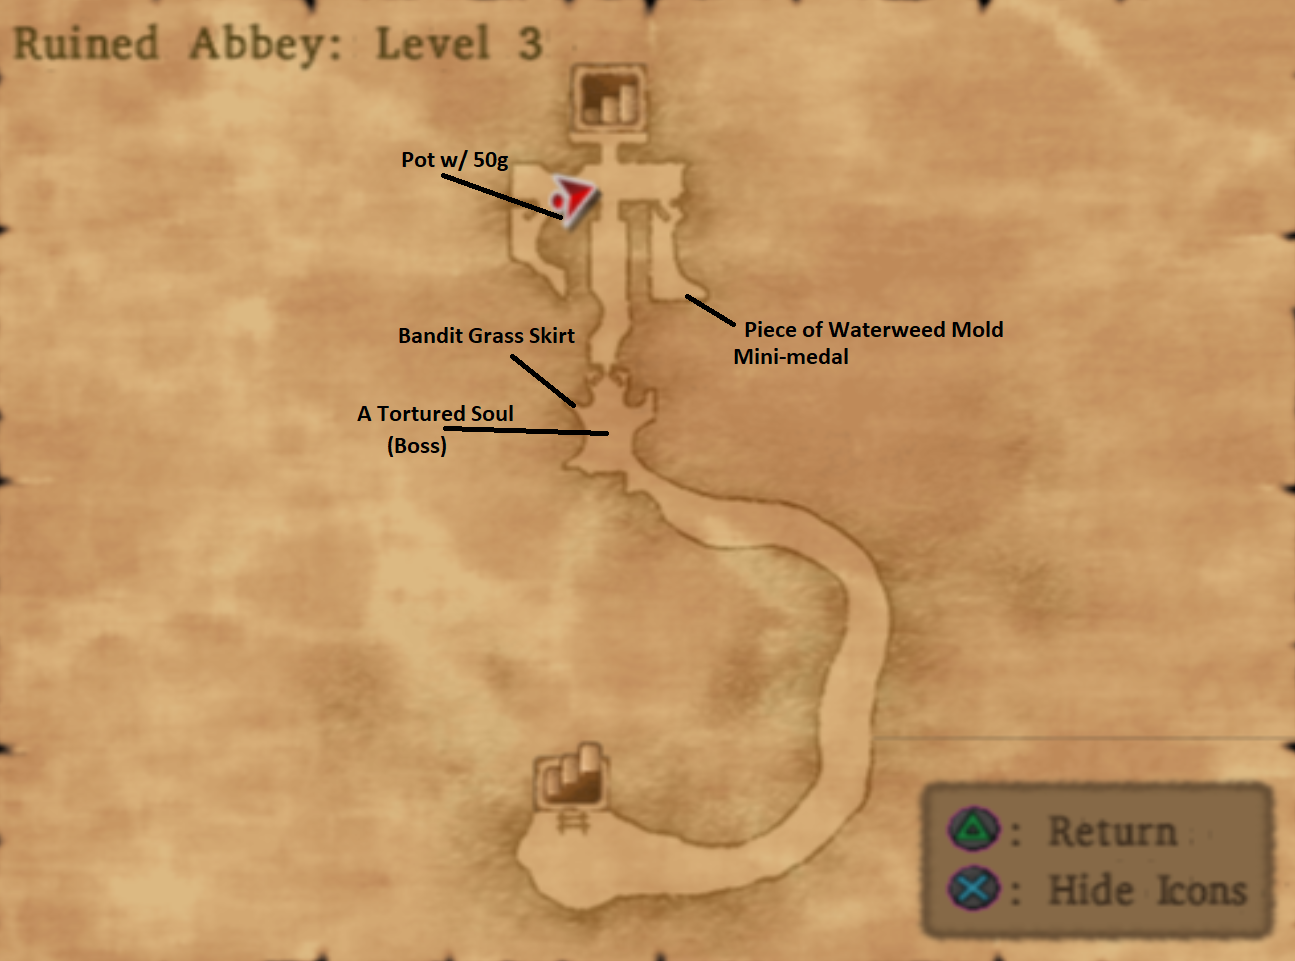
During the battle with A Tortured Soul he summons a zombie and a skeleton to aid him. If you defeat these adds he'll just summon more so I recommend you focus all your damage on the zombie, leaving the skeleton alive since he is the weaker of the two. Once the zombie is defeated focus on the boss until he goes down then turn your attention to the last skeleton standing.
After defeating the boss check the closet in his room for a Bandit Grass Skirt then travel south and up the stairs in the bottom of the dungeon. This will take you back to the Maella Abbey but this time on the opposite side of the bridge that the guards were blocking.
When you first surface from the Ruined Abbey - smash the two barrels you see in front of you as one of them contains a Mini-medal. Head into the building (inspect the bookshelves in here if you want an Alchemy recipe) and upstairs, you'll trigger a cutscenes. Talk to everyone on your team in the Jail cell to trigger another cutscene. Once you regain control of your character listen to Angelo and take the secret path out of the Abbey.
Another cutscene will show you that the Abbey's bridge is on fire. Return to the Abbey yet again and return to the Bishop's room where you'll watch more cutscenes. When you regain control of your character head into the room guarded by two guards to speak with Marcello. Angelo will join your party and you'll be given the World Map - about freakin time!
Search the bookshelves in Marcellos room for an Alchemy Recipe then leave the Abbey to be on your way. Outside the Abbey I recommend using Zoom to travel to Simpleton. From there you'll want to exit the town from the opposite end and follow the path until you reach the Kingdom of Ascantha.
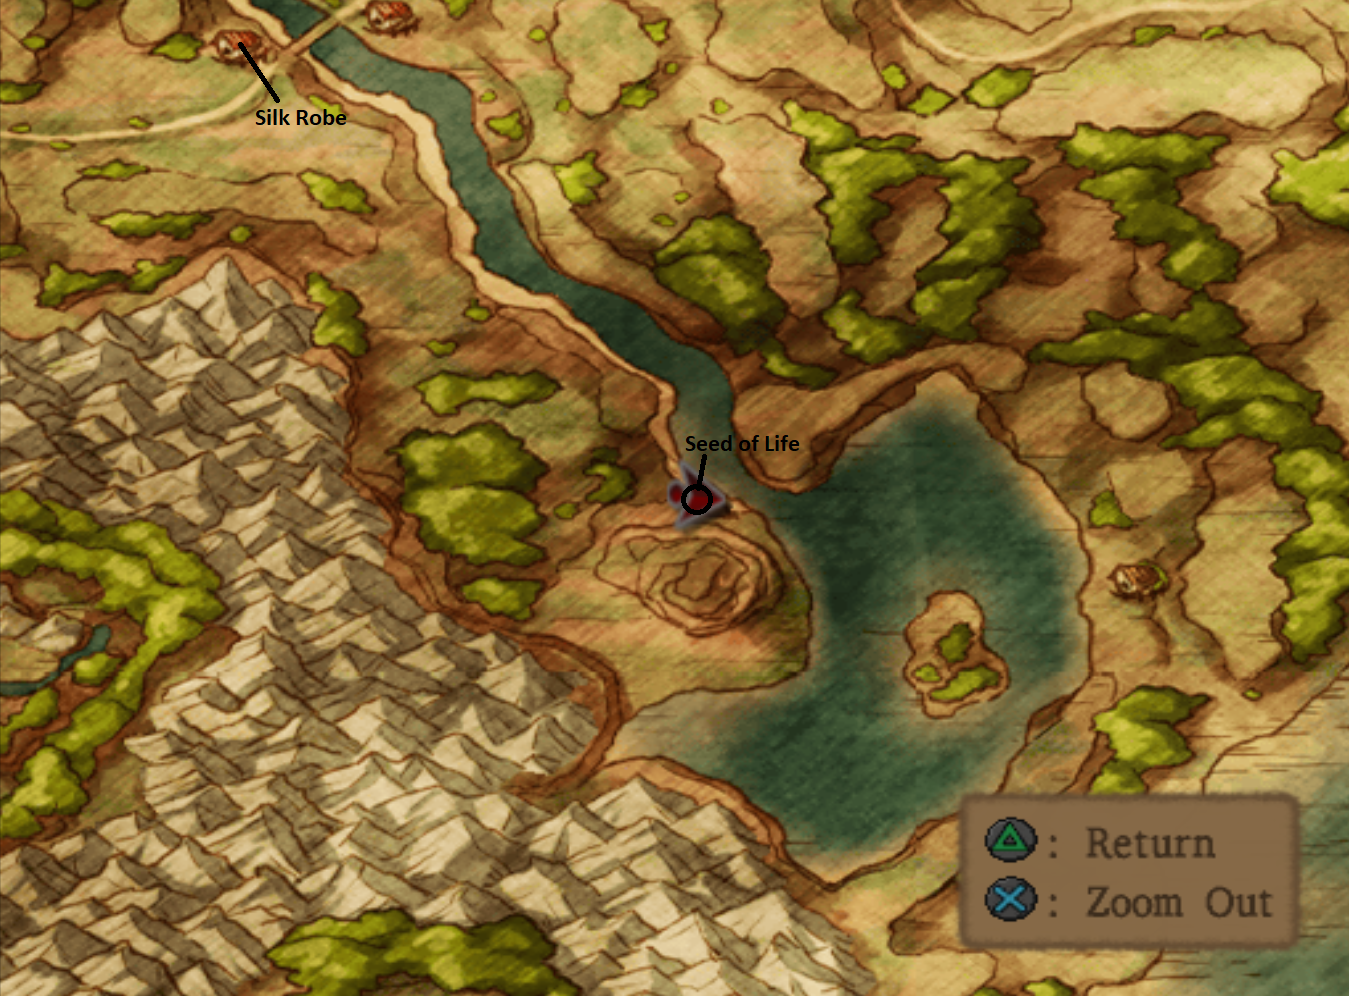
There are tons of stuff to collect on your way to Ascantha, use my maps above for help finding all of the treasure in the region east of Simpleton. After you cross the bridge you're in the Ascantha region and there's more stuff but you'll have to use the next portion of my guide for those maps.
Also the final footnote, if you discover the dungeon nearby the Seed of Life treasure chest in my screen shot above - ignore it for now. You'll be coming back here after you travel to Ascantha.
Continue to Walkthrough Chapter 3 (Ascantha, Wisher's Peak, Pickham, Morrie's Place)
Continue to Walkthrough Chapter 4 (Swordsman's Labyrinth, Hilltop Hut, Castle Trodain)