
Dragon Quest VIII: Journey of the Cursed King Walkthrough Chapter 1
This is the first Chapter of my Dragon Quest VIII: Journey of the Cursed King complete walkthrough. Since there weren't many guides online for this game with pictures I decided to make one! The guide is separated into multiple chapters to make it easier for mobile users; less pictures per page makes it easier to load.
Unlike many of the other guides, like the ones that you find on Gamefaqs, this guide is designed to point you in the right direction but not hold your hand throughout the entire game. Dungeons and Towns you'll be exploring mostly on your own, with my maps pointing out any treasures that are hidden in a dungeon as well as any puzzles you'll encounter that could possibly get you stuck.
Additionally depending on your own personal preference, my maps/pictures are designed to work as a guide of their own. If you'd like to skip reading text entirely while you play, you can just look at the maps for the treasure chest locations and where you need to go to advance the story forward.
Skill Point Tips: Dump your early Skill Points into Courage (Hero) and Humanity (Yangus). Also straight raising Fisticuffs on Yangus for the Thin Air ability; more will be explained about that later. Hero: Swords or Spears is recommended.
Weapon/Armor Tips: Get a Boomerang for the Hero, it does damage to whole groups of enemies. Don't put points into Boomerang though.
The Town of Farebury
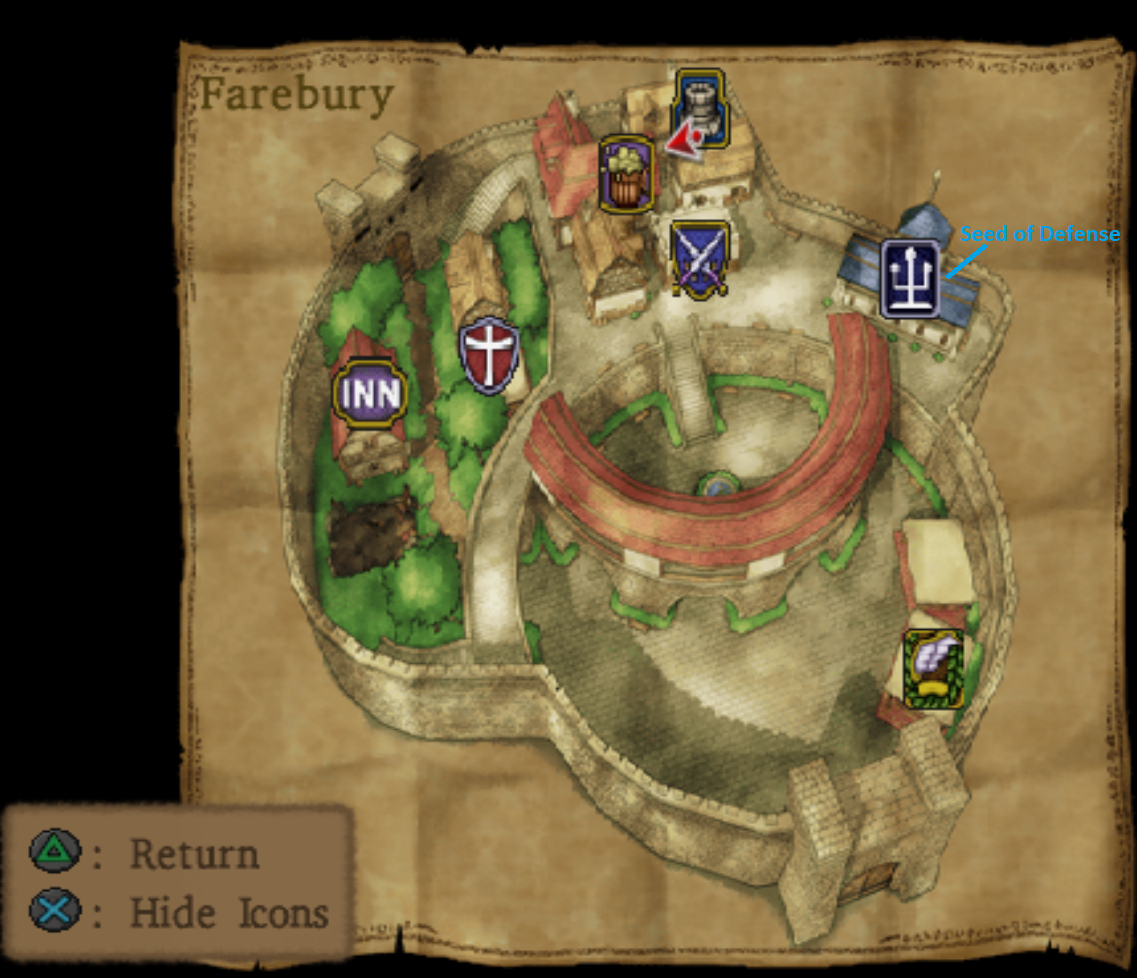
You start your adventure in Dragon Quest VIII just west of the town of Farebury in a little clearing of the woods. Fun little fact as we start our adventure, this is the only Dragon Quest game in the series that begins with a battle! Beat the slimes that attack you and when you regain control of your character you will be in the town of Farebury.
Inside Farebury you'll need to enter the Bar and go over to the barkeep to trigger a scene of a Fortune Teller who is drunk. After the scene approach him yourself and speak with him for another scene. Exit town to the north and King Trode will ask you to go back into town and speak with the man's daughter. Next to the well, where I am standing in the screenshot of the map above, you'll find the Fortune Teller's home, which is where you'll find his daughter.
She asks you to collect his Crystal Ball which was lost many years ago in the Waterfall Cave. This is our next stop to the south of Farebury. Prior to heading to this dungeon though you need to do some grinding outside of town - hunt monsters until you can buy some armor upgrades in town, the Boomerang weapon for the Hero and then when you're ready head south to Waterfall Cave.
While leveling up around Farebury I recommend collecting the different items that are found in chests scattered throughout the area. You won't have a World Map yet, you don't get it until Angelo joins your party later in the game, but you can use the map I have below to guide yourself around.
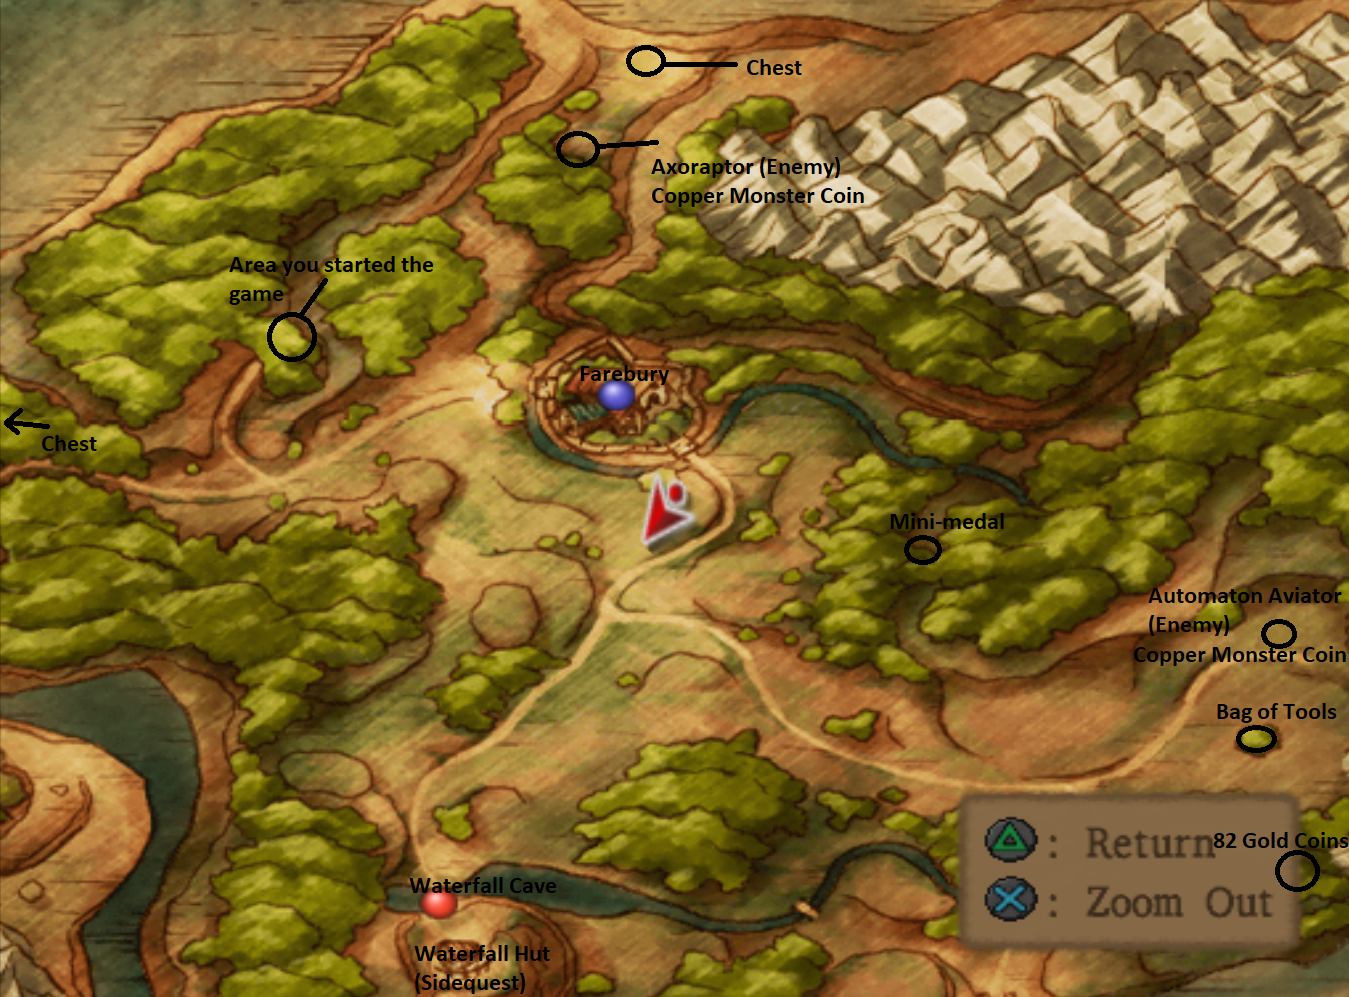
The first sidequest of this game is given to you by a man living in a hut on top of the Waterfall Cave dungeon. You can get to his house by circling around the hill that the Waterfall Cave's entrance is in. Inside of his house you should search the bags on the wall for Seed of Agility.
Continue reading for more information on the Waterfall Hut Side quest
I highly recommend that you pick this sidequest up and complete it before doing the Waterfall Cave dungeon. It'll help you earn some Gold, gain a few levels with Hero/Yangus and that'll allow you to unlock Heal with Yangus if you dump all his points into Humanity. It'll make the first little bit of the game much easier with him having a Heal too.
Once you're finally ready head on into Waterfall Cave, the games very first dungeon!
Waterfall Cave
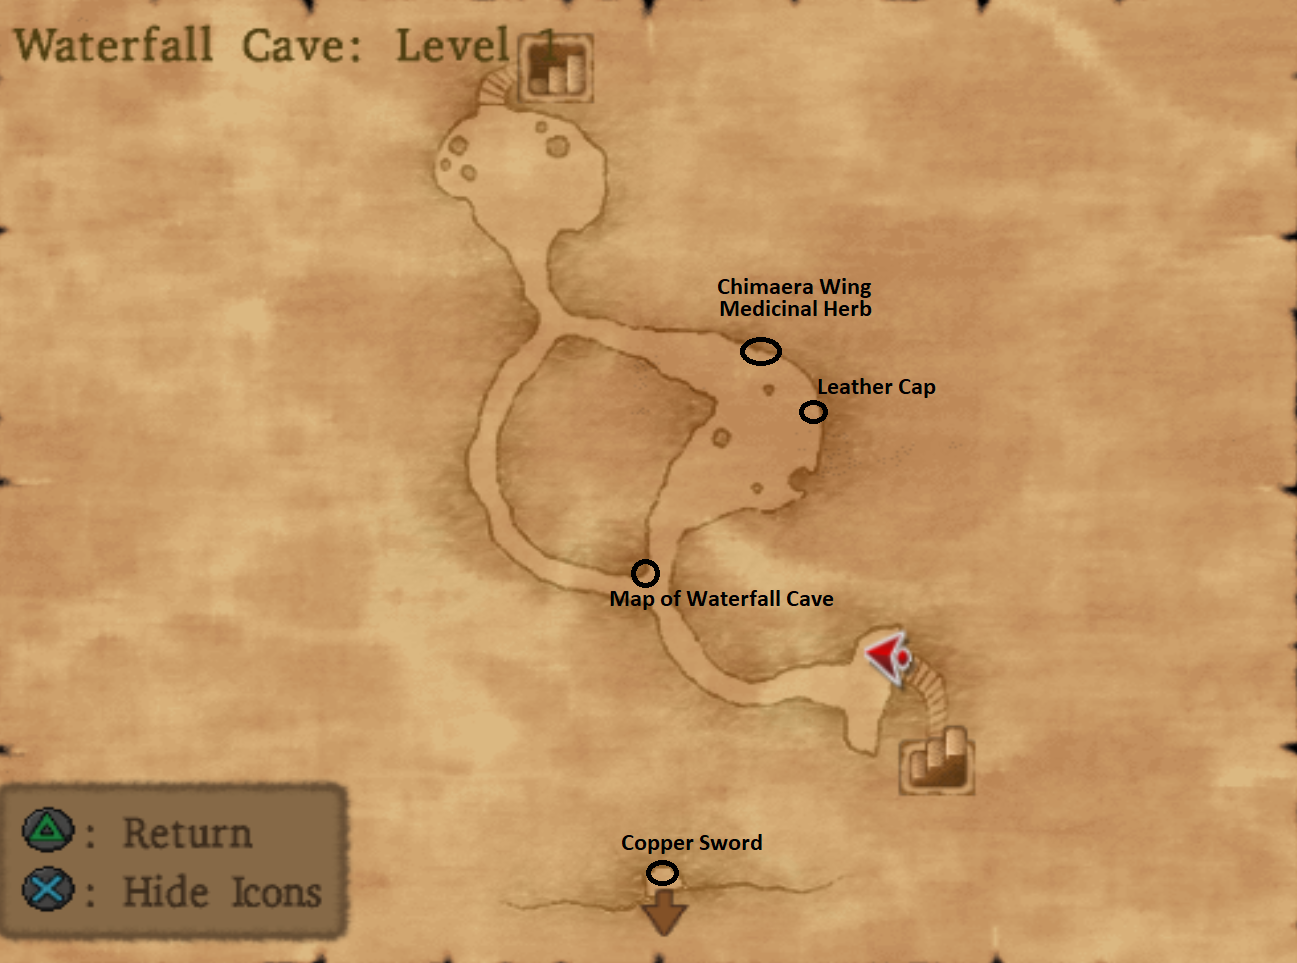
The Waterfall Cave is the most straight forward dungeon in the whole game, obviously, since it's the first dungeon! At the first intersection you come to in the dungeon you'll find a treasure chest with the map. Northeast of this chest you'll find an additional three chests which is the direction you'll want to head before traveling down to the second floor.
On the second floor tell the little monster blocking the path that you'll fight him and he'll chicken out, letting you through. The northwestern arrow on the map leads to the Copper Sword treasure chest which is back on Level 1. The Staircase going down in the eastern portion of Level 2 takes you to Level 3 which is where you'll find Geyser, this dungeon's boss.
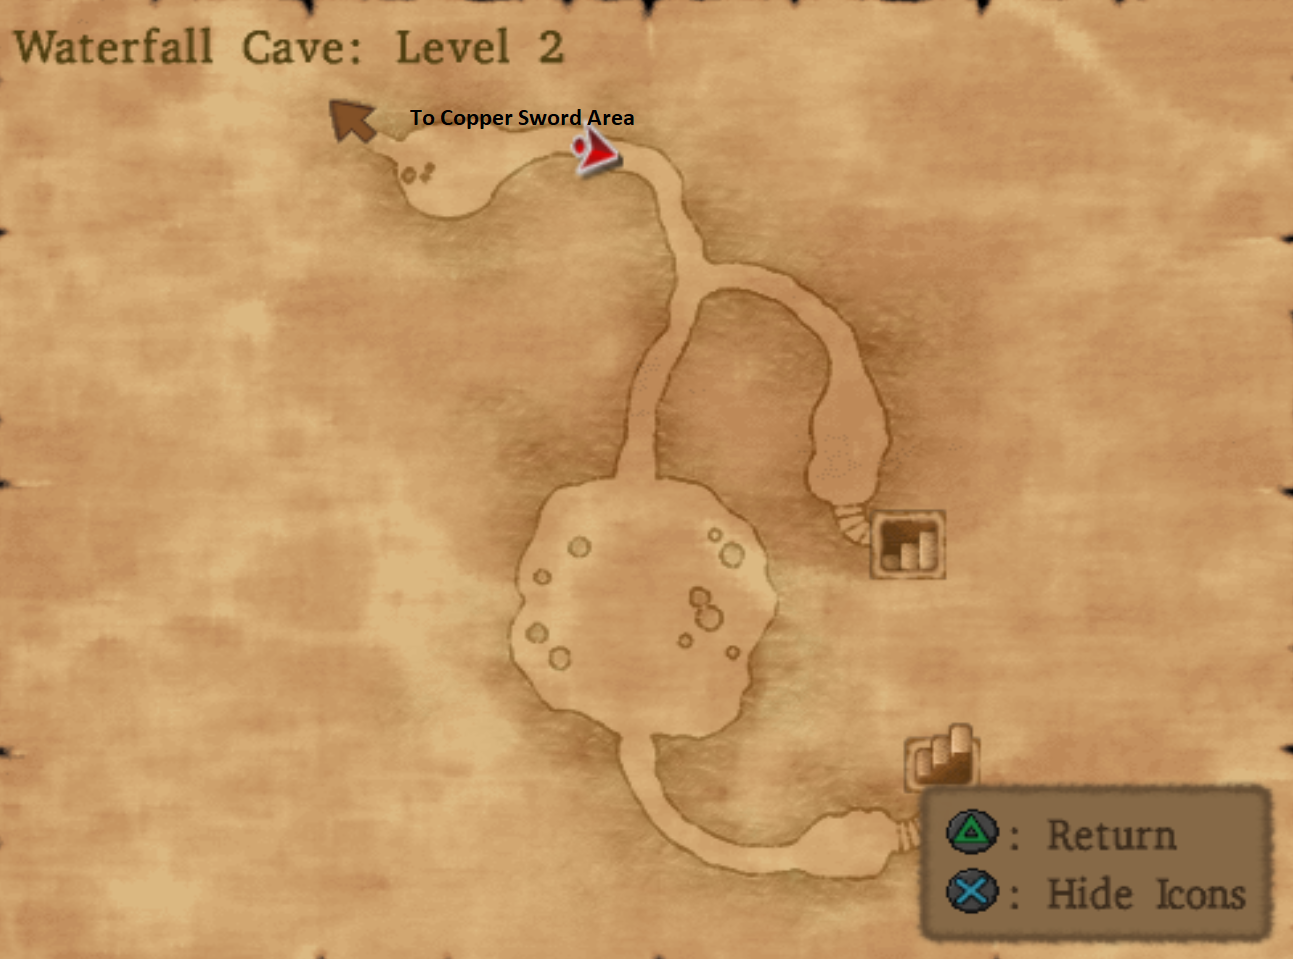

Geyser is a pretty easy fight if you've raised Yangus' Humanity skill high enough to unlock Heal on him. If you haven't stock his inventory with Medicinal Herbs too so he can heal when needed. Otherwise all you'll wanna do is wail away on this boss with basic attacks.
This is also going to be the only time I tell you this, but you should also experiment with the 'Psyche Up' command which builds tension on your characters. The more tension you build the stronger all of your moves will be, if you properly use your tension during battles you'll be much better at the game.
After you defeat Geyser use Evac on the Hero to leave the dungeon and return to Farebury. Speak with Kalderasha and give him the Crystal Ball that you just recovered. That's all we need to do in Farebury. When you're finished watching the scenes it's time to travel southeast from Farebury to the town of Alexandria.
The Town of Alexandria
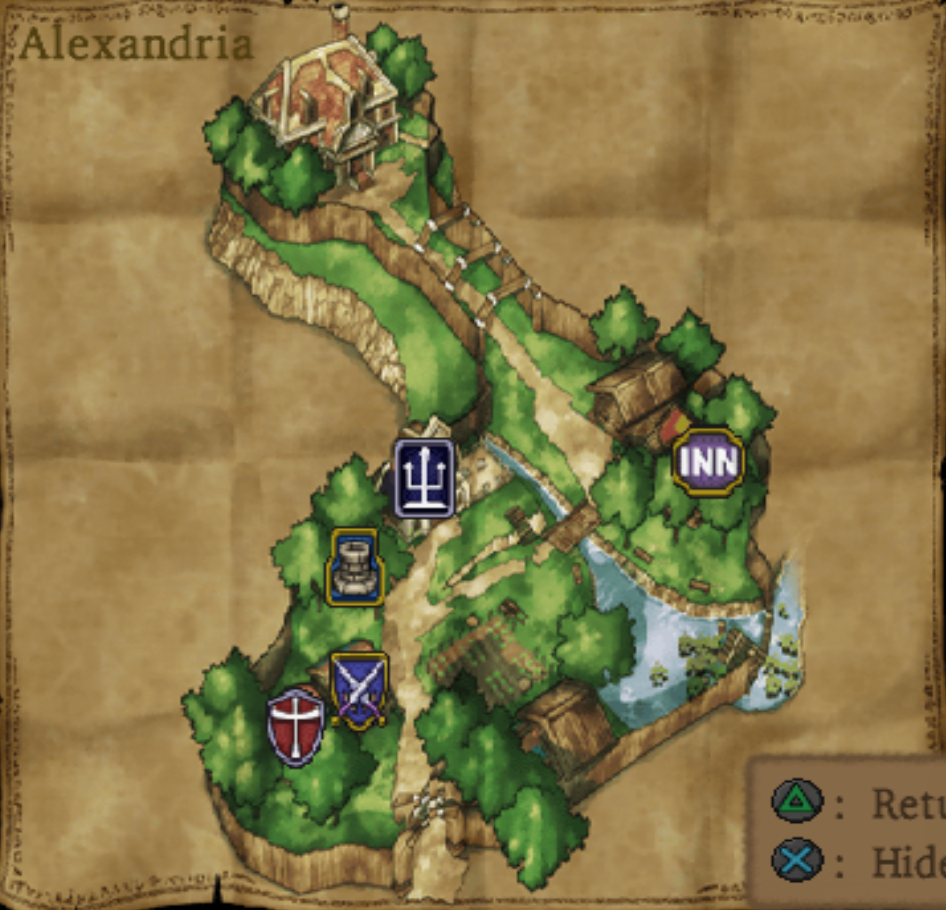
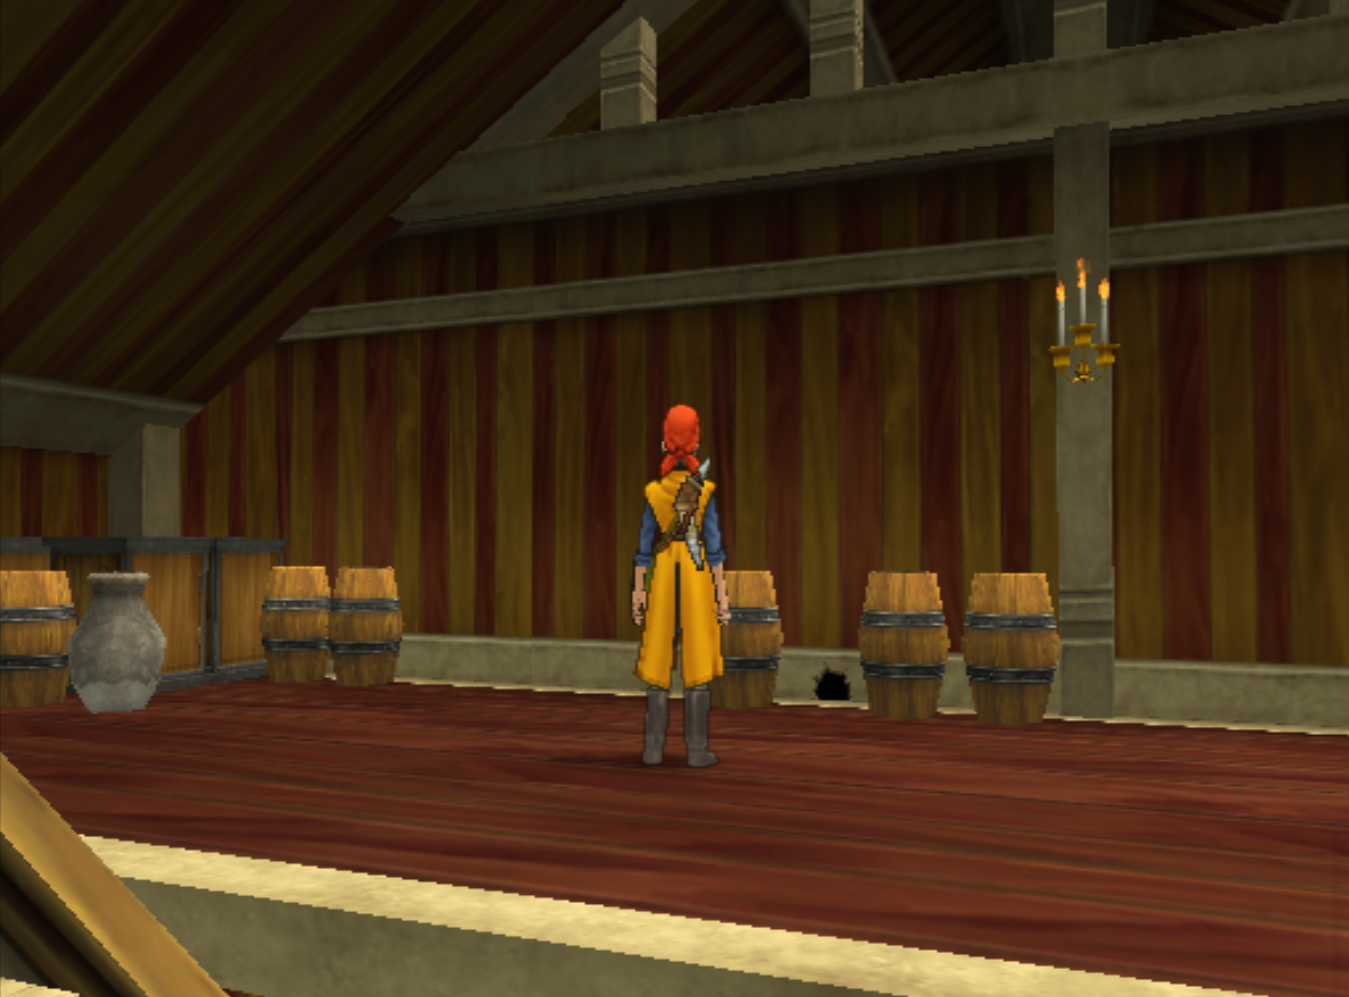
When you first arrive in the town of Alexandria you'll want to hit up the Armor and Weapon shop and buy any upgrades you can afford. Second thing you'll want to do is rest up at the Inn if needed and save your progress. Third and last before continuing with the story line, travel around the town and break any pots/barrels you come across, open any closest or drawers and collect all the hidden treasures.
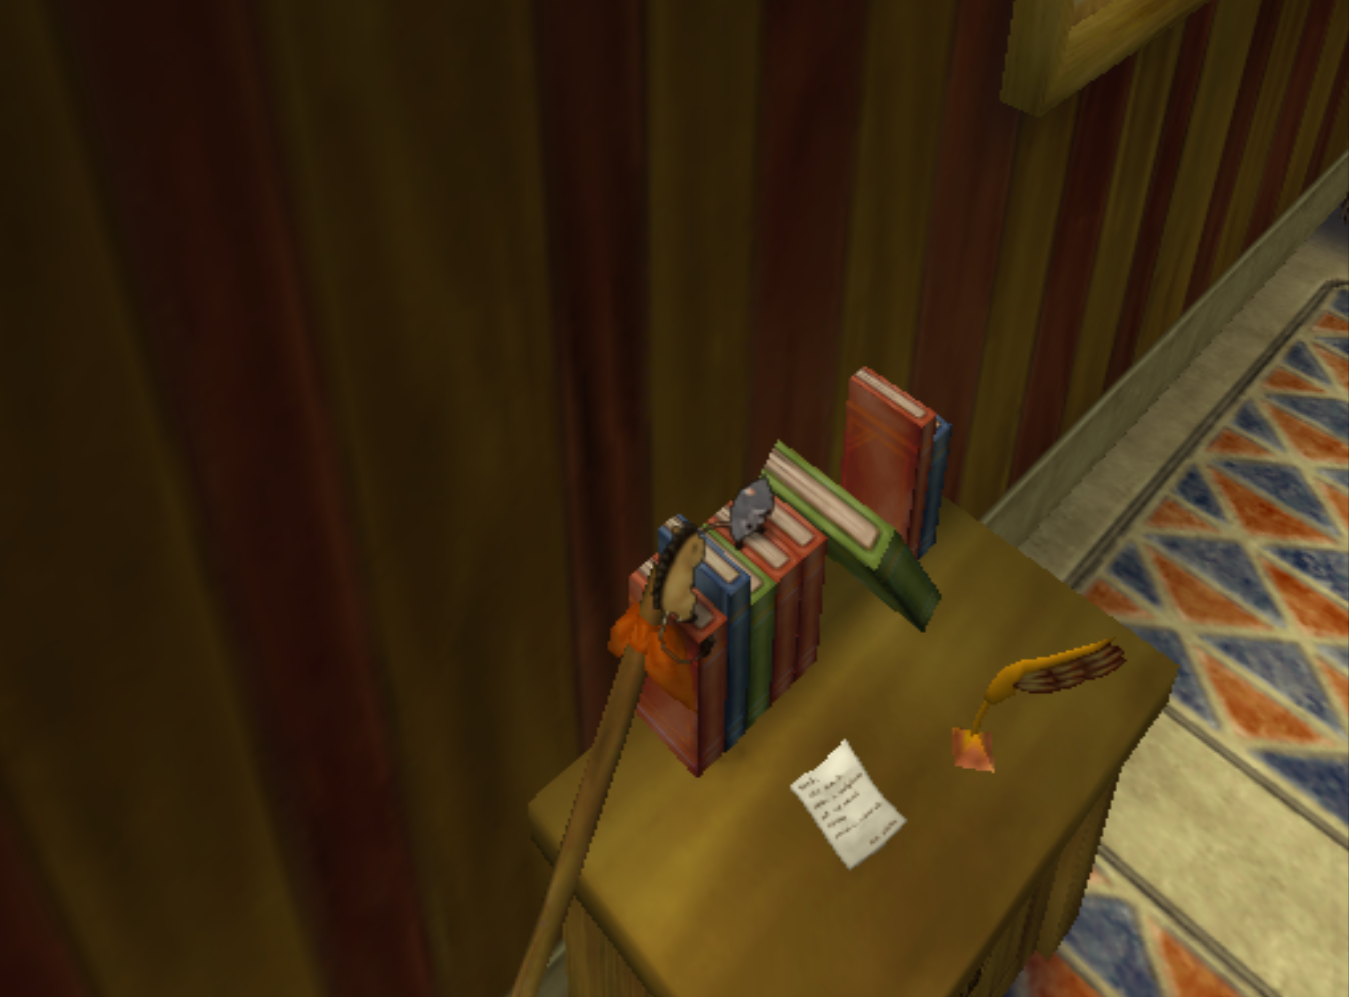
Once you're done collecting all the goodies and are ready to advance the plot forward travel to the northern portion of town where you'll find a large mansion, enter inside and travel up to the attic (reached easily from the second floor).
Inside the attic look for a little hole next to the ground in one of the walls, the same one shown in my screenshot below. You'll be able to send Munchie, your pet rodent, through the hole and into Jessica's room. Ontop of Jessica's desk you'll find a letter that she wrote, you need to collect it in order to advance the plot.
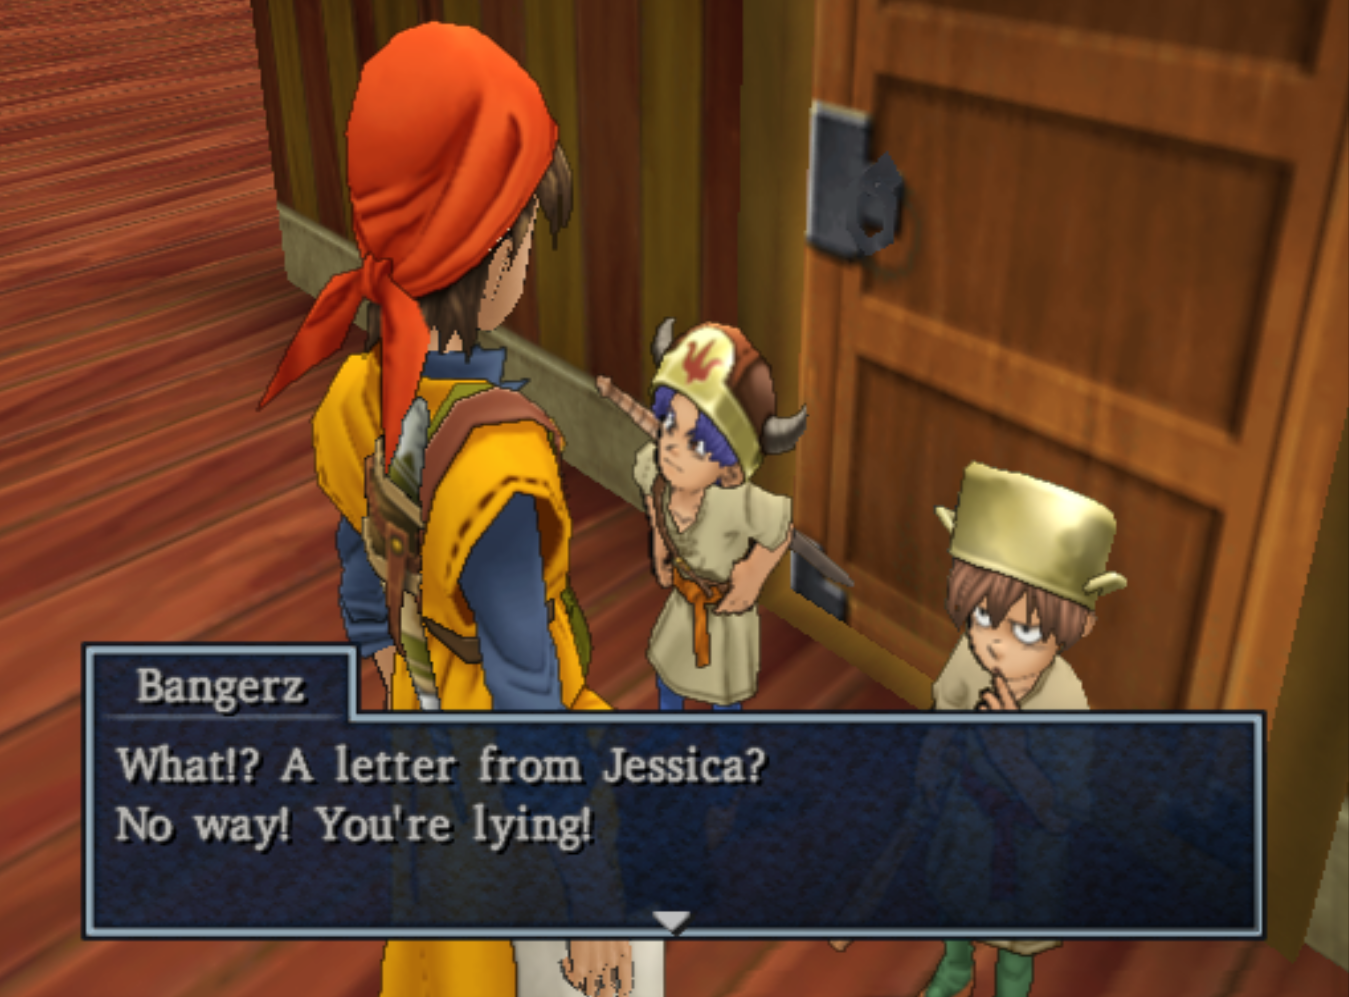
With the note in hand head over to Bangerz, one of the two kids standing outside of Jessica's room. He'll interrogate you about the note, answer "Yes" to all of his questions to advance the plot. Once you've got Bangerz following you, head outside of Alexandria and east to Alexandra Tower.
He'll open the door at Alexandra Tower for you, granting you access to this dungeon.
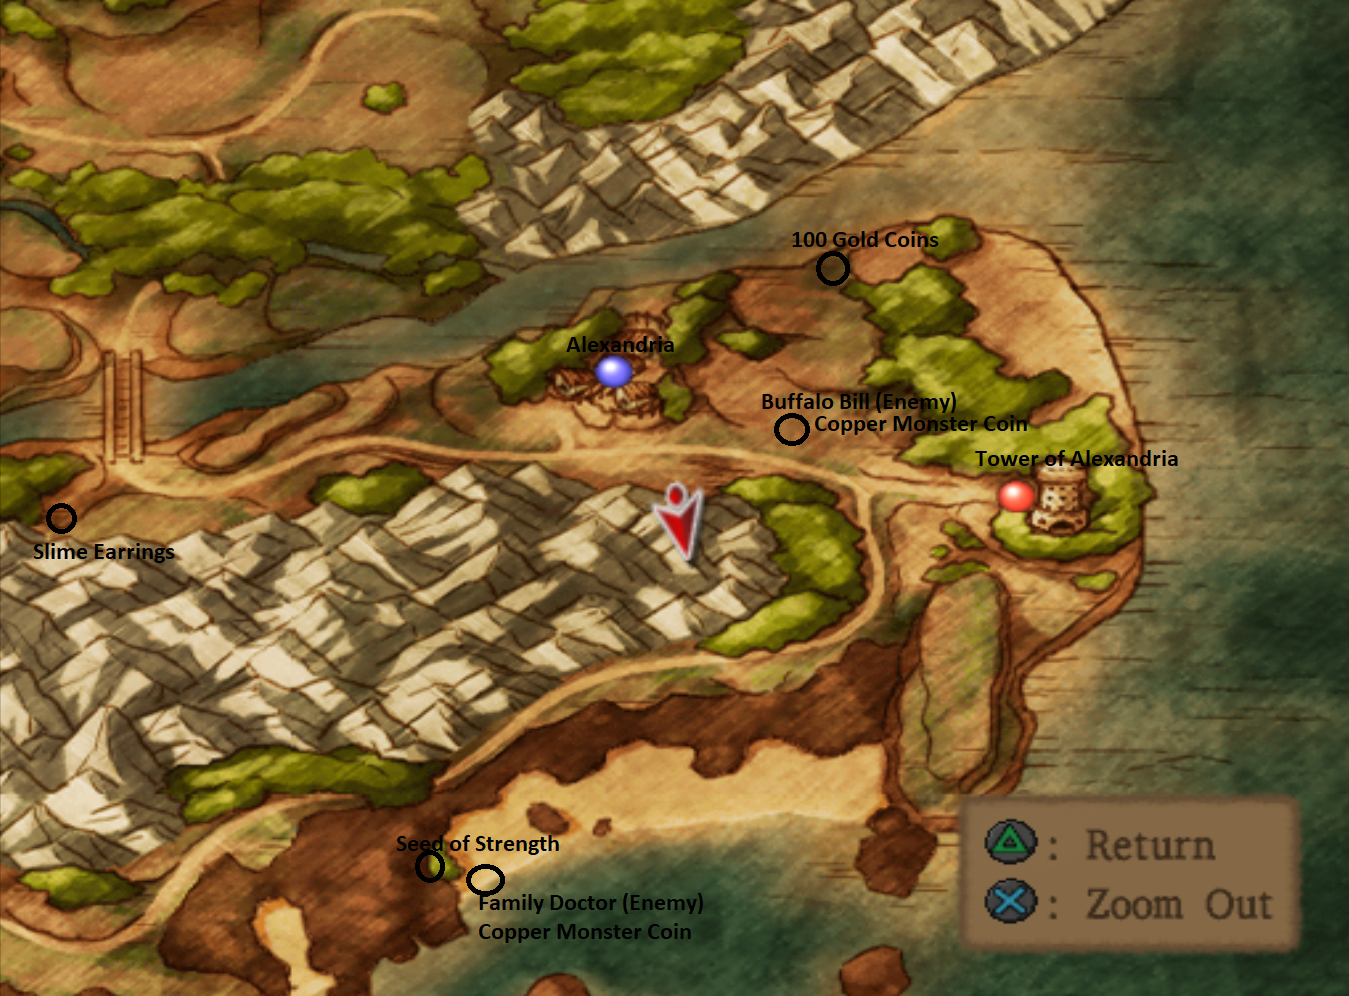
It doesn't matter when but at some point while you're in this area I recommend running around and collecting all of the goodies. Use my map above if you want some guidance on where to find all of the nearby treasure chests. If the map is too small, click to enlarge it.
Alexandra Tower Dungeon
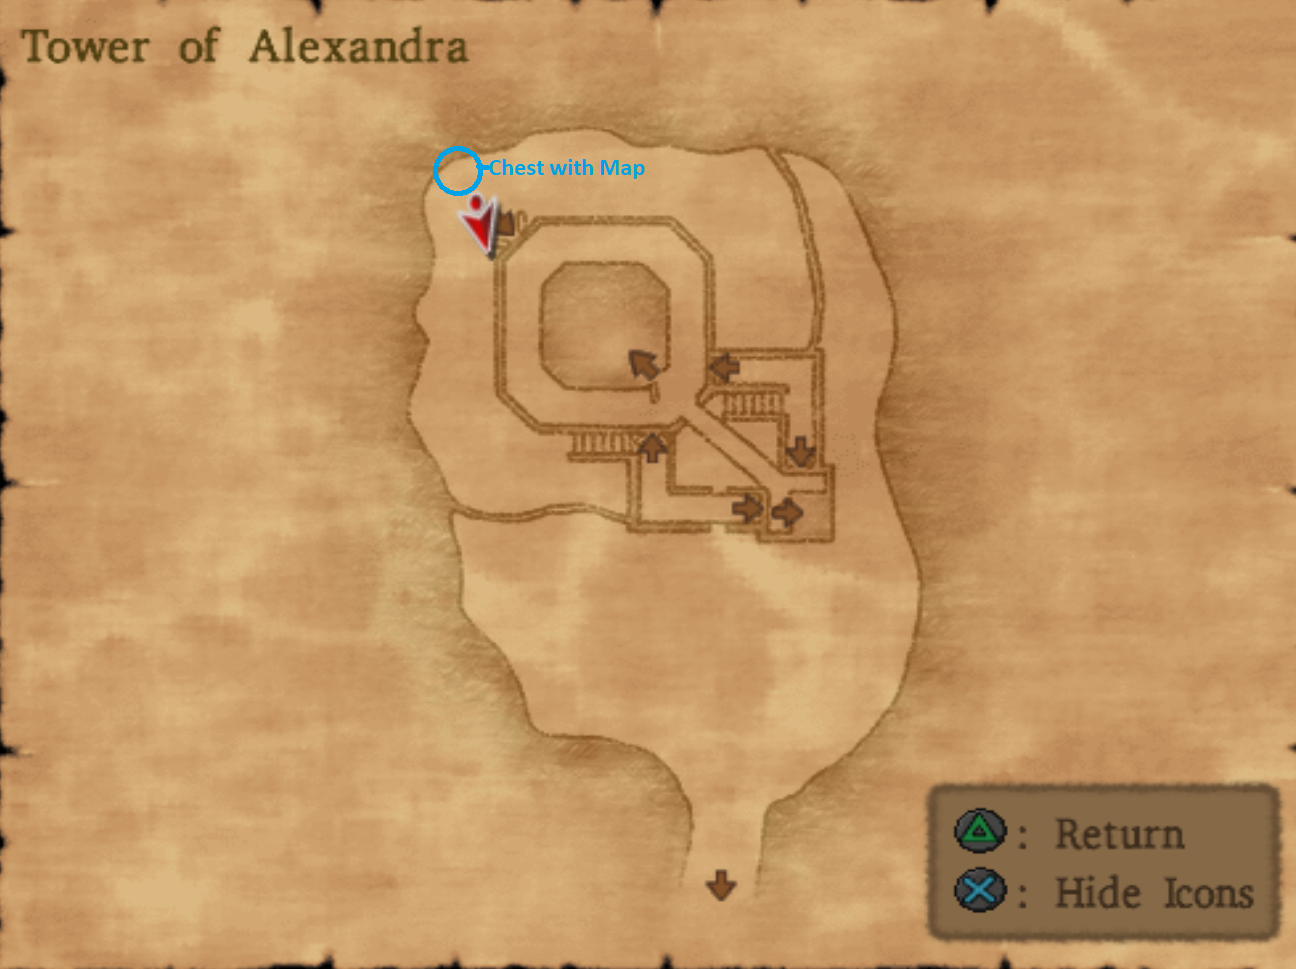
The Map of Alexandra Tower is found in the outside courtyard that you come across very early on in the dungeon, it's the location that I have marked on my map above. Once you reach the third floor of the tower and above you'll come across a bunch of faces on the wall which will allow you to move from room to room when you inspect them.
Lots of treasure in this dungeon is found in rooms that you can access by inspecting these faces, if you're unsure whether or not you've missed a nearby chest use Yangus' Nose for Treasure Skill and he'll tell you about anything nearby.

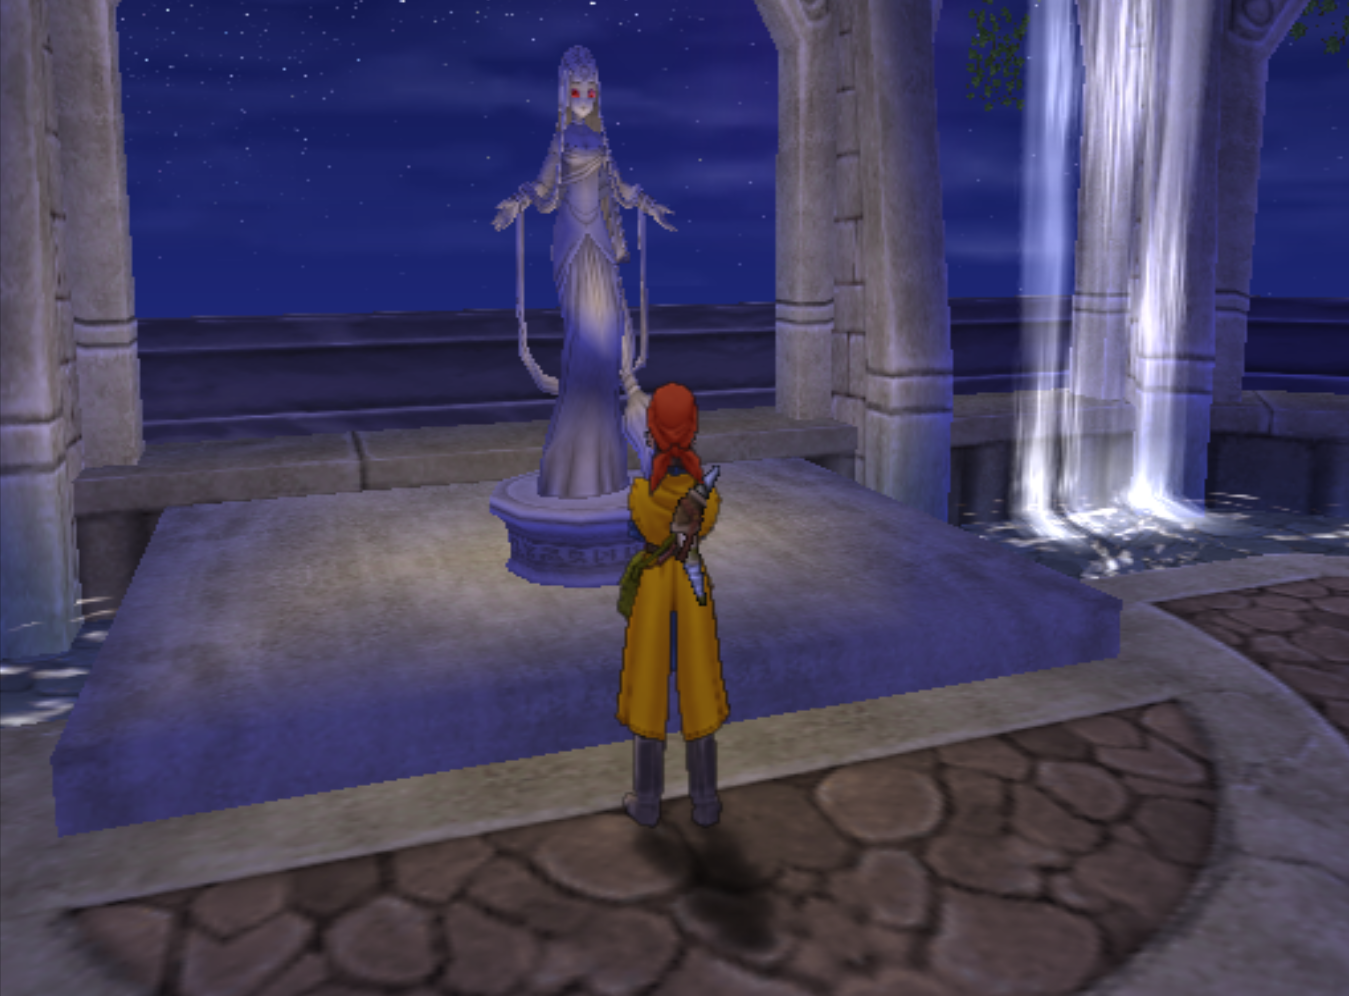
At the top of the Tower you'll find a statue with red eyes. Inspect it and you'll trigger a scene where Jessica appears and attacks you and your party. Don't worry, there is no fight against her here - her dead brother speaks through the statue and you'll be treated to a cutscene of how he met his end.
After the cutscene, speak with Jessica who is crying next to the statue then leave this floor of the tower. On the floor just below it use the Hero's Evac spell to teleport out of the dungeon and return to the town of Alexandria.
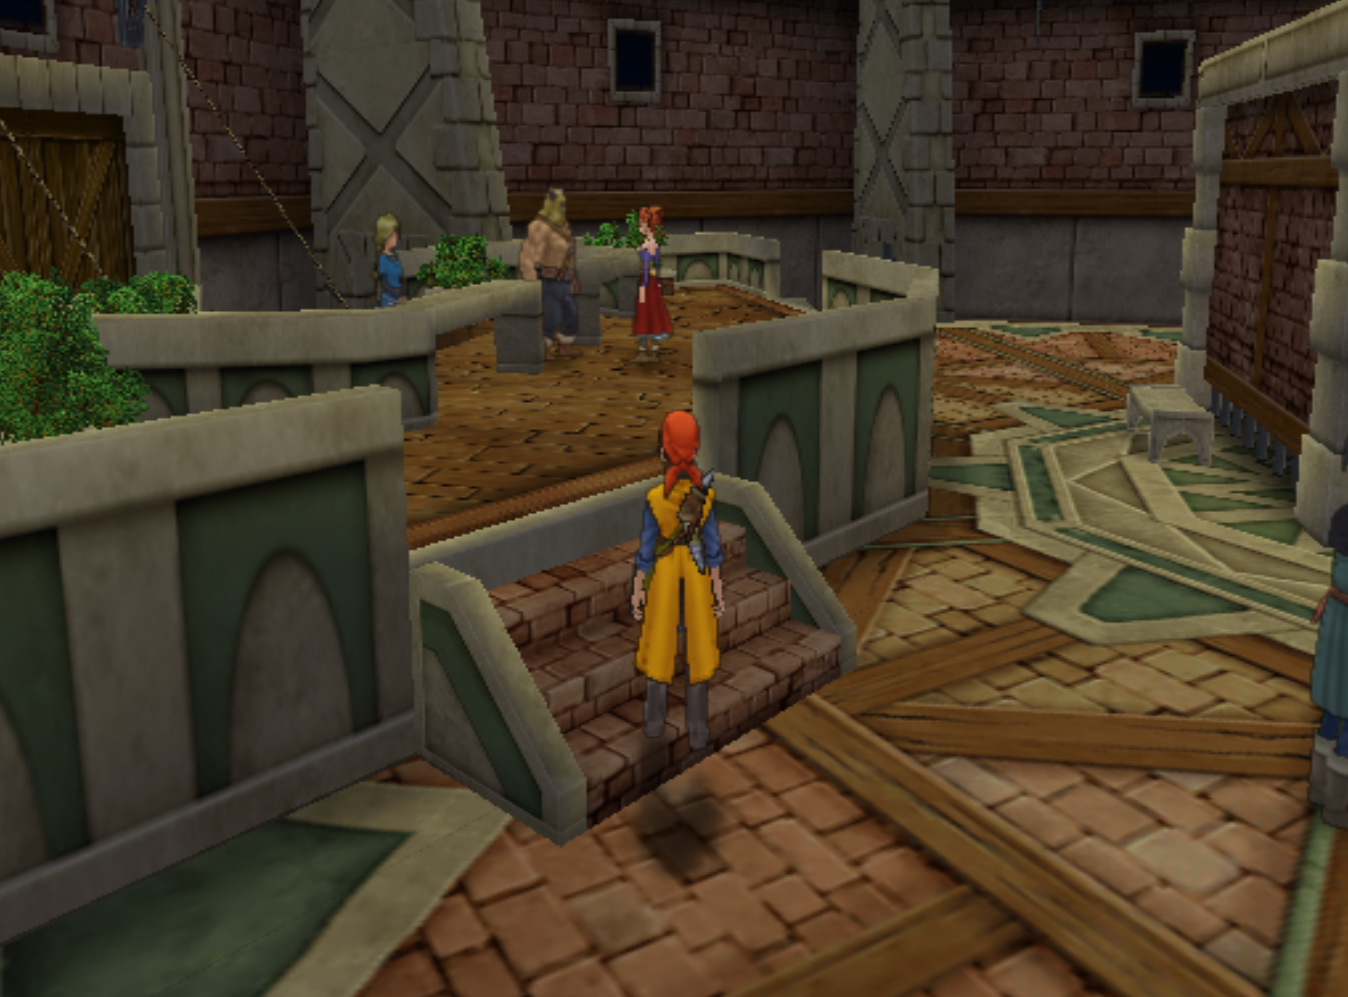
Head to the Inn if you want and stay the night there if you need to recoup from the dungeon. Bangerz is outside and he tells you that he paid for the night so you get to stay there for free. Once you're ready to advance the plot head back to the large mansion in Alexandria and up to the second floor where this all started - you'll find Jessica there speaking with her mom.
Once the argument is over and Jessica leaves the house, before leaving you should explore her room and collect Jessica's Outfit from the closet in there. With all that out of the way leave town and head east, towards the Tower of Alexandra again.
Instead of going into the tower this time you'll want to follow the fork in the road south, following the road as it runs parallel to the beach. On the western most portion of the beach by the palm trees you'll find a treasure chest with a Seed of Strength inside. There's also a powerful monster roaming around in this area too which you'll have to avoid in order to reach the chest if you're underleveled.
Port Prospect

Once you arrive in Port Prospect it's recommended you buy any upgrades for your gear as well as stock up on Medicinal Herbs in the Hero's bag as well as Yangus'. When we advance the story again we're going to be fighting a boss right away - so you'll want to be prepared. Additionally before continuing the story it's recommended that you're at least level 11, if you're lower than this level grind outside of town for a bit before advancing.
When you're ready to advance the plot head down to the large building near the ocean in Port Prospect. Inside you'll find Jessica speaking with someone about taking the Ferry across the ocean. Walk up to trigger a scene.
After you watch the cutscene you'll need to speak to Jessica again in order to board the ferry and face off against the next boss, Khalamari. I highly recommend watching the scene where he talks to himself using his two tentacles. I've played a lot of games and that's probably the most unique intro to a boss fight I have ever seen. =P
Important: As I said earlier you literally board the Ferry and before you can even move you face off against Khalamari. Make sure you have Medicinal Herbs in your Hero's Inventory as well as Yangus - you're going to need to heal a lot during the course of this fight.
Ferry

Depending on your level this fight may be easy as cake or extremely hard. If it's difficult for you, you'll have to Heal on almost every turn using the main character, sometimes you'll even have to use a Medicinal Herb with Yangus too. Khalamari has one single target attack and two AoE attacks, all three deal 20+ damage in most cases.
After you defeat Khalamari you'll find yourself back at Port Prospect. Jessica tells you to go buy what you need in town, rest up and when you're done come back and talk to her again. When you speak to her again she'll ask you to officially join your party and come on your adventure. Accept and you'll trigger a cutscene of you sailing on the Ferry. Scroll down once you regain control of your character.
Ferry Loot:
Gold Bracer (Reward for defeating Khalamari)
Antidotal Herb
12 Gold Coins
Medicinal Herb
Pot Lid
Medicinal Herb
Seed of Life
Seed of Agility
10 Gold Coins
Bronze Knife
On the Ferry once you regain control of your character, head down inside of the boat into the same room where you find Medea (the horse) and the carriage. Smash all the pots and barrels you can find inside here - there's quite a few items for you in these things. After you've done this and collected all the goodies head into the room at the bottom most portion of the ship where King Trode is.
Speak with him and he'll reward you with the Alchemy Pot, an item that you'll most likely be using a lot of as you progress through the game. After King Trode explains to you how the Alchemy Pot works and tells you how to access it you'll be interrupted by a sailor who notifies you that you're coming up on land. Continue to the next chapter of the guide for Peregrin Quay.
Continue to Walkthrough Chapter 3 (Ascantha, Wisher's Peak, Pickham, Morrie's Place)