
Temple Ruins Overview - Baldur's Gate 2
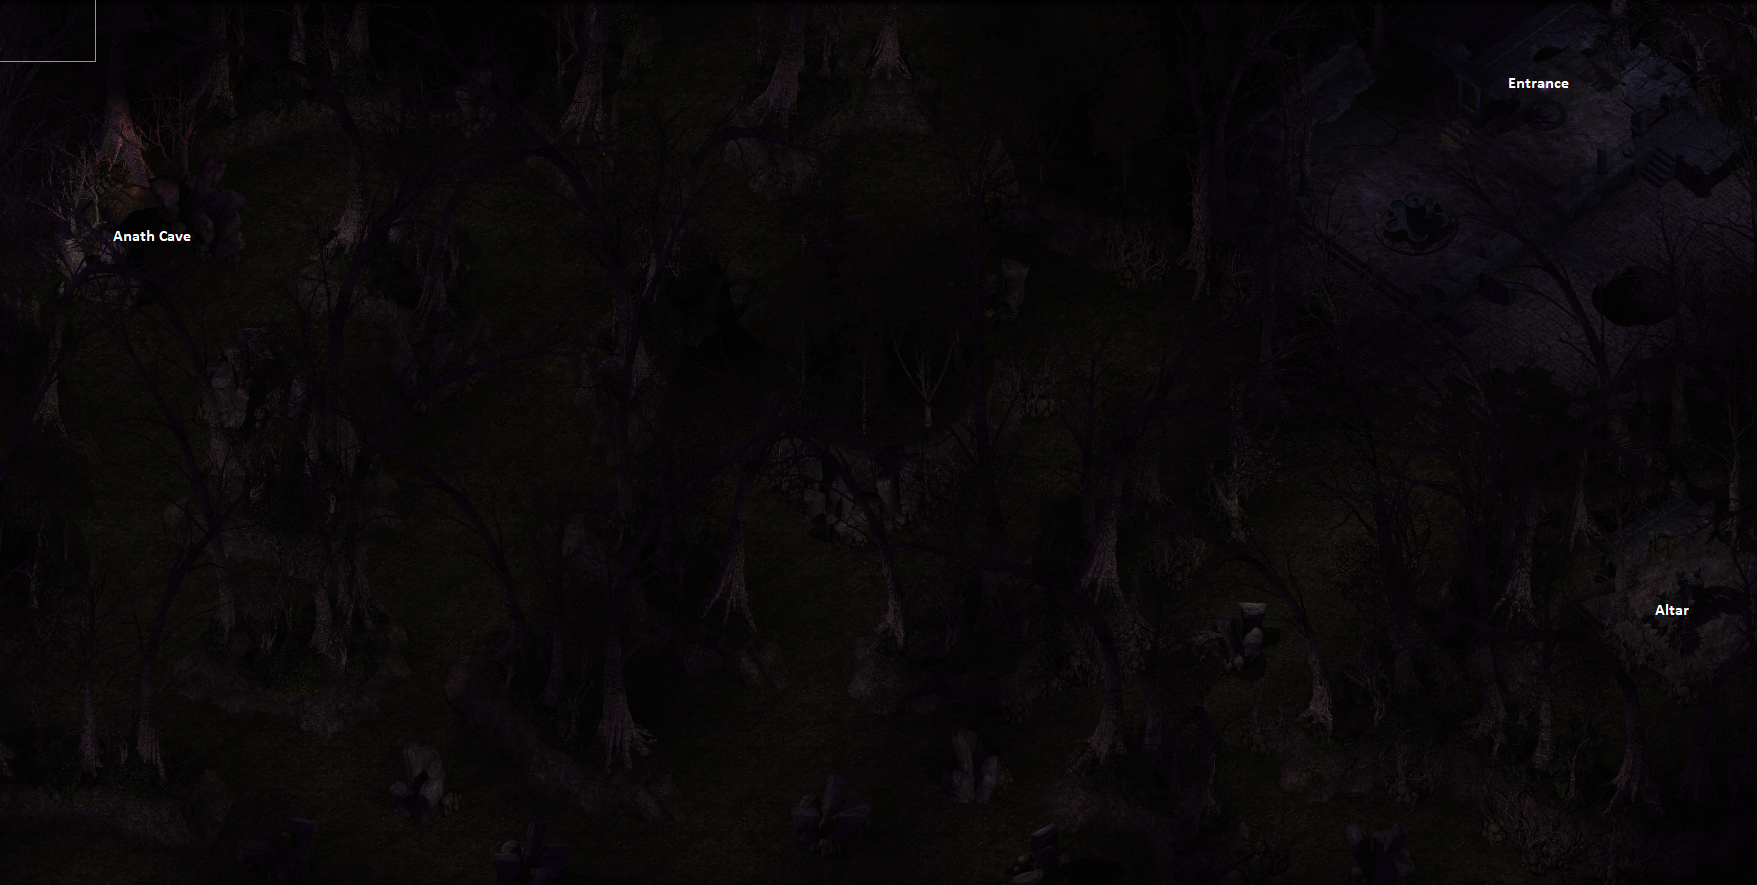
Temple Ruins is a large map which is unlocked during the Investigate the Deaths in Umar Hills side quest. Once you explore the Ranger's Cabin and loot Merella's Journal as well as A Note from Mazzy Fentan this location will unlock on your World Map. There are 2 parts to this map, an outside portion which has almost nothing worth mentioning and an inside portion which is going to be the meat of the dungeon.
After you complete the Investigate the Deaths in Umar Hills quest the Temple Ruins map will be overwritten with a new version. For this reason it is strongly recommended that you be thorough and collect all the available loot before completing the quest.
Anath Cave: When you first arrive in this zone and pass by this area you'll meet a werewolf named Anath. She gives you some dialogue explaining what happen here and not much else.
Entrance: This is the entrance that leads down into the Temple Ruins (Inside) which is the meat of the dungeon.
Altar: Here is where you will find the Shade Lord who is the boss of this dungeon and is involved in the Investigate the Deaths in Umar Hills quest.
Temple Ruins - Interior
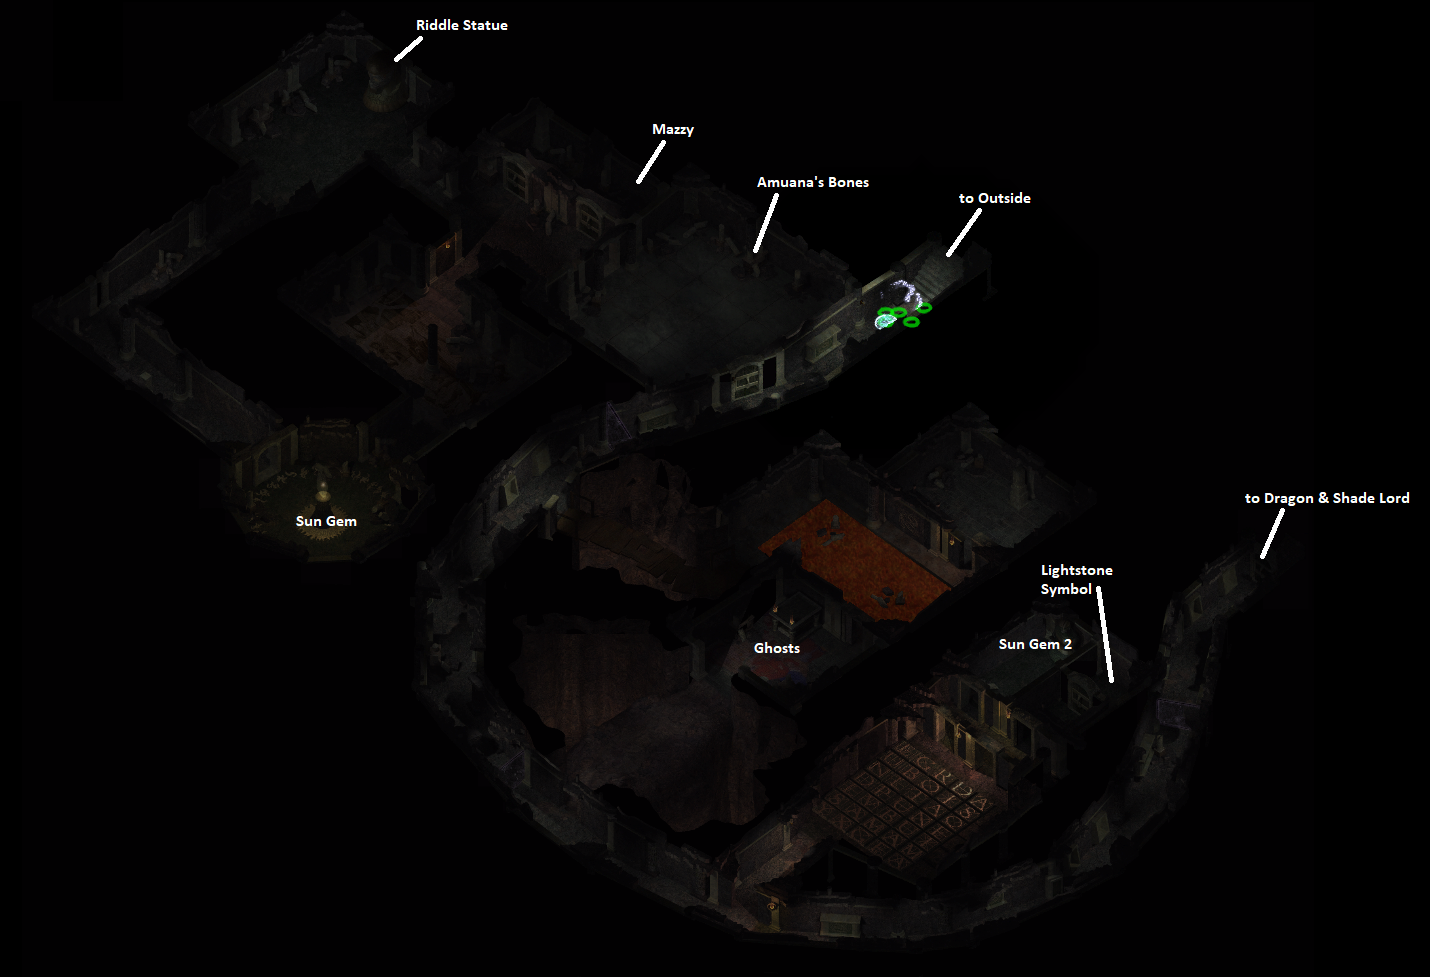
The inside portion of the Temple Ruins is one big puzzle that you'll have to solve in order to reach Thaxll'ssillyia and the Shade Lord. What you need to do is collect all 3 of the Symbols hidden throughout the area, Sun Ray Symbol, Dawn's Light Symbol and the Lightstone Symbol. Once you have all 3 they'll automatically combine to make a Symbol of Amaunator.
Aside from these 3 Symbols you'll also have to collect 2 Sun Gems which will be used to open the locked doors blocking your path. The first Sun Gem opens the doors to the southern half of this dungeon and the second Sun Gem will unlock the door leading to Thaxll'ssillyia and the Shade Lord.
Amuana's Bones: You need to pick up these bones and give them to the Ghosts I have marked on my map. Badon and Dettseh are their names and they'll give you the Dawn's Light Symbol and Shadow Dragon Wardstone in exchange. Both of these items are required for this dungeon.
Mazzy: Mazzy is a potential companion in BG2 and will offer to join you once you free her and speak to her.
Riddle Statue: At this location you will find a statue that offers you 3 different riddles, one for morning, afternoon and evening. If you solve all 3 you'll be rewarded with EXP as well as the Sun Ray Symbol. For more information about the correct answers to this riddle check my Youtube Video for this puzzle or my Investigate the Deaths in Umar Hills quest entry.
Sun Gem: This is the first Sun Gem that you can find in this dungeon; you'll need this Sun Gem to open up the locked door that leads to the second half of the Temple Ruins dungeon.
Ghosts: These are the 2 ghosts that you have to trade Amuana's Bones to for the Dawn's Light Symbol and Shadow Dragon Wardstone.
Lightstone Symbol: Here you'll find the Lightstone Symbol which is one of the required items to create the Symbol of Amaunator and complete the Investigate the Deaths in Umar Hills quest.
Sun Gem 2: At this location you'll find an altar with a container that contains another Sun Gem. You'll need this Sun Gem to open up the door that leads to Thaxll'ssillyia and the Shade Lord. Also, this altar is involved in a side quest during Chapter 6 if your lover gets taken by Bodhi and turned into a Vampire.