
Investigate the Deaths in Umar Hills - Baldur's Gate 2 Side Quest
Investigate the Deaths in Umar Hills is a side quest that can begin one of 2 ways. The first of which is for you to visit the Government District where you'll find a kid by the name of Delon in the middle of the map. He'll tell you about the situation in Umar Hills and ask you to help when you talk to him.
Alternatively, if you have Minsc in your party then Delon will come and find you while you're traveling around Athkatla. He can approach you in any district and will automatically start dialogue with Minsc. Regardless of how you accept it, once this quest begins Umar Hills will be added to your World Map and you will be able to fast travel there.
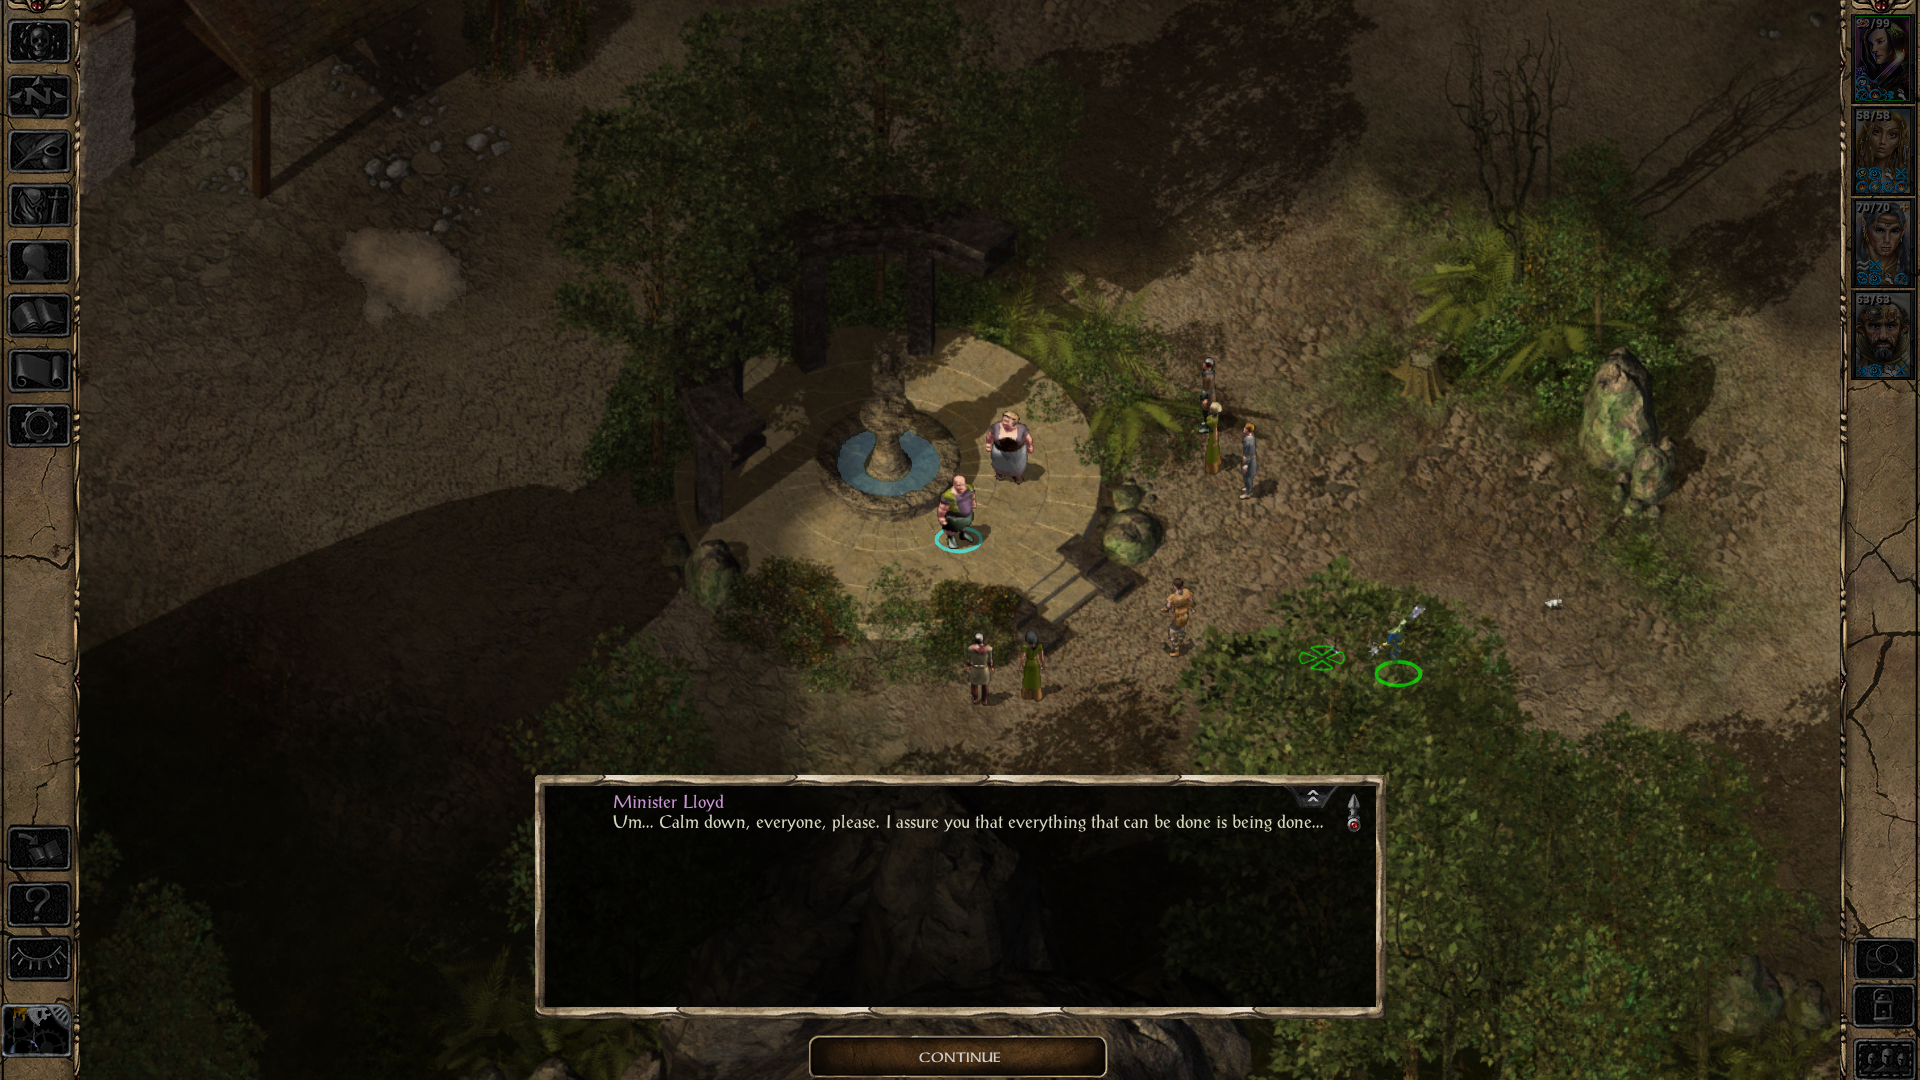
Upon arriving in Umar Hills for the first time you will find the Mayor and a bunch of villagers grouped around the fountain (pictured above) talking about their current plight. When the discussion is over you'll want to meet with the Mayor inside of his house which is near where you zoned in for the first time.
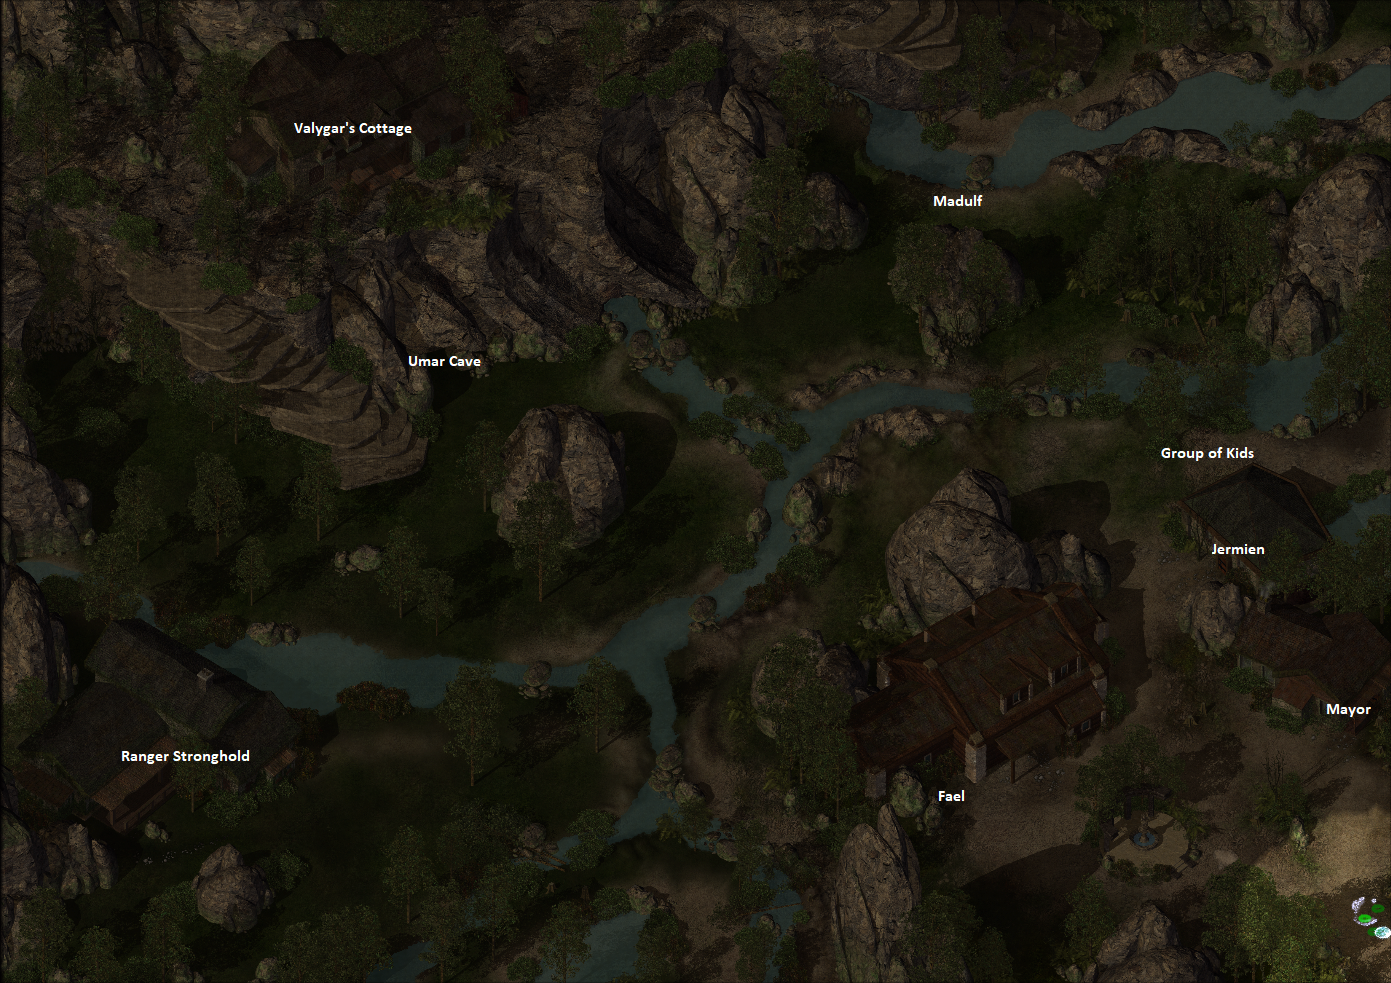
Umar Hills Map Locations
If you need help finding any of the locations I talk about in this guide you can consult the map screenshot that I have above. Check out my Umar Hills Overview page for indepth write ups about each of the different locations on the map; this screenshot is taken directly from that page.
The Mayor will give you some extra details about exactly what is going on in the city and give you 2 leads to follow. Your first lead involves going north of the town and speaking with Madulf the Ogre; your second lead is to visit the Ranger Cabin in the western portion of this map which is owned by Merella.
Madulf is who I typically visit first, he is not involved in the killings happening in Umar Hills and his tribe is actually suffering the same fate as the humans. You technically have 3 ways of dealing with this situation but the best method is to broker a deal between Madulf and Lloyd.
Below is a list of your 3 different ways to deal with this scenario.
1. Defeat Madulf and his friends
2. Refuse to broker the deal between Madulf and Lloyd
3. Broker the deal between Madulf and Lloyd
Agreeing to speak with Mayor Lloyd for Madulf will get you the best reward of 27k EXP as well as Shield of the Lost +2. The other options will get you no EXP and no reward. Once you've finished this part it's time to investigate the Ranger Cabin on the western side of the zone to advance this quest forward.
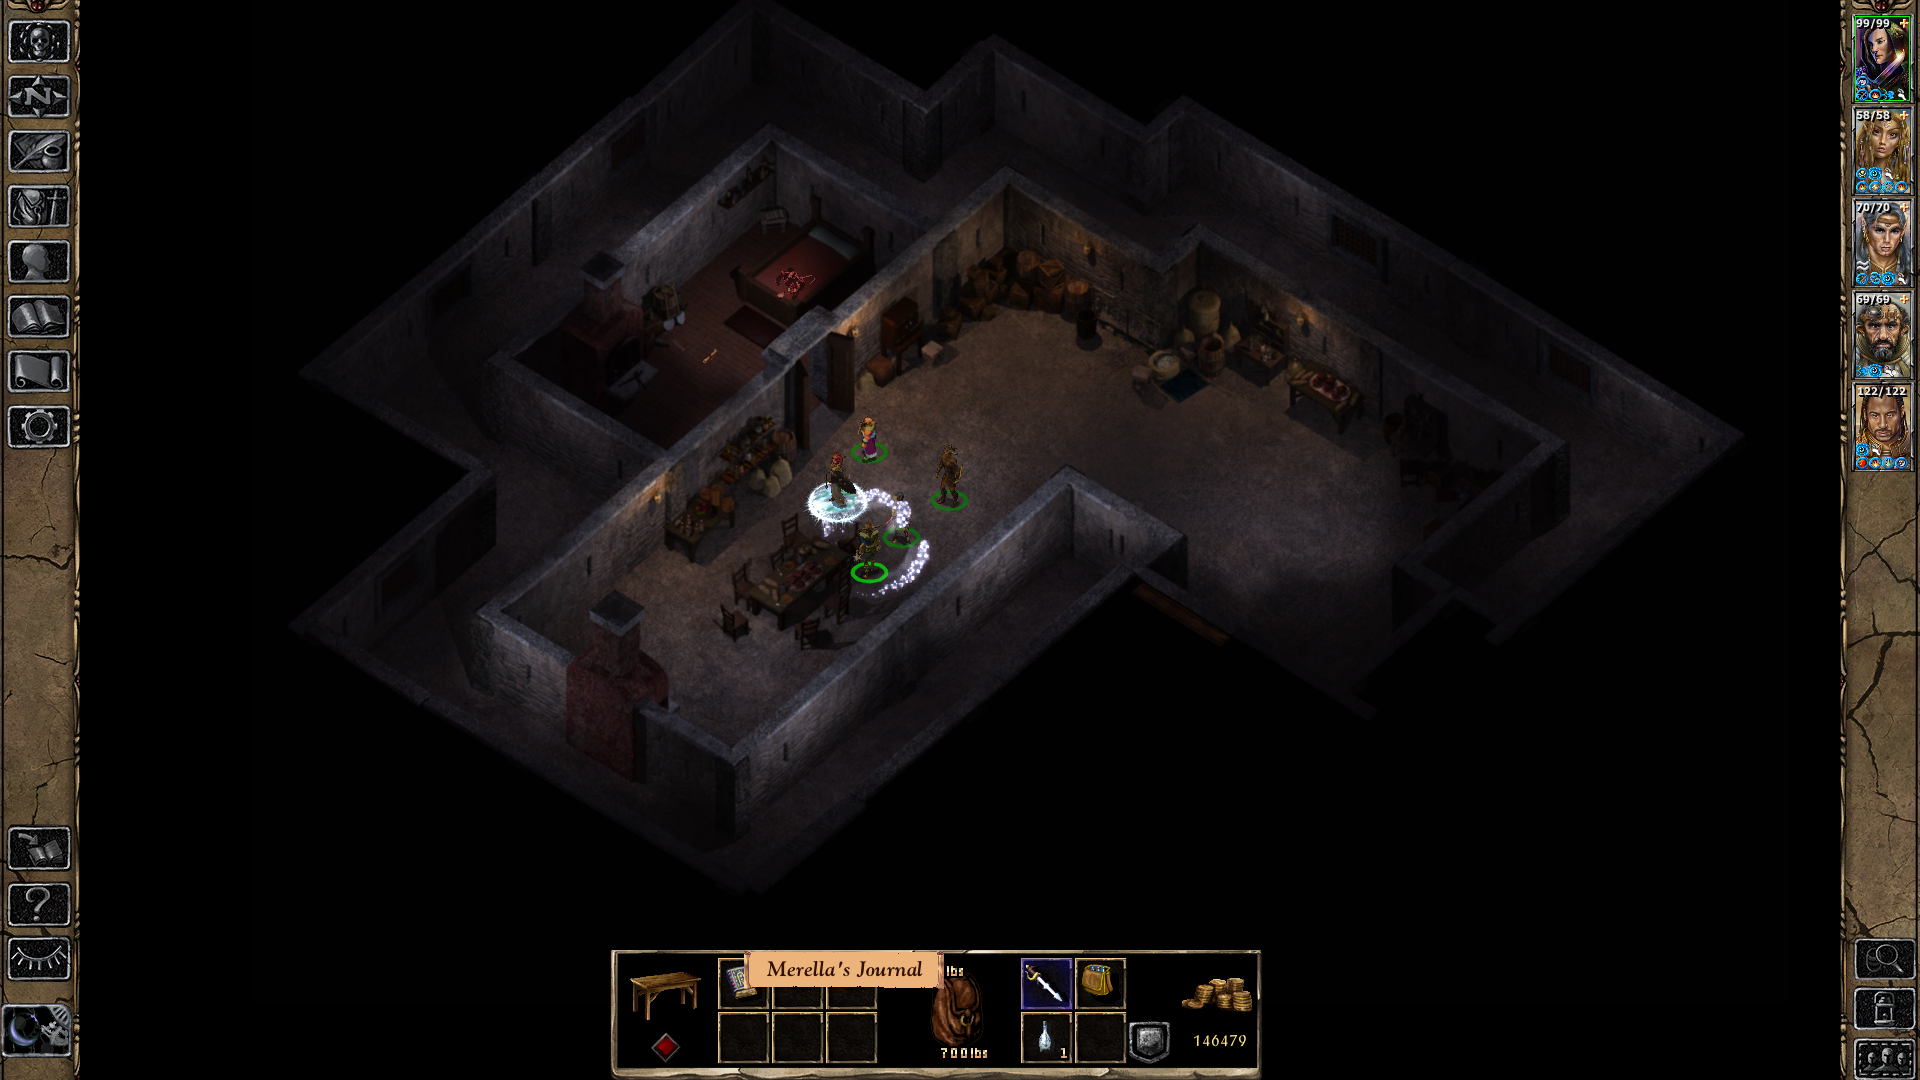
Where to find Merella's Journal & unlock Temple Ruins on the map
Inside the Ranger Cabin you'll need to loot Merella's Journal as well as A Note from Mazzy Fentan. You can find the journal inside of the table in the middle of the house and the note is found on the floor of the bedroom. Looting both of these objects will update your World Map and add the Temple Ruins location to it as well as update your quest.
As you can probably guess, the Temple Ruins is going to be our next destination. The outside portion of the Temple Ruins doesn't have much to note except for Anath, a werewolf who will give you some backstory about what is happening in this area. You can find the stairs leading down into the actual dungeon in the northeast portion of this area.
The inside of this dungeon is going to be a bit of a puzzle that we have to solve in order to proceed. What you need to do in this dungeon is collect all 3 Symbols which will then give you access to the final room with the Shade Lord inside. In order to make things easier for you I have provided a step by step list of exactly what we need to accomplish inside of the Temple Ruins. If you're confused about any step of this list scroll down the page a little bit further and I will break everything down in much more detail.
Step-by-Step List of what to do in Temple Ruins:
1. Loot Amuana's Bones
2. Free Mazzy Fentan (potential companion)
(Rangers) Make sure to loot Tombelthen's Journal (second half)
3. Pick up the Sun Gem
4. Complete the Statue of Ritual Puzzle for the Sun Ray Symbol
5. Give Amuana's Bones to Badon and Dettseh for the Dawn's Light Symbol and Shadow Dragon Wardstone
6. Loot the Lightstone Symbol from the room on the other side of the Tile Room; there is a "friendly" shade in here that asks for help too
7. In the adjacent room grab the Sun Gem #2 from the container
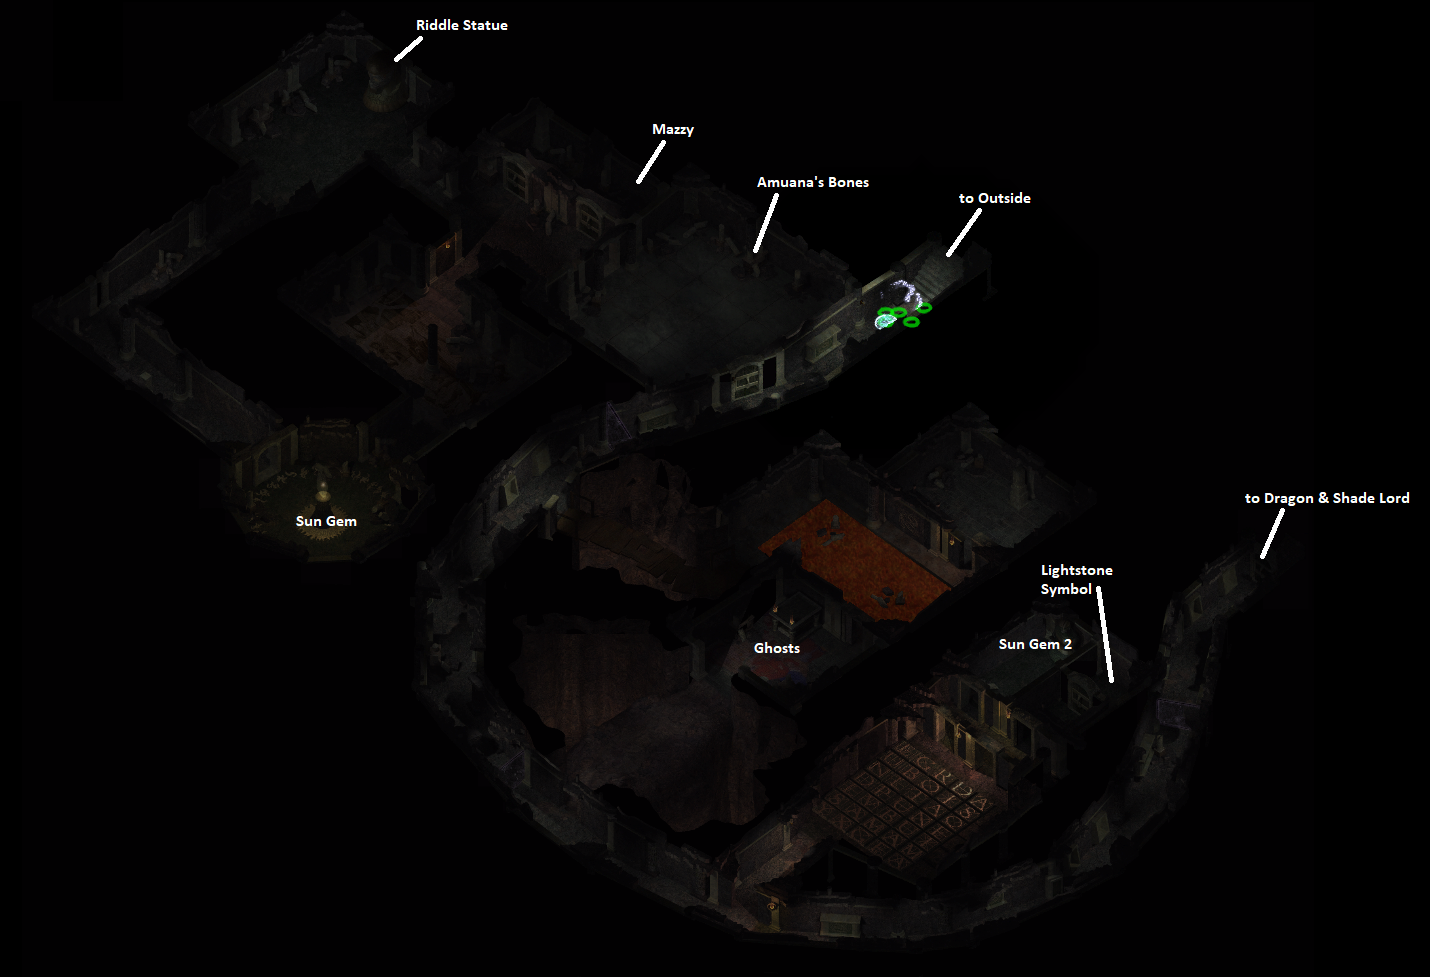
To learn what all of these map locations mean check my Temple Ruins Overview
The first part of the temple that we're going to be clearing is the northern half. In the first room you come across you'll want to search the coffin for Amuana's Bones, we'll need to give this to the ghosts a little bit later. You'll also want to want to defeat the Shadow Jailor and pick up the Shadow Prison Key which we can then use to free Mazzy Fentan. She will offer to join your party as a companion if you want her.
Just above the room with Mazzy you will find a Statue that offers you a riddle. There are actually 3 riddles in total that this Statue gives to you, one for Morning, Afternoon and Evening. I have a Youtube video that shows you how to solve this puzzle if that's your thing. Alternatively check my write up below for all of the answers.
All that is left for us to do in the northern half of this dungeon is to grab the Sun Gem from the pedestal in the northwestern portion of this dungeon; this gem will open the locked door that is blocking our path to the rest of the dungeon.
Morning Ritual Answers:
2: I shall say a prayer to the Light
3: I shall hold high the Holy Book that the Sun might bless it
1: I shall reflect on the glory of the Light as it conquers the Dark
Noon Ritual Answers:
3: I shall sing a hymn of praise to Amaunator
1: I shall raise my hands to the Light
1: I shall rejoice at the dominance of the Light
Evening Ritual Answers:
1: I will recite the Tenets of faith
3: I will hold high my children that they might see the Sun
2: I shall mourn as I watch the Sun give way to the onslaught of night
Now for the bottom half of the dungeon, all we need to do in the southern half is give Amuana's Bones to the 2 ghosts and collect the Lightstone Symbol on the other side of the Tile Room. The 2 ghosts are found in a small crypt room just south of the room with lava and they will stop you as you run past them. When you give them Amuana's Bones they will give you the Dawn's Light Symbol and Shadow Dragon Wardstone.
The Shadow Dragon Wardstone is an important item because it will make Thaxll'ssillyia neutral to you allowing you to safely pass by without being attacked.
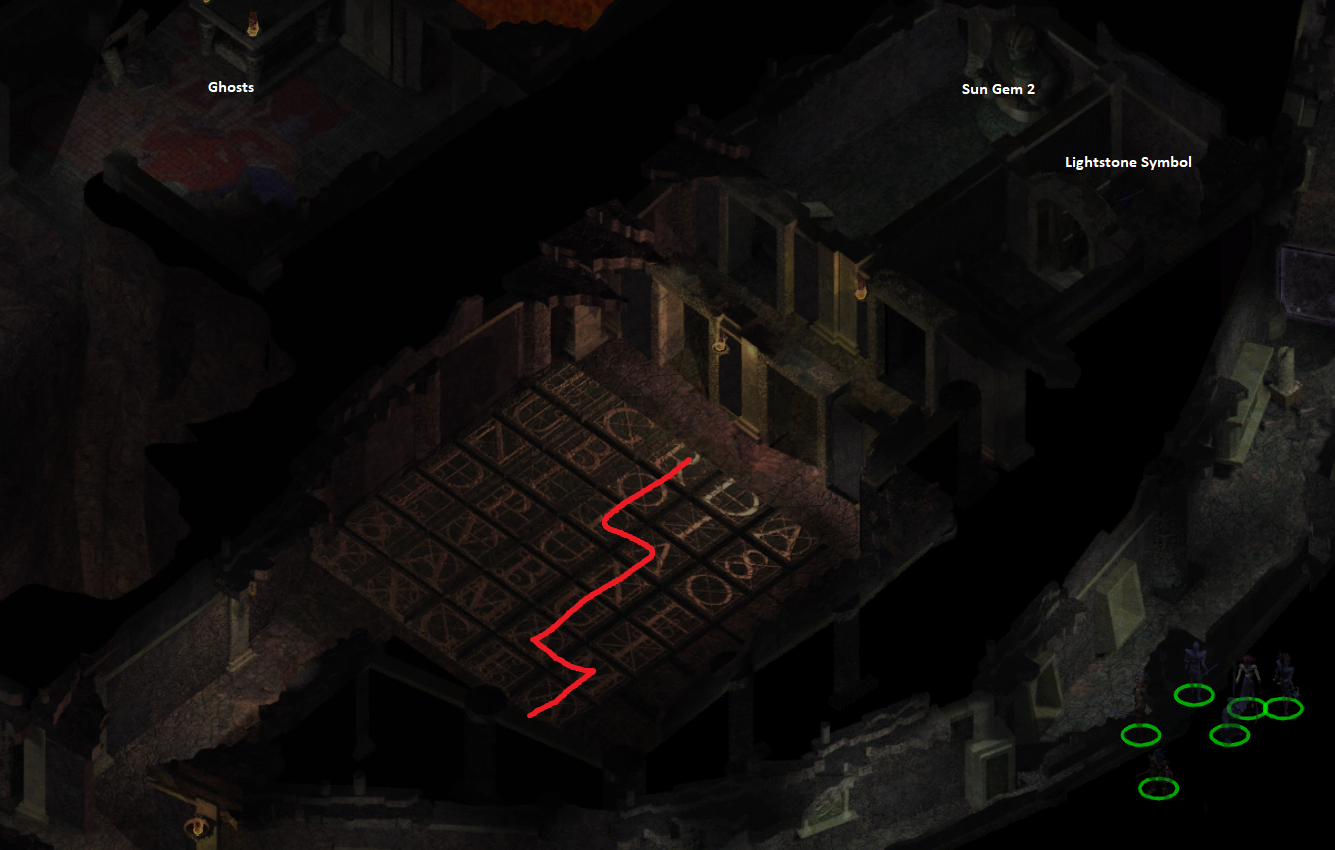
Tile Room "puzzle" solution
As for the final symbol, you'll find it on the opposite end of the Tile Room (pictured above). The Tile Room is essentially a room with a bunch of letters printed on tiles; if you step on the wrong tile it will result in a flame jet being cast on the character which will deal a moderate amount of damage. Honestly, you can run over these tiles and ignore the puzzle completely even if you're playing on the harder difficulties.
However, if you want to avoid taking damage what you're supposed to do is only step on letters that correspond to the God's name. In this case the God is Amaunator so you'll only want to step on letters associated with that name, the best path to follow across the tiles is the one shown in my screenshot above.
Once you make it across the tile floor you will find a "friendly" shade in the eastern room. He will ask for help crossing the tile floor, it doesn't matter what your answer is to him. In the container behind this shade you'll find the Lightstone Symbol which is needed to create the Symbol of Amaunator.
While you're in this area you will also want to search the container in the adjacent room for the Sun Gem. This gem is required to open the door leading to Thaxll'ssillyia and the Shade Lord and is the final item we need in this part of the dungeon.
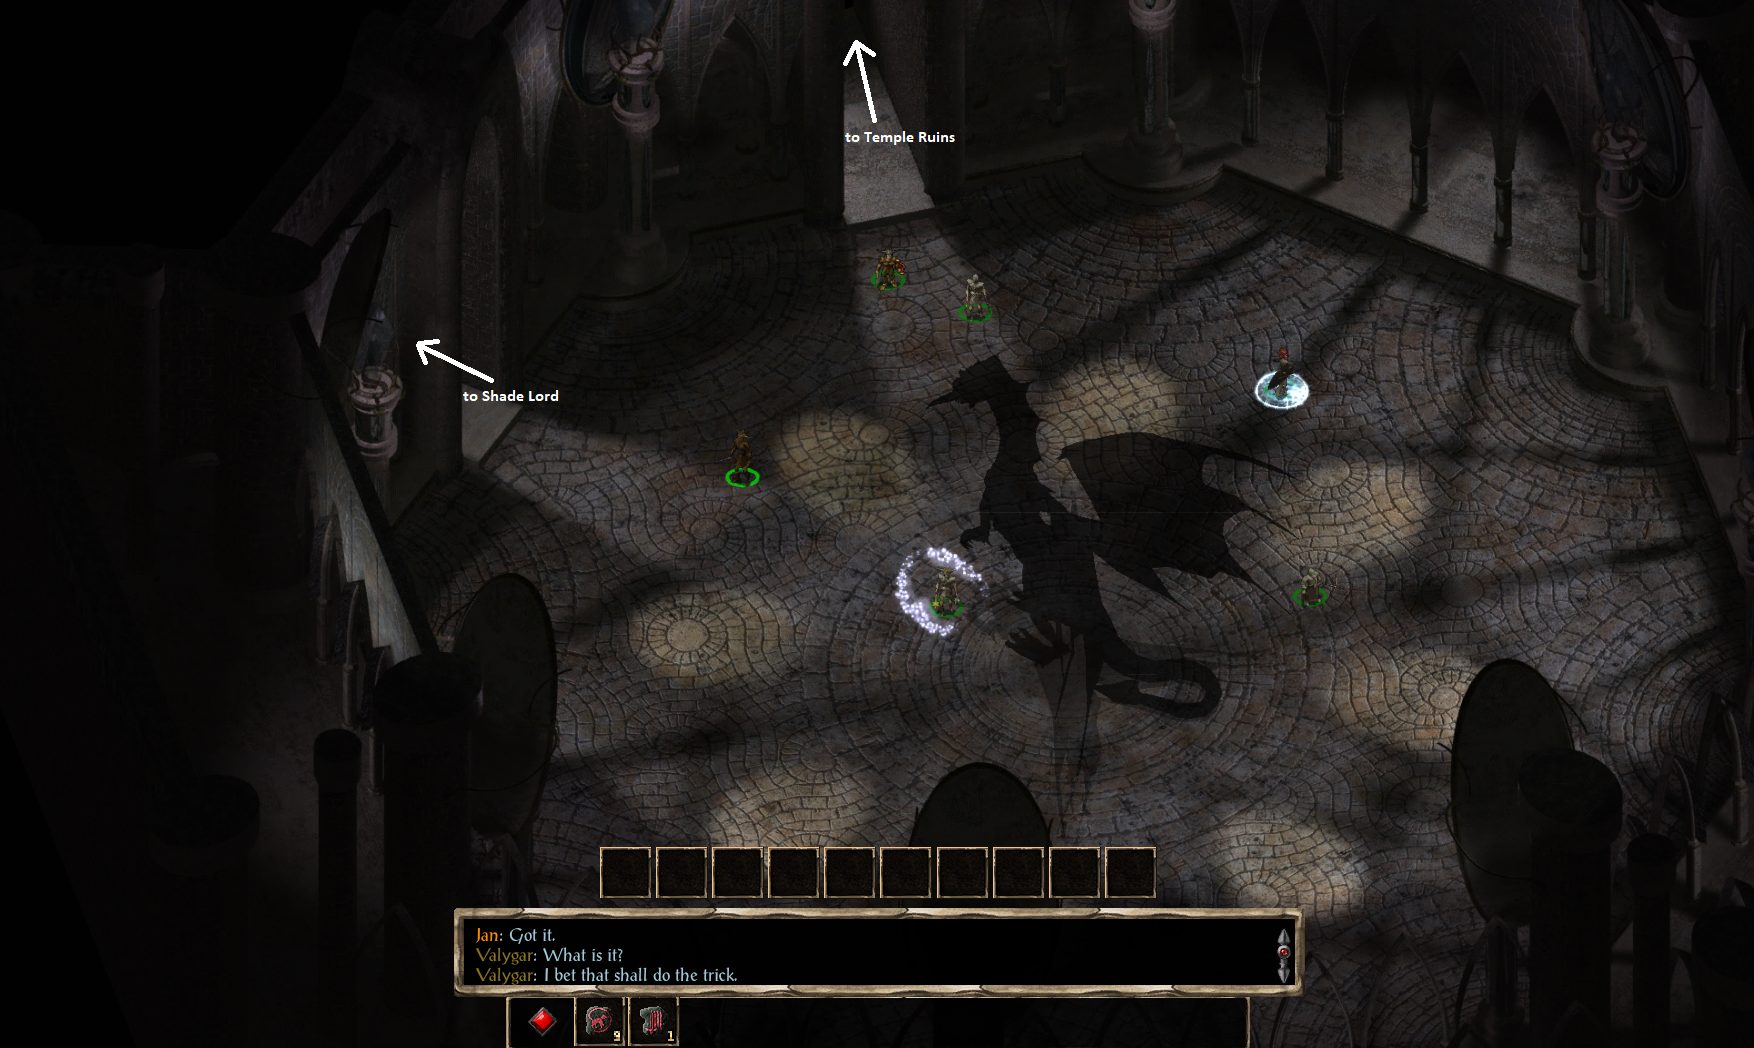
Thaxll'ssillyia will not attack you so long as you have the Shadow Dragon Wardstone in your inventory. Depending on your party's level I would probably recommend avoiding this dragon for now as he can be a tough fight for lower level teams. For more information about Thaxll'ssillyia and how to beat him check out my Challenge Thaxll'ssillyia side quest page.
For right now all we want to do is travel through the northwest doorway which will lead us outside to the portion of the Temple Ruins that the Shade Lord is in. You'll get a short scene between the Shade Lord and Mazzy if you have her in your party - otherwise you have to fight the Shade Lord along with a couple of other enemies including Shadow Patrick and the Shadow Altar. The Shade Lord will drop Duskblade +2 and Darkmail +3 when he is defeated.
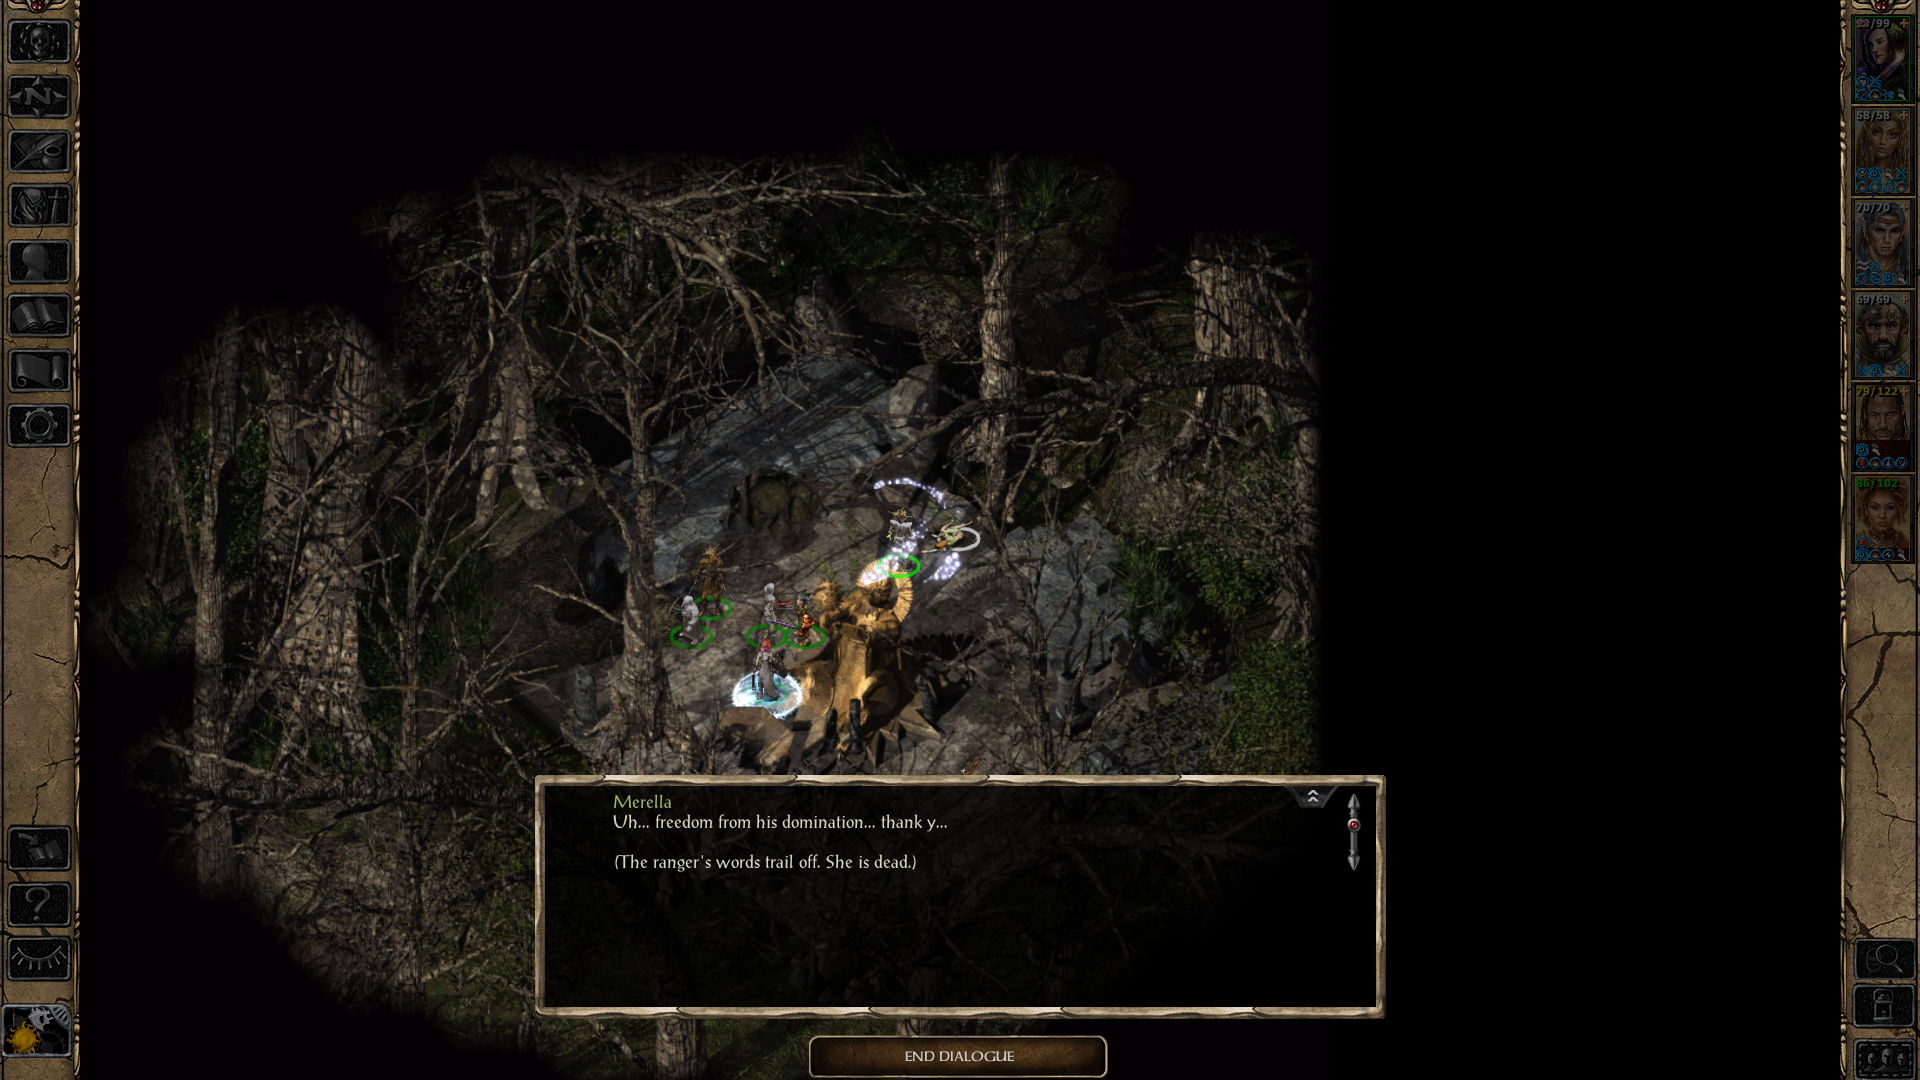
Once every enemy is defeated you'll get a scene where the Temple Ruins changes from its dark and dreary environment to one of light. When you regain control of your characters you'll want to talk with Merella's body which is nearby and pick up the Cloak of the Stars she drops along with the gems and gold.
At this point we're done with the quest and all that is left is to return to Umar Hills and speak with Mayor Lloyd for our final reward. You will be given The Night's Gift armor along with some gold and EXP. If you're playing a Ranger as your main character then the Mayor will also offer Merella's Cabin to you, accepting the cabin will start the Ranger Stronghold Quest series.