
Investigate and Destroy the Cult of the Eyeless - BG2 Side Quest
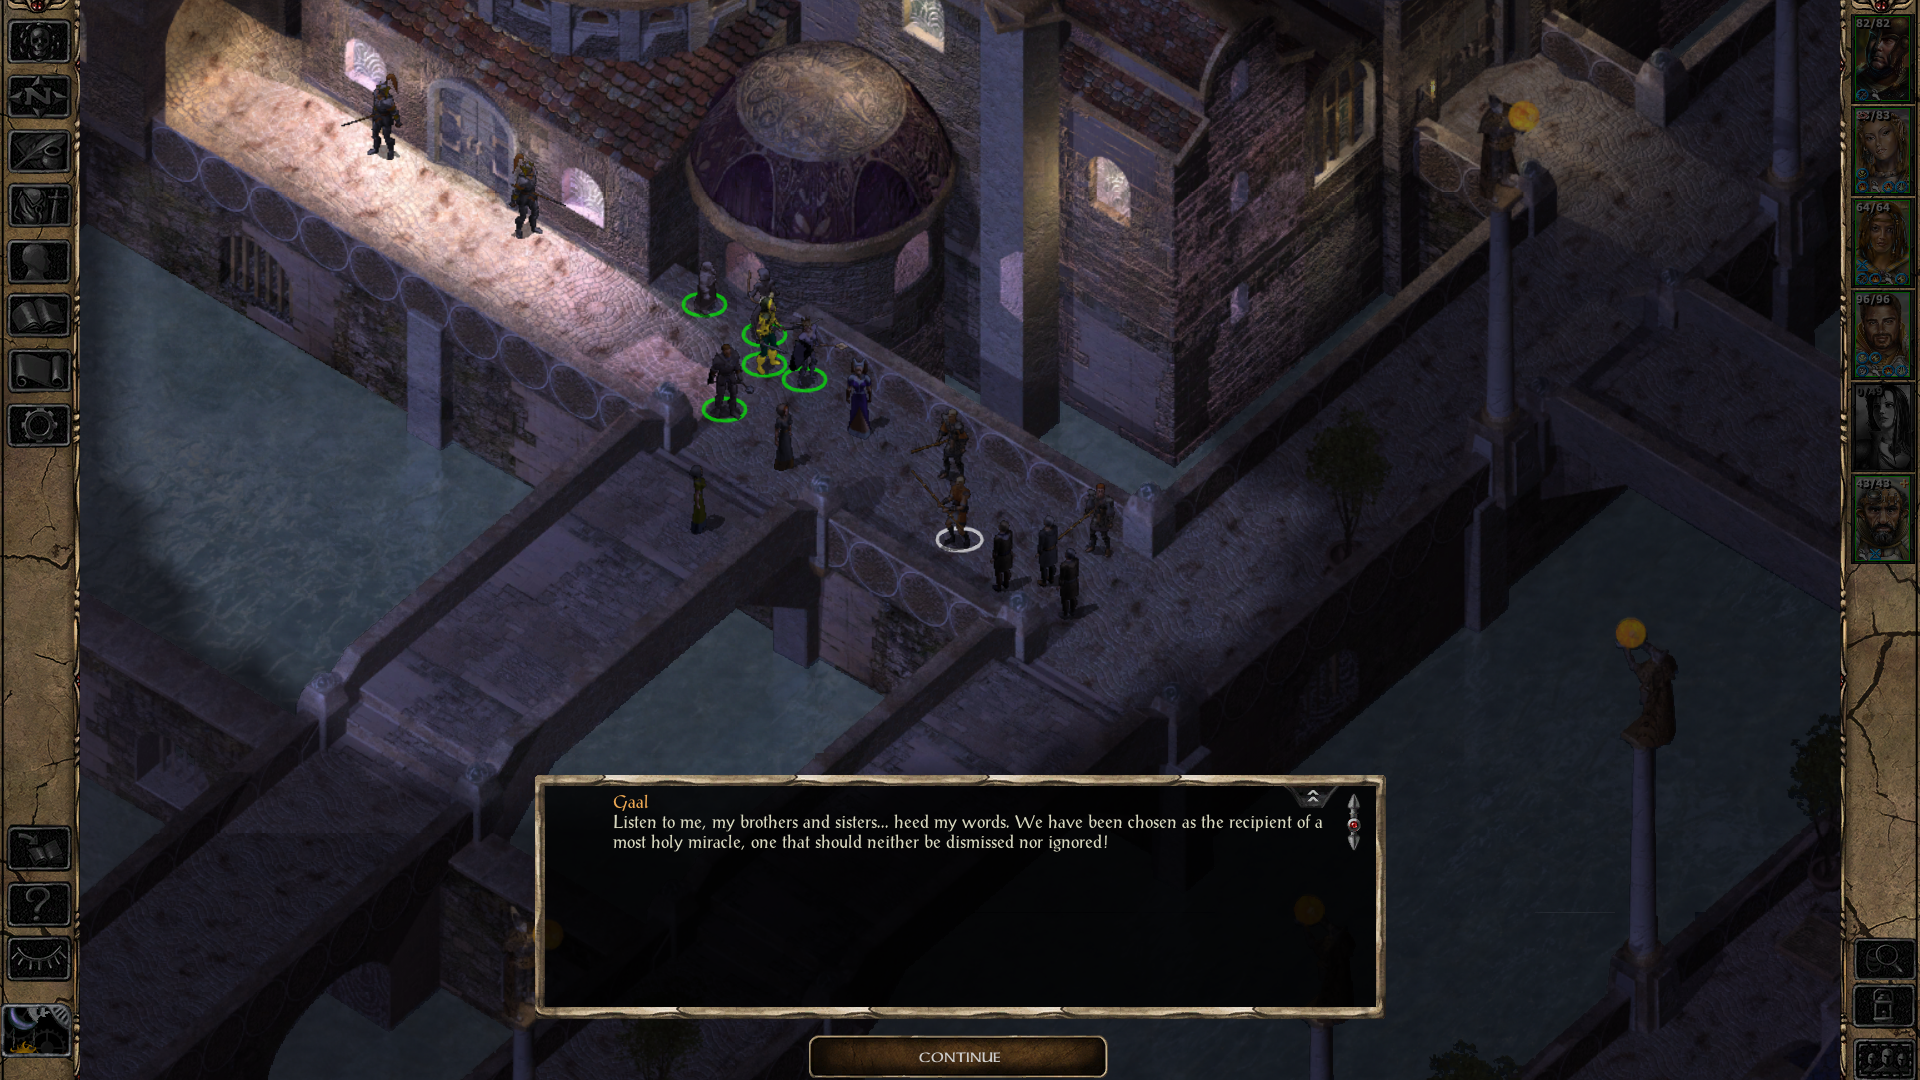
Investigate and Destroy the Cult of the Eyeless is one of the more story driven side quests that you will get when visiting the Temple District in Athkatla. This quest will begin after you witness Gaal giving a speech to people in the central portion of the Temple District. Depending on your class and alignment you'll be approached by a leader of one of the temples in this district and he'll give you this quest.
For this quest you're tasked with entering the Temple District sewers and destroying the Cult of the Eyeless. Despite your primary goal being to destroy them you should really infiltrate them first as there is significantly more loot and EXP for doing it this way. If you provoke a fight with Gaal or the Cult of the Eyeless before retrieving the 1st part of the rod during this quest you will permanently lose access to a couple of maps with a lot of loot.
The maps you'd lose access to are the Lower Reaches, Ghoul Town and Pit of the Faithless. For this reason my obvious advice to you is going to be follow this guide and don't fight Gaal until the end of the quest. Our first task for this quest is going to be head down into the Temple District Sewers and speak with Keldorn in the northwestern portion of the map.
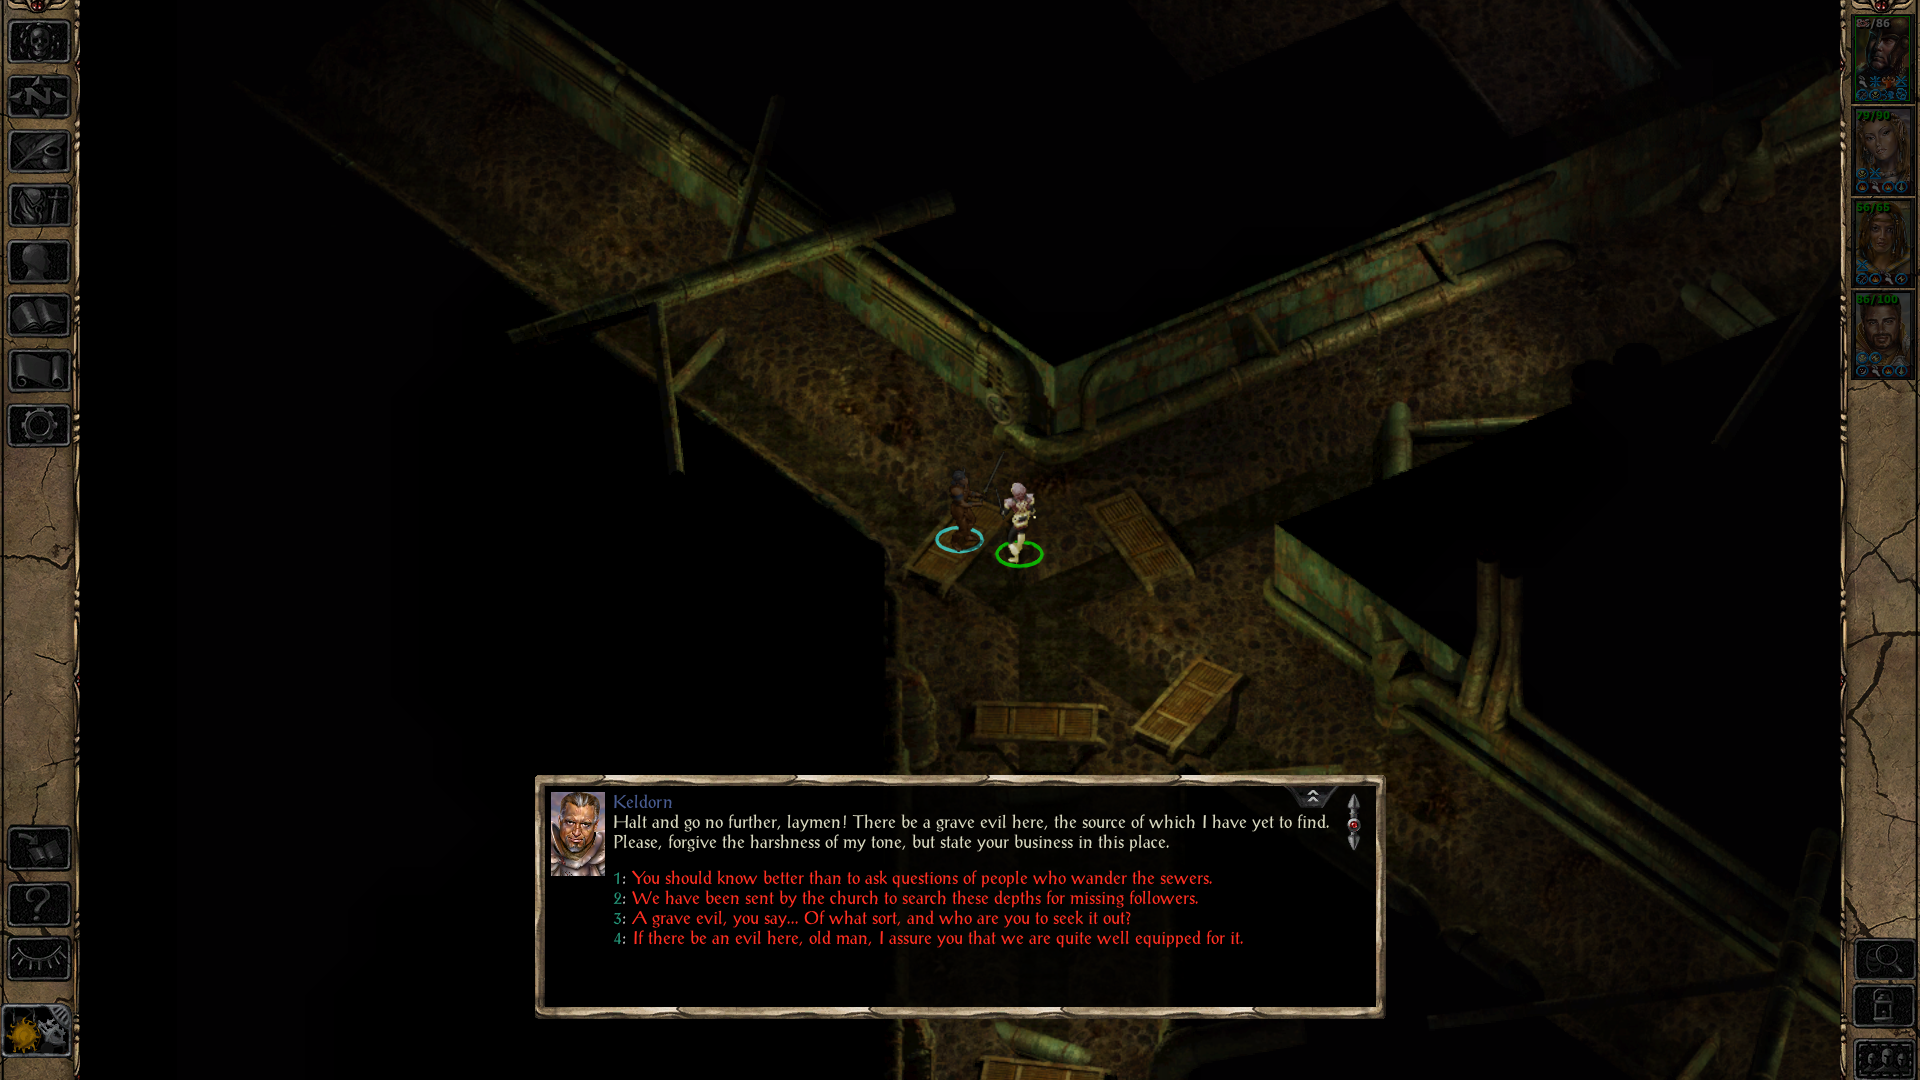
Keldorn is a potential companion in this game and is working to destroy the same cult that we are. Take him or don't, it's up to you, either way continue through the sewers to reach the Cult Hideout map. Our destination is in the south which is where you will have an event with Gaal when you see him a second time. During this conversation it's important you agree to help him find the rod he needs. This will unlock the first map, Lower Reaches.
Next you'll want to go to the northern end of the Cult Hideout map and speak with Sassar who will give you some information about the rod. He's found along the path leading to where we have to go and he's another important NPC that you need to leave unharmed for now because he unlocks the next 2 maps we need. There is a sarcophagus with a Lich in this room too but for the time being you want Sassar alive so don't mess with anything.
When you make it to the Lower Reaches you'll encounter a puzzle involving a broken bridge, a picture of what I am talking about is below. Also, for more information on the optional goodies you can find in this zone check my Lower Reaches Overview page. That page goes into detail about all the notable things on this map so I don't waste your time in this guide.

The answers to the puzzle can be found below:
Answer #1: Life
Answer #2: Time
Answer #3: The current one, for it alone is my choice
Once the puzzle is complete the bridge will allow you to travel across it. The path will lead you straight to a temple inside of which you'll find a hostile demon named Empathic Manifestation. In order to actually defeat this enemy you'll need to heal it. If you don't have any healing spells memorized you can find a Cure Serious Wounds scroll inside the altar in the back of the temple.
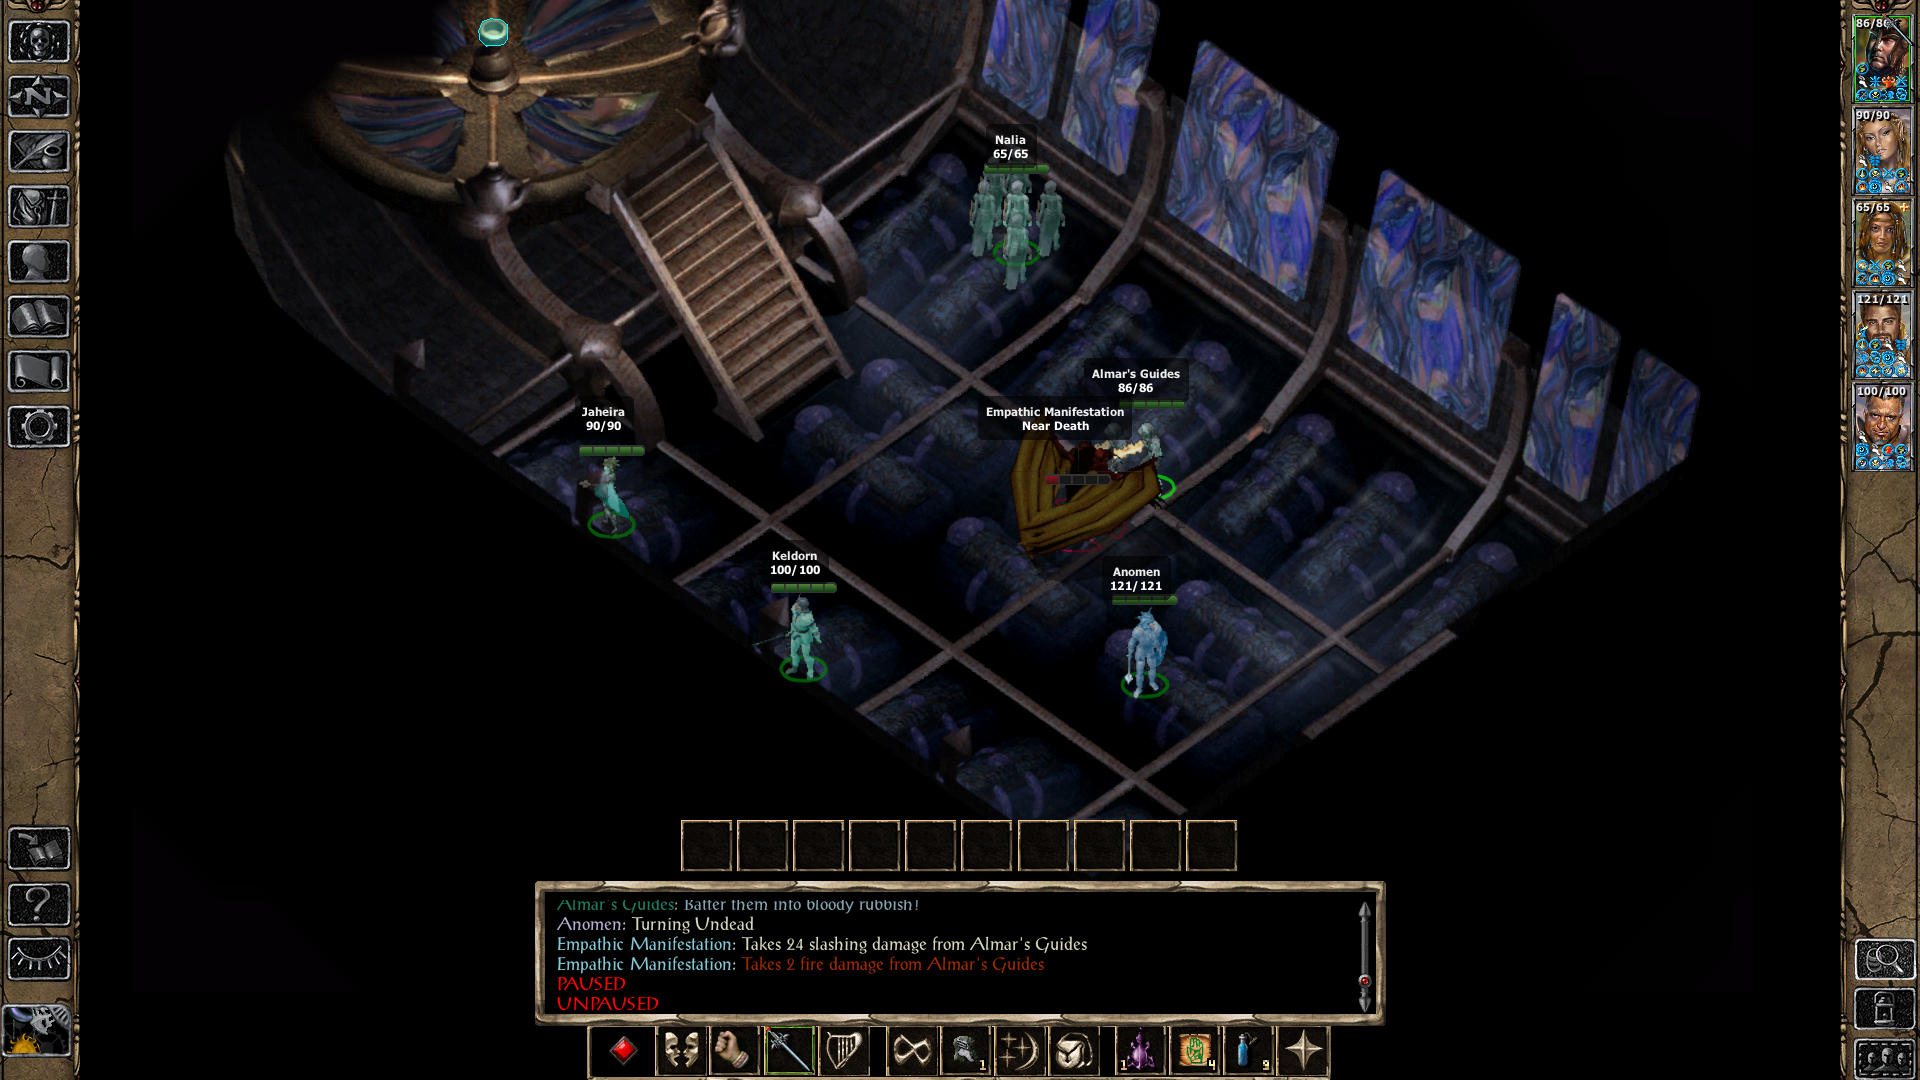
Now that the Empathic Manifestation is defeated an Avatar will appear and talk to you. He'll give you the first Rift Device Part (the rod) that we came down here for and also ask a favor of you. Basically once the rod is completed bring it back to him so that he can destroy it; I'll talk about this more at the end of the quest.
Return to Sassar at the Cult Hideout map and he'll tell you a pass phrase that you need to repeat to someone named Tad inside the Cult Compound. Doing this will give you access to the next 2 maps, Ghoul Town and Pit of the Faithless. If you need help finding Tad's location or figuring out how to zone into the next map take a look at my screenshot below.
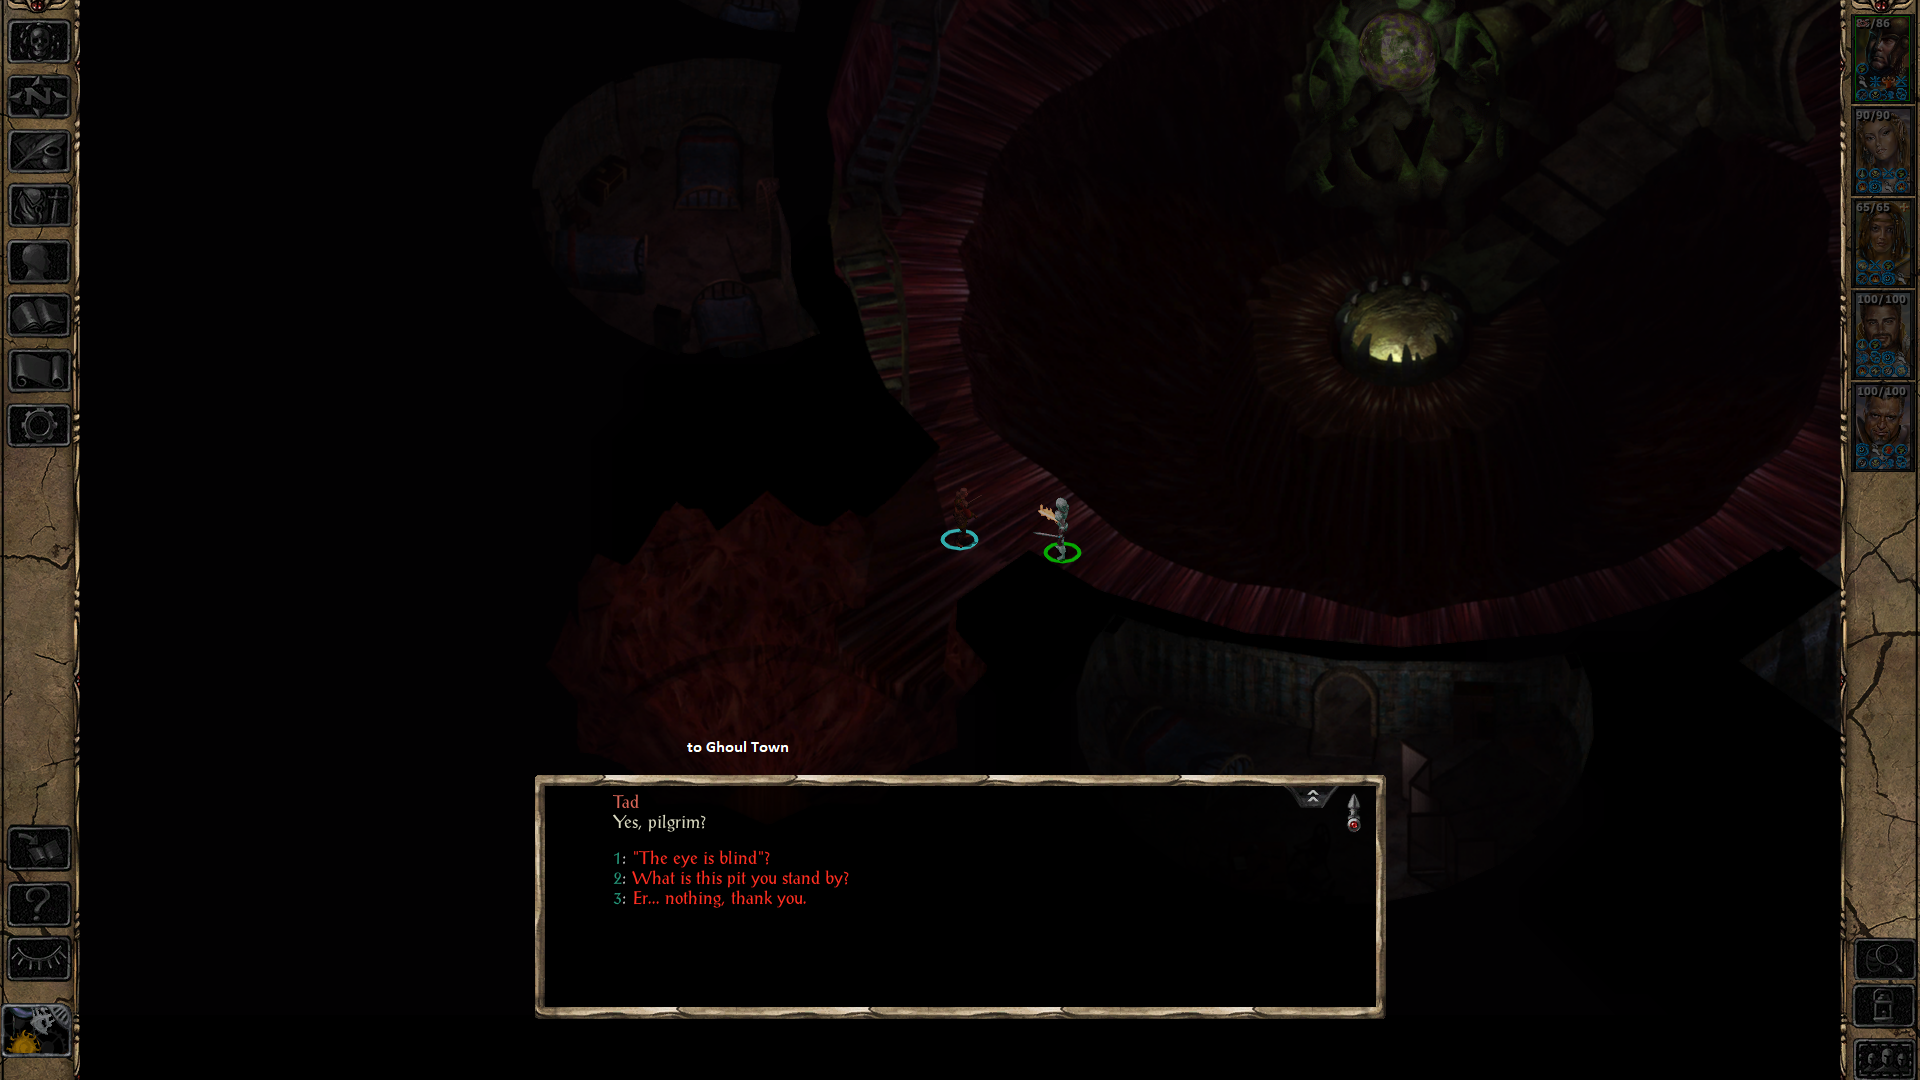
The area you have to click on in order to advance to the next map is the fleshy area behind Tad. It doesn't seem like there would be a way to go down here but... sure enough there is. Ghoul Town is our next map and it's a pretty short 2 part map; make sure you grab the Gauntlets of Dexterity while you're here.
Pit of the Faithless is the next and final new map that we'll be visiting for this quest. As you can probably guess from the environment of this map, we're going to be fighting some Beholder enemies here. I recommend you buff up a lot and save often on this map incase you make any mistakes. For those of you who need help with strategies for Beholder enemies check out my BG2 Beginner's Guide or my How to easily defeat Beholder enemies Youtube Video.
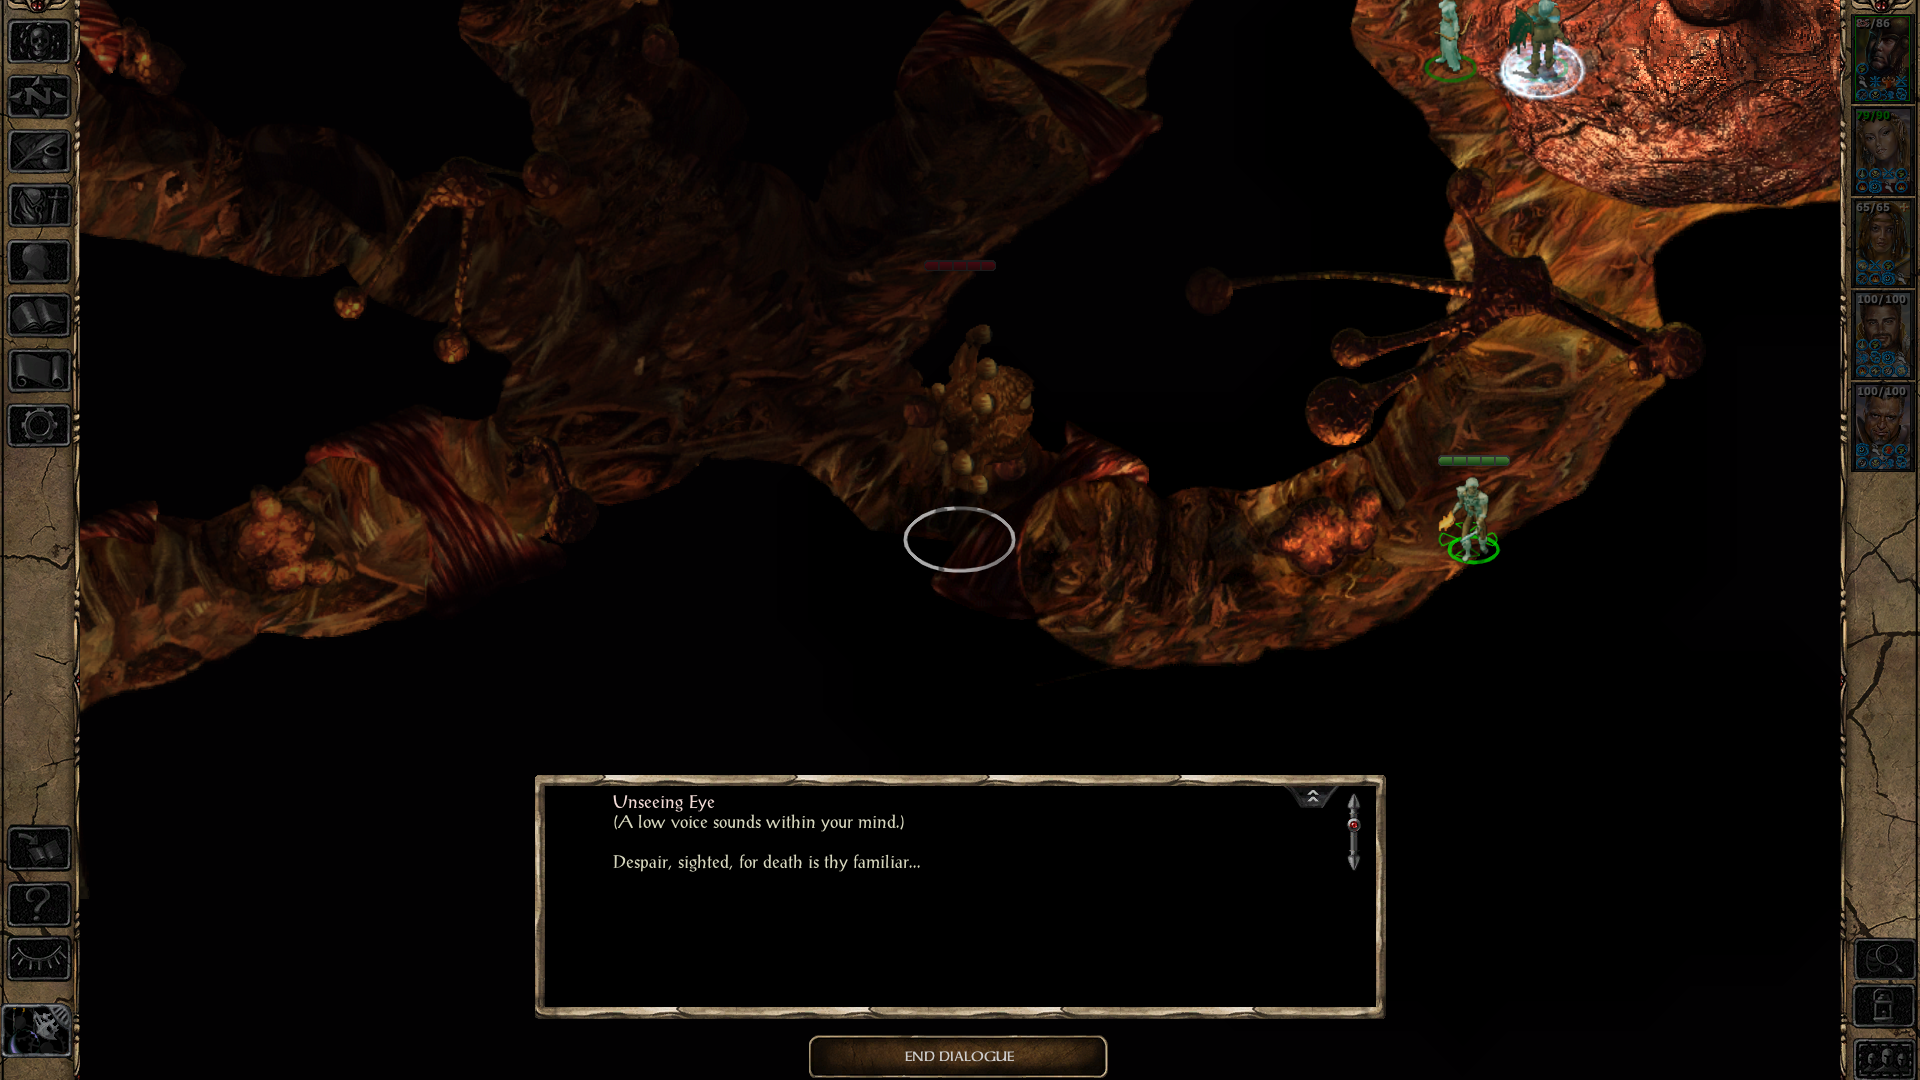
All we need from the Pit of the Faithless is the Rift Device Part in the eastern portion of the zone. Once you pick this item up it'll instantly combine with the other Rift Device Part in your inventory and create the Rift Device. You should equip this item quickly since you'll attract the attention of the Unseeing Eye (an Elder Orb Beholder) who will appear out of thin air to attack your group.
You can technically take out this enemy the old fashion way or you can use the single charge of the Rift Device on it to pretty much instantly kill it. Something worth noting is you can't take the Rift Device out of the Sewers so it isn't like you can save the charge for a harder enemy later. This is really your one chance to use the item before it is destroyed a little bit later during the quest. Either way, once the enemy is defeated and you've collected all of the loot in this area you'll want to escape through the southern exit.
With the Unseeing Eye defeated we're officially done this quest - but wait there's more! If you want some extra EXP you should take the Rift Device back to the Avatar in the Lower Reaches to have the rod permanently destroyed for good. This will earn you about 75k EXP in total so it's definitely worth the quick trip back down here. You'll also receive a medium shield, Saving Grace +3.
Also, as you may have guessed Gaal won't be too happy with all that you've done so I recommend returning to the Cult Compound too and taking him out along with all of the remaining followers. Gaal will have some guards with him when you find him again but it shouldn't be too tough of a fight. They'll drop Girdle of Fortitude as well as The Guide when you defeat them. This will tie up all loose ends for this quest, now all that is left is to return to the Temple District and turn in the quest to whomever originally gave it to you.
Completing this quest will begin the next one in the chain which is Gain the Services of Sir Sarles for the Temple.