Mother 3 Walkthrough - Chapter 5
When you gain control of your characters you'll want to travel north into the cave. You'll find a hot springs here along with a Mole vendor and a frog to save/access your DP. I recommend you get all your DP out now and you outfit your characters with better stuff.
Before you go forward with the game, I actually recommend you turn around and go back to Tazmily. You'll want to follow my two tips below to get some better equipment and do some money/exp grinding. This will get you squared away for the rest of the game.
(Duster's Ultimate Weapon) Tip: You can get some very powerful weapons for Duster right now, return to Osohe Castle and visit the same room at the top where you fought Mr. Passion. You'll find a new boss here named Lord Passion, he will drop a set of Mystical Shoes once he is beaten. This is a hard fight, use Offense Down on the boss with Kumatora and buff your team's stats with your main character. This weapon will last Duster until the end of the game.
Money Making Tip: Visit the shop in the town square, it's the small brown building where Caroline used to live. She now runs a new version of her old bakery. Purchase Fresh Egg from Caroline and then wait outside of her building (or use the turbo speed on an emulator) and all of the eggs will hatch into Chicks and eventually grow up into Chickens. Each egg costs 40 DP and each Chicken is worth 200 DP.
Once you're done with all of this stuff back in town you'll want to return to the area where we started the chapter. If you've forgotten, it's all the northeast of Club Titiboo. The path forward is linear, your dog will turn back into a dog and you will come across a large open area with tons of holes. A scene with Duster happens here and he says to jump into random holes.

The right hole to fall into is the one I am looking at
Most holes will lead you to some presents, I actually recommend you take this alternate way first for the loot. When you're ready to continue with the story fall into the hole show above. This will lead you to an inactive Clayman which you'll try to take the egg out of. A scene will commence and you will have to follow the Clayman through a few areas and to a factory (this is where the path we're following ends).
Enter the factory and you'll have another scene inside, your team will be confused for someone else and you will be given disguises. Go through the factory, inside you'll find an Instant Revitalizing Device which will heal you to full. I suggest you use this to prepare for the boss coming up, when you exit the building there will be a scene of your Clayman being thrown into a truck - now we must pursue it!
Follow the truck up the road and eventually you'll have a scene with a Pork Bean, a moment later it will crash and you'll start the boss fight against Fierce Pork Trooper. During this fight you can use a DCMC item from your inventory to stun him for a few rounds. You should also get into the habit of debuffing the enemy (Offense Down, Defense Down) and buffing your group (Defense Up and Offense Up).
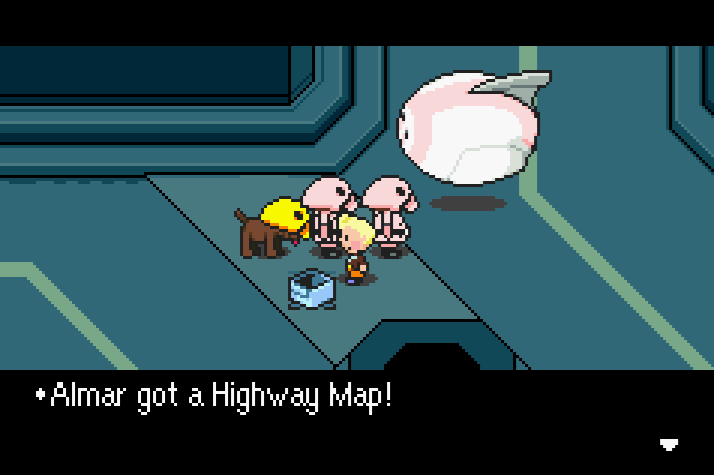
After defeating the boss get inside of the Pork Bean parked nearby and go into the tunnel straight ahead. Go straight and you'll run into a Highway Map right where the road curves (pictured below). Make sure you get this since it'll make getting around significantly easier for you.
After getting the Highway Map you'll want to go west one screen and get the Doggy Biscuit near the recharging station. We can give this to a dog later near Mouse #4 for a better item so don't consume it. From here you'll want to go directly north until you come to a clearing. Hop out of your Pork Bean and go up the hill, you'll find a present with Chic Gloves, they're an upgraded weapon for Kumatora. You'll also find a mouse here who asks for your help finding her children.
Note: If you travel too far northeast along the road your Pork Bean will break down unless you charge it at a charging station.
Below you'll find locations for all 7 mice that we are looking for. If you're having trouble finding any of them use my map below for additional guidance.
Mouse #1: Found in the southwestern most portion of this area, this mouse is reading a sign in the top of the room.
Mouse #2: You'll find this guy in the same location where you beat the Fierce Pork Trooper earlier.
Mouse #3: This mouse is found outside of the Clayman Factory, travel back to the factory and exit your Pork Bean then go north immediately. You'll find this mouse there.
Mouse #4: Directly north of where you met the mother who started this quest is where you'll find this mouse. He is standing near the cliff edge over looking the sky in the distance.
Mouse #5: About half way across the suspension bridge in the northern portion of this area is where mouse #5 is found.
Mouse #6: Go southeast of the store marked P on your map, there will be a small room that you can go into. Inside this room you'll find a man named Leo-Leo surrounded by presents as well as this mouse. Keep talking to Leo-Leo and he will let you open 1 present which always gives a Knit Sweater.
Mouse #7: In the same room that you parked to get Mouse #6, go east and you'll find him right before the zone line to the next area.
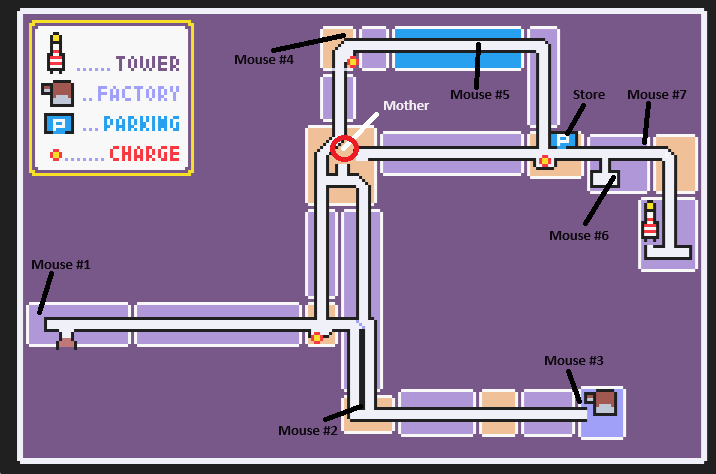
All 7 mice that you need to find are shown on my map above
Once you have located all 7 mice return to their mother and she'll give you a Shield Snatcher item. Give this to your dog since they are the weakest character in our party. Now, it's time to face the next boss! Travel east of the store (marked P on your map) and disembark your Pork Bean after going through the tunnel.
In this area you'll get a scene of the Clayman we've been chasing being dumped off into a garbage ditch. Climb down the ladder and there will be a scene after which you'll be fighting the Forlorn Junk Heap! This boss is protected by a shield so you'll have to use the item we just obtained to get rid of it. After that you'll want to debuff the boss with any skills or PSI you have that will decrease Offense and Defense.
After the fight you'll get picked up by a Pigmask soldier, they'll take you to Thunder Tower. Follow the linear path when you arrive here and make sure to use the Instant Revitalizing Device that you pass in the hallway after riding the long elevator up. You'll also find Item Deposit Guy and a blue present in this room with a Tower Sketch inside! In other words, this room is pretty hard to miss.
For those of you who have yet to notice, the pink pig-looking machine to the left of the Instant Revitalizing Device is actually a vending machine. It sells an upgraded weapon for your main character, but you may want to wait depending on how frugal you want to be. There is something better coming up.
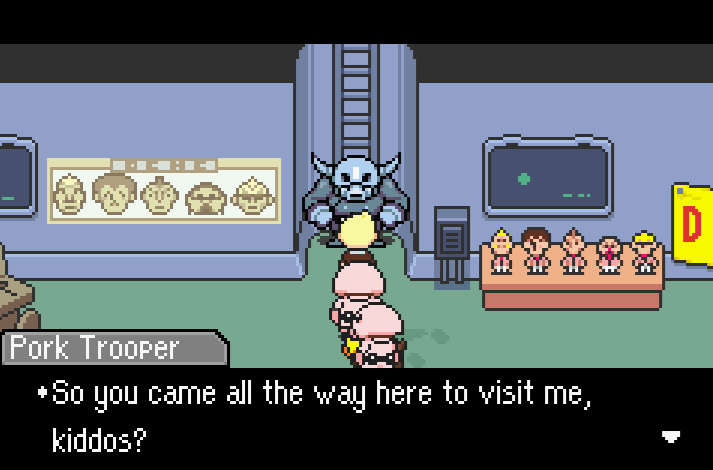
Our destination is the room in the center of the first floor, it will be marked on your map. Here you'll find the Pork Trooper from before guarding the ladder that goes up.
Much like before you'll want to use a DCMC Pamphlet (or item) to stun him for a few rounds. Reduce his Offense and Defense with debuffs and buff your Offense and Defense - like I said earlier, get into the habit of doing this for all bosses. Buffs are very important in this game, so are combos but they are much harder to do!
Fassad shows up after the fight and you guys climb the ladder to escape him. Keep going up as far as you can go and you'll eventually hit a hot spring. Grab all of the presents in this room and use the hot spring, also check out the vendor in this room too. It sells the Rubber Cape item which is the best protection you can get to electrical attacks. Equip it to Kumatora for right now and if you want to your other characters too. This item lets us avoid a massive AoE attack on the next boss.
This next boss is optional but victory will reward you with a very good weapon for the main character. Next to the ladder you'll find a case and a robot walking around. Inspecting the case will cause the robot to freak out and trigger a boss fight with you (pictured below).
Li'l Miss Marshmallow is a difficult fight, especially if you're not any good at combos. My biggest advice is going to be the same ol' same ol', debuff her into oblivion and buff yourself up. About half way through the fight she activates the ultra ticked off system and the fight gets a bit harder. I recommend you save some of your strongest attacks and healing items for this phase and make sure you're buffed up properly before it.
When the fight is over you'll get Friend's Yo-Yo. This is a weapon for the main character that is a decent improvement over what he currently has. After resting in the hot springs continue up the ladder to the top of the tower. Along the way you will learn PK Flash from the tower striking you with lightning.
Further up the tower in the generator room you will trigger a boss fight with Mr. Generator. This boss is very hard and can wipe you out if you're ill prepared. His strongest attack is an electrical discharge that deals massive damage to your entire party - unless they have the Rubber Cape from earlier. Keep everyone above 150 HP when he does this attack, you can unload on him once the attack is over.
If you don't have that much HP then either grind or use the Rubber Capes. After the boss fight is over there will be a short scene. Continue outside and go upstairs - approach the gun for another scene. This will conclude the chapter.
Continue to Chapter 6 of my Mother 3 Walkthrough
Return to Chapter 4 of my Mother 3 Walkthrough

