
Guild Wars 2 Halloween Event
The Halloween Event of Guild Wars 2 starts in Lion's Arch (LA) and takes place in a few different areas of the world. There are quite a few things to do for the event but not all of these things are currently added into the game. At the current point in time only Part 1 is available which has you collect 6 different clues to combine together to create a book. Which will most likely be used in the future parts. You will need to gather Candy Corn, a minable node throughout the world to fuel the Candy-Powered Matter Meter for this quest.
I will add much more information to this page as the Halloween Event goes on and as I learn more.
Guild Wars 2 Halloween Event Guide (The First Six Clues)
Haunted Doors & What they're all about
Halloween Event (Part 2) Mad King's Labyrinth - How to Reach the Mad King's Realm (Video)
Halloween Event (Part 2) The Clocktower
List of Halloween Crafting Recipes (Coming Soon)
List of all the Halloween Events (Coming Soon)
Queensdale Pumpkin Carving Locations
***
Join my Halloween Event Discussion on Gw2 Guru!
Join my Halloween Event Discussion on Gw2's Official Forums! (Part 1)
Join my Halloween Event Discussion on Gw2's Official Forums! (Part 2) - Help me keep this post bumped, the forums are filled with SO much hatred for this event and Anet there needs to be at least one positive helpful post going for people who actually want to enjoy the event.
To get started you will want to speak to Magister Tassi who is located in central Lion's Arch in the Grand Piazza. Also known as the huge area where the what seems to be a bugged event takes place. It could get quite laggy in this area so be warned!
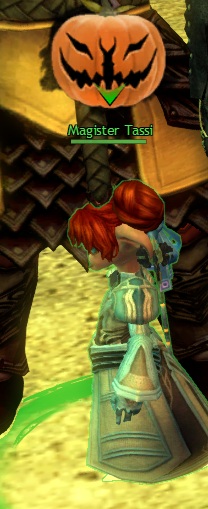

The First Clue: Serene The Ghost (Gate Hub Plaza)
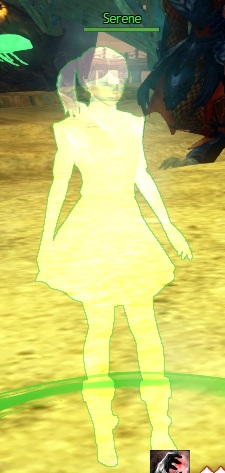
Serene is standing right next to Magister Tassi who gives you the Candy-Powered Matter Meter which is used for every part of this quest. Use the Etheric Field next to Magister Tassi to expose Serene (but chances are someone already exposed her so just look around, someone might be standing on her). Talk to her once she is visible to collect the first clue.

The Second Clue: Samson, Thorn's boyhood friend

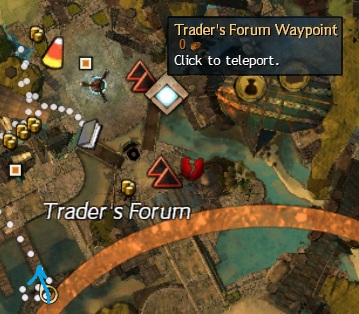
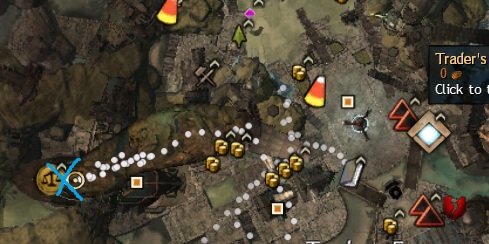
To reach this ghost you need to jump into the water off the southern dock near Trader's Forum (where I am on the map). From here swim through the sewage tunnel (Where the arrow is pointing on my map). When you reach the junction in the tunnel swim down below. Follow the tunnel until you reach the end almost directly under where the Trading Post is above. Use your Candy Matter Meter Aqueous Scan to uncover Samson. Speak to him to collect the next piece.
A picture of where Samson is on the map can be found below.
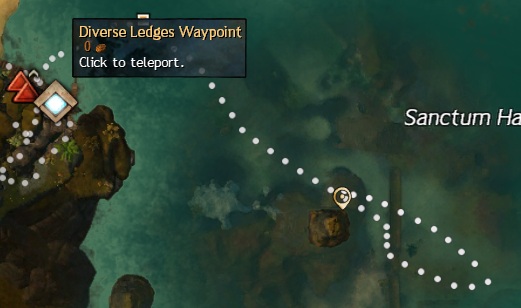
The Third Clue: Tynna (Diverse Ledges Waypoint)

For this part you need to swim out into the water of Lion's Arch just southwest of Sanctum Hallows on the map. Once you reach Tynna's location use the Etheric Scan on the Candy-Powered Matter Meter to expose Tynna. Speak to her for the third clue.
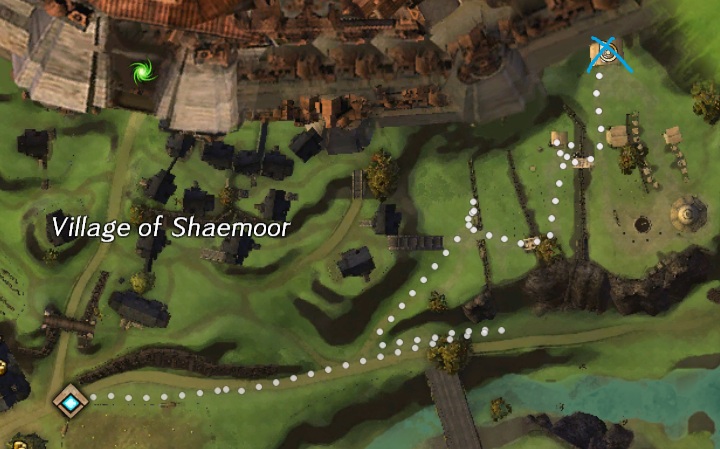
The Fourth Clue: (Queensdale) Shaemoor Waypoint

For this ghost you're going to be leaving Lion's Arch and traveling to Queensdale, just south of Divinity's Reach. The waypoint you'll want to pick is at the Village of Shaemor, Shaemoor Waypoint. From Shaemoor Waypoint you will want to run far east through the graveyard until you reach the northern most tomb at the far eastern end of the Graveyard. As seen in the picture below. Use the Gaseous Scan on the Candy-Powered Matter Meter to expose Prince Ewan Thorn and then speak to him for the clue.
If you're having a hard time viewing the picture below click to enlarge it.
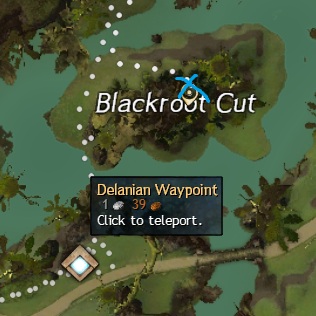
The Fifth Clue: Kessex Hills - Delanian Waypoint
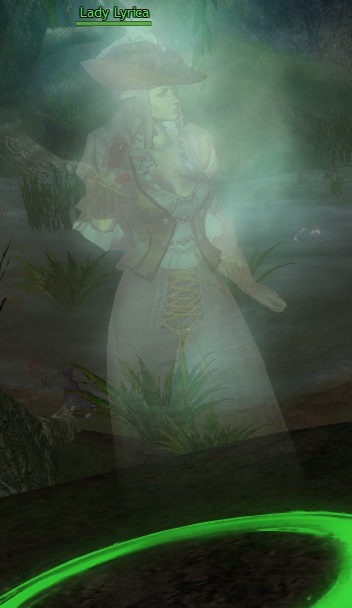
This clue is in the eastern end of Kessex Hills just north of Delanian Waypoint. It's just a short run north of the waypoint, just above the second "o" in Blackroot Cut. A picture of the location can be found below. To uncover the ghost here you will want to use the Candy-Powered Matter Meter: Corporeal Scan to uncover Lady Lyrica. Speak to her to receive the fifth clue.
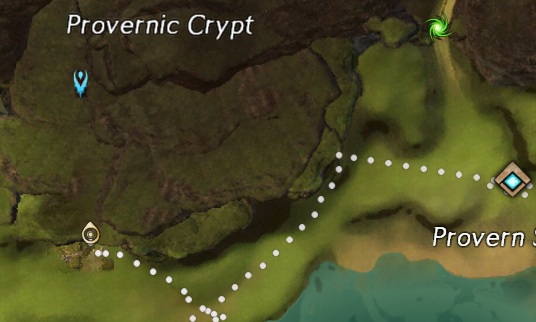
The Sixth Clue: Gendarran Fields (Provern Shore Waypoint)
For this clue you need to port to Gendarran Fields, the Provern Shore Waypoint and head west from here. You'll find an entrance to the Provernic Crypt just south of the "Pr" in the word Provernic, I have a picture of it on my map below. Once inside the Crypt follow it all the way back until you reach the Heavy Door. Be careful of all the traps and dangerous things throughout this crypt. If you're not careful you can quickly die from the things in this cave.
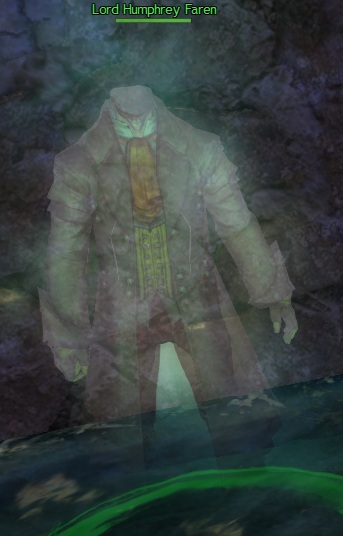
This door is locked but in order to open it you need to put Boulders on the Pressure Plates to spawn a Champion Spider, kill her and then the door will open. Lord Humphrey Fallen is who you need to speak to for the clue, hug the right wall when you enter and he spawns around the corner. He can also spawn in other locations in the room so just watch where the train of people are going to find him. Also there is a Grand Chest inside this room that has loot similar to what the World Dragons have. Be sure to grab this!
To leave click on the Mysterious Rock which will port you back to the entrance of Provernic Crypt.
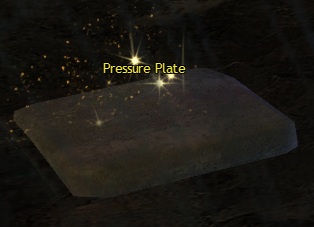
The Pressure Plate Puzzle:
Alright so there are a few different Boulders around this cave. Grab anyone that you come across because you will need it for the Pressure Plate if the door is not already open. The Pressure Plates are little plates on the ground as seen in the picture below. They can be found in a "Hidden", I use that word loosely, part of the cave off the southwestern end of the large room leading to the door which leads to Lord Humphrey. It may sound confusing at first but once you find the area leading to the Pressure Plates room it will be a cake walk from there.
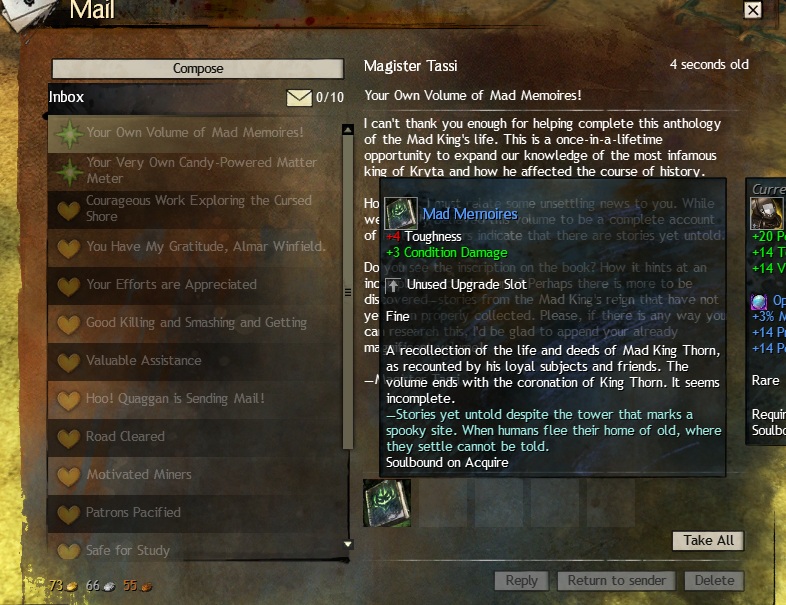
After you collect all six of the clues return to Magister Tassi and turn them all into her. She will then mail you the completed book which can be finished via the next parts of the Halloween Event which are going to be added in as time goes on (a few days between each as far as I know). Below is a picture of the end result you will get from completing this scavenger hunt. Click on the picture to enlarge it.
A Quick Run down of all 6 of the next clues
Clue 7 - Gendarran Fields (Ascalon Settlement Waypoint)
Clue 8 - Harathi Hinterlands (Demetra Waypoint)
Clue 9 - Bloodtide Coast (Laughing Gull Waypoint)
Clue 10 - Harathi Hinterlands (Seraph's Landing Waypoint)
Clue 11 - Harathi Hinterlands (Arca Waypoint)
Clue 12 - Sparkfly Glen (Fort Cadence Waypoint)
Clue 7: Gendarran Fields - Ascalon Settlement Waypoint
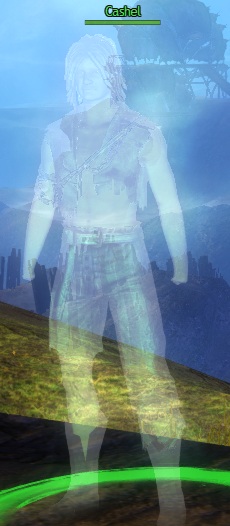
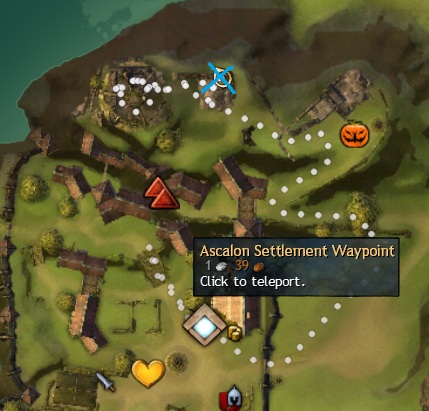
To uncover the ghost for clue 7 you will need to use the Corporeal Field Scan via your Candy-Powered Matter Meter to uncover a Suspicious Location (much like all previous ghosts for Part 1). Inspecting the Suspicious Location will trigger an extremely easy event, "Drive Back The Hands of the Accursed Thieves". Simply smash the hands that come out of the ground to complete it. After you finish speak with Cashel, the friendly ghost, to get your seventh clue.
Below is a picture of where you'll want to use the meter incase you're even the slightest bit confused.
Clue 8: Harathi Hinterlands - Demetra Waypoint
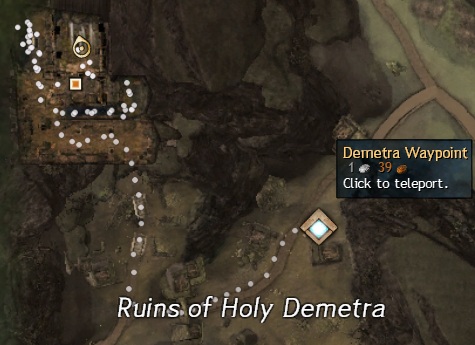
For this clue you will need to go to the zone just north of Gendarran Fields, Harathi Hinterlands. Here select the Demetra Waypoint and head northwest into the ghostly tombs by the Martyr's Tomb PoI. In the large room with the Statue of Dwayna is where you'll want to be for this clue. If you inspect the statue you will learn that you need to /kneel before it. Do that and then whip out that Candy-Powered Matter Meter and use your Etheric Scan to uncover the ghost for the next clue.
Click on the map picture above if you're having trouble viewing it.
(I recommend you get the other Harathi Hinterlands clues NOW that way you don't waste extra money with ports. You can get the clues out of order, don't worry.)
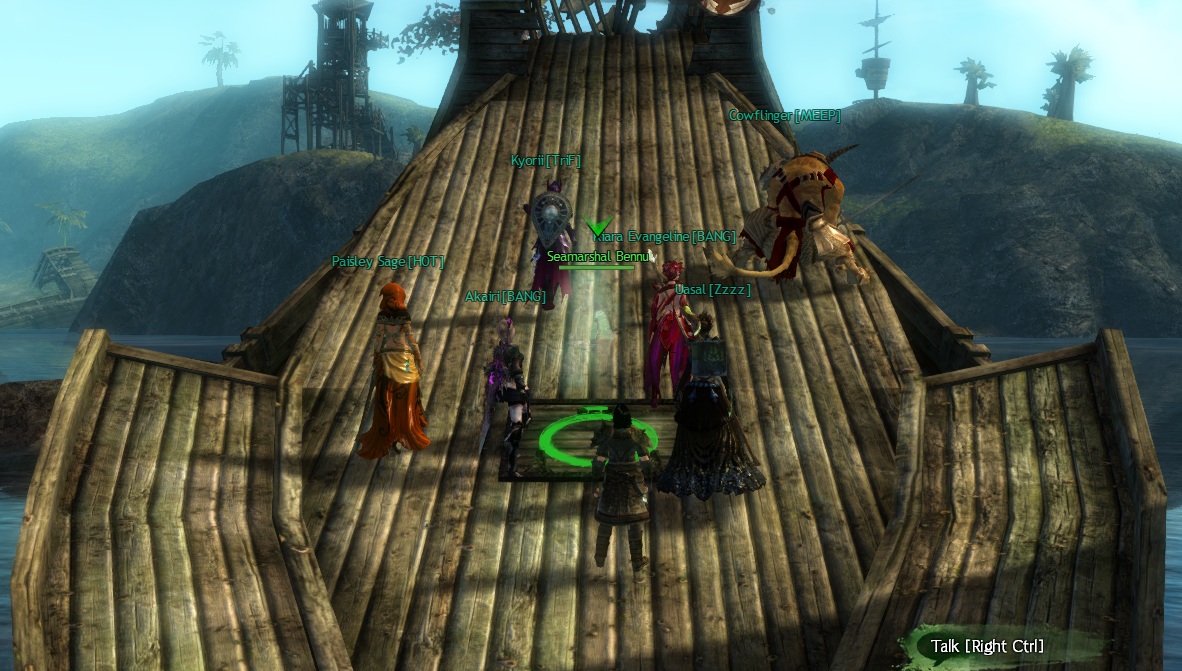
Clue 9: Bloodtide Coast - Sorrowful Waypoint
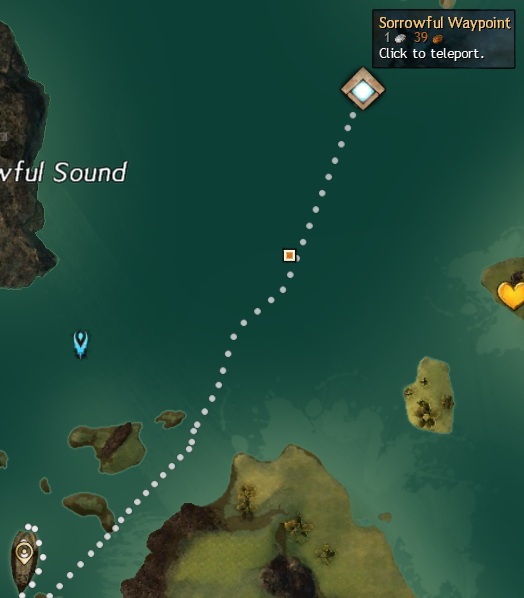
From Sorrowful Waypoint you'll want to head southwest to the only wooden ship on your map that is out in the ocean. Ontop of the wooden sunken boat in the ocean you will want to want to use the Aqueous Scan. Inspect the Suspicious Location after you use the scan and a haunted door will spawn as well as start an event to kill a bunch of Candy Corn monsters that flood out of it. After you finish this event speak with Seamarshal Bennu to complete this task and collect the ninth clue.
If you're having trouble viewing my picture above click on it to enlarge it. Same goes for the picture right below this sentence.
Clue 10: Harathi Hinterlands - Seraph's Landing Waypoint
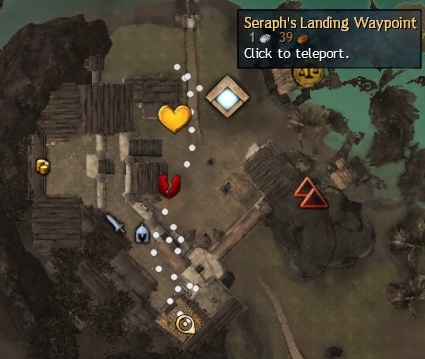
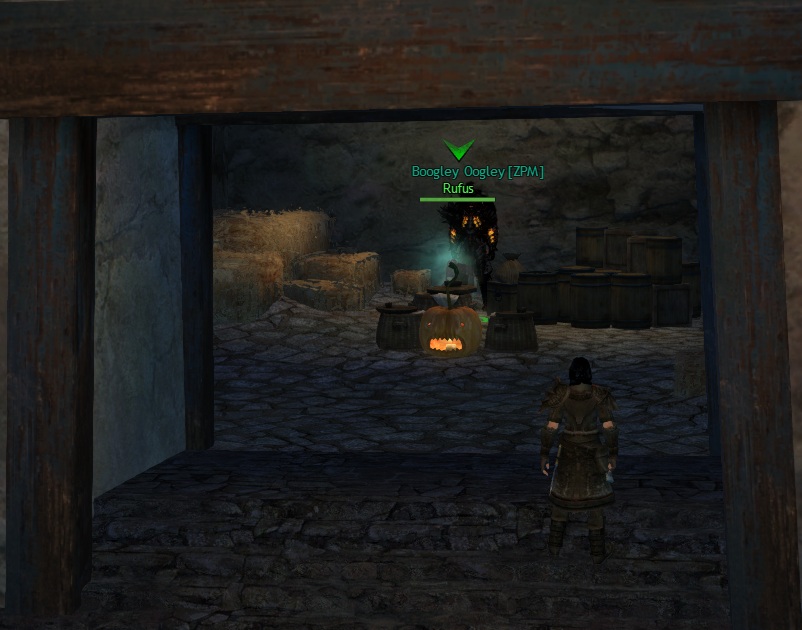
This is probably the easiest of all the clues in part 2 to get. What you need to do is port to Seraph's Landing Waypoint and head to the southern part of town. Go up the stairs and into the southern most building where you'll find a carved pumpkin and a bunch of hay bales. In this room you will want to use your Candy-Powered Matter Meter's Corporeal Field Scan. Doing this will uncover Rufus who will give you the tenth clue that you're after.
Click to enlarge the screenshot below to get a good look of the room with Rufus.
Clue 11: Harathi Highlands - Seraph's Landing WP or Bridgewatch Camp Waypoint
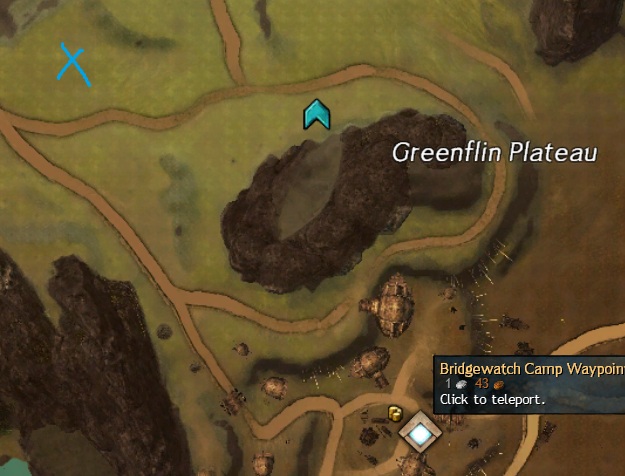
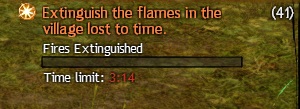
For this clue you can port to either of the two aforementioned Waypoints. Whichever one you choose you'll want to head to the blue X on my map which is to the east of Arca Lake, just southeast of the bridge going over the river. Use your Candy-Powered Matter Meter here to start the "Extinguish the flames in the village lost to time" event. For this event you need to kill nearby enemies to get a Water Bucket. The Aqueous Scan on the Candy-Powered Matter Meter are rumored to work as well although I did not try them.
After you extinguish all of the flames Portia the ghost will spawn. Talk to her to get the Eleventh Clue.
Note: The Suspicious Location will spawn on the bridge nearby. Or is at least rumored to (I was standing at the ghost's location when the event started so I can't say for certain.
Clue 12: Sparkfly Glen - Fort Cadence Waypoint
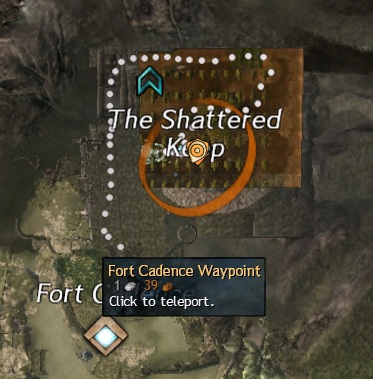
For this one you will need to port to the Fort Cadence Waypoint in northern Sparkfly Glen. Once here head down into the Shattered Keep to the bottom floor of the crypt. Here you will need to use your Etheric Scan to reveal a Suspicious Location nearby the ghostly treasure. Inspect it to spawn Wynn nearby, a ghost whom upon speaking to him will give you the twelth and final clue that you need.