
Dragon Quest VIII: Journey of the Cursed King Walkthrough Chapter 4
This guide is designed to point you in the right direction but not hold your hand throughout the entire game. Dungeons and Towns you'll be exploring mostly on your own, with my maps pointing out any treasures that are hidden in a dungeon as well as how to solve any puzzles you'll encounter that could possibly get you stuck.
Additionally depending on your own personal preference, my maps/pictures are designed to work as a guide of their own. If you'd like to skip reading text entirely while you play, you can just look at the maps for the treasure chest locations and where you need to go to advance the story forward.
Skill Point Tips: Jessica Staff (Magic Barrier 31 Points); Whip (Attack Power Bonuses); Yangus Humanity (Golden Oldies 100 Points); Scythe (Attack Power Bonuses); Hero Courage (Holy Protection 28 Points; Omniheal 82 Points); Sword or Boomerang and Angelo Bow (Shining Shot 88 Points); Charisma (Squelch 3 Points; Divine Intervention 27 Points) and Staff
Alchemy Tips: Staff of Antimagic, Iron Cuirass, Fur Poncho, White Shield, Fur Hood, Mercury's Bandana, Silver Cuirass, Cheeses & Other Consumables
Swordsman's Labyrinth
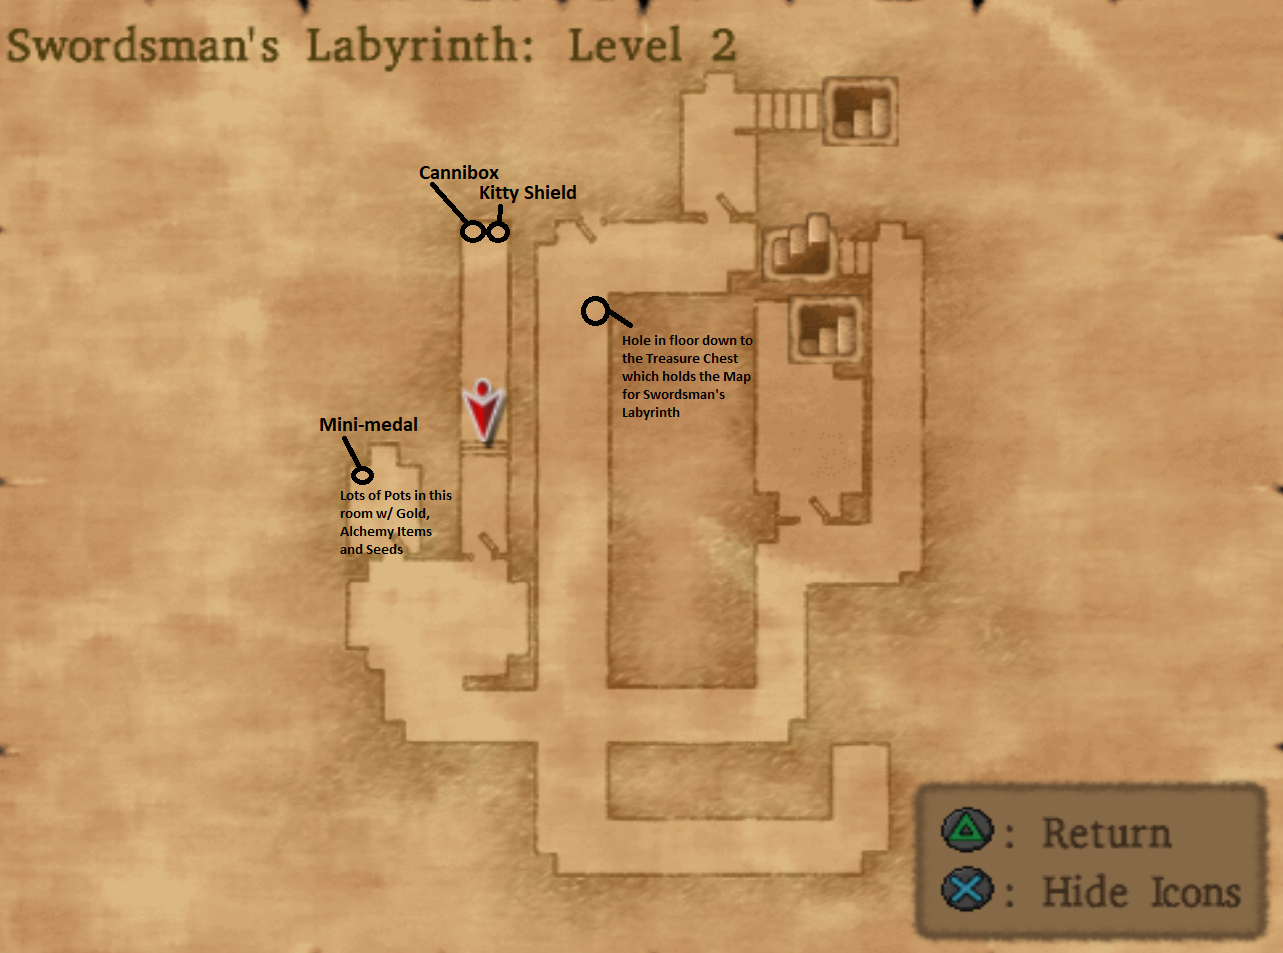
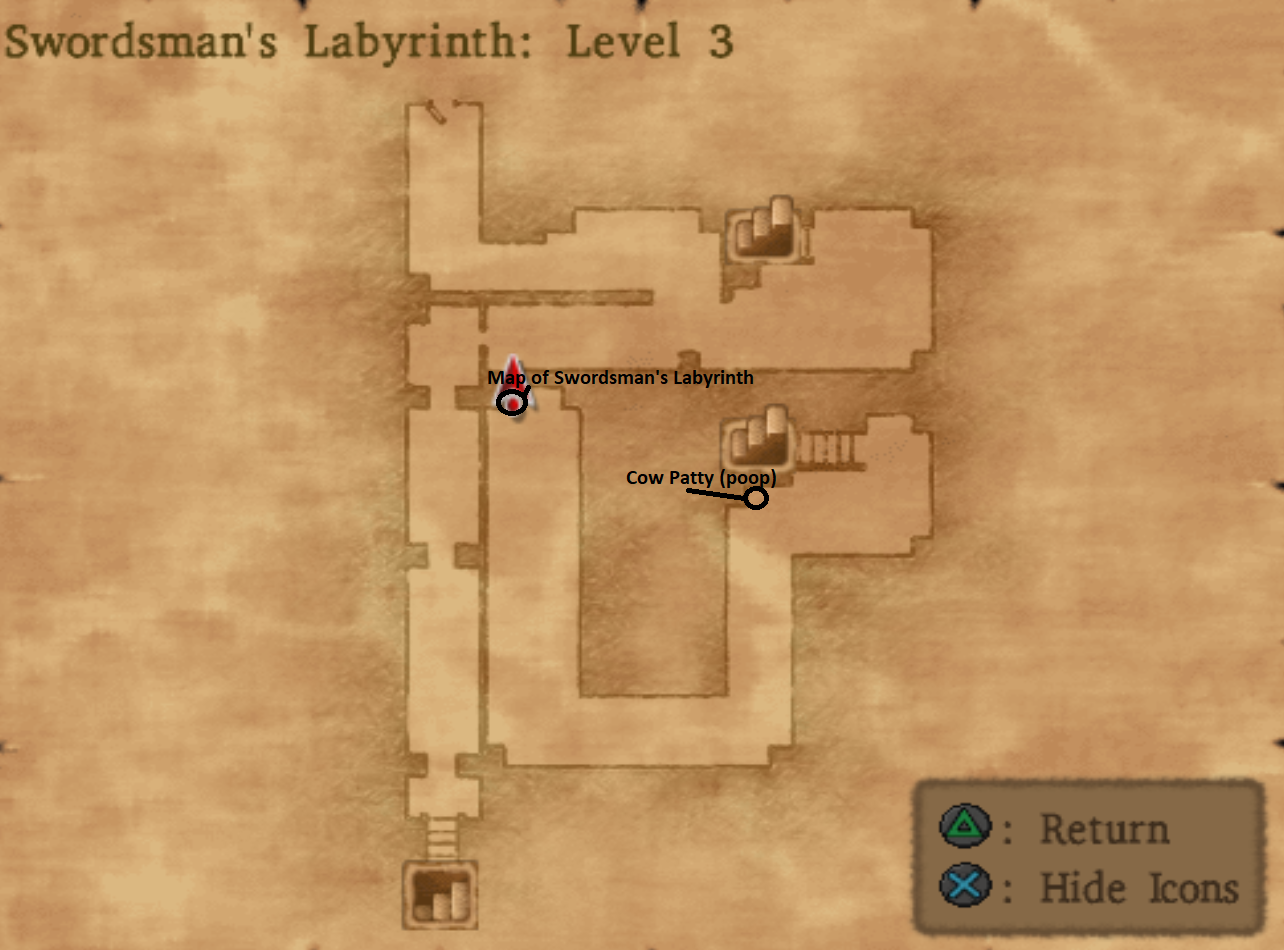
The Dungeon Map for Swordman's Labyrinth is found on the third floor of the dungeon. The fastest way to get here is to travel down to the second floor of the dungeon and try to open a door in front of a small pit in the ground. The door isn't actually a door, it's a spring board which knocks you down into the pit. The treasure chest right in front of you is the Dungeon Map.
Now you can explore the whole dungeon and collect all of the goodies. When you're ready to progress to floor 4 take the southern exit on level 3. Floor 4 has two puzzles which I will explain below.
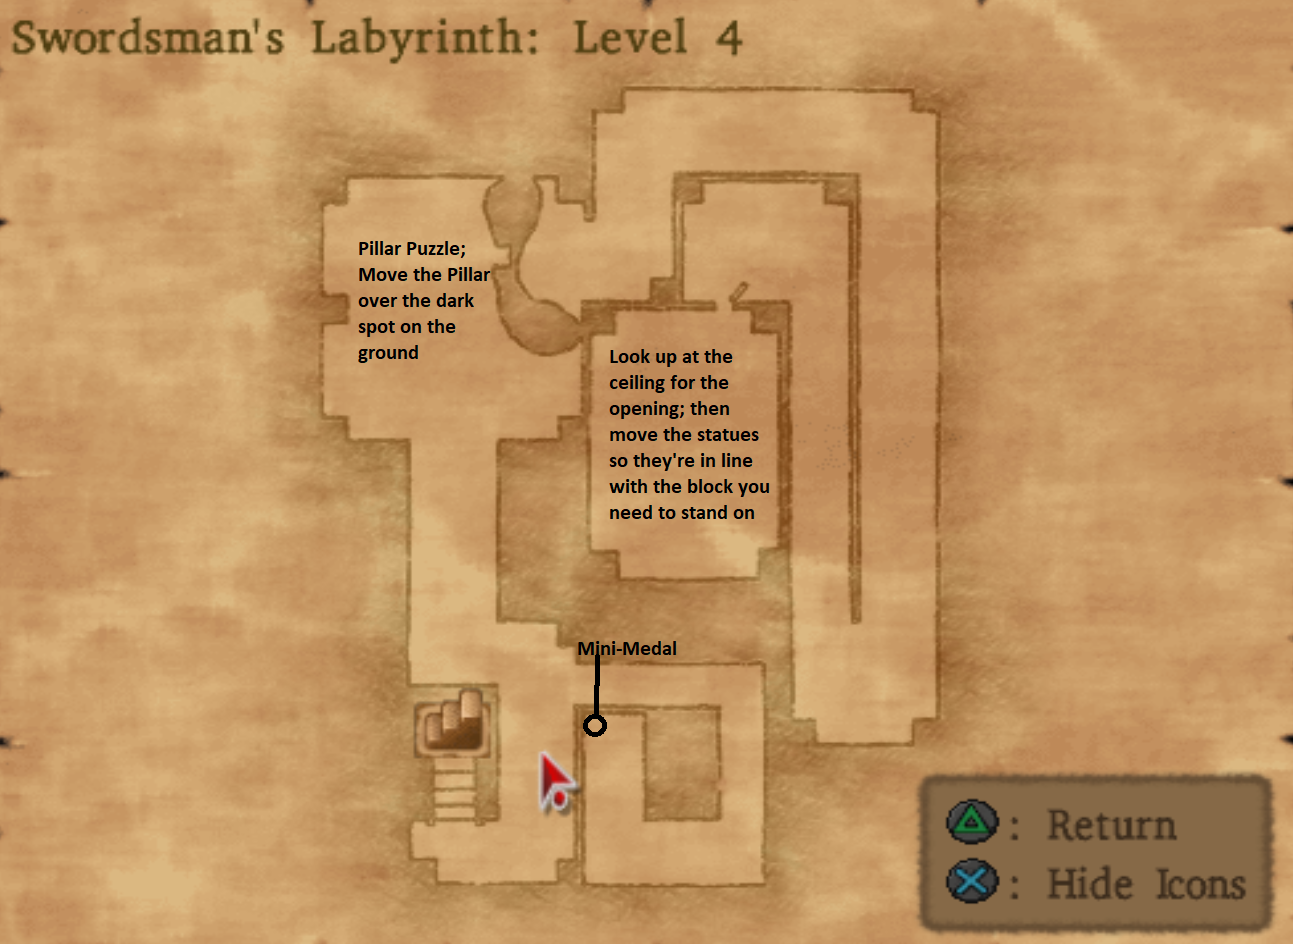
I'd be surprised if you can screw up this first puzzle. In order to lower the bridge in the northwestern portion of level 4 you need to move the stone pillar ontop of the darker area on the ground. Press X or whatever the interactive key is for you on your device to grab a hold of the pillar and push it. Easy peasy.
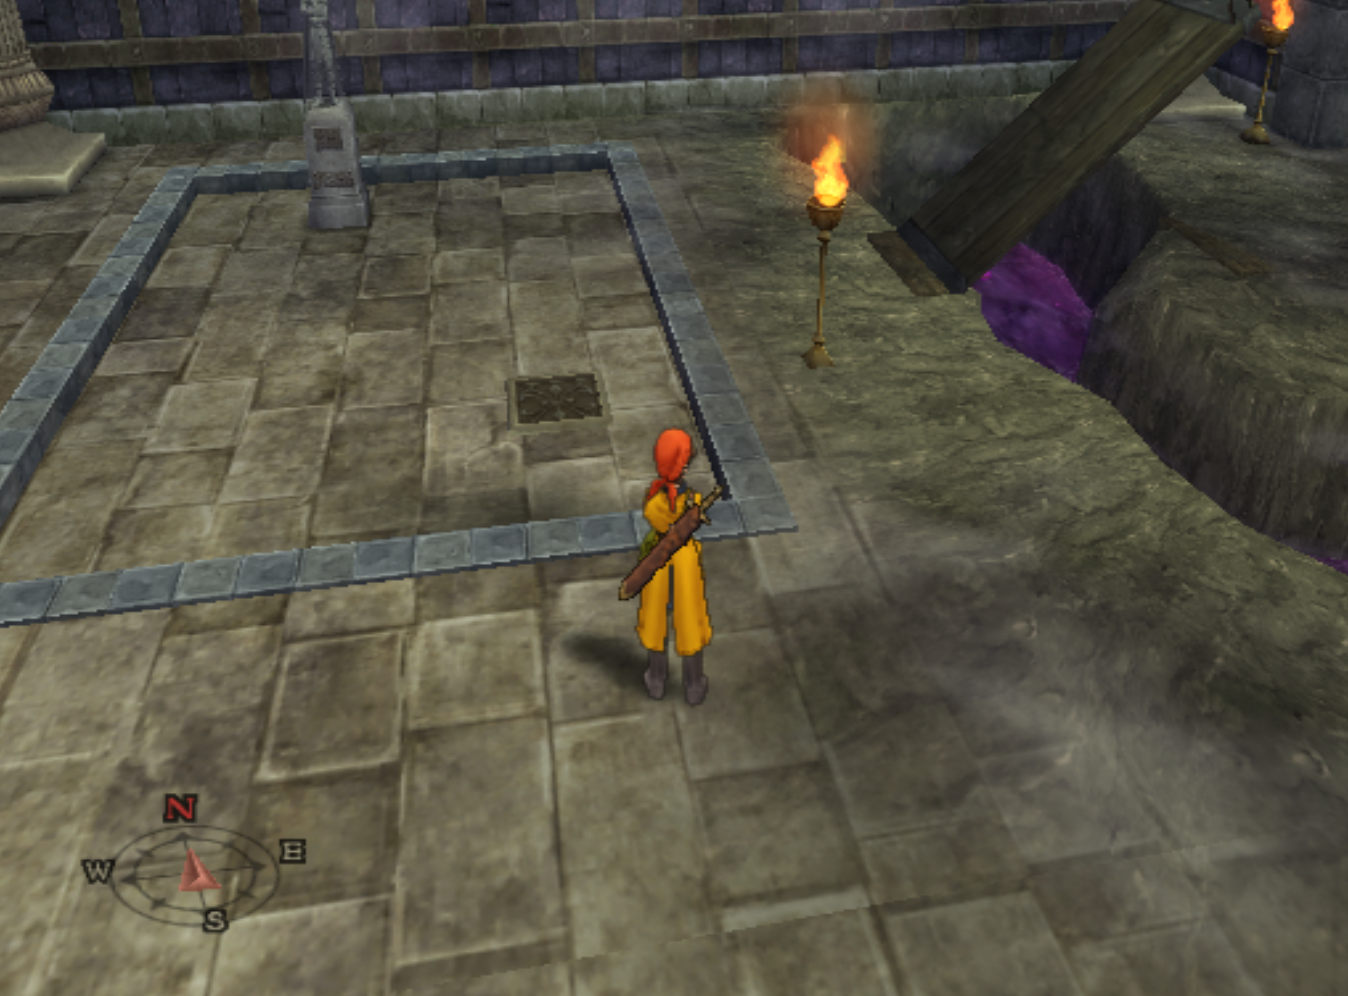
For this last puzzle what you have to do is move the two statues so that they're lined up with the block you plan to step on. My screenshot below solves the puzzle for you, move your statues where mine are and step on the block marked with a blue X. If you're still confused here is how the puzzle actually works...
The stone plaque in the back of the room tells you to look up to see the direction to go. You're supposed to go into the center of the room, into first person view and look up - you'll see a hole in the ceiling when you do. Then you have to line the stone statues up with one another and whichever tile they're lined up with launches your character up. If you line them up wrong you smack into the ceiling and take damage.

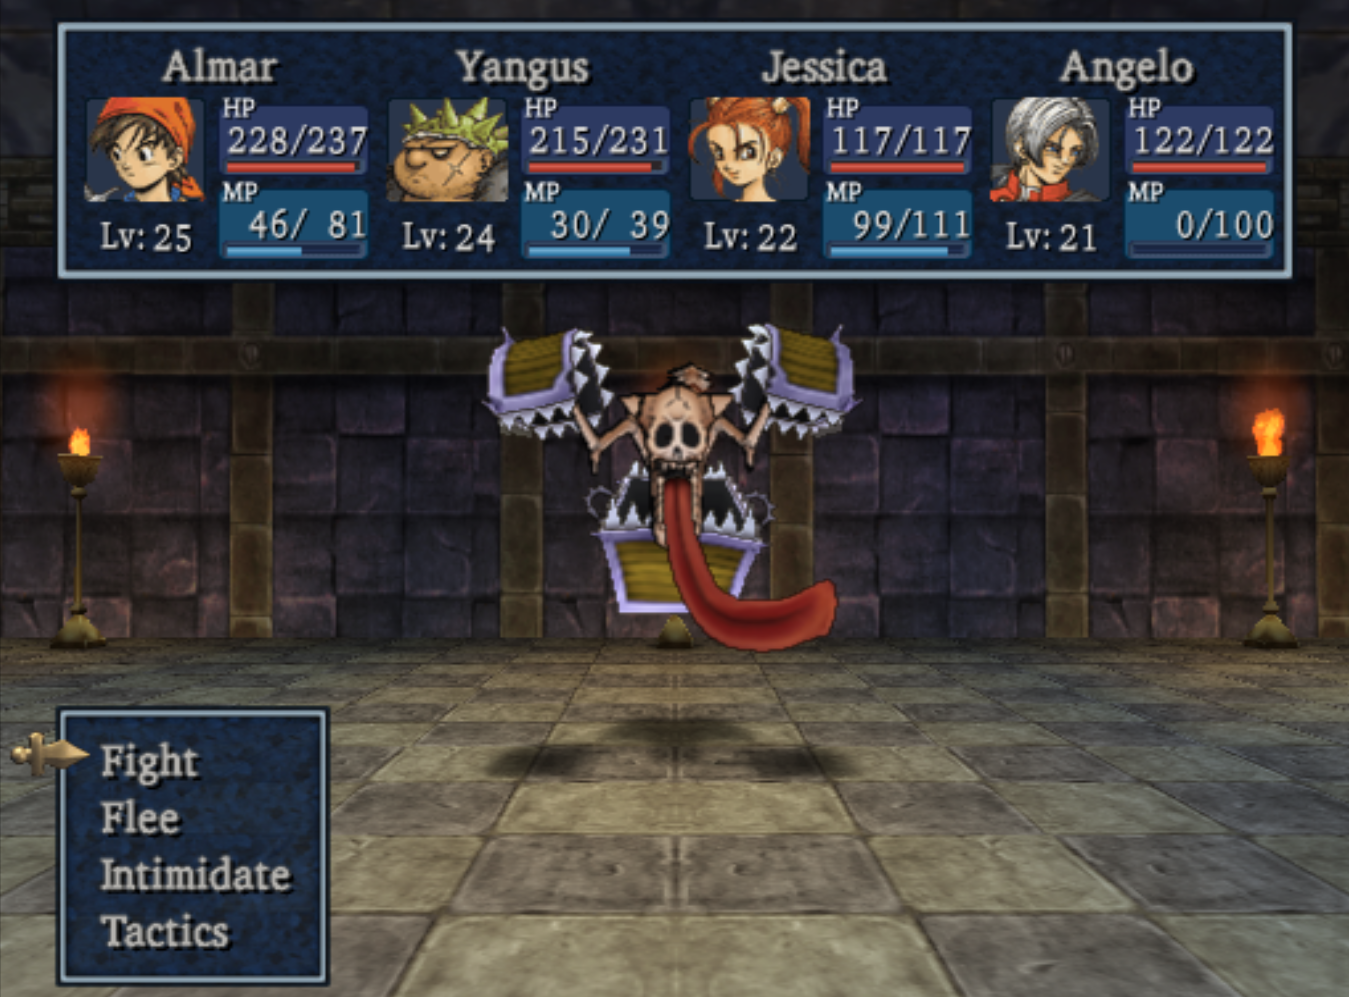
As you could probably already imagine, you'll get launched back to the first floor in the same part of the room that the chest with the Venus Tear is in. Heal up and prepare yourself before you interact with the chest, doing so triggers this dungeon's boss fight.
This boss has three abilities which you'll want to keep an eye out for. The first is he is able to put your entire party asleep with a single attack. Only moderately annoying compared to the others. He can also hit your entire team with Crackle, an ice spell which deals about 30 damage. Last but not least his most devastating ability is "Desperate Attack" this can deal close to 100 damage to someone in your party which means it has a good chance of taking out one of your weaker members in a single blow.
Once the boss is defeated you'll be rewarded with the Venus Tear that you came here for. Use Evac on whichever character you want and return to Reds place.
Once you give the Venus Tear back to Red and give her the Venus Tear in exchange for Medea back. With Medea back in your hands it's time to return to Pickham again and this time speak to Brains. If you forget where Brains' house is head back to Chapter 3 of my guide and use the map.
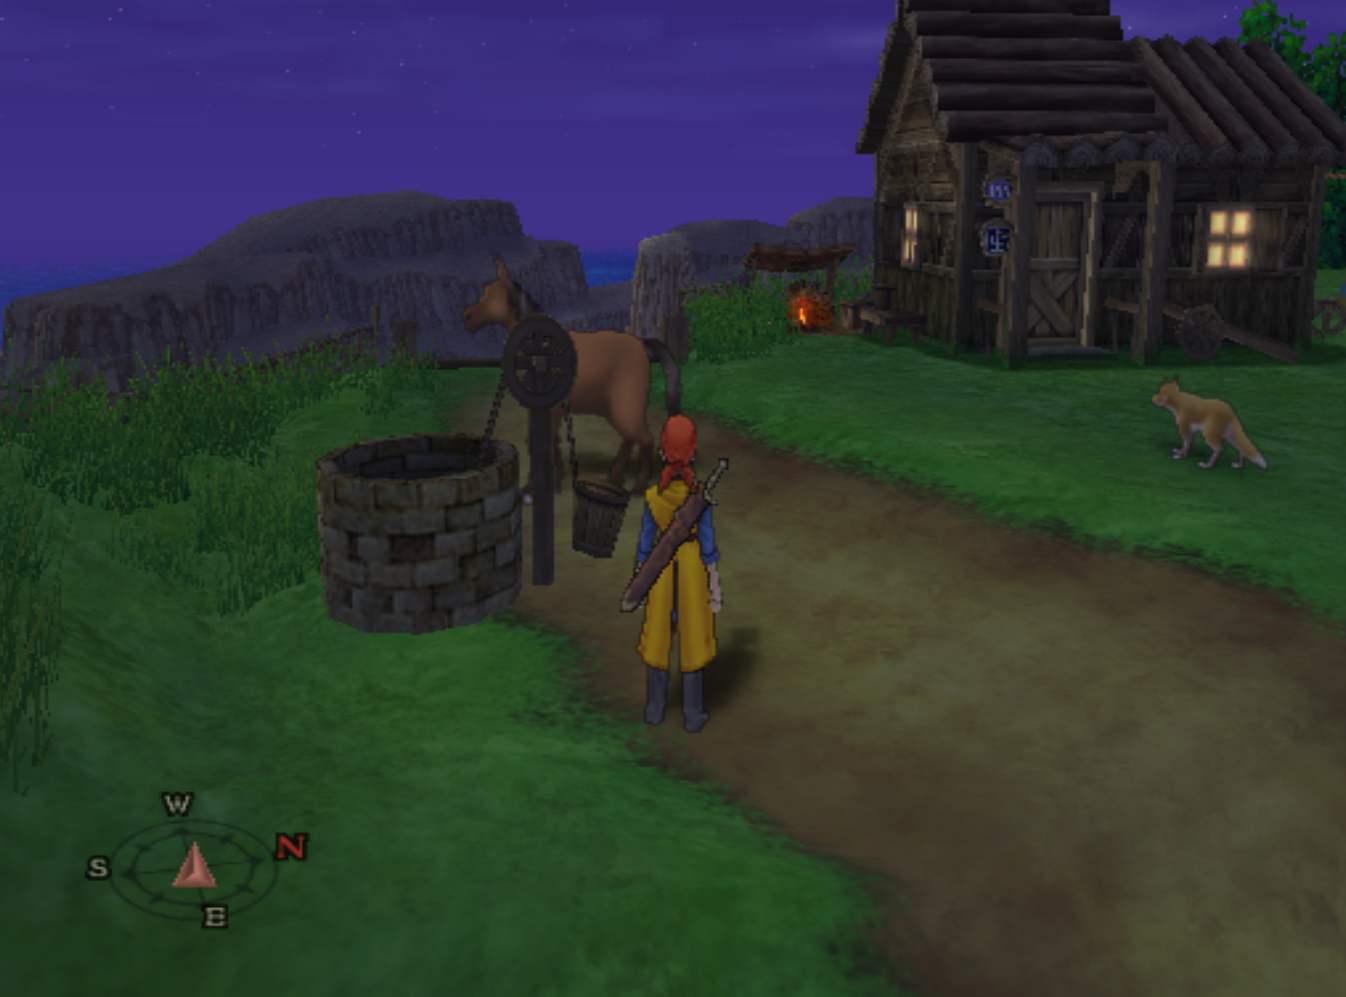
Brains tells you to return to Port Prospect and travel west from there. Use Zoom to quickly get back to Port Prospect and open up your map. You'll see a path west following the mountain ranges, head in that direction. Eventually you'll find yourself at a hut on the top of a hill overlooking a barren wasteland, shown in my screenshot below.
Inside of this hut you'll find an Inn as well as a Church where you can save or do whatever else you need to do. You'll also find a pot inside this building for you to smash for a Mini-medal. Next to this building you'll find a well which you can go down - this is also shown in my screenshot below.
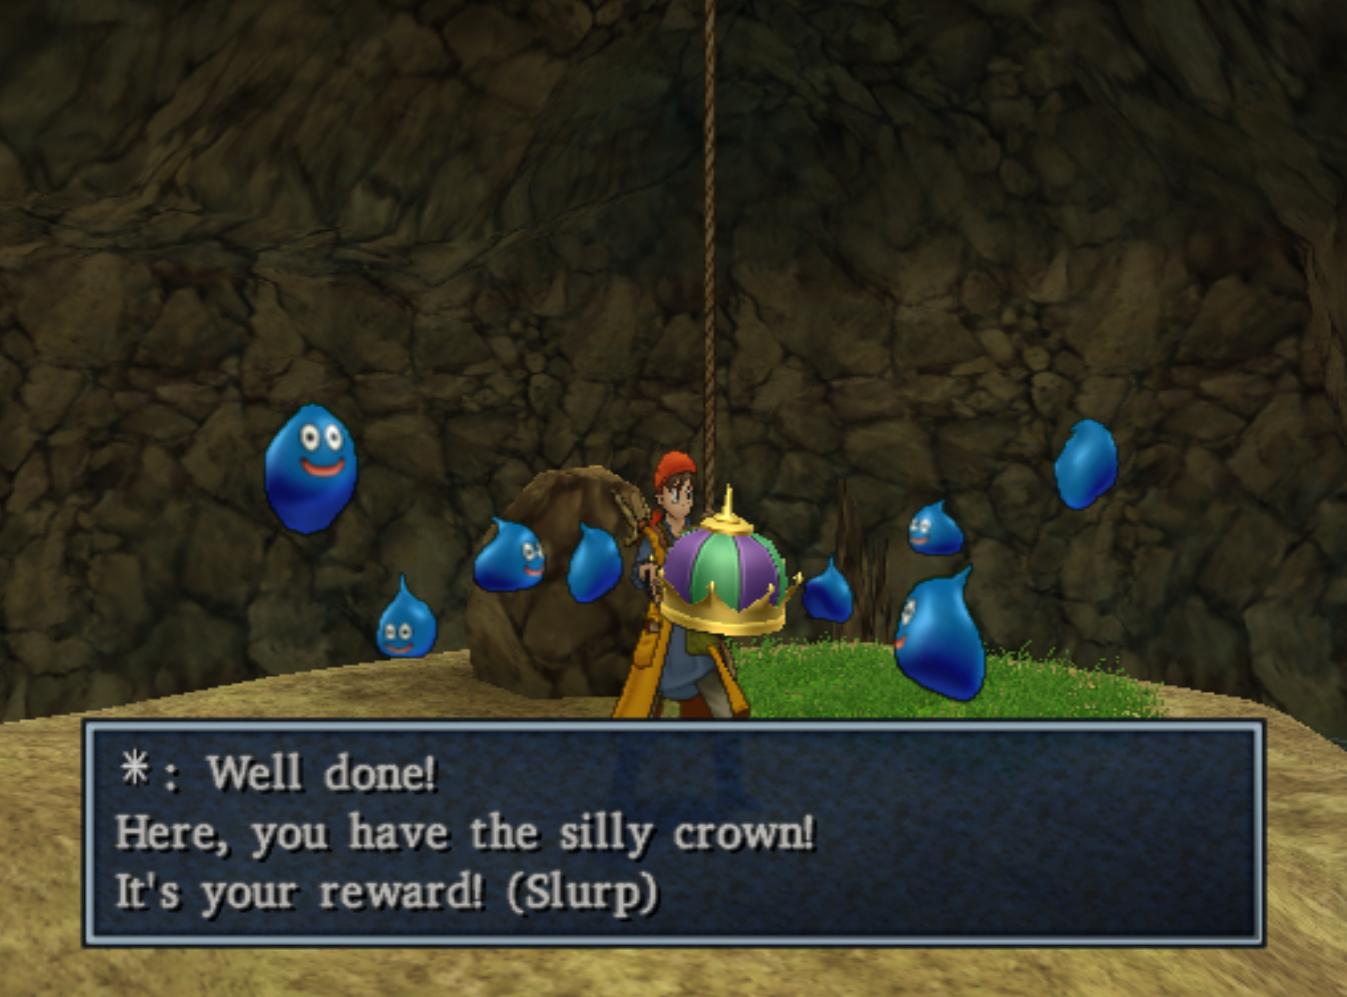
At the bottom of this well you'll notice that it looks nothing like the previous wells that we have been down, considering the floor is all blue and there's a crown right next to the rope. Inspect the crown to trigger a scene. After the scene talk to all the slimes you freed, one of them will teach you an Alchemy Recipe. It's one of the slimes next to the rock.
From the Hilltop Hut travel west to the desert wasteland. The ship that Brains told you about is found in this area, it's covered in sand and when you approach it a scene will trigger. On the opposite side of the barren wasteland you'll find a cave along the northern mountain side which takes you north to Trodain castle. If you continue traveling west along the coast line you'll eventually come to an enemy, Potty Dragon, which roams around on the world map. Defeating him will reward you with silver monster coin. Be warned, this enemy is about twice as hard as the boss we just faught in Swordsman's Labyrinth.
Further west of the Potty Dragon enemy you'll find a treasure chest with a Seed of Magic.
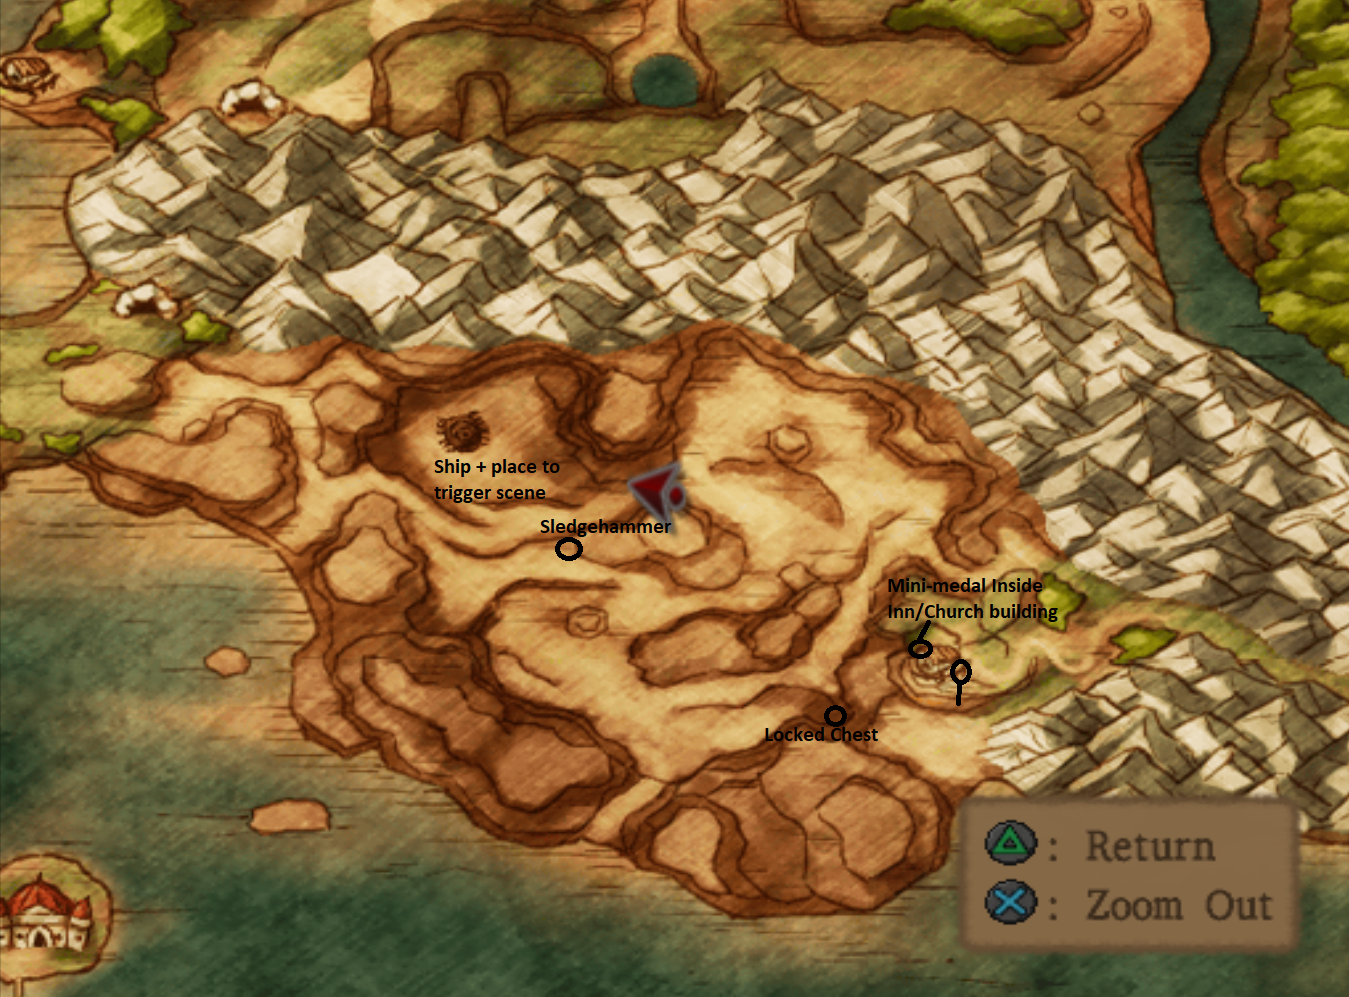
When you're ready to continue to Trodain Castle head north through the caves to the area around Trodain. When you first come through the caves you'll see a building to your west, that's a Church/Inn combo. If you need a break at any point stop over there, otherwise I recommend grabbing all the goodies in the area before continuing all the way north to Trodain Castle.
There is one enemy that you will encounter in the Trodain area called Dieablo that you need to be cautious around. When they attack they roll a dice from 1 to 6 and if it lands on 6 they cast a level 6 spell on your whole party. For each level of the spell it does about 10 points of damage so a level 6 spell will hit everyone in your party for 60 damage. If this wasn't enough some battles you can encounter up to 4 Dieablos!
Also just outside Trodain Castle you'll encounter a slime enemy roaming around on the world map named Slimy Smiley. Defeating it will reward you with a Copper Monster Coin and will allow you to send this monster to Morrie's Monster Arena <Add Links>, a side quest we started near the town of Pickham.
When you are ready to advance the story forward, travel north into Trodain Castle and you'll be treated to a long cutscene explaining the events that transpired just before the start of the game.

Castle Trodain Dungeon
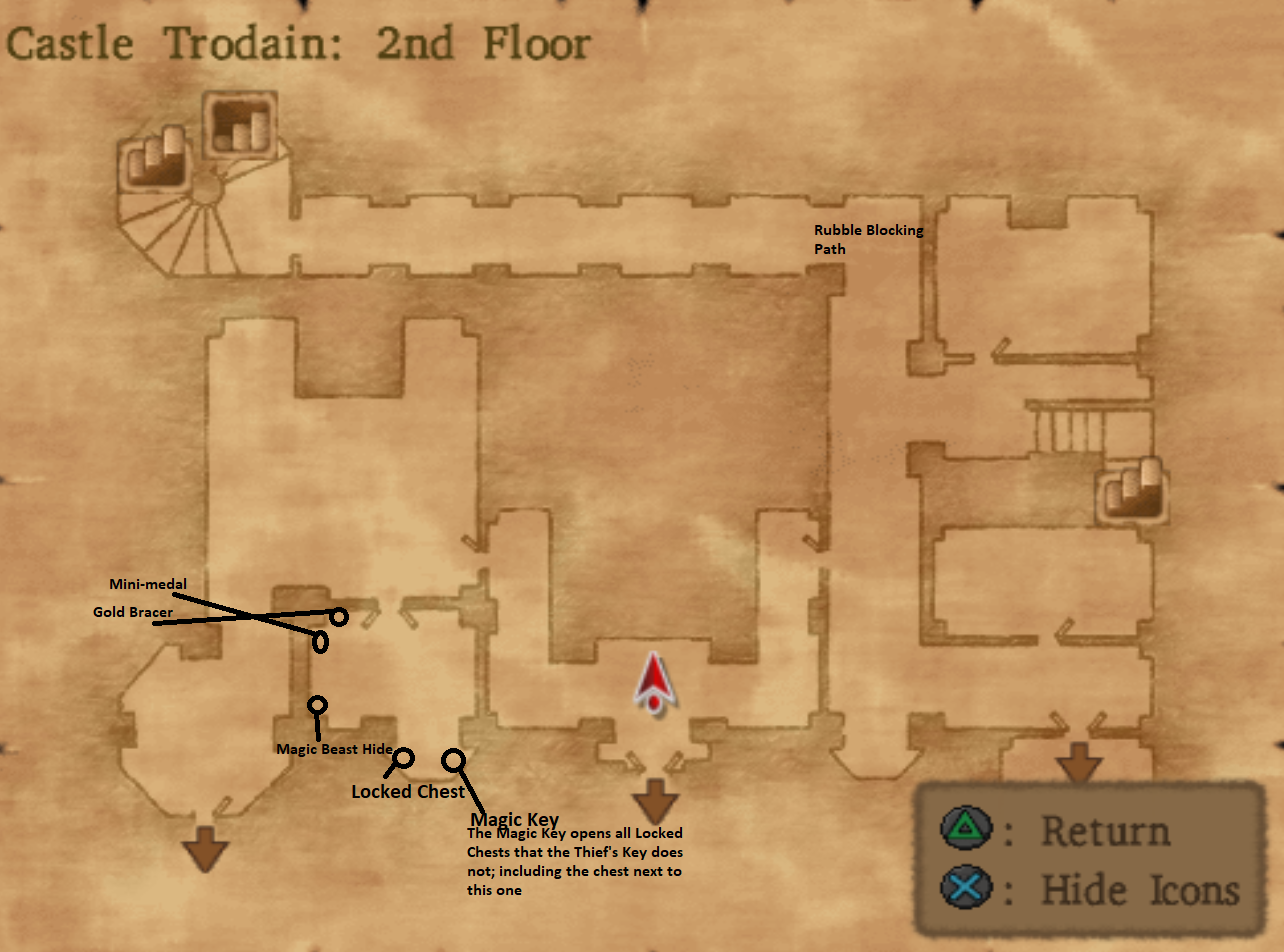
The Dungeon Map for Castle Trodain is found just outside the front entrance of the castle. Grab the map from the chest then head on inside. As always, I am going to let you explore this dungeon yourself - there is one thing that I feel is important to draw your attention to though and that's The Magic Key which you find in the western portion of the second floor.
All those locked treasure chests that we have found throughout the world up until now can be opened with this key which is why it's so important for you to get it before leaving here. From here on out, my map locations will no longer say "Locked Chest" I am going to assume that you have this key from this point forward.
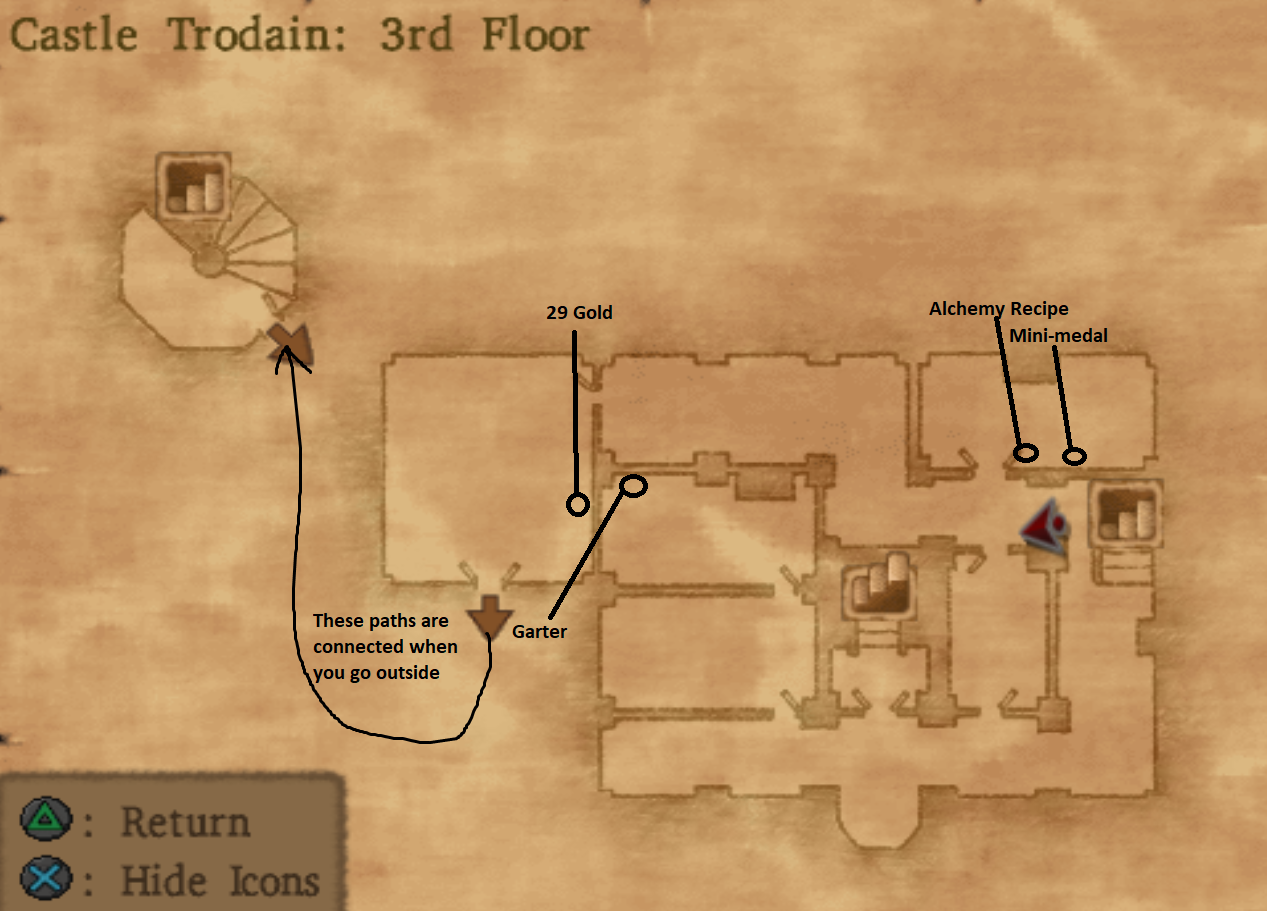
When you are ready to advance the story forward you'll want to head on over to the Castle Trodain Library. To get here you need to travel up to the third floor and take the western exit out to the balcony. Here you can enter the third floor again but in a tower instead. My map above shows you the proper path to take.
Once in the tower travel down to the first floor, this allows you to access the part of the first floor we were cut off from before. You'll want to take the southwestern exit on the first floor to the Castle Trodain library. This is our destination!

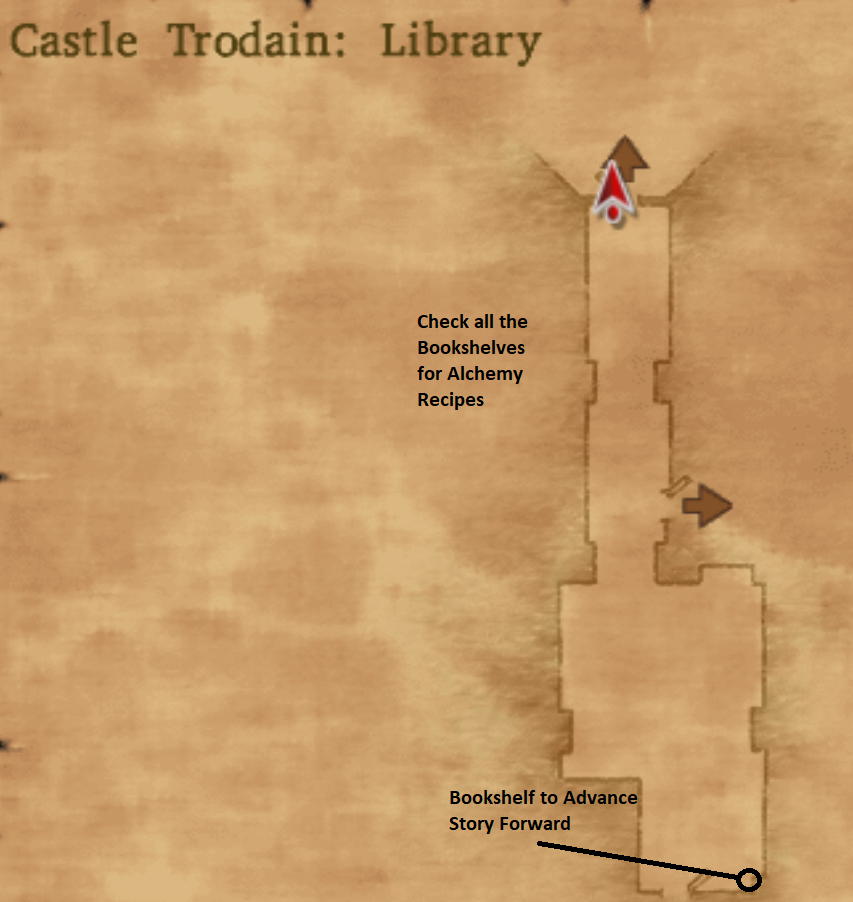
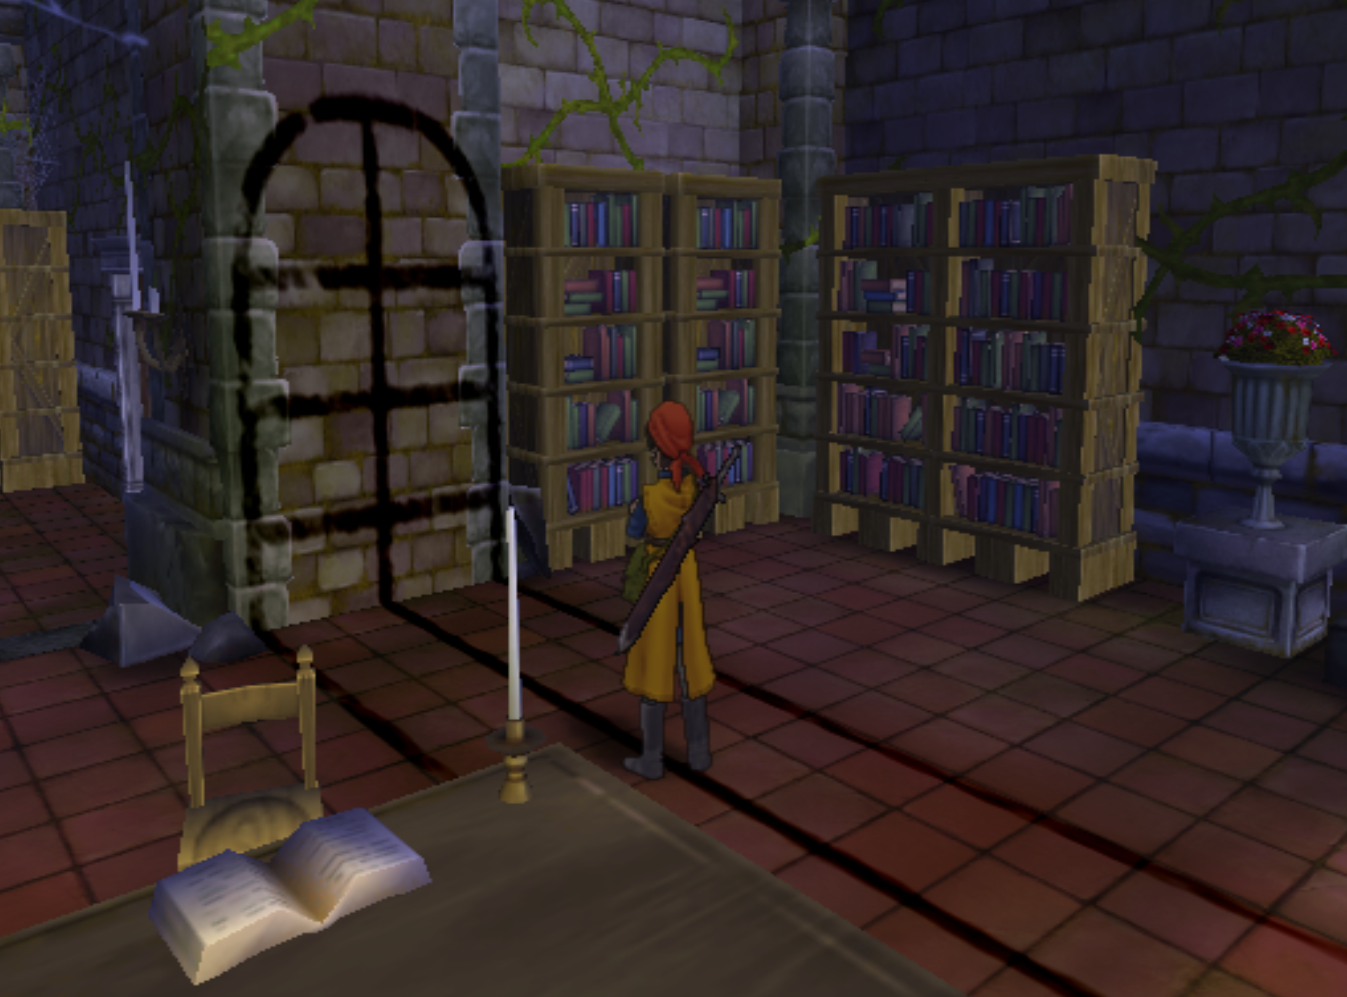
Inside the library you're going to find a buttload of bookshelves - I figure that's pretty obvious though, after all it is a library! Search all of the bookshelves for Alchemy Recipes, there's quite a few for you to find in here. When you enter the main portion of the room you'll trigger a cutscene, when you regain control of your character finish searching the bookshelves in the main room.
To advance the story forward you will want to search the bookshelf in the southeastern most portion of the room, it's a single well hidden bookshelf. Searching the bookshelf will trigger a cutscene of your party reading the book at the table until nightfall. As the moon takes the night sky a shadow is cast on the wall of the castle, revealing another Moonshadow Window.
Interact with the window to be taken again to the dimension where Ishmahri is. Talk to him to begin another cutscene during which he asks you to get him the Moonshadow Harp if you wish to get the ship you found south of Trodain Castle into the ocean.
Ishmahri gives you a hint for how to find the Moonshadow Harp, he tells you to return to the man who owes you a favor - which is the King we saved in Ascantha with Ishmahri earlier in the game. Use Zoom to travel back to Ascantha and into the castle to speak with the King.
Return to Walkthrough Chapter 3 (Ascantha, Wisher's Peak, Pickham, Morrie's Place)
Continue to Walkthrough Chapter 5 (Ascantha, Land of the Moles, Mole Hole & Side Quests)