
Dragon Quest VIII: Journey of the Cursed King Walkthrough Chapter 6
This guide is designed to point you in the right direction but not hold your hand throughout the entire game. Dungeons and Towns you'll be exploring mostly on your own, with my maps pointing out any treasures that are hidden in a dungeon as well as how to solve any puzzles you'll encounter that could possibly get you stuck.
Additionally, depending on your own personal preference, my maps/pictures are designed to work as a guide of their own. If you'd like to skip reading text entirely while you play, you can just look at the maps for the treasure chest locations and where you need to go to advance the story forward.
Skill Point Tips: Jessica Staff (Kazing 100 Points); Whip (Attack Power Bonuses); Yangus Humanity (Golden Oldies 100 Points); Scythe (Attack Power Bonuses); Hero Courage (Omniheal 82 Points); Sword or Boomerang and Angelo Bow (Shining Shot 88 Points); Charisma (Divine Intervention 27 Points) and Staff (Oomph 65 Points)
Alchemy Tips: Razor Wing Boomerang, Holy Talisman, Silver Tiara, Bandit Axe, Dancer's Mail, Dragon Mail, Dragontail Whip, Falcon Knife, Platinum Mail, Robe of Serenity, Sandstorm Spear, Zombie Slayer, Premium Mould; Cheeses & Other Consumables
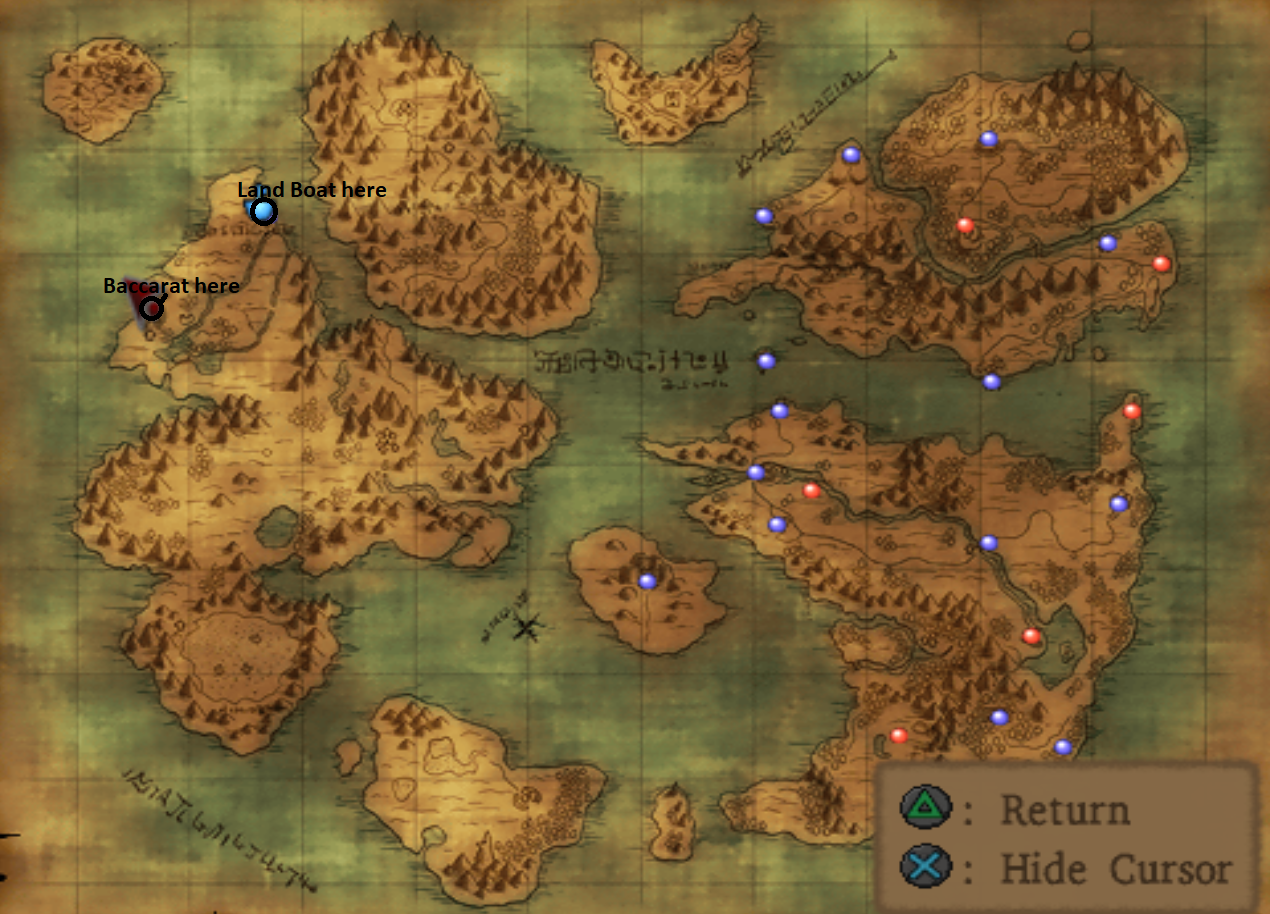
When you're ready to move the story forward you'll want to sail on over to the northern end of the western continent. If you remember when we stopped by Princess Minnie's Castle earlier in Chapter 5, someone inside there told us they saw a jester running across the ocean to the west - that was Dhoulmagus.
The area on the western continent we're going to be first exploring is Baccarat. Take your boat up to the northern most portion of the western continent and park it between the two rivers on the world map right next to the church. If you need a picture for directions use mine below.
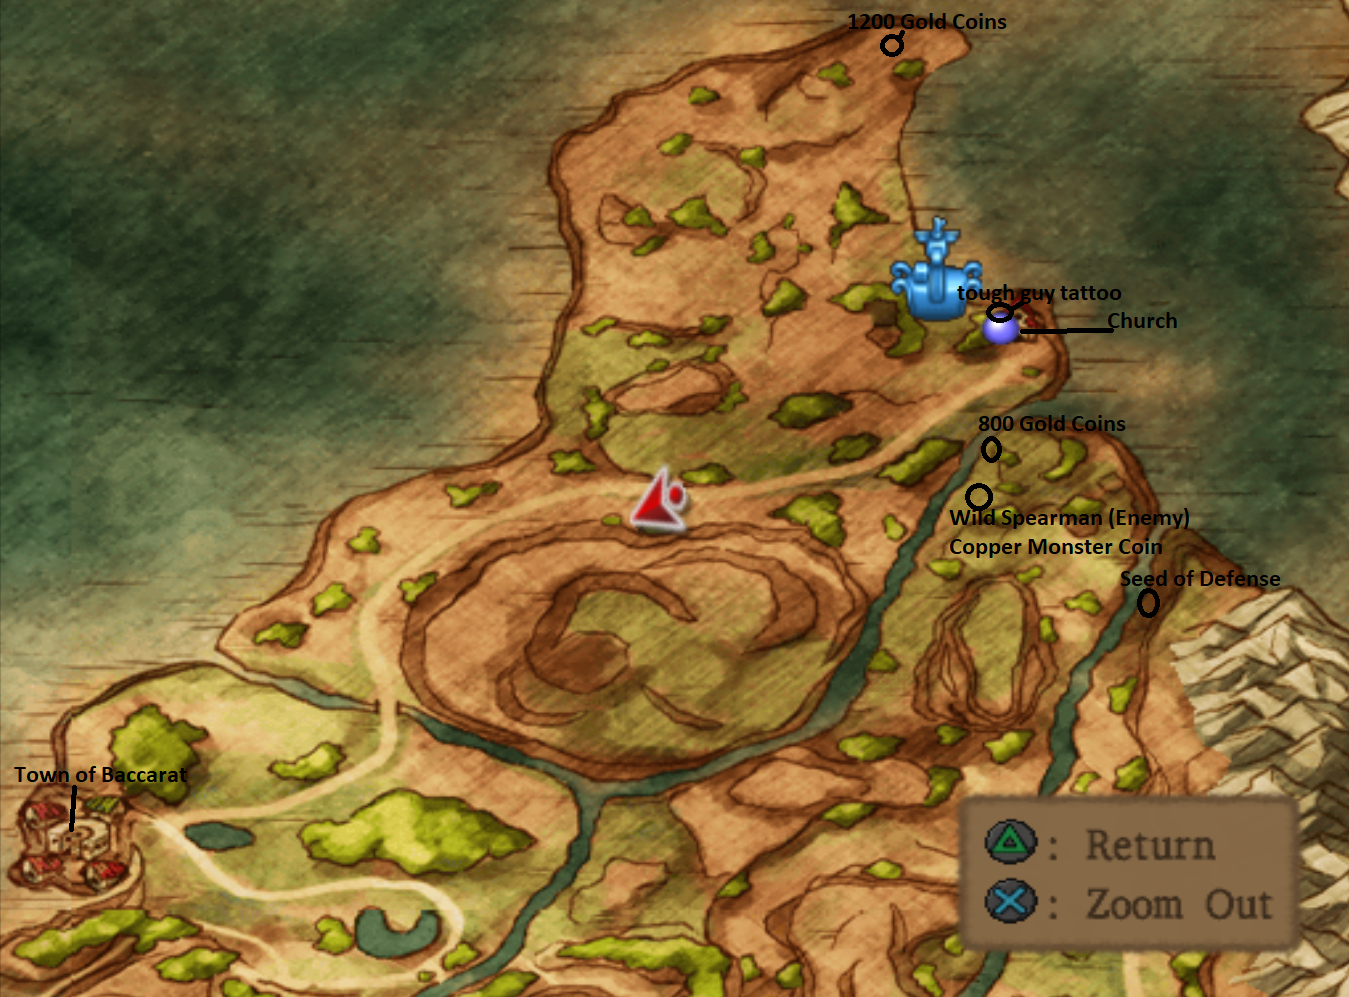
Inside the church you'll find a mini medal in a closet. Just out back of the church you'll find a treasure chest with a tough guy tattoo inside. I'd ignore the chest on the other side of the river for right now, we can get that later. Grab the one at the northern most portion of the peninsula then head south to the town of Baccarat.
Town of Baccarat
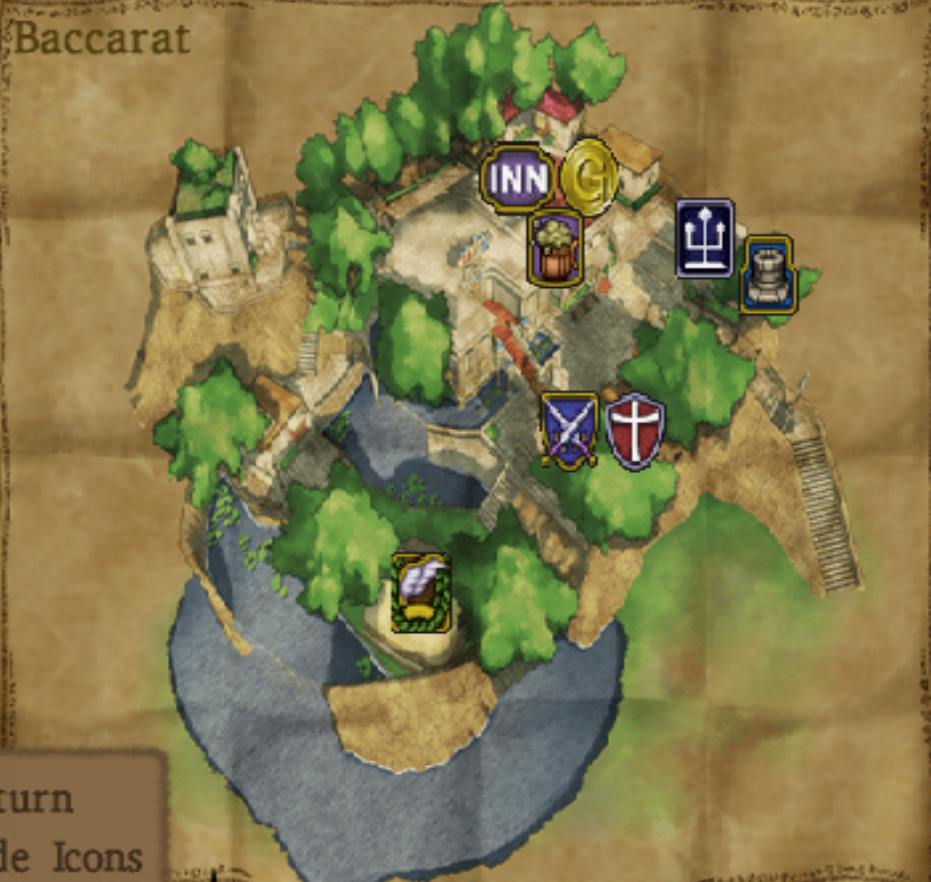
Baccarat is a big town much like Pickham and also much like Pickham there's a casino here too! I recommend you don't upgrade your weapons and armor in this town, if you want to upgrade your gear Zoom back to Neos because they sell much better stuff over there. Otherwise save your gold.
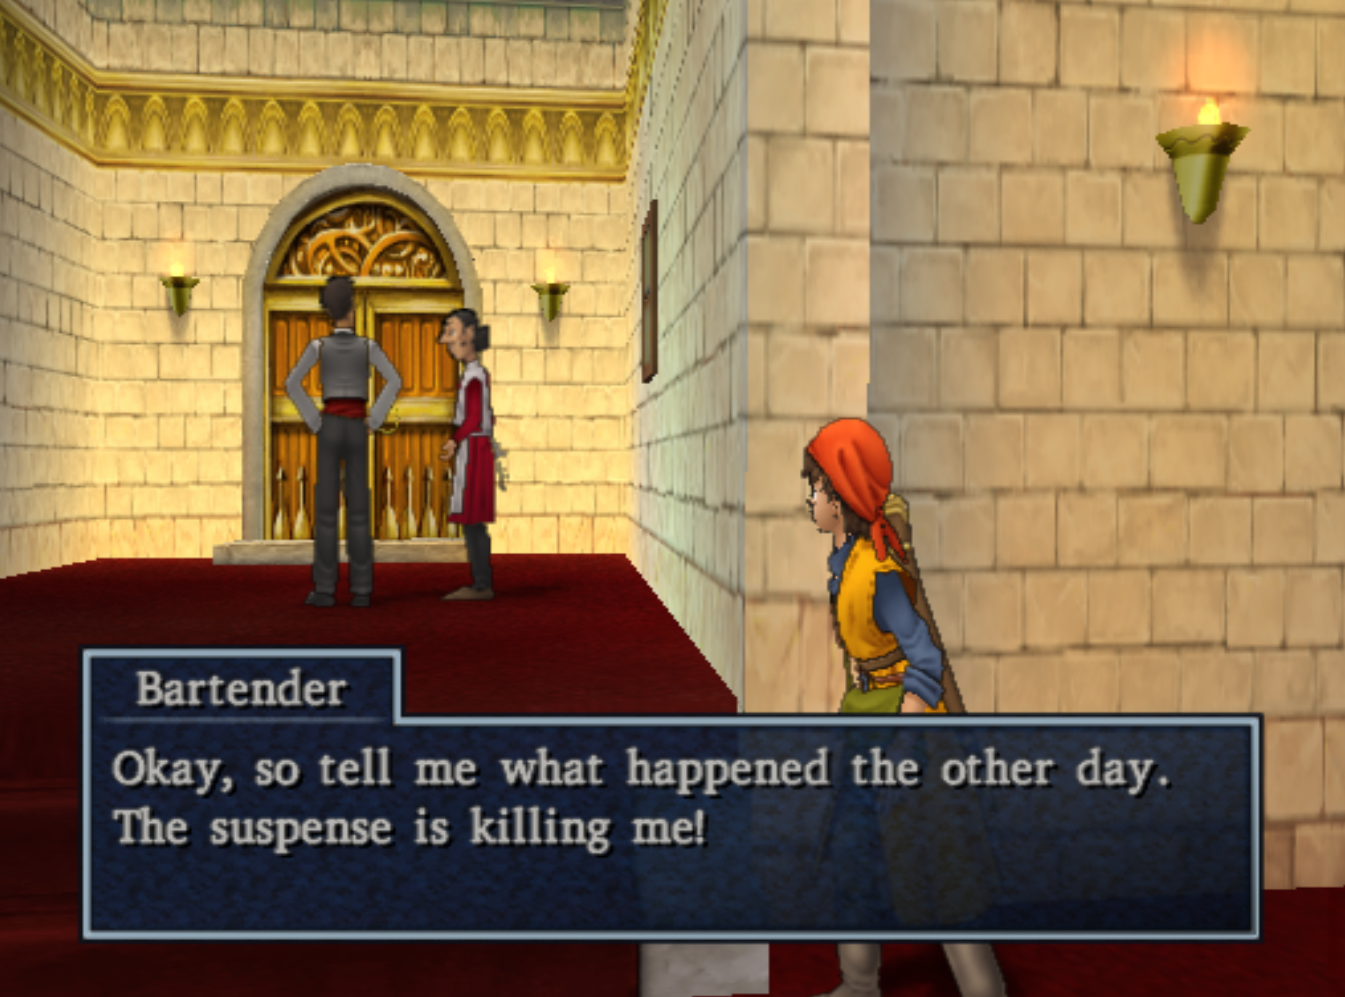
It'll take you awhile to explore this whole town but save the Inn for last, that's where you go to advance the story forward. When you're done running around town collecting all of the loot here head up to the second floor of the Inn and you'll trigger a scene of you eavesdropping on a conversation. This is all you need to do in the town to advance the story forward.
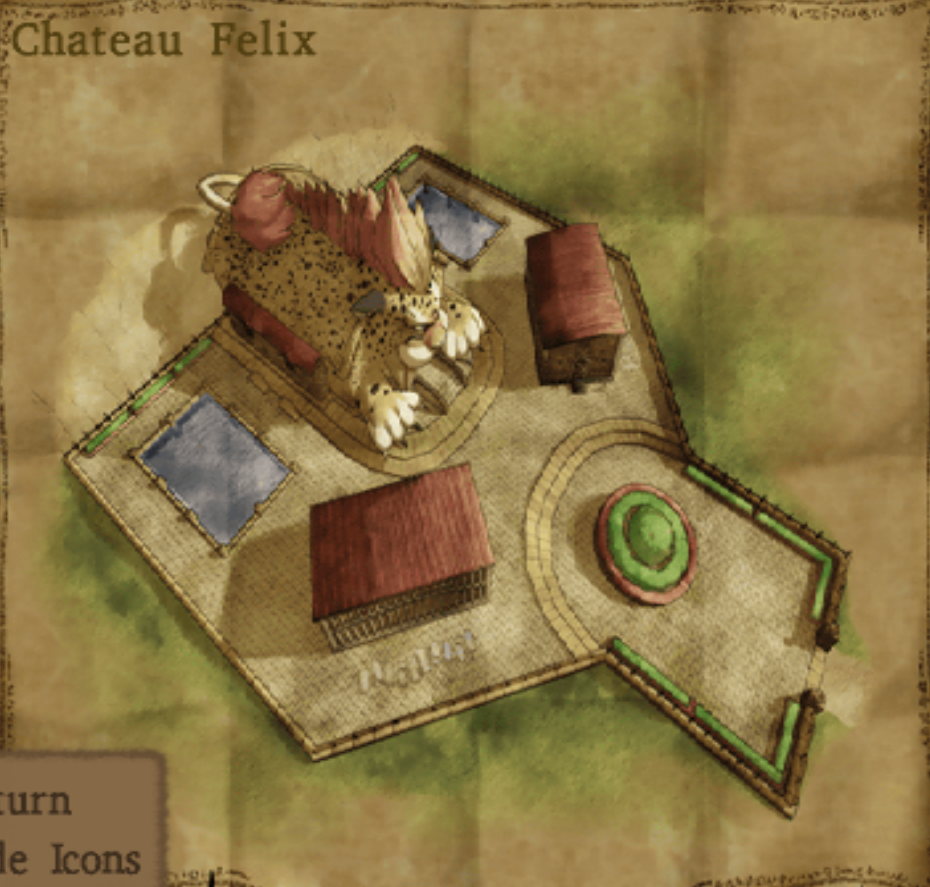
After you're done, exit the town and head southeast to Chateau Felix. This is one of the optional side quests in the game, if you'd like to complete it I recommend you head over to my Chateau Felix Side Quest Guide and read more about it there. It's a lot of running around, you get to collect some loot and you get two rare items, Baumren's Bell and Yggdrasil Leaf.
The next area that we need to go to is the island that's northwest of where Baccarat is. When you dock on this island there will be someone else from Baccarat docked next to you looking for the man who killed Golding. Speak with them to trigger a scene.
After the scene you'll want to search the whole island for some treasure, the Zombie Mail in particular can be used in Alchemy. Aside from that there's two Mini medals for you to pick up here - which, unless you missed some, means we can go back to Princess Minnie's Castle and get another prize!
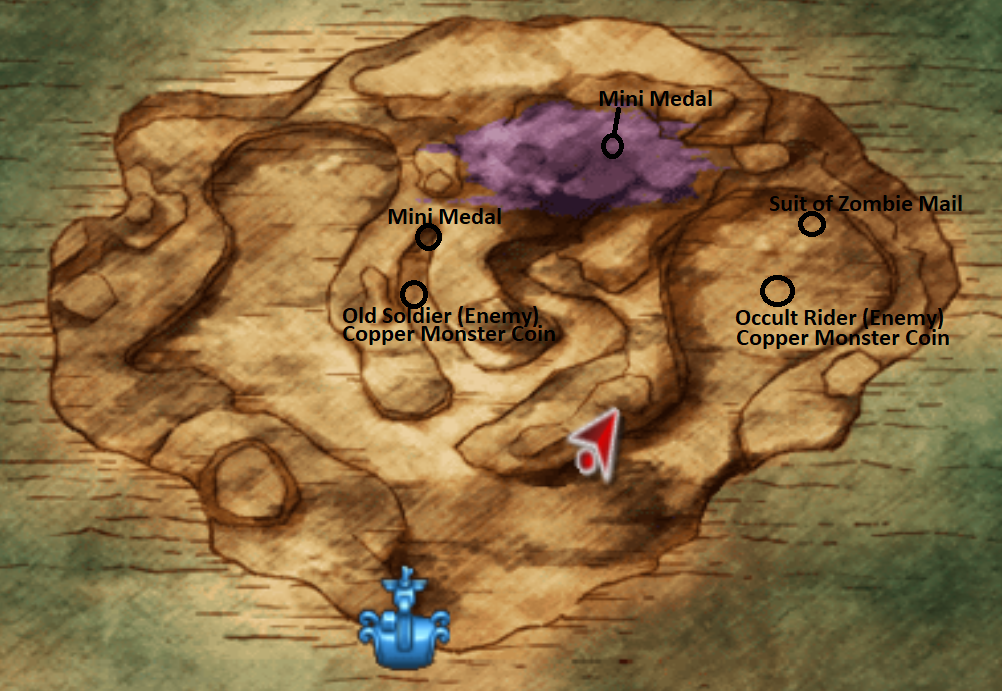
When you're ready to progress the story forward head up to the purple smog at the northern end of the island. The building to the right has a pot with a Mini Medal in it. Retrieve it then enter the building that you saw Dhoulmagus enter. For the time being there is no hope navigating in this dungeon, exit and you'll find the scouting party you talked to on the beach waiting for you outside.
Speak with them to trigger a scene, they tell you that in order to clear this dungeon you'll need a magic mirror from Argonia, the castle town southeast of Baccarat. Use Zoom on your Hero to travel to Chateau Felix. Assuming you did the side quest you'll be able to ride a sabrecat again by ringing Bumren's Bell from your inventory. If you accepted the side quest but didn't finish it head into Chateau Felix and talk to Tom he'll give you a new tiger.
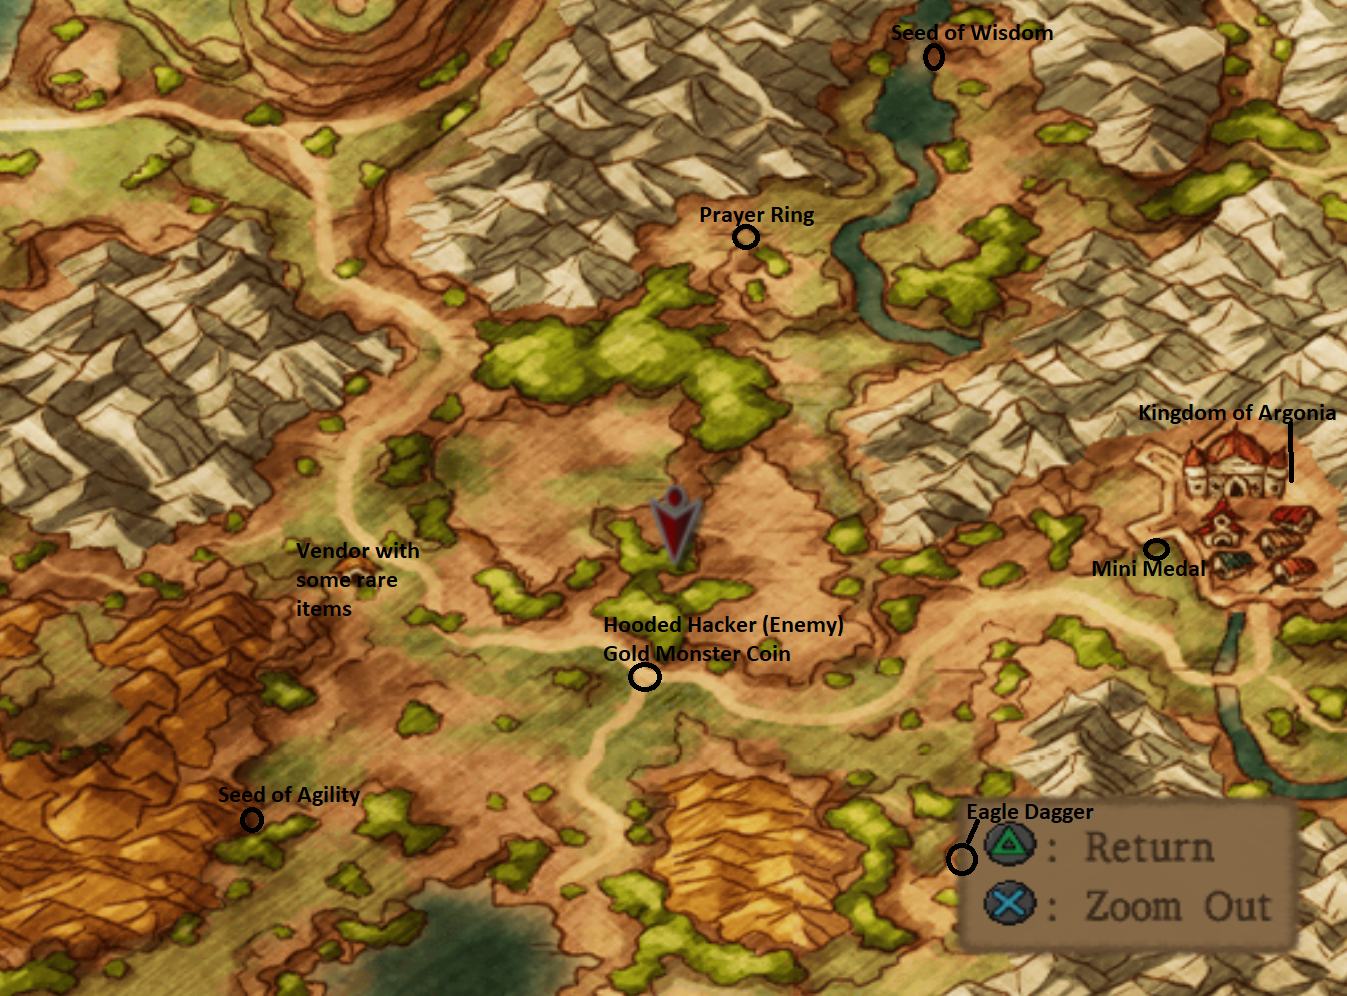
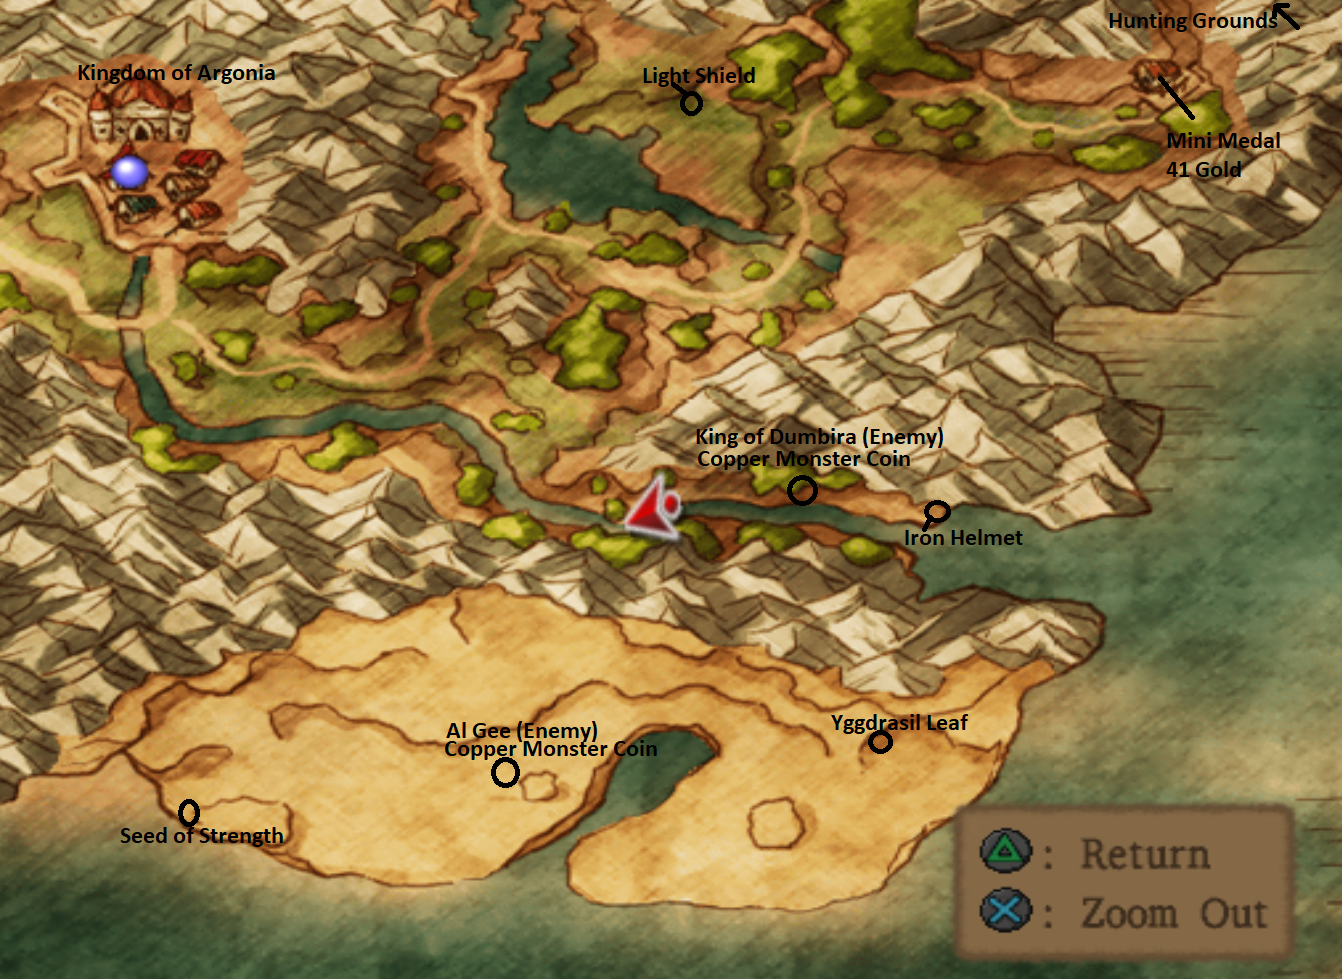
While on this tiger you'll want to explore the area west of Argonia - as you can see from my map above there's a few goodies around for you to find. When you get close to the Kingdom of Argonia a cutscene will boot you off the tiger, you can use Baumren's Bell to summon your tiger again if you have it.
Once you're ready to advance the story forward head into the town of Argonia and get to exploring.
Town of Argonia

Argonia is another extremely big town with a lot of different areas to explore. It'll take you a bit of time to cover it all; when you're finally ready to advance the story you'll want to head into the castle at the northern end of town. For that reason I would recommend saving the castle goodie hunt for last.
Prior to plundering the castle you should stop at the armor and weapon shops in town. There are some upgrades here for you, some of the stuff is even better than Neos! Silver Mail which can be used on Angelo and the Hero reduces spell damage by 20 points for the cost of 4300 Gold. Magic Vestments reduce the damage from spells by 2/3 and can be equipped on Jessica and Angelo.
As you're talking to people throughout town you'll notice that they keep talking about The Bazaar. This is set up after we complete the next dungeon and return to town - but you might want to hang onto some gold for it when we come back, some rare and powerful items are sold there.
Once you're ready to progress the story forward travel to the second floor over the castle, the large room in the center is where you'll find the King. Approach him to trigger a cutscene. After the scene you're tasked with finding Prince Charmles, who sounds like a complete delight to be around.
Prince Charmles can be found on the third floor of this castle in the kitchen behind a locked door. In order to get him out of the Kitchen you need to go up to the floor just above this one where you'll find a hole in the wall (shown below). Use Munchie like you did much earlier in the game to find Jessica's note; send him through the hole into the opposing room.
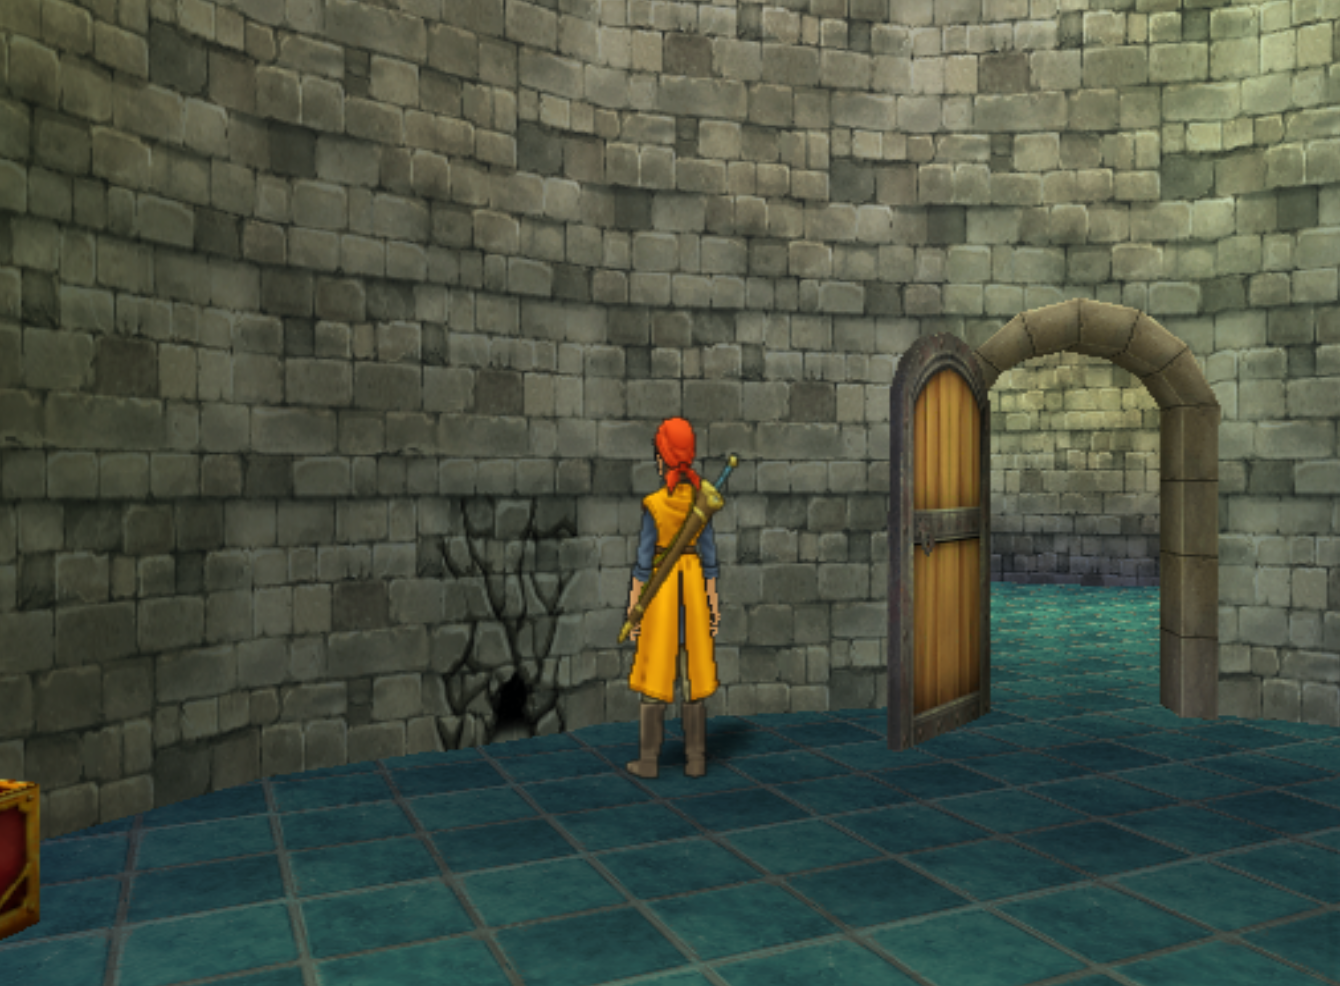
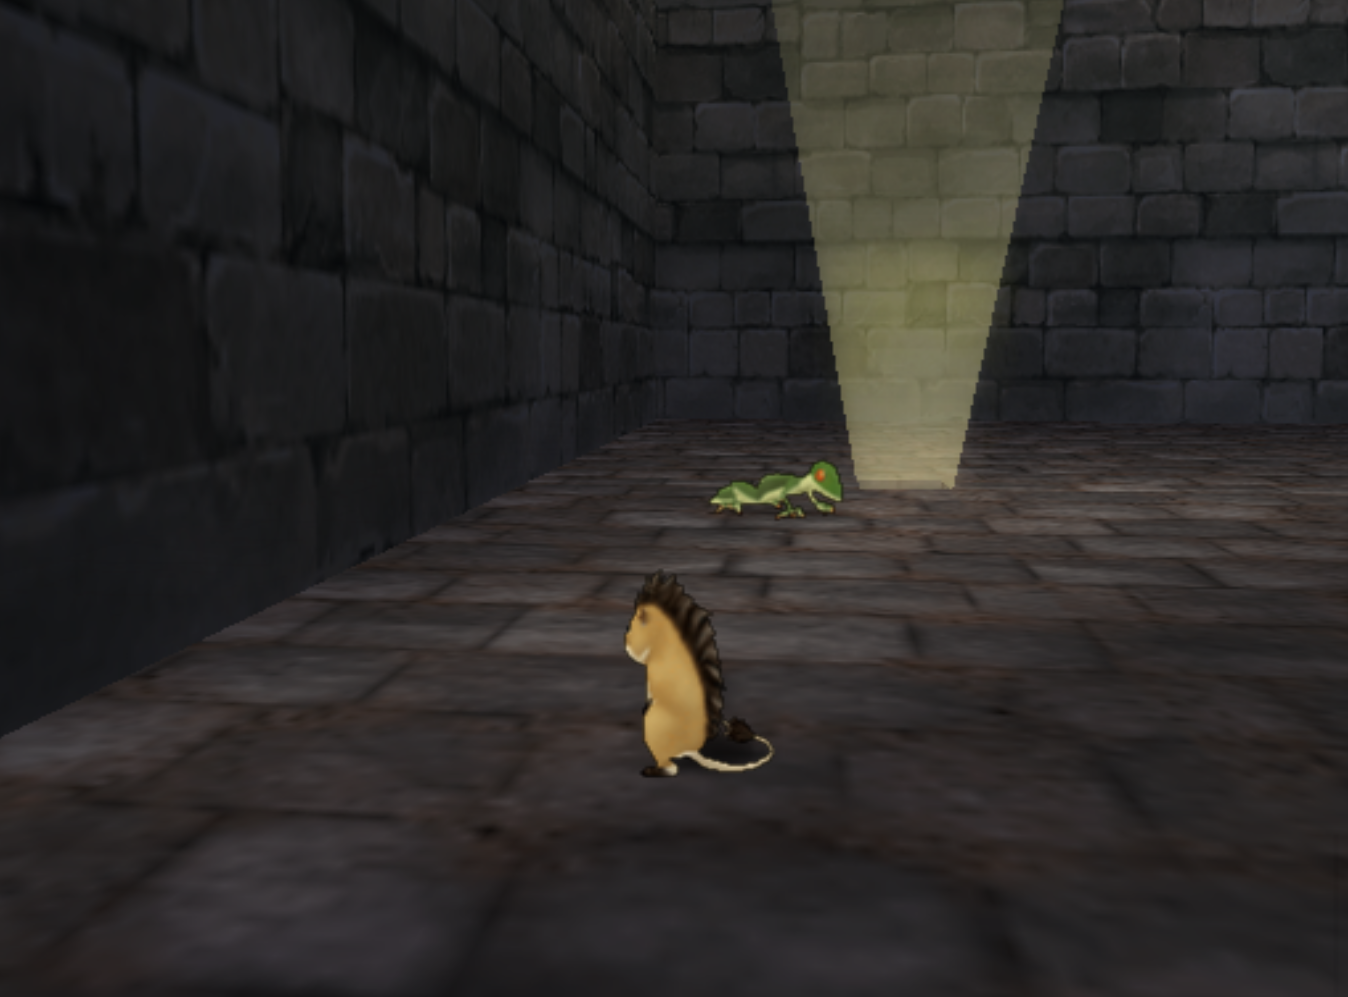
The hole that you're sending Munchie through is found on Argonia Castle: 4th Floor, West Wing in the southern most circular room. A screen shot of this location is shown in the picture above. While controlling Munchie you'll have to push a lizard down a hole in the ceiling; it'll land on Prince Charmles head and send him screaming out of that room down to his daddy.
Pushing the lizard onto his head is easier said than done. Basically how this mini game works is when you collide with the lizard it'll run in the opposite direction -- kind of. Depending on the angle you hit it, it may go straight or it may go slightly diagonal. It's a bit of a pain in the rear but you'll eventually get the little fella into the hole. Return to the Hero with Munchie and then return to the Throne Room.
After you watch the cutscene exit town to be treated to another cutscene with the brat. He gives you Lizard Humour which we'll need when we get to the Royal Hunting Grounds. Open your inventory and use Baumren's Bell if you completed the side quest to summon a sabrecat. To the east we ride, hyah!
The Royal Hunting Grounds are at the far northeastern end of the area; if you follow the path east it'll lead you straight there. Before you enter you have to use the Lizard Humour on yourself; otherwise Prince Charmles yells at you and demands you apply it.
Inside the Royal Hunting Grounds there's two chests for you to get, a Mini Medal and a Dragon Scale. Both of which are found along the paths to the right from where we entered. They're also extremely important treasures so make sure you get them before we're done here. As for advancing the main story line... much like everything else with Prince Charmles it's a pain in the butt.
The first lizard we have to fight is right in front of us when we enter but you can't get close to it if you run at it or if it can see you. So, what you need to do is get behind it and then use the D-pad to slowly sneak up on it. Once you collide with it you'll start the battle. As for the battle itself it's really not all that difficult.
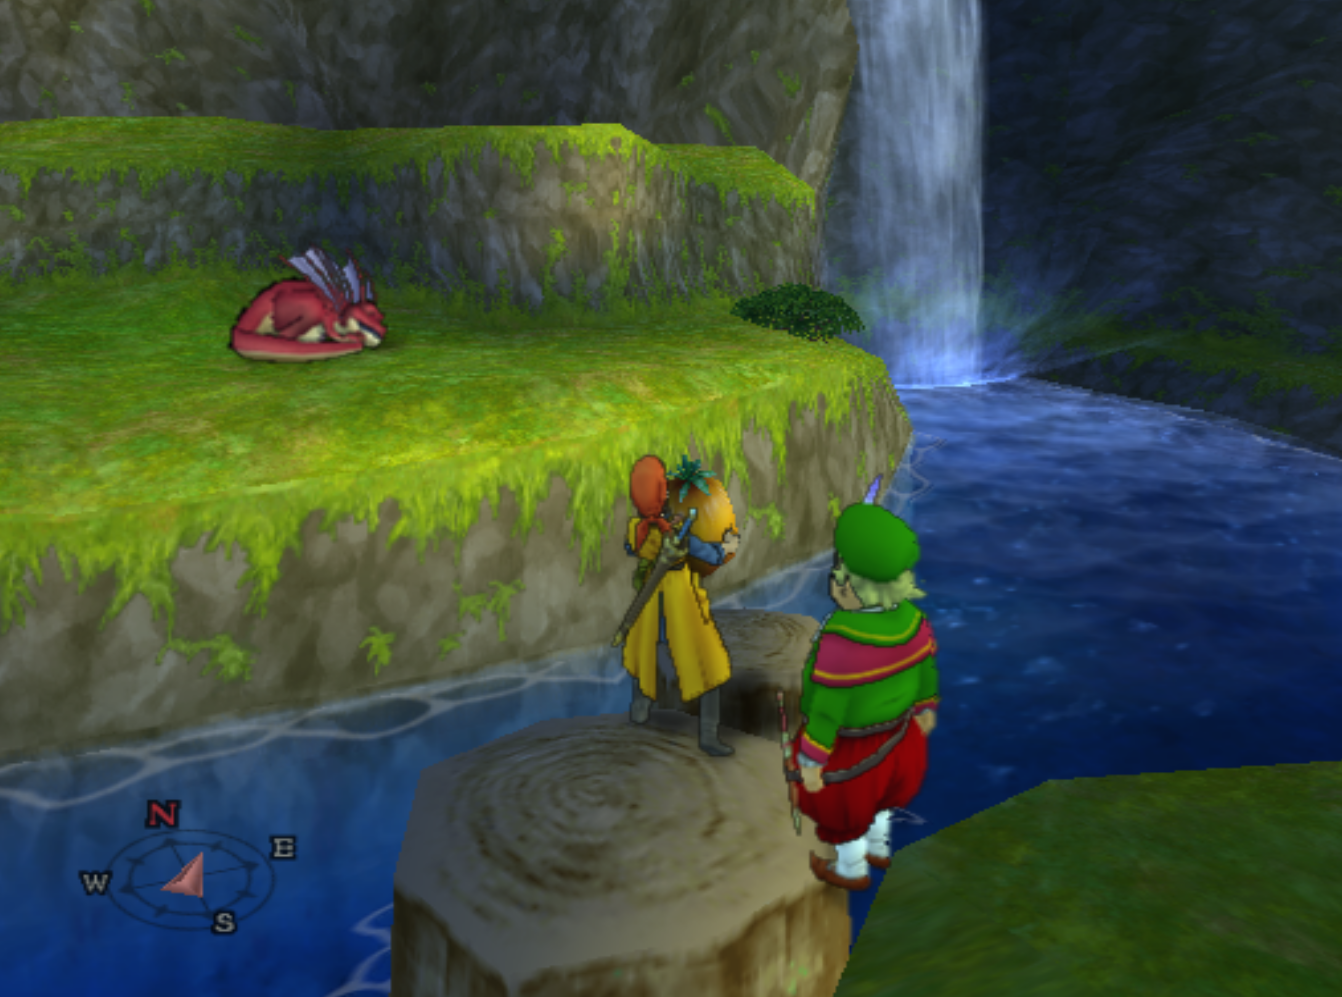
With the first lizard out of the way, it's time to defeat #2. Approach the sleeping lizard to trigger a scene; with that out of the way head across the nearby fallen tree and pick up one of the fruits on the other side. Bring it back to this platform and drop it to attract the lizard over.
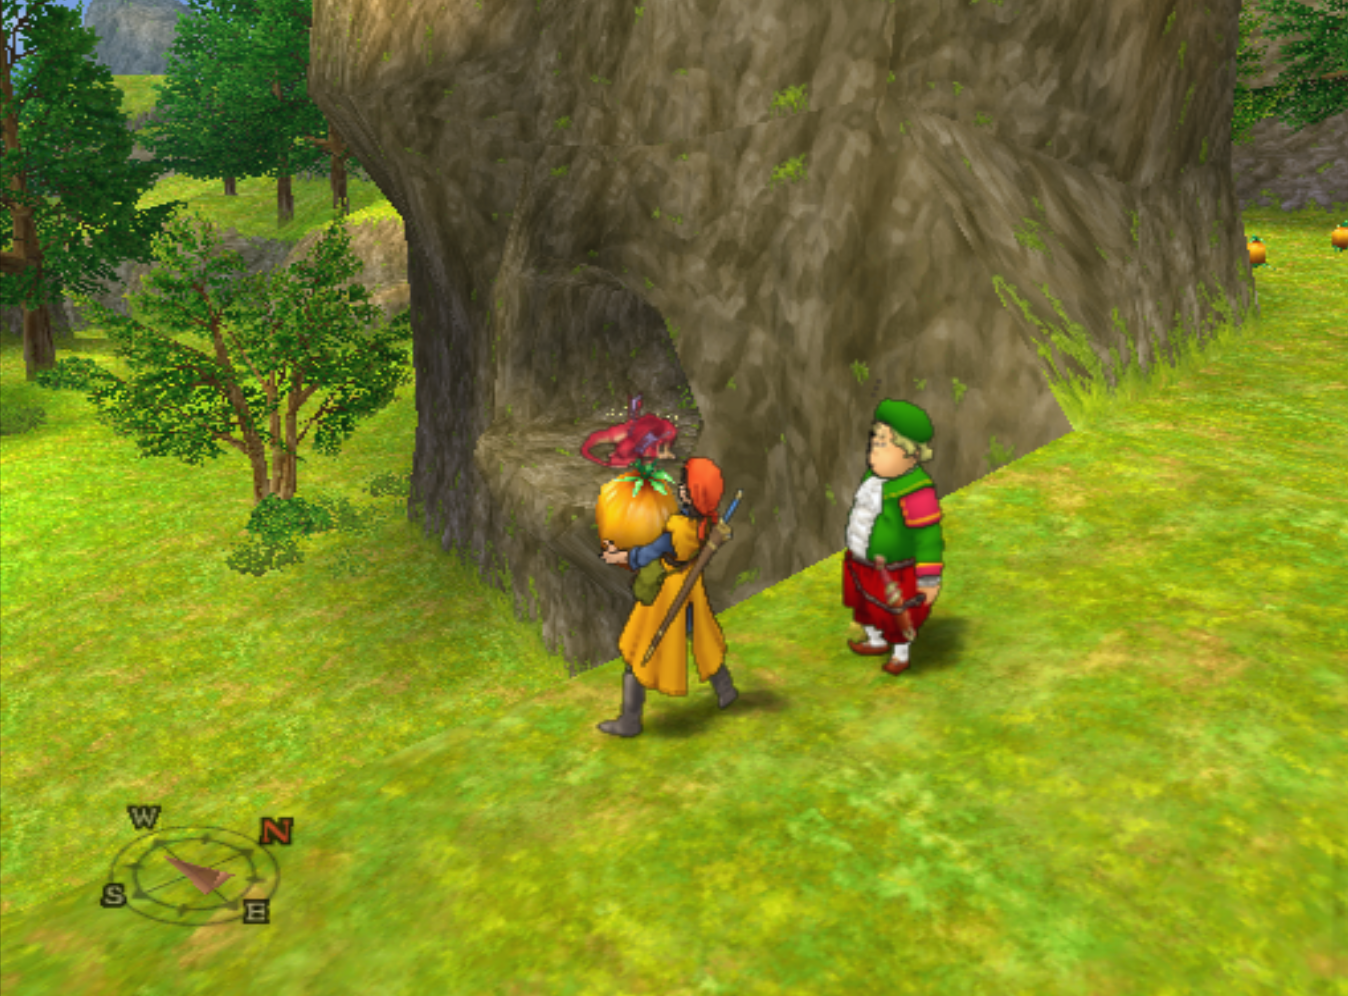
After you beat that lizard head in the opposite direction we entered this area at. Following the path you'll eventually come to a cave in the side of a wall, as you run up a nearby hill to pass by this cave you'll trigger a scene of an argon running over and jumping in to sleep. The brat tells you to fight this lizard; grab a nearby fruit and toss it off the side of the bridge then jump down to fight the lizard.
The brat will throw a fit and demand you spend the night out here once he realizes this heart is small too. Watch some cutscenes, basically him acting out - they're really trying to drive home the fact that he's a pompus little shit. After the cutscenes head down to where you faught the last lizard and engage Godzilla.
Once the boss is dead you can leave this place and head back to Argonia using Zoom. The Bazaar is now here in Argonia so check all the shops and be sure to stock up on any items you see that you'd like to use. There's a bunch of new armor and weapons in town as well as shops that sell items you can use in Alchemy. You won't have all the gold you need to buy everything you want - there's that much stuff!
The Alchemy Recipes you're able to make with the items you purchase at the Bazaar aren't listed in the section on this page. I've listed them all in the Chapter 7 Alchemy Guide to make things easier for people. There's honestly so many different Alchemy Recipes that you can make once you visit the Argonia Bazaar that it needed its own page. Before continuing on your journey it's strongly recommended you read over that guide and make items that would be useful to you.
When you're ready to advance the story forward go up to the second floor of the town and talk to Charmles who is buying an Argon heart off of a peddlar; a cutscene follows. Head inside of the castle and to the throne room for another cutscene and to advance the story forward yet again. When the scene is over talk to the King who is standing near the window at the back of the room for another cutscene.
All that's left is to head up to the 4th floor (East Wing) and over to the treasure room. This is where you will find the Magic Mirror along with other goodies. Use my map location below if you're having trouble finding this room.
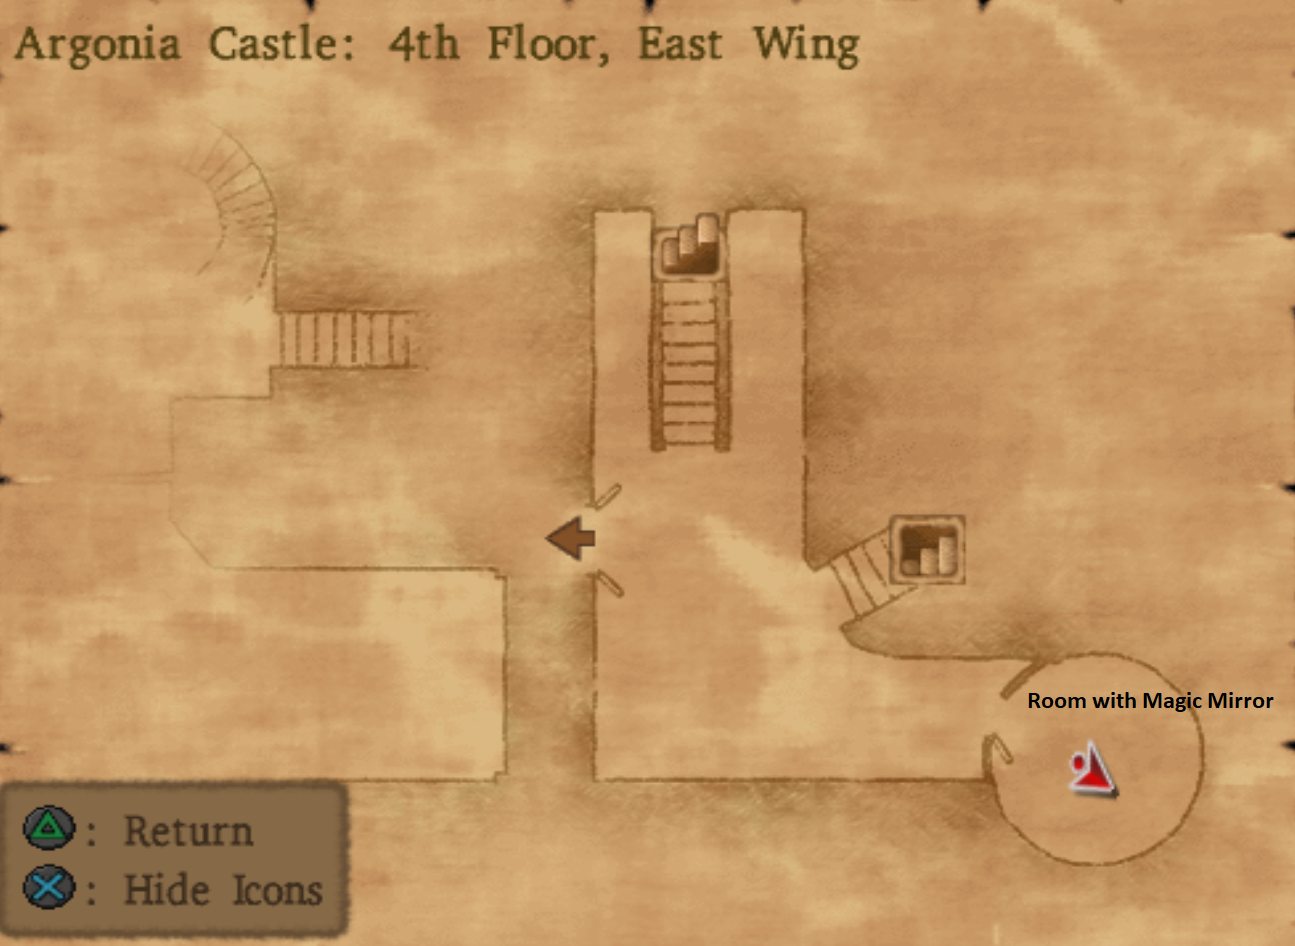
With the mirror in hand, exiting the treasure room will trigger a cutscene where one of the nobleman inside of the castle tells you that there's no mana left in the mirror. This means at the current point in time it can't be used how we'd like to use it. As you could probably guess the next thing we need to do is find a way to recharge this mirror.
To the west of town there's a small hut in the mountains. This is our next destination.
Return to walkthrough Chapter 5 (Ascantha, Land of the Moles, Mole Hole & Side Quests)
Continue to walkthrough Chapter 7 (Argonia Bazaar, Dark Ruins, Arcadia, Rydon's Tower)