
The Black Morass Instance Guide (TBC)
The Black Morass was the original instance made to work like Violet Hold. In The Black Morass, much like Violet Hold, rounds of mobs will spawn and they must be killed while you protect Medivh from any attackers. In order for you to enter The Black Morass you must first complete Caverns of Time: Durnholde and the quests involved in that instance. If you're confused of what The Caverns of Time is, then don't worry I'll explain it really quick.
Caverns of Time is a set of instances that take you back in time to certain important events in the WoW lore. Here you are able to re-live and reenact these events. These events include things like protecting Arthas on his journey to become corrupt, breaking Thrall out of Durnholde and the battle for Mount Hyjal. All of these events can be replayed and relived within The Caverns of Time.
At the start of The Black Morass you will want to be sure to speak with Sa'at and accept your Chrono-drake Beacon. Also, if this is your first time here make sure to accept his quest "The Opening of the Dark Portal". After you accept this quest you and your group will want to mount up and head straight through the instance until you find Medivh. He is this really old man that is standing in the dead center of a large purple circle. In other words, you can't miss him. Once you find him, keep your distance and don't get too close or you'll start the instance.
The first thing you will want to do is clear all the low level trash mobs by where each of the portals opens. Someone in the group should probably know each place, if not then just clear a large area around Medivh. Or if you're around level 80 you won't even have to worry about clearing the area around Medivh. When you get close to Medivh you will trigger Black Morass to start. If you're new to this instance there is one specific thing you should know. Keep the adds of off Medivh, usually a group sets a specific ranged DPS to do this. Also, don't go AFK.
![]() Chrono-Drake Beacon - This beacon is given to you by the NPC at the start of the instance. It summons a drake that will help defend you and your group against the attacking dragons. This beacon can be used during any of the portals or bosses throughout the entire instance except for at the last boss. The last boss will destroy any single Chrono drake that you summon, however if you summon them all at once the boss will only destroy one and let the others stay. This is a good strategy to keep in mind if you are under geared.
Chrono-Drake Beacon - This beacon is given to you by the NPC at the start of the instance. It summons a drake that will help defend you and your group against the attacking dragons. This beacon can be used during any of the portals or bosses throughout the entire instance except for at the last boss. The last boss will destroy any single Chrono drake that you summon, however if you summon them all at once the boss will only destroy one and let the others stay. This is a good strategy to keep in mind if you are under geared.
Chrono Lord Deja
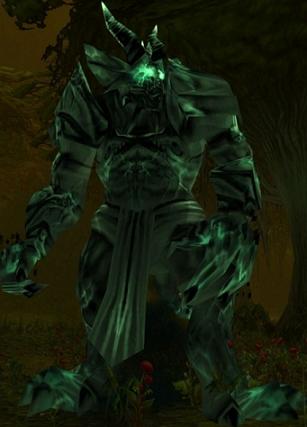
This boss is your usual tank and spank type boss encounter. The only two things worth mentioning for this boss is his Arcane Blast ability, which he uses on both normal and heroic and his Attraction ability, which he only uses on heroic. Arcane Blast is a pulse-like AoE that comes out from Chrono Lord Deja's body. This ability will damage anyone that is close enough to get hit by it. On normal difficulty this would only affect the melee but on heroic Chrono Lord Deja also has an ability to pull players to him.
This could be a massive inconvenience if you're ranged and you get caught in the Arcane Blast. Either way, it only does 1-2k damage meaning you'd have to be caught in it for quite awhile for it to take you down.
Normal Loot Table:
Heroic Loot Table:
Everything he drops on Normal.
(As well as the following Items):
Temporus
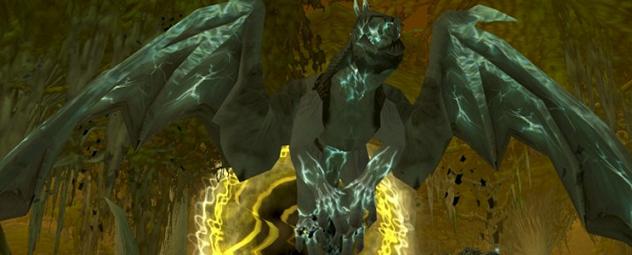
Temporus is a pretty big pain in the ass of a fight. His most annoying ability is Mortal Wound which decreases healing taken by 10% for each stack of it on you. Temporus will re-apply this and continually make it stack on your tank throughout the whole fight. This could make it very difficult for the healer unless the tank has enough avoidance to dodge/parry an attack and reset the Mortal Wound counter. Another thing to keep in mind is that Temporus is immune to taunt, meaning you will not be able to taunt him off the tank briefly to reset the counter.
On normal mode Temporus has only one more move and that is called Hasten. This increases his movement and melee speed by 200% but it can be purged and dispelled, even spell stole. When fighting Temporus on heroic difficult you will have to deal with one extra attack, Spell Reflection. A blue shield will appear around Temporus' head and he will reflect all spells back at their casters for a short period of time.
Normal Loot Table:
![]() Khadgar's Kilt of Abjuration
Khadgar's Kilt of Abjuration
![]() Epoch-Mender
Epoch-Mender
![]() Hourglass of the Unraveller
Hourglass of the Unraveller
![]() Laughing Skull Battle-Harness
Laughing Skull Battle-Harness
![]() Star-Heart Lamp
Star-Heart Lamp
![]() Millennium Blade
Millennium Blade
Heroic Loot Table:
Everything he drops on Normal.
(As well as the following Items):
The portals before Aeonus are the most difficult ones you will come across in the instance. Depending on the gear and levels of your group you may have to have two ranged classes switch to adds. Another option is to use your Chrono Beacons by Medivh during each portal. This will take care of the adds while you and your group kill the portal guardian. Also, keep in mind that depending on how much of Medivh's shield is left you may be able to let Aeonus sit and attack Medivh while you get some mana back. Usually if his shield is at 75% or above you will have plenty of time to do this.
Aeonus
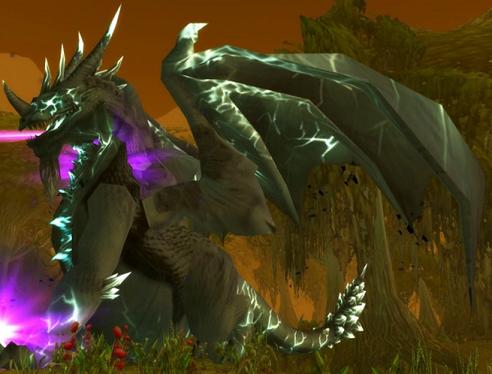
Aeonus is the final boss of The Black Morass and what a pain in the rear this boss can be. During the encounter Aeonus will frequently use an ability called Time Stop which stuns everyone in the group for 4 seconds. During this time it is recommended that the tank is loaded up on HoTs and hopefully popped a defensive ability (trinket for more dodge or parry, shield block, shield wall, divine protection etc etc.) The good news is before even charging into this boss you can take a brief second to rest. Since Medivh doesn't have anything to worry about you can let Aeonus pound on his shields for close to a minute before engaging.
On heroic difficulty Aeonus is a real pain in that rear to kill. As with every heroic boss he will hit harder and have more HP. One other final skill you should be warned of for Aeonus is his Frenzy. Aeonus has an ability called Frenzy which causes him to go enraged, increasing his damage and attack speed. Also during the final fight with Aeonus you are able to use the drakes you're given in the beginning of the instance. Just a tip for using them, make sure to use them all at the exact same time. If you pop them all at the exact same time Aeonus will only dismiss one, leaving the rest to F his stuff up.
Normal Loot Table:
![]() Primal Nether
Primal Nether
![]() Cowl of the Guiltless
Cowl of the Guiltless
![]() Handgrips of Assassination
Handgrips of Assassination
![]() Helm of Desolation
Helm of Desolation
![]() Bloodfire Greatstaff
Bloodfire Greatstaff
![]() Latro's Shifting Sword
Latro's Shifting Sword
![]() Legplates of the Bold
Legplates of the Bold
![]() Legplates of the Righteous
Legplates of the Righteous
![]() Mana-Etched Crown
Mana-Etched Crown
![]() Moonglade Pants
Moonglade Pants
![]() Pauldrons of the Crimson Flight
Pauldrons of the Crimson Flight
![]() Primal Surge Bracers
Primal Surge Bracers
![]() Scarab of the Infinite Cycle
Scarab of the Infinite Cycle
Heroic Loot Table:
Everything he drops on Normal plus the following epics.
![]() Girdle of the Deathdealer
Girdle of the Deathdealer
![]() Breeches of the Occultist
Breeches of the Occultist
![]() Girdle of Valorous Deeds
Girdle of Valorous Deeds
![]() Quantum Blade
Quantum Blade