
The Botanica Instance Guide (TBC)
The Botanica is one of four instances located in Netherstorm. The four instances are The Arcatraz, The Mechanar, Tempest Keep (Raid) and Botanica. Botanica is probably the second most difficult instance here, Arcatraz being the other 5 man that is harder. Unlike the other TK instances in Botanica you will quite often get pulls of 4 - 5 mobs at a time which may or may not require crowd control depending on the levels and gear of your group. The hardest part of running Botanica will be towards the end right after the Satyr boss. The few slime-looking creatures you will fight here could be exceptionally difficult depending on your group and difficult of the instance.
Also, as the instances name suggests, while here you will find quite a bit of herbs scattered throughout the instance. If you're a herbalist then this is a great way to greatly increase the amount of money you will make while running Botanica.
Commander Sarannis

Commander Sarannis can be quite an annoying fight if you're group isn't ready for it. Throughout the fight she will apply an Arcane debuff to the group that increases Arcane damage taken by quite a bit. It can stack on the group up to three times and then Sarannis follows up it with a nasty Arcane Explosion-like ability that deals a great amount of damage to the whole group. Aside from this ability Sarannis also summons four adds when she gets low on health (30-50%).
The four adds consist of three Bloodwarder Reservists and one Bloodwarder Mender. The Reservists are non elite and the Mender is an elite. All of these adds should be dealt with as quickly as possible to prevent anyone in the group dying. After Sarannis is killed none of the adds will despawn, meaning you'll have to kill them now if you haven't already.
Normal Loot Table:
Heroic Loot Table:
Everything that she drops on Normal.
Also Has a Chance To Drop:
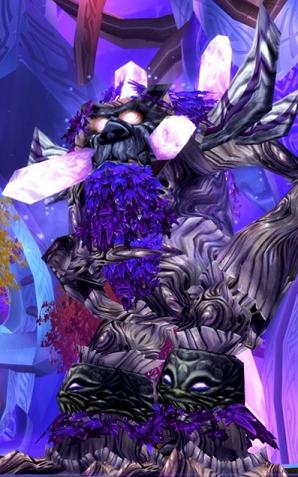
High Botanist Freywinn

High Botanist Freywinn will spawn Seedlings every few seconds during the encounter. They have a very low amount of health and can be easily killed by a single Arcane Explosion or other AoE attacks. It is recommend that they are dealt with rather quickly so that they don't beat down your healer or an important DPS. During the encounter High Botanist Freywinn will turn into Tree Form and become immune to attacks. During this time he will spawn some more adds and also cast Tranquility, healing him and any adds he summoned.
During this time you want to run away from High Botanist Freywinn (behind any wall) to break LoS from the casting adds. As they all come around the wall you will want to burn down any of the adds he summoned. Once they are all dead he will become un-immune and start attacking once again. Depending on how good your DPS is will determine how many times he does this throughout the course of the encounter.
Normal Loot Table:
Heroic Loot Table:
Everything he drops on Normal
Also Has a Chance To Drop:
Thorngrin the Tender

Thorngrin the Tender is a minorly complicated fight but with a semi-intelligent group it shouldn't be a problem. During the fight Thorngrim will "Sacrifice" a random player and place him on an altar in the back of the room. If you ever did Diremaul it works in almost the same way, make sure you heal the player and don't let him die. At random times Thorngrim will start his Hellfire ability which can put a real strain on the healer to keep himself, others and the Sacrificed target alive.
For this reason tank Thorngrin away from the person being Sacrificed and tank him away from everyone else. Whenever he does use Hellfire get out of his range asap. Especially if he does it on heroic where it hurts twice as much. Also since Thorngrin has a whole list of ranged abilities you must dodge I highly recommend clearing the whole area around him, or at least as much as you think you will need.
Normal Loot Table:
Heroic Loot Table:
Everything he drops on Normal.
Also Has a Chance To Drop:
Laj

First and foremost for all tanks out there make sure to tank Laj on his platform. Laj is another some-what annoying fight. During the fight he will spawn adds and teleport back to his main central platform (thus the reasoning for tanking him here). The adds hit hard but can be feared, stunned, banished and crowd controlled in almost every way. Two more things during this fight you have to watch out for... One of them is Allergic Reaction, an ability that Laj will put on the tank forcing him to take more damage. If you have someone who can dispell poison it is highly recommended to dispell.
Another trick of Laj's is to change in color, after changing in color he will also switch vulnerabilities. Below is a quick list of his colors and what he will be invulnerable/highly resistant too.
Blue (Frost Resistant)
Red (Fire Resistant)
Green (Nature Resistant)
Black (Shadow Resistant)
White (Arcane Resistant)
Normal Loot Table:
Heroic Loot Table:
Everything he drops on Normal.
Also Has a Chance To Drop:
Warp Splinter
First things first; as a tank you will want to tank Warp Splinter near the front of the room. This way he will be more away from his adds that he spawns in the back of the room giving you more time to DPS him and wait for the adds to cram together for AoElimination. (Funny aren't I? I like to think so at times...) There are really two ways to do Warp Splinter all depending on what your group is like. If you have extremely High dps (any level 80 really) you can burn down Warp Splinter and forget about his adds. If you have a rag-tag group of like level 67's you will need to focus heavily on the adds.
If you're in a group doing Botanica the real strategy for the fight is, have everyone stay max range to avoid taking War Stomp damage. The little treants he summons will help him and heal him; as such they will need to be eliminated immediately.
Normal Loot Table:
Heroic Loot Table:
![]() Boots of Ethereal Manipulation
Boots of Ethereal Manipulation
Also drops everything he would normally drop on Normal Mode.
Also Has a Chance To Drop: