
Breath of Fire 2 - TownShip Walkthrough
One of the very unique aspects of Breath of Fire 2 is the ability to create your own town! The town you create in the game will be called TownShip and you'll be traveling to and from here quite frequently throughout the game. One of the cool aspects of this feature of the game is you'll be able to invite people you meet to live in your town!
Each resident gives you a unique bonus for letting them live there - most of them are complete crap but some of them are truly fantastic! You can also get a unique bonus depending on which carpenter you select for the town. Sadly once you select a carpenter you can't go back so if you're reading this guide after you've already chosen one and you wanna change... sorry =(
The Ordinary Carpenter is a cook and he offers many really good recipes that will allow you to max out your character's attributes early on in the game. This is the best carpenter you can choose by far. Even though the houses he makes look basic as all hell - he's worth it!
The Wooden Carpenter that builds the tree house type houses doesn't have a really good special benefit. What he does is allows you to play a minigame where you use Tolens to acquire unique weapons and armor from his collection. If you're using an Emulator with save states this may be a decent choice for you since you can play endlessly until you get what you want.
The Arabian/futuristic Carpenter offers a really unique looking building and a kind of interesting special benefit. The town he builds (the bar) will be filled with different NPCs that tell you random facts about your adventure thus far. Like how many dressers you've opened for items, how long you've been playing, how many items you've used. Not really useful for anything but interesting none the less.
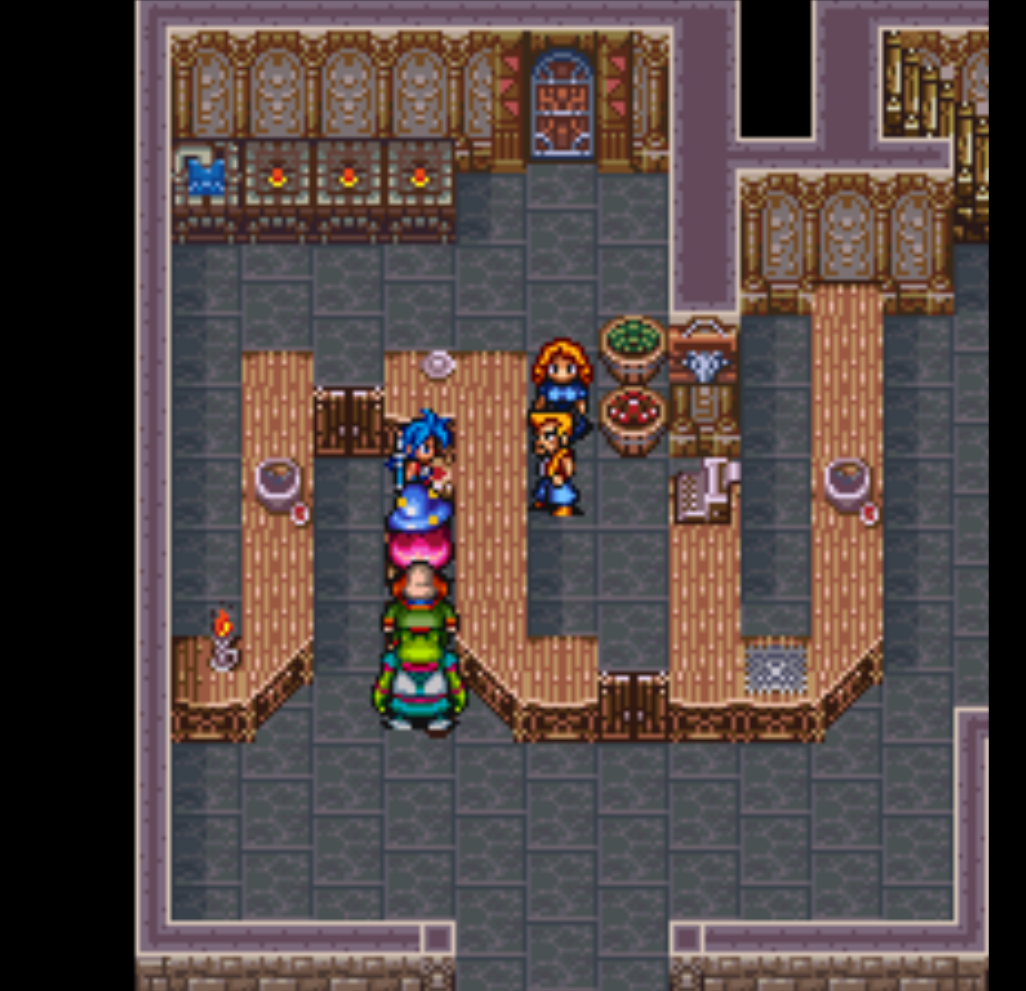
As I hinted the choice of Carpenter directly effects what your town looks like. In the screenshot I have chosen the first town option as the first carpenter has the best benefits and this town is easiest to navigate. I strongly recommend you choose the first Carpenter too as the second one you have to ride a Gondola to travel between some residents and the third one has pitiful benefits.
After you've chosen your Carpenter the next step is picking your residents! There are a total of 27 different residents to choose from in the game and each of them gives you something different. This part of the guide is going to tell you the residents I feel are the best choices for TownShip. If you'd like to see what each Resident does and all of your choices check out my guide on all the TownShip residents.
House 1 Hekkeller: For the first half of the game no one sells anything better than Hekkeller. If you have the coin when you first recruit him he sells weapons that you won't see in the game for another 5 or 6 towns! Most of the stuff he sells is useful until you reach Guntz much later in the game.
House 2 Leminton: Leminton is another Armory vendor who sells some stuff that Hekkeller doesn't. There's much debate about choosing MacClean for his secret Fishing location or Leminton for the few useful items he sells you. The choice is ultimately yours; I chose Leminton because I dislike the Fishing mini game.
House 3 Baretta: Baretta is probably the most agreed upon choice for House 3 tenants. For the first half of the game she sells complete junk that you can buy anywhere else but at the end of the game Baretta sells some of the best items money can buy!
House 4 Barose: Barose is the best choice you can make for the fourth tenant. He will offer to teach any member of your party that you choose some spells. In order for Barose to teach you the best spell he can (Missile) you'll need to talk to him with 1 HP and 0 AP. I opted to not learn any spells from him since the time I spent trying to lower my HP/AP to where it needed to be I ended up getting 2 - 3 levels on everyone. If there is a fast way to meet Barose' prerequisites that you know of I could see him being extremely useful.
House 5 Hanz: Hanz is one of my favorite residents for TownShip because he opens up a specialty item store that sells Charms and other useful upgrades you can't buy anywhere else! He's definitely my favorite choice for this house and arguably the best choice if you picked the first carpenter as Hanz sells Cooking Materials!! Yozo is an extremely close second for House 5's tenant.
House 6 Daiye: Daiye is only useful to your town if you have the carpenter that can cook. Since Daiye opens up a fish store that sells Srdine (Sardine), Mckrl (Mackerel), Bait, Unagi, Tuna and Minnow it makes it so you don't have to go out and fish for many of the Cooking Materials you'll need.
There you have it! The 6 tenants I recommend and why I recommend them! TownShip is finally completed shortly after visiting FarmTown - or at least that's when the town is filled in with all 6 buildings. If you chose the same residents I did you'll be able to use Hanz, Daiye and the Carpenter to cook up a bunch of really great stat boosting meals as well as some Gold Bars for money!
If you didn't choose the first carpenter this next part won't be available to you. Sorry =(
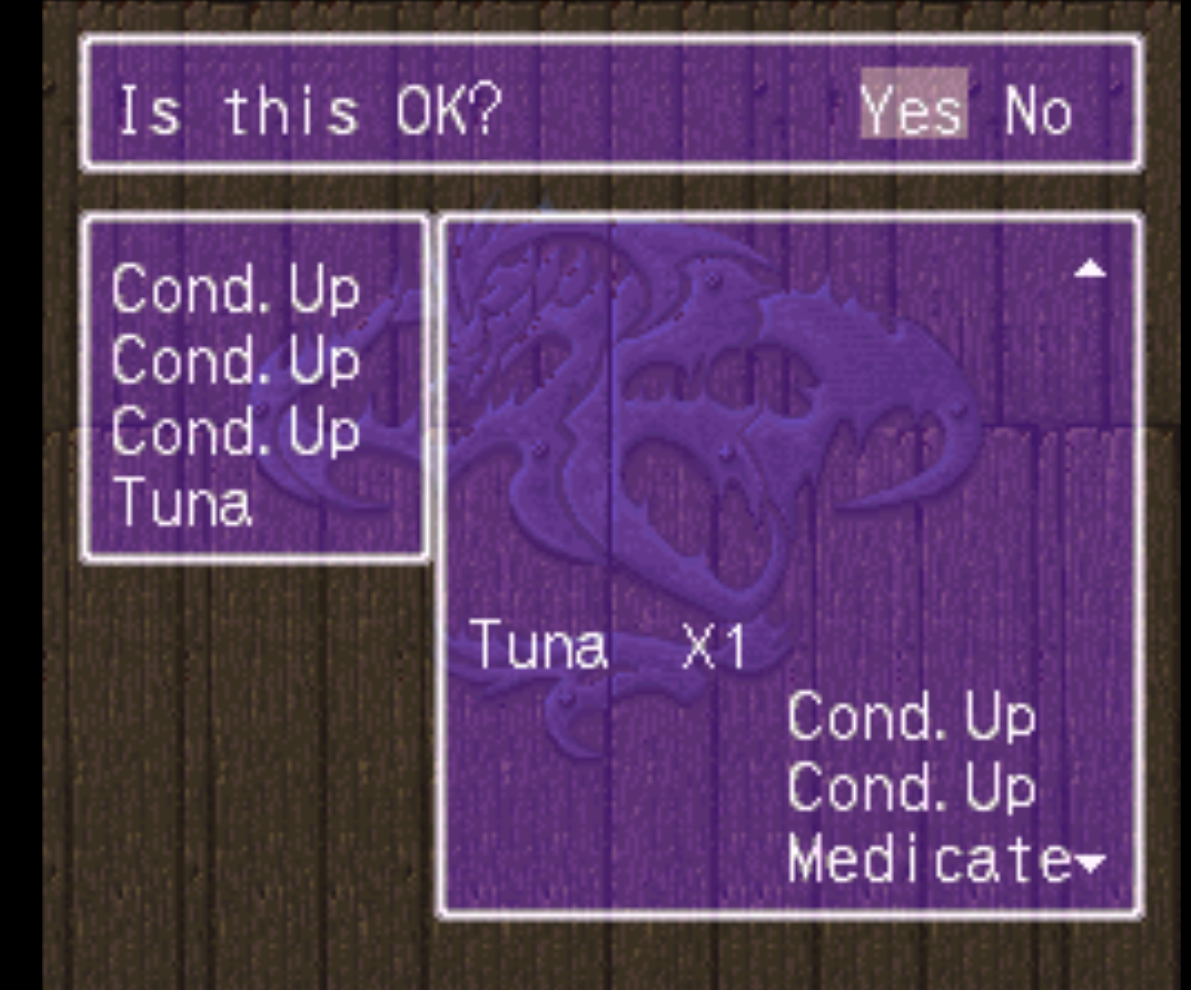
The first thing and arguably the best thing for you to make is a ton of Gold Bars. That way if you don't like the cooking process or how much time it takes you're already rich and you can just spend the money on the best gear from Baretta later in the game. The recipe for Gold Bars can be seen in the screen shot below... or...
3 Cond. Up and 1 Tuna = 2 GoldBars
3 Cond. Up = 1 GoldBar
In other words make sure you always add in 1 Tuna and you'll double how many GoldBars you make!
If you don't mind cooking you'll be able to continue by making stat food for each of your characters. What I did is I made Agility, Stamina and Strength stat food for anyone who lacked in those stats. An example is, I got Spar, Nina, Bleu and most of my casters 80+ STR and almost 100 AGI/STA for times when I like to just turn on Auto Attack and walk away as the battle finishes.
It's completely up to you if you'd like to follow this same route or not - it's completely unnecessary to beat the game and after raising all my stats up a lot the game was a complete pushover for me. If you would like to follow the same route here's a bit of information that I learned about each of the stats and what they do. It may be of assistance for you when figuring out what stats you'd like to spend time raising!
Strength - Increases the damage of each melee/auto attack (arguably I think this is one of the most important stats if not the most important)
Stamina - Decreases the overall damage done to you with each attack (I loaded characters that died quickly like Nina and Katt up on Stamina)
Agility - Determines how many times a round you'll attack and your attack order (I increased almost everyone's Agility as to almost guarantee my party attacks before the enemies)
Wisdom - Increases the damage done by magical attacks and apparently helps with decreasing the damage they do to you too. (The whole internet argued that this attribute sucked so I didn't focus too much on it)
Luck - I was told it did something similar to Wisdom.
Guts - It gives you a small chance for your character to come back to life when they're defeated in combat.
To the best of my knowledge that's how the stats work in Breath of Fire 2. I did a decent amount of research before writing these guides as well as research in game and that's the best I have come up with. If you are interested in raising your stats here's the recipes for PwrFood (Strength) Stamina (Stamina) and Dinker (Agility).
Pwr. Food: 2 Medicate
Permanently increases the Strength of a character by 1 point.
Stamina: F.Spice and 2 Tuna
Permanently increases the Stamina of a character by 1 point.
Dinker: 2 Cond. Up
Permanently increases the Agility of a character by 1 point.
Those are the only three stats I can recommend you spend time raising. The other stats - unless you're a completionist you might as well just ignore. If you raise these 3 stats enough you'll already be extremely powerful and you'll wipe the floor with the end bosses.
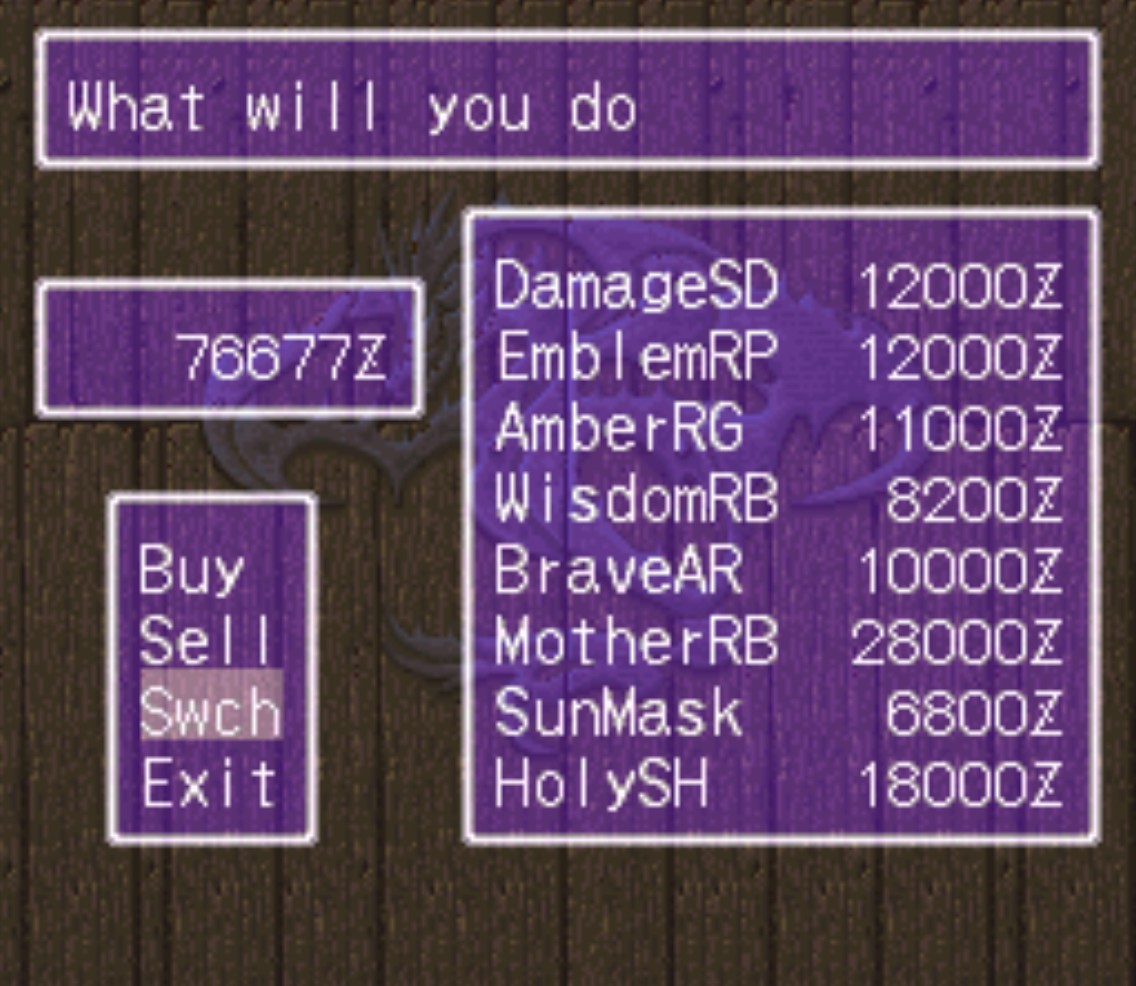
There's one last thing worth mentioning and that's a place aside from Baretta you can buy some really great armor. The best part about this location too is you can access it much earlier than you can Baretta's wares. It's really expensive stuff but using the Gold Bar trick from earlier it'll only take 20 minutes or so to fully gear everyone out.
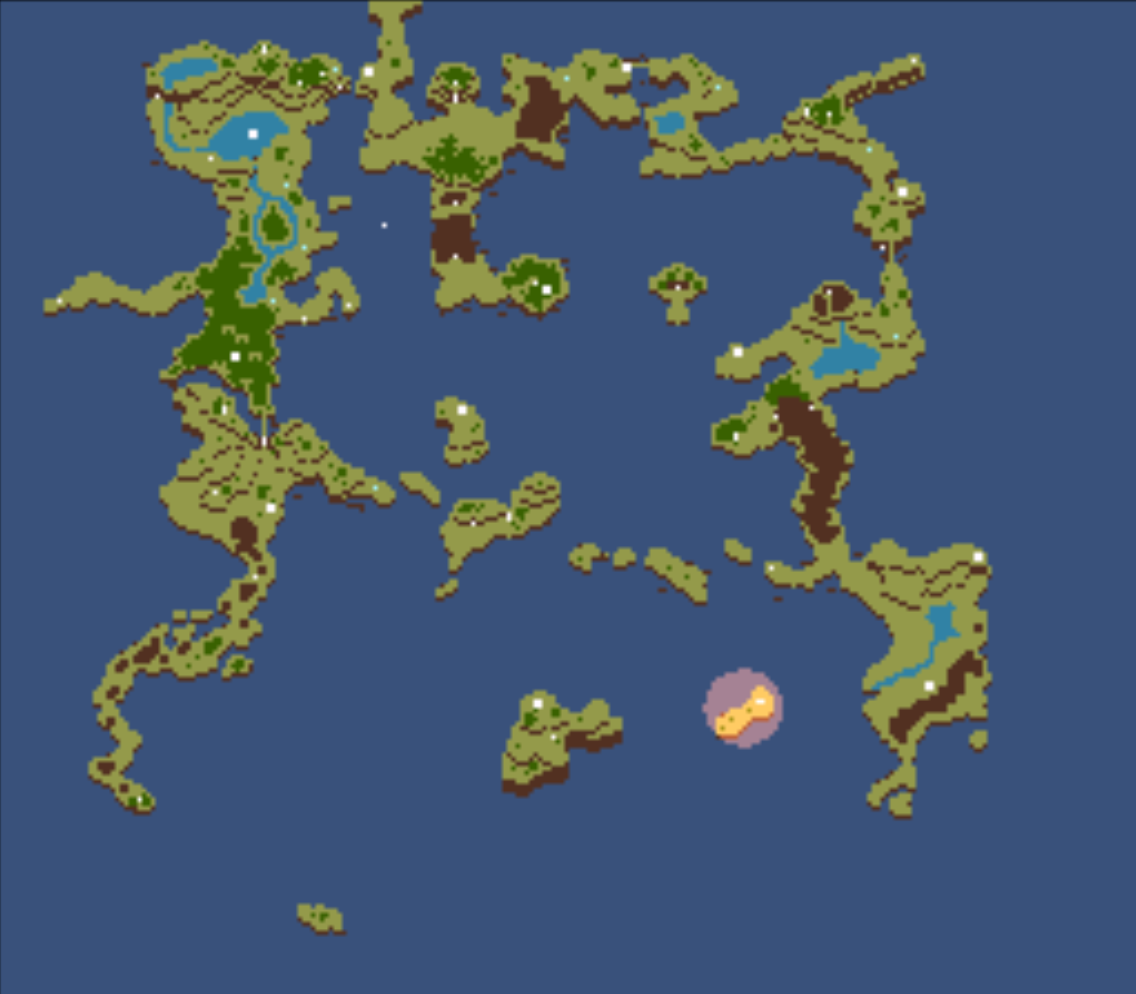
Almost directly south of TownShip you'll find an island that you can only land on from flying (so you'll need Nina's Bird or TownShip to fly there). The vendor on this island sells a lot of the same stuff Baretta does when she finally upgrades her wares for the last time. The best part of this location though is you can buy the items before Baretta sells them!
The location I am standing at in the map above is where you'll find the vendor
How to make TownShip fly!
Believe it or not you can actually make TownShip fly in Breath of Fire 2! It kind of comes out of no where that you can make your city fly and if you aren't careful while playing through the game you can totally mess it up and make it so you can't fly the town. Much like a lot of other aspects of TownShip one oopsie and it's all over.

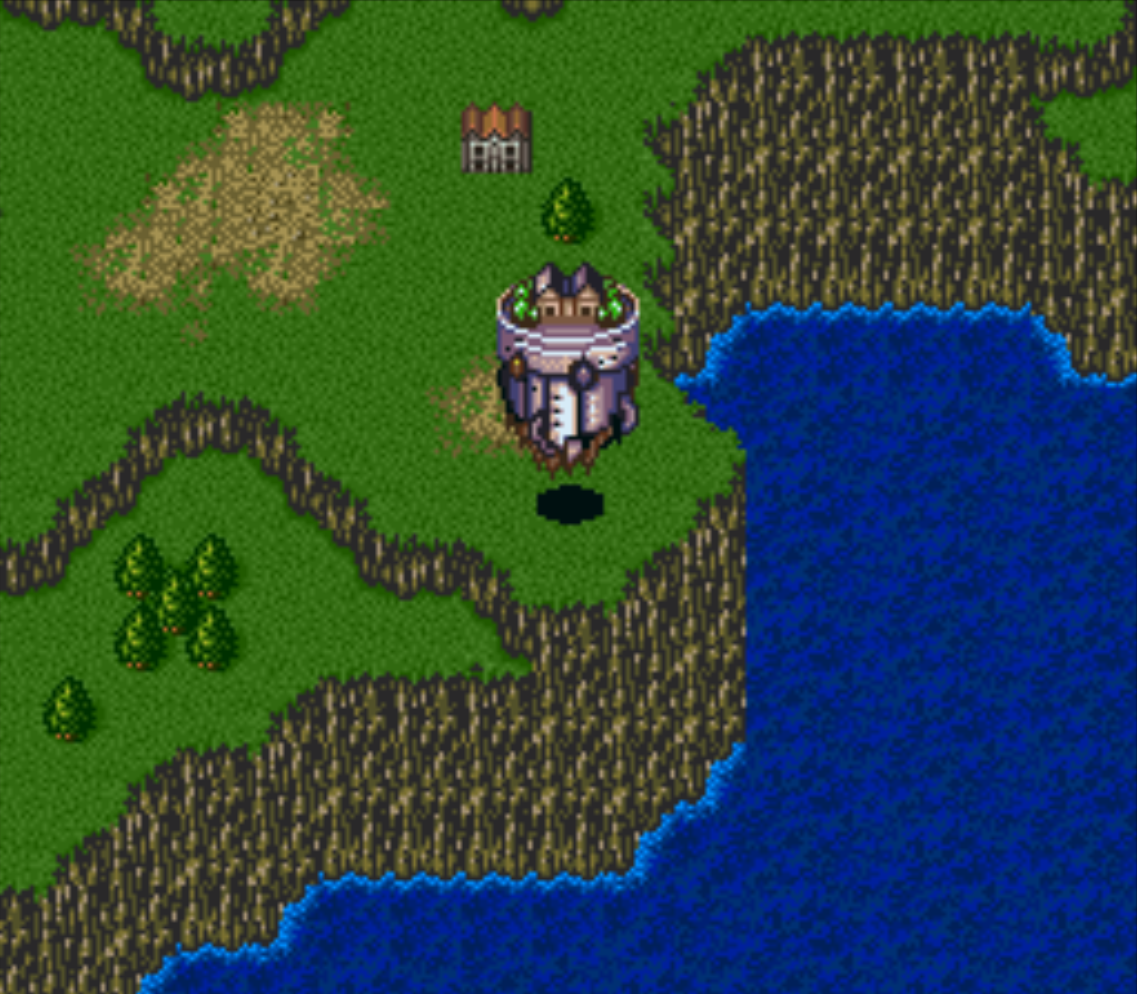
To get this whole side quest kicked off you'll need to go inside of the Well in TownShip after the town is fully constructed. You'll notice a weird machine inside (which is seen in my screenshot) and that'll trigger the side quest. After that you'll want to speak to the Great Tree east of Guntz with Spar. He will tell you to find a mechanic in Guntz.
In Guntz you'll want to visit the northern most house - it's the largest house in the entire city. Once inside head to the second floor and you'll notice a couple rows of Bookshelves. You'll be able to go behind these bookshelves and into a new area where you'll be able to speak with an eccentric mechanic named Eichichi.
Go through a bit of dialogue and you'll be able to invite her back to TownShip. Revisit the Well and you'll find Eichichi there. The next part of this quest comes a bit later during a boss fight in St. Eva's Church.
The rest of this guide is going to have spoilers.

The boss in St. Eva's Church is Ryu's father. As seen in the screenshot you'll fight him and three eye balls at the same time. You have to kill the eyeballs and not him - if you kill him TownShip will never fly and you will also forfeit your chance for the best ending.
Once you free Ryu's father you'll want to revisit the well in TownShip. Ryu's dad (whose supposed to be blind) will somehow navigate himself to the room and he'll even point out that the machine is one that feeds off of human energy without touching it or being able to see it. How amazing!
Anyway, brief cutscene and you'll be able to fly TownShip by .... slowly killing your father.
This is the weirdest way I have ever seen a game create a means of flying on the over world. I mean if you seriously think about this Ryu's father probably has some serious PTSD from being hooked up to a machine that was killing him for years. He was literally begging us to kill him when we found him.
Then we're going to hook him back up to the machine that was torturing him for God-knows how many years? Imagine the PTSD flashbacks this poor old man is having let alone the physical anguish he's put through making the whole town fly. Whomever made this should get themselves tested for sadism!