
Dragon Quest VIII: Journey of the Cursed King Walkthrough Chapter 10
This guide is designed to point you in the right direction but not hold your hand throughout the entire game. Dungeons and Towns you'll be exploring mostly on your own, with my maps pointing out any treasures that are hidden in a dungeon as well as how to solve any puzzles you'll encounter that could possibly get you stuck.
Additionally depending on your own personal preference, my maps/pictures are designed to work as a guide of their own. If you'd like to skip reading text entirely while you play, you can just look at the maps for the treasure chest locations and where you need to go to advance the story forward.
Skill Point Tips: Hero Courage (100 Points); Spear (If you plan to Metal Slime Hunt/Level to 65 to do Dragovian Trials) otherwise max Sword; Jessica Staff (Kazing 100 Points); Whip (Attack Power Bonuses/100 Points); Yangus Humanity (100 Points); Axe (If you plan to Metal Slime hunt/level to 65); Angelo Bow (100 Points); Staff (100 Points)
Alchemy Tips: Scourge Whip, Sun Crown, Timbrel of Tension, Metal King Shield, Liquid Metal Sword; Cheeses & Other Consumables
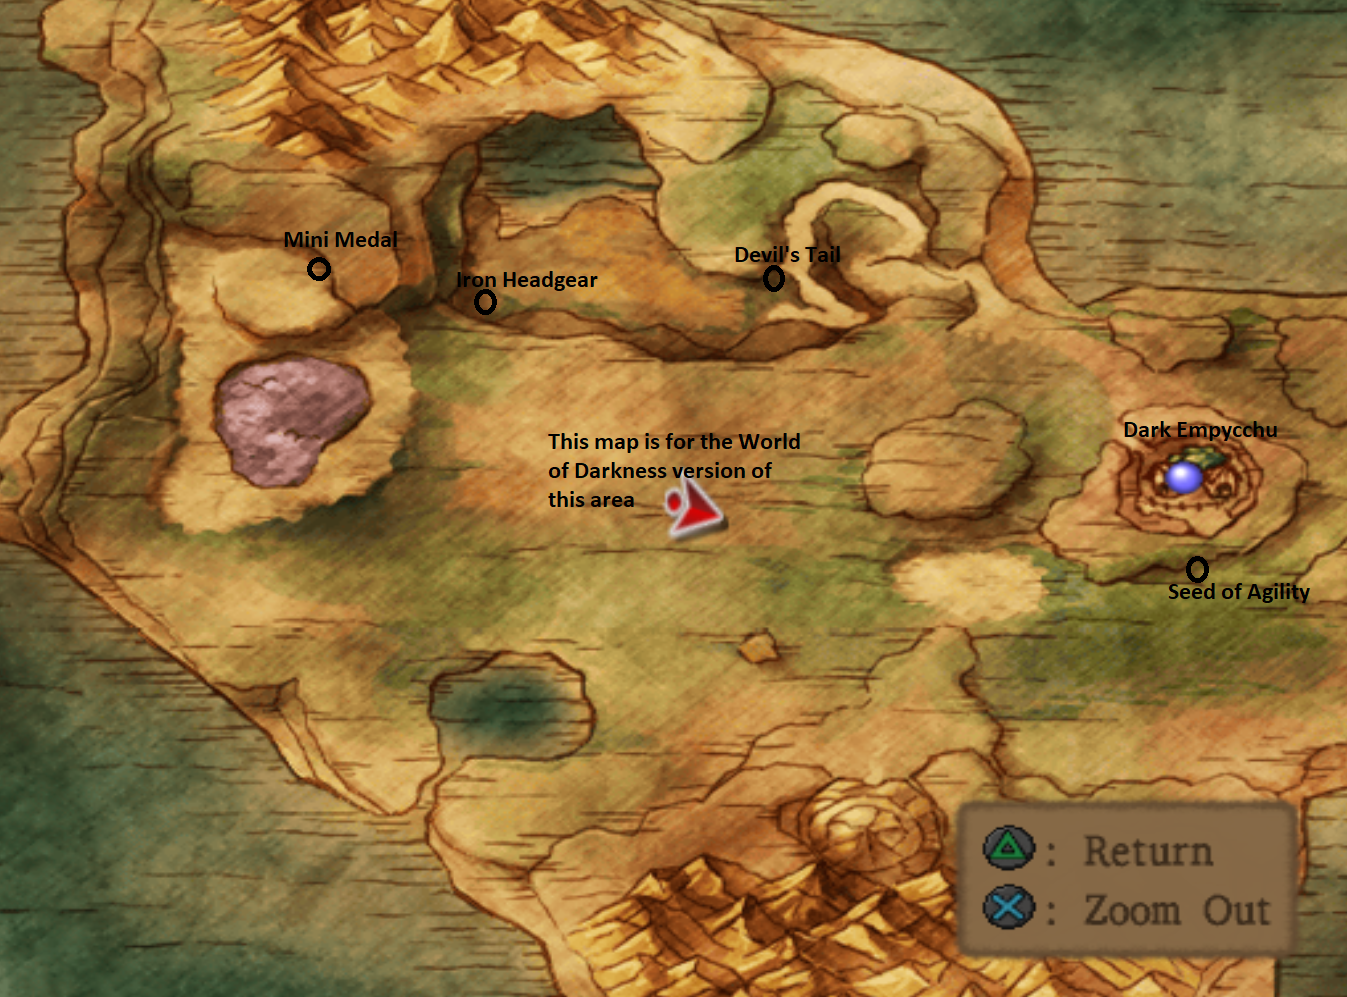
The World of Darkness shares the same layout as the Isolated Plateau; so we're basically exploring the same place a second time. There are four chests for you to collect in this area, one near where you port in - two of them are near where you arrived in your ship back in the real world and the last chest is just south of Dark Empycchu.
Dark Empycchu is the name of the town while in the World of Darkness and it's also our destination when we want to advance the story forward.
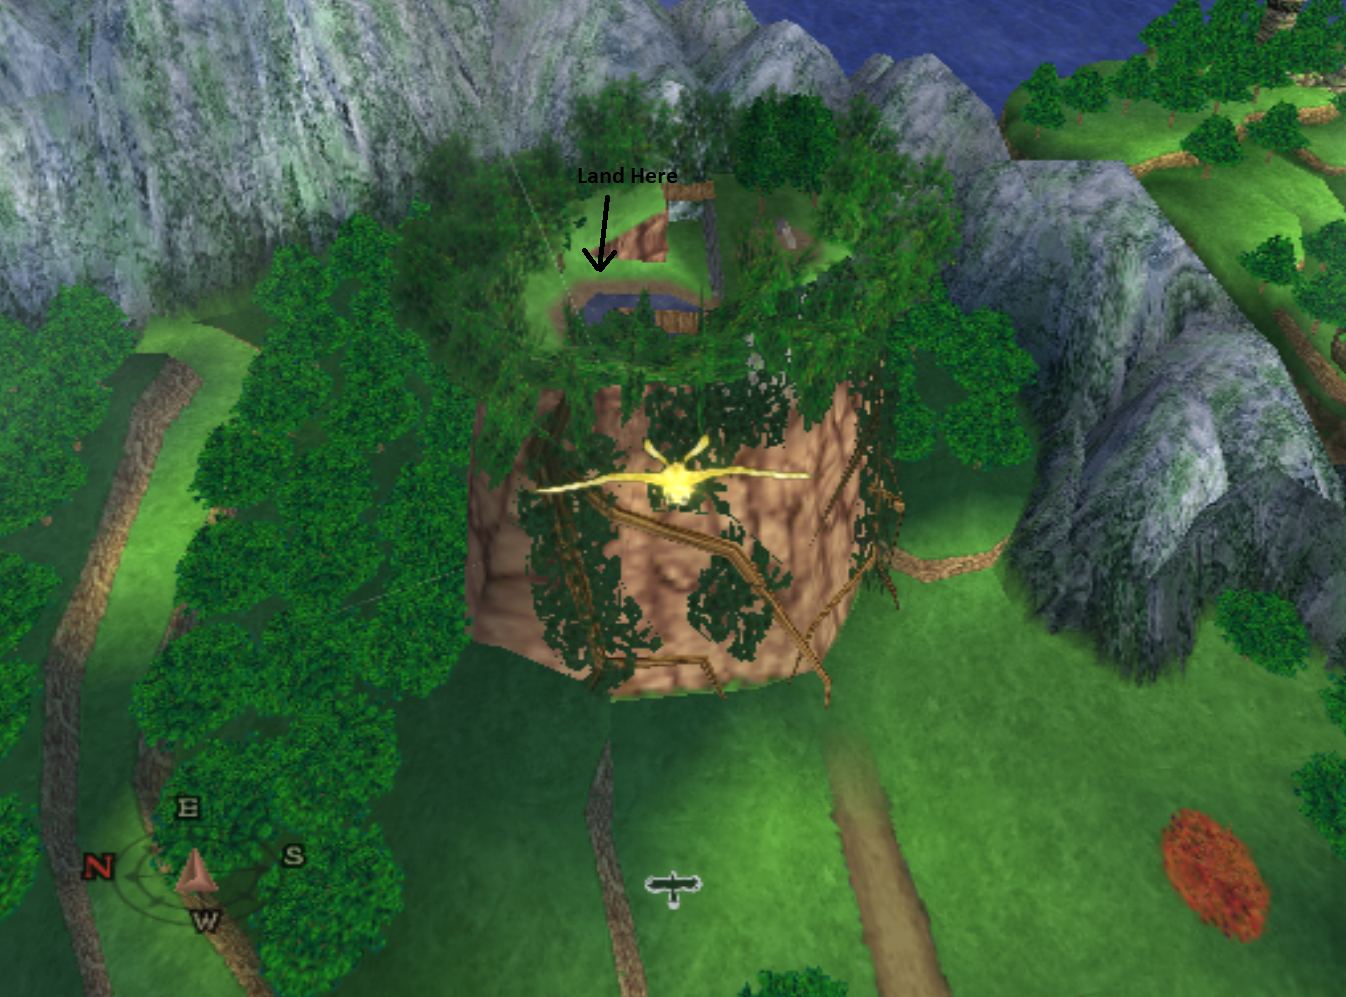
Town of Dark Empycchu
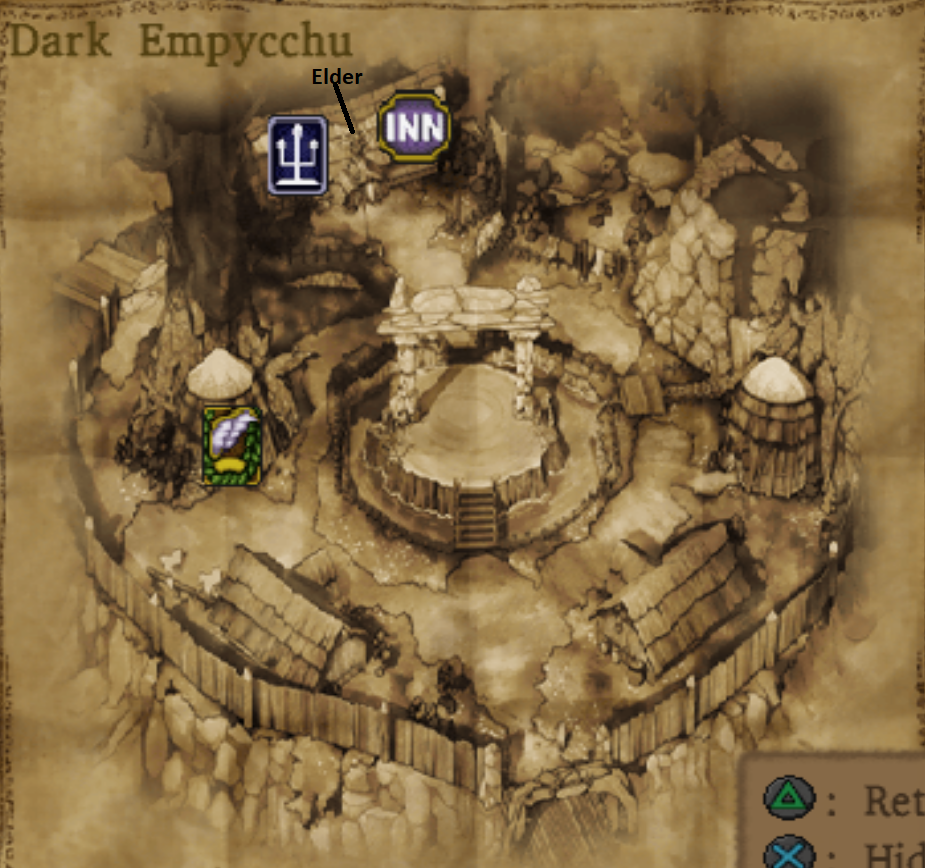
Much like when we arrived at the regular version of this town you'll want to search the entire place for goodies. Also, much like the regular Empycchu this place is full of loot for you to collect. When you're ready to advance the story forward you are going to want to talk with the Elder in the northern most portion of the town, just like we did in the regular town of Empycchu. Accept the Elder's request and stay the night at the Inn for free again.
Your destination? The same stone formation we went to while in the world of light to find Empyrea. When you get to the stone formation this time though you should be prepared for a fight. Empyrea will engage you in a boss battle when you approach.
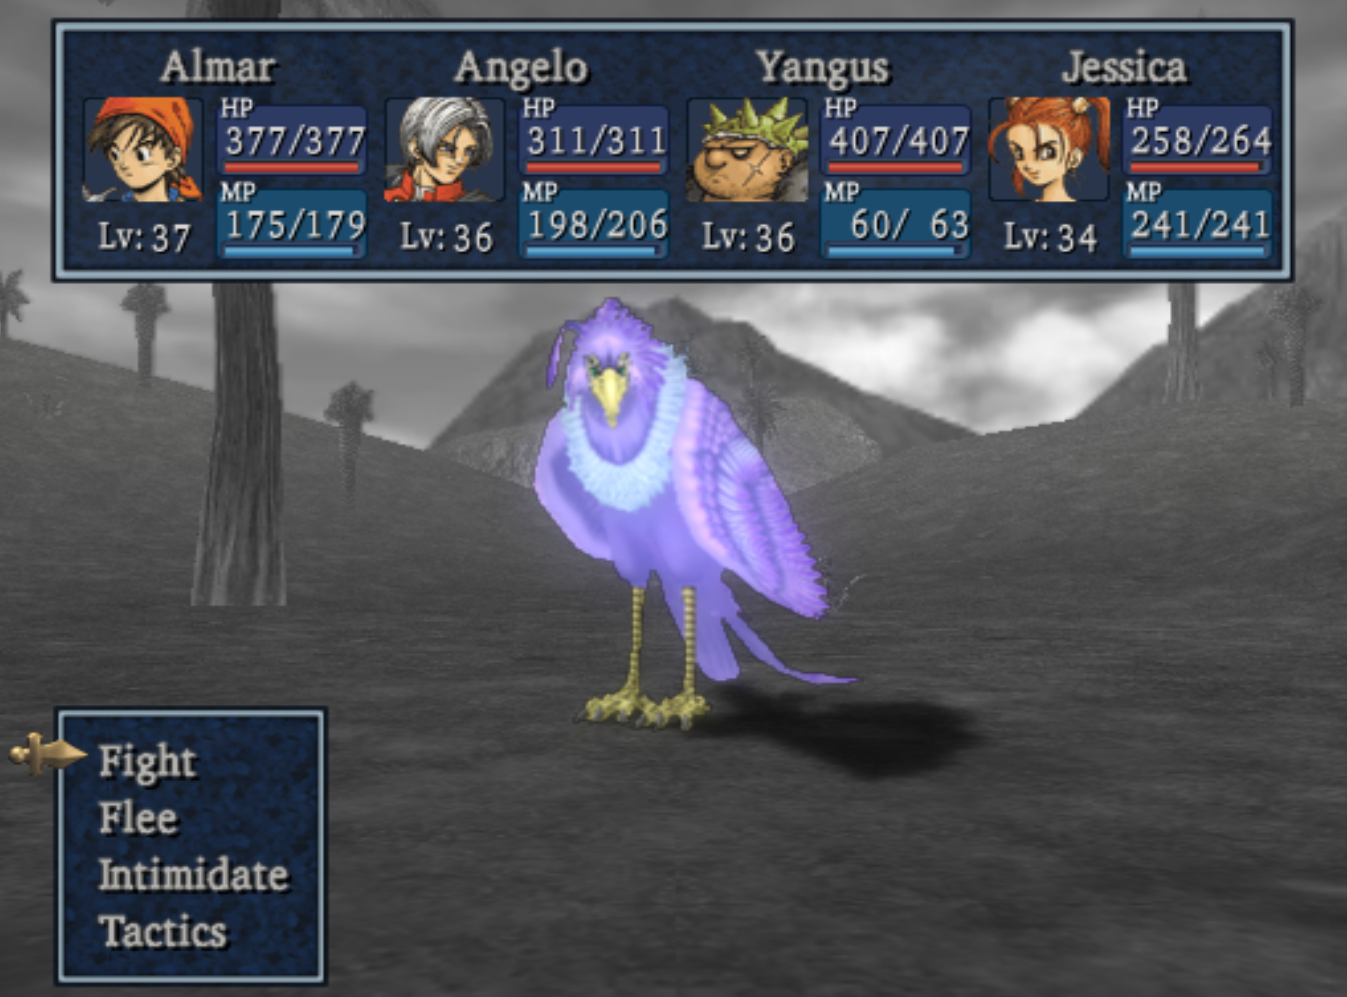
Empyrea attacks twice per round like most of the bosses we have faught before her. The most damaging attacks she dishes out are her physical attacks so it's highly recommended you keep your party buffed with Kabuff the entire time. Keep an eye out for when she dispells the group to cast Kabuff again. Aside from that lay into her with your strongest physical attacks and it won't take long to beat her.
After you beat Empyrea she will ask you and your party for help. Apparently some not-so-friendly person is holding her egg hostage and she requests your help in getting it back. If you need to rest up before helping her then decline to go right now, return to town and spend a night at the Inn. Then come back here in the morning and tell her you're ready to depart.
Godbird's Eyrie Dungeon
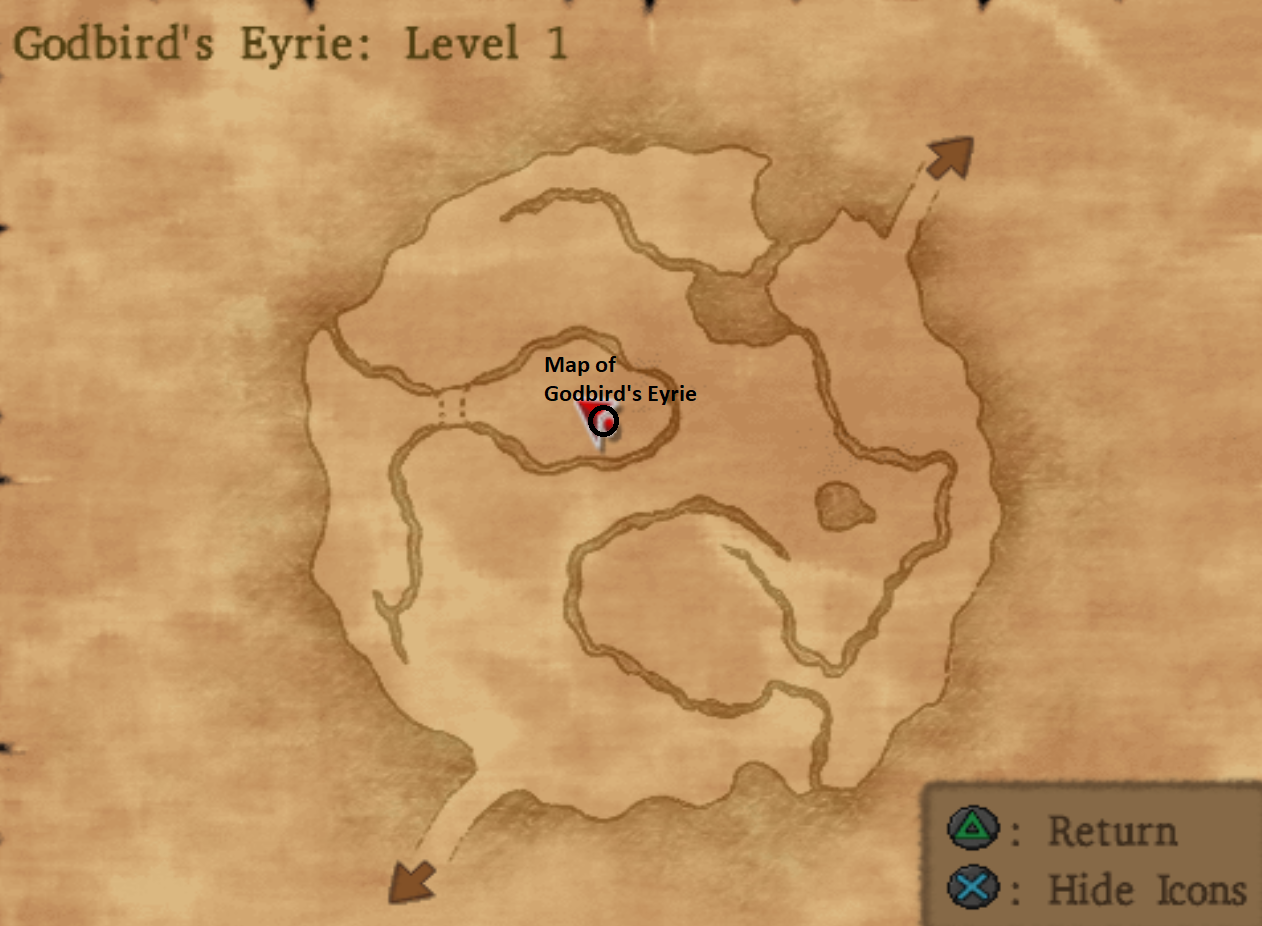

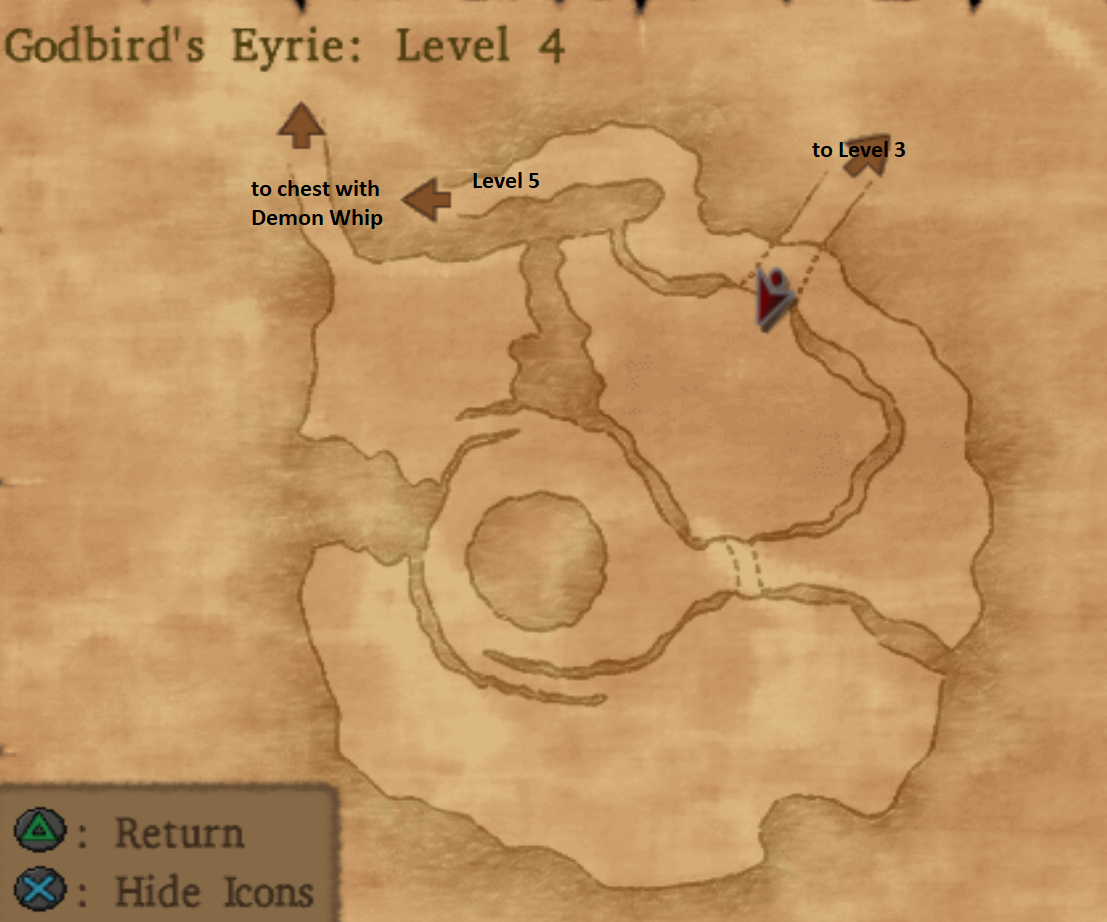
This dungeon is rather big but luckily it's straight forward - no puzzles here! You'll find the map for the dungeon on the very first floor on the raised platform. A Gold Nugget on the second floor and two exits, take the northern one first so you can collect the chest then take the southern when you want to progress to the third floor.
On the fourth floor you'll have a similar detour to make, take the northwestern most exit to grab a chest then circle back around and take the northeastern exit to proceed to the fifth and final floor of the dungeon. On the fifth floor take the southeastern exit to collect a treasure chest before proceeding to the next floor. Be prepared when you go through the doorway at the top of these stairs as Gemon, the boss, is standing right in front of you when you do.
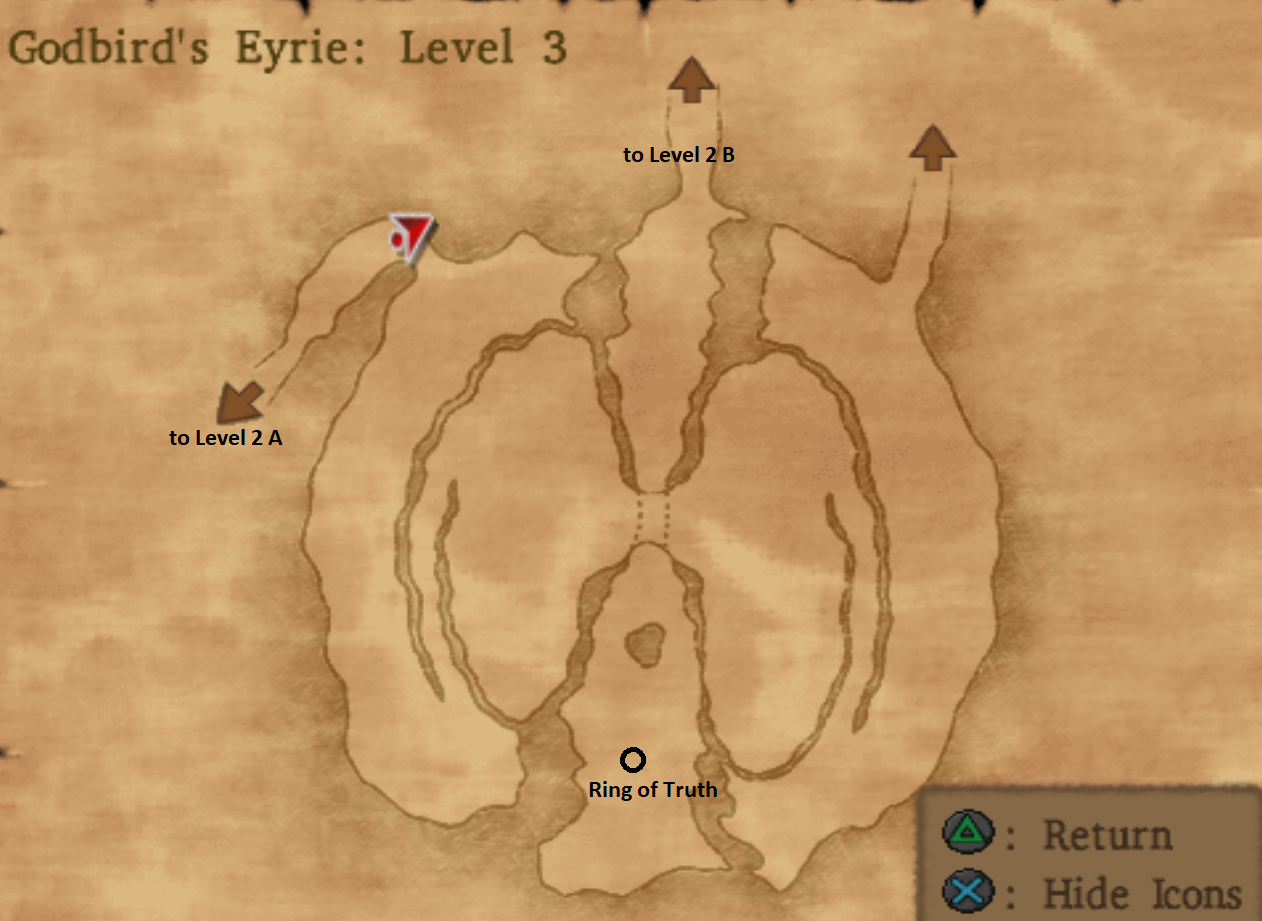
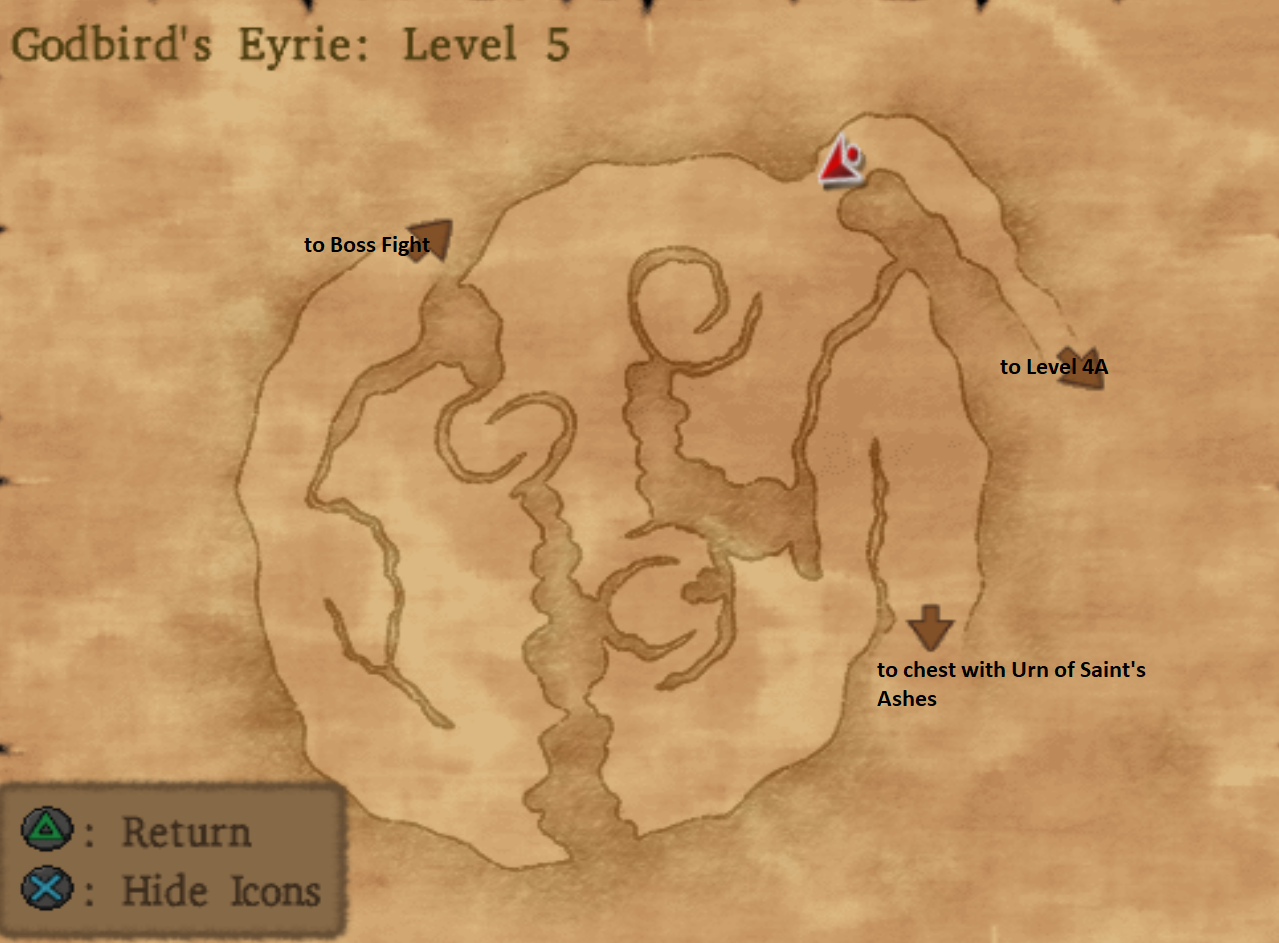

Gemon isn't that challenging in comparison to Empyrea who we just faught. He can summon the two other enemies that come with him during the fight - I'd recommend just focusing entirely on Gemon or doing AoE attacks until the adds are dead then focusing single target attacks on Gemon.
After you defeat Gemon there'll be a cutscene and at the end of it you will be rewarded with the Godbird's Soulstone. This allows you to fly when you're in the World of Light! Empyrea will take you and your party with her out of the World of Darkness and place you back in the World of Light when the scene is finished.
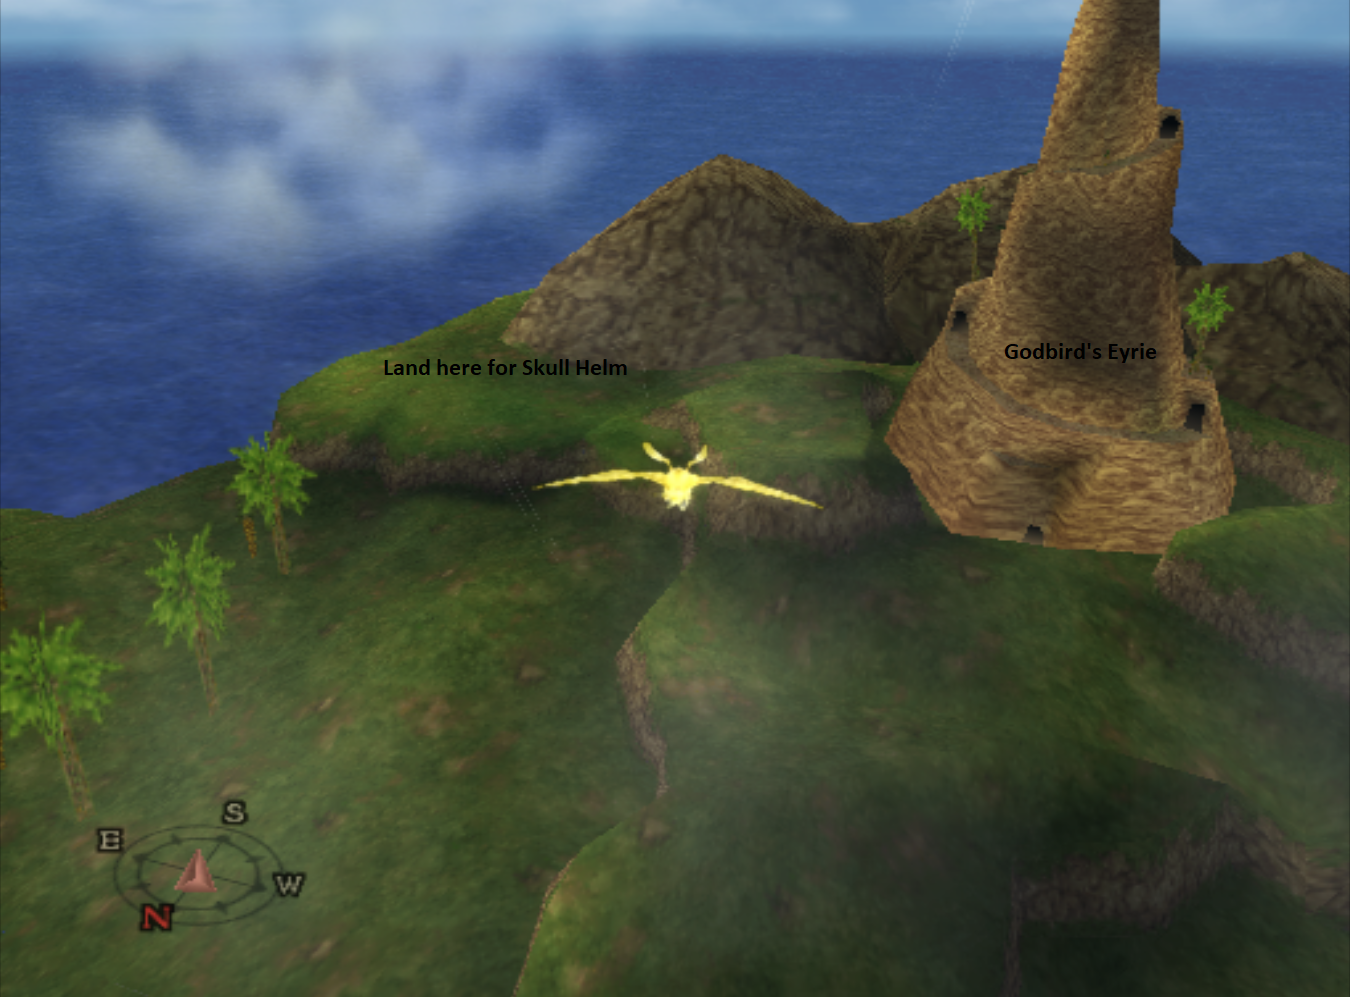
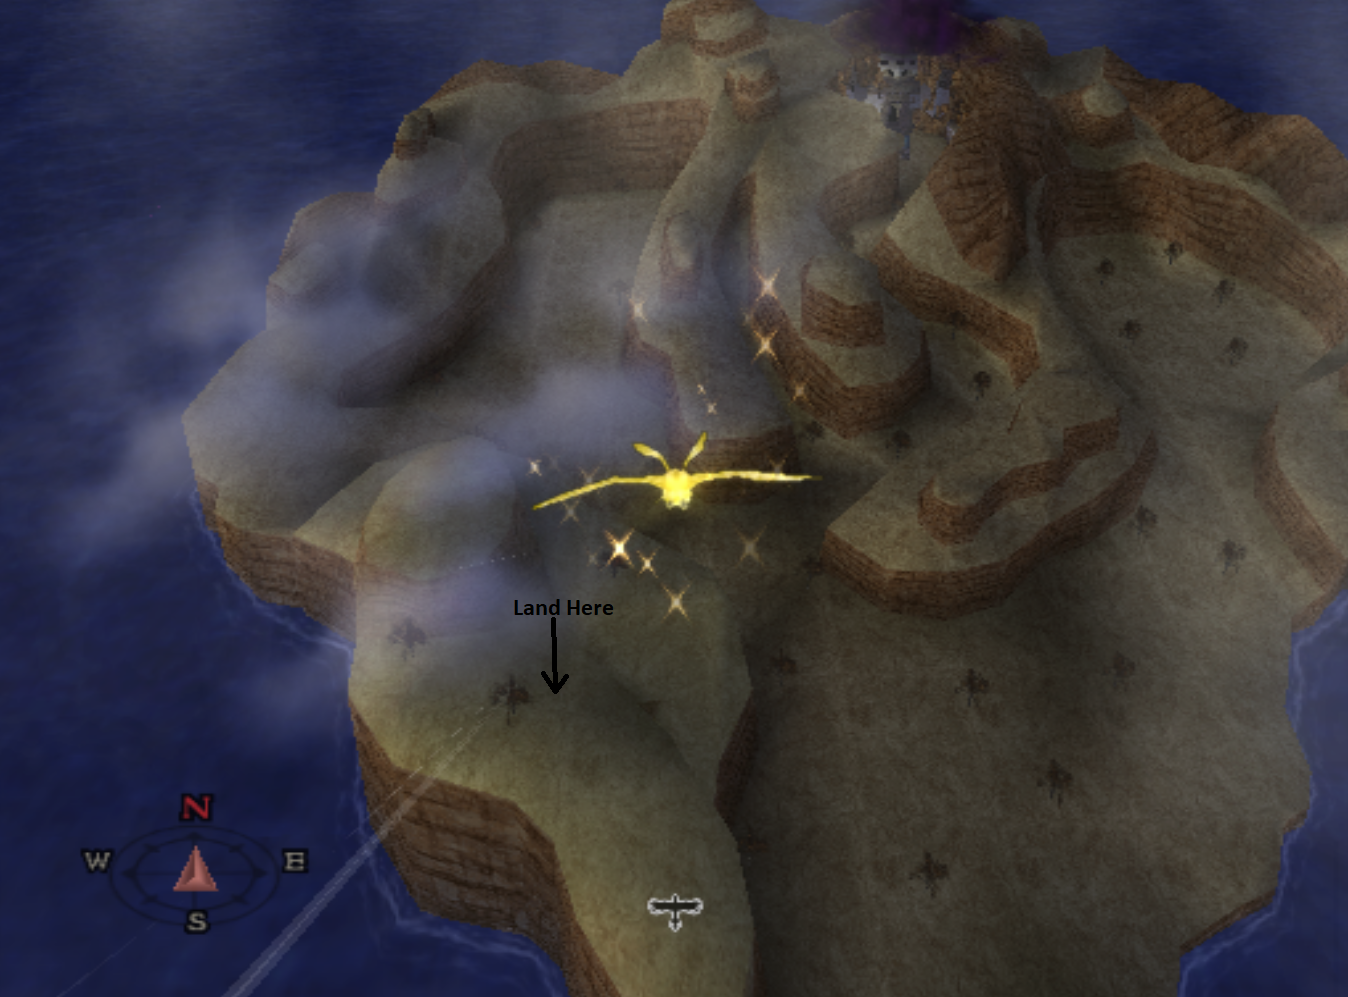
When you are back in control of your character you will want to go into your inventory and use your Godbird's Soulstone. Our first stop is the exact dungeon we just came from - Godbird's Eyrie. This time though we're going to clear it in the World of Light. All of the treasure chests are in the same spot and all of them are refilled throughout the dungeon. Two of the chests have Mini Medals and one has a piece of Orichalcum - an incredibly rare ore used in the Alchemy Pot.
You're going to run through the whole dungeon again and collect all the chests then Evac/Zoom out.
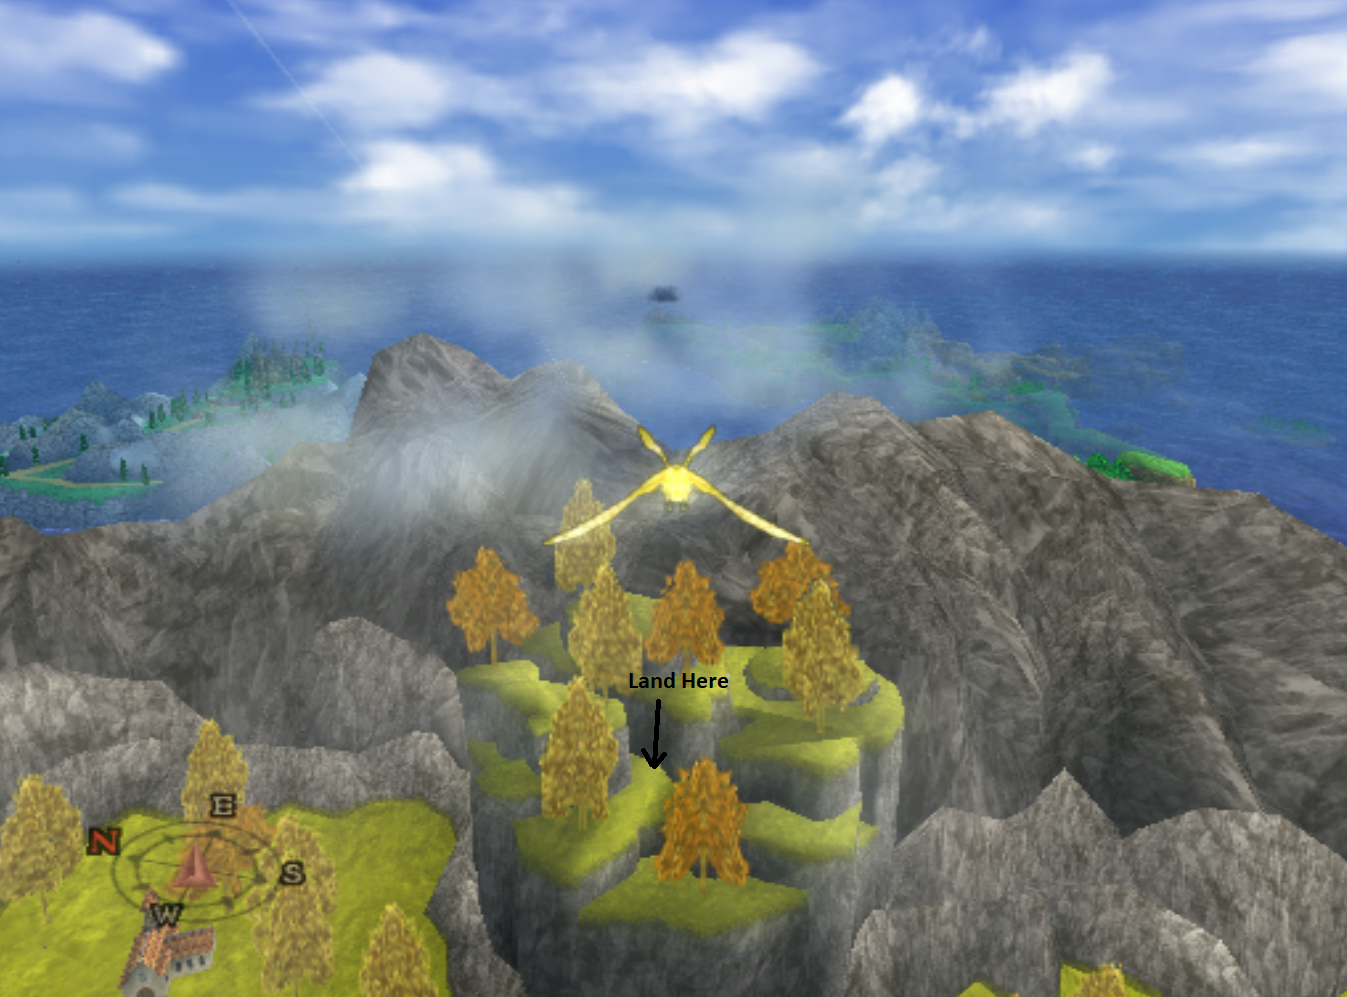
Note: Just east of Godbird's Eyrie along the cliff you'll find a treasure chest with Skull Helm in it. This is an extremely important item for you to collect because it allows you to make the Timbrel of Tension; arguably the best item in the entire game.

Side Questing - Treasure Hunt
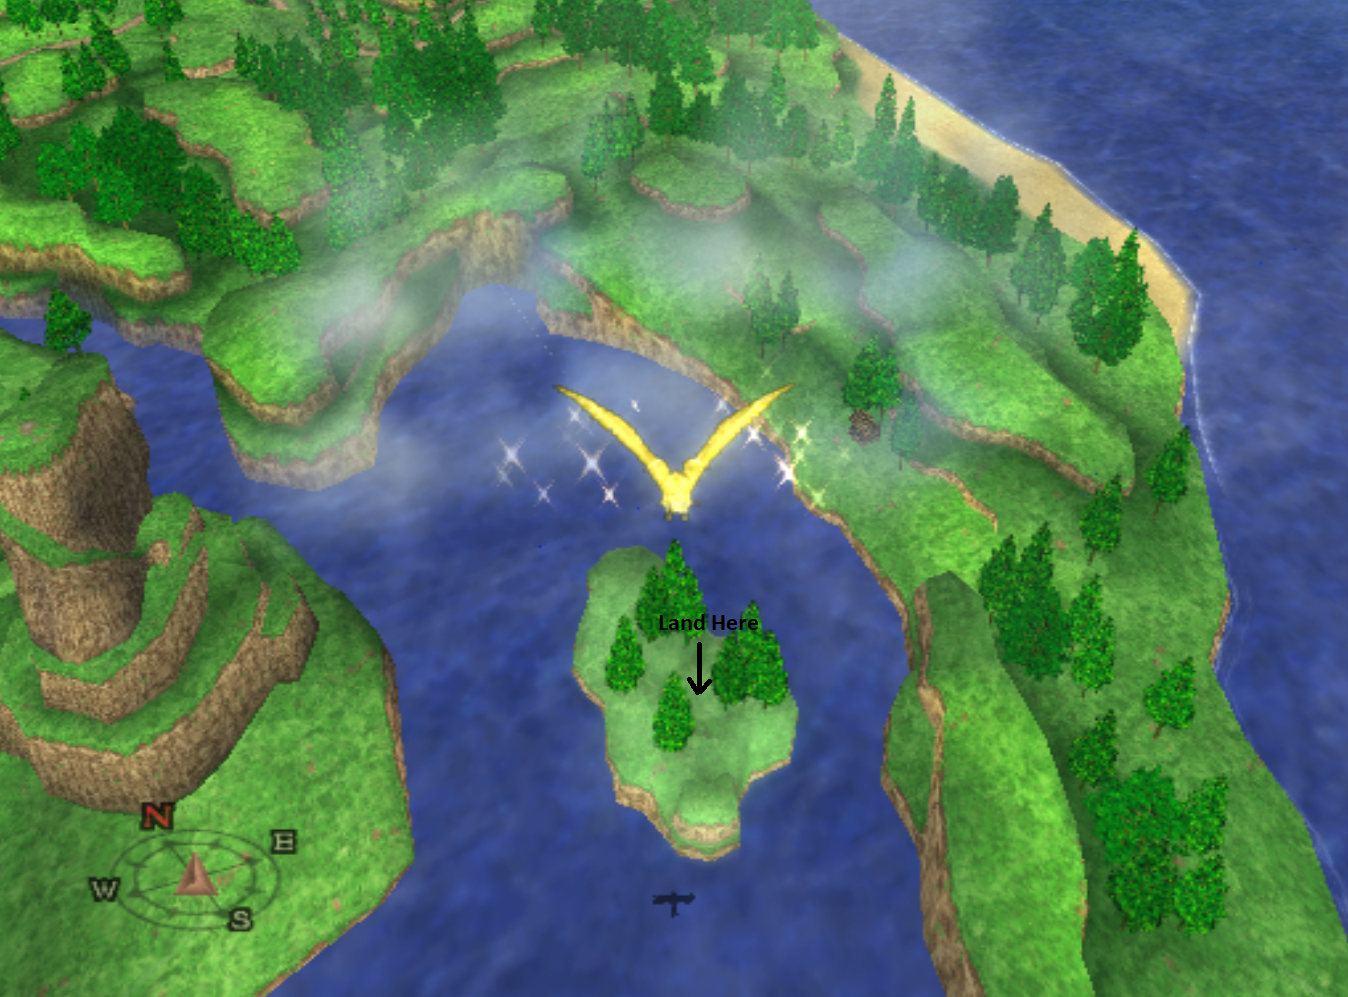
This is our final side questing treasure hunt of the walkthrough. Now that we drank the Red Bull and got wings it's time to explore what's left of the world and collect all the goodies. It doesn't matter what order you do the following areas in and it's up to you if you want to skip any of them. Though I would recommend you don't skip anywhere that you can find Mini Medals.
Hill East of Farebury Loot:
1) Yggdrasil Leaf
2) Mini Medal
Lake North of Pickham Loot:
1) Phial of Yggdrasil Dew
2) Bushwacker (Enemy) Silver Monster Coin
Hill West of Argonia Loot:
1) Flametang Boomerang
Desert Treasure Chest Loot:
1) Mini Medal
2) Ogre Shield
North of Arcadia Chest Loot:
1) Conqueror's Axe
2) This is one of the best leveling locations in the game
Northwest Isle (Near Dark Ruins) Loot:
1) Lots of Alchemy Recipes (Check Graves)
2) The Troll Patroller (Enemy) Gold Monster Coin
3) The Stonemason (Enemy) Silver Monster Coin
4) Ruinous Shield
The final location we're going to hit up in this adventure is the Lord High Priest's Residence which is the floating island just north of Savella Cathedral. You'll witness a scene here between Marcello and the High Priest when you approach the building; when it's finished you'll be able to access the large mansion in the center of the area.
All of the loot in this area is found inside of the building; however you must wait until it's day time to get one of the Mini Medals, the one inside the High Priest's private room. Or you can just wait a little and we'll come back to this same island and into that room for another cutscene and you can grab it then.
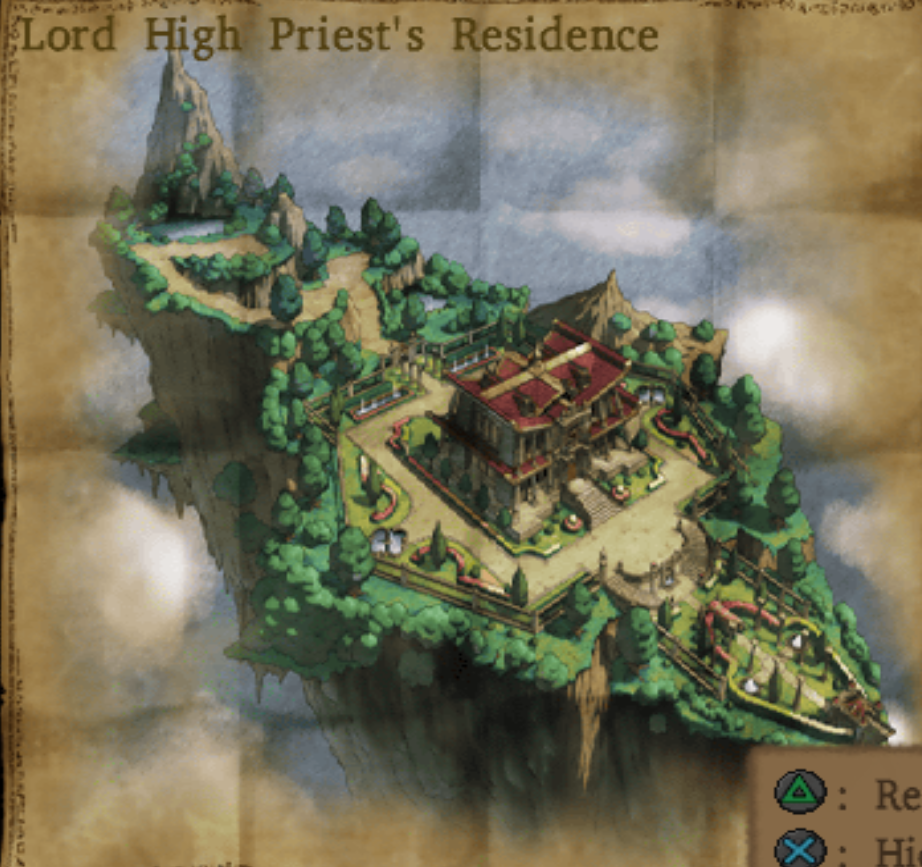
Lord High Priest's Residence Loot:
Story: Scene between Marcello and the High Priest
1) Mini Medal
2) Sage's Robe
3) Seed of Life
4) Mini Medal (In Priest's Room only open during daytime)
When you're done collecting all of the loot at each of these locations your next stop will be Tryan Gully which is a town that monsters and humans can live in together peacefully. Tryan Gully is found just north of Swordsman's Labyrinth and can only be reached with the Godbird's Soulstone.
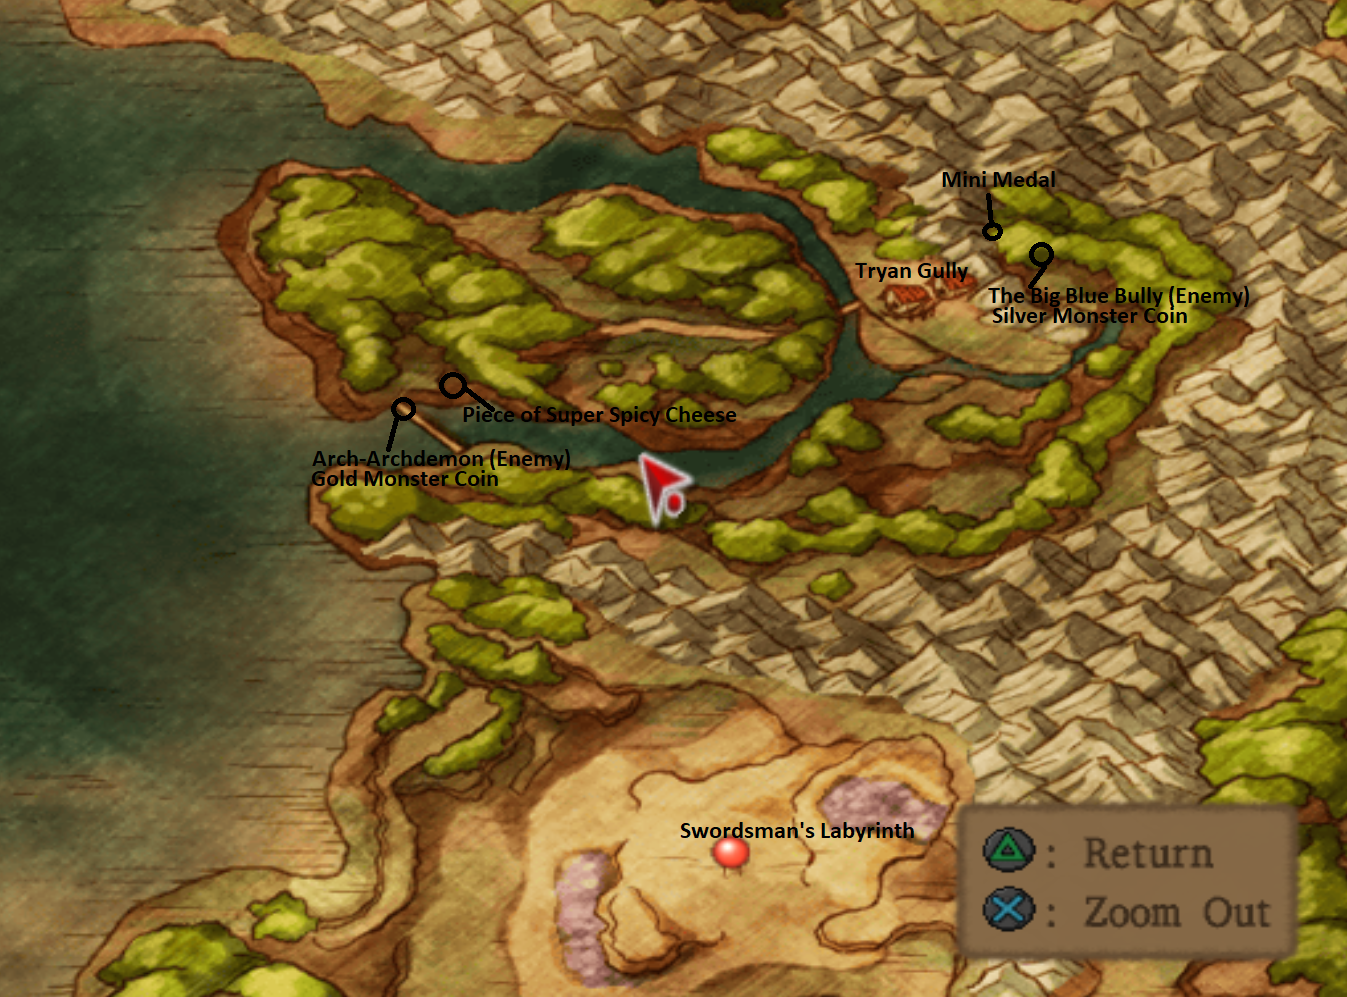
Tryan Gully is the last friendly town in the game that you come across. The best items you can buy are sold at these shops and many of the items sold here can be used in Alchemy Recipes to make some of the best armor in the game. The next page has a list of all the Alchemy Recipes you can make using Tryan Gully items.
Walkthrough Chapter 9 (Side Quests, Savella Cathedral, Pirate's Cove, Empycchu)
Walkthrough Chapter 12 (Collect All 7 Orbs, Rhapthorne Final Boss Fight)