
Walkthrough Act 3 - Champions of Norrath
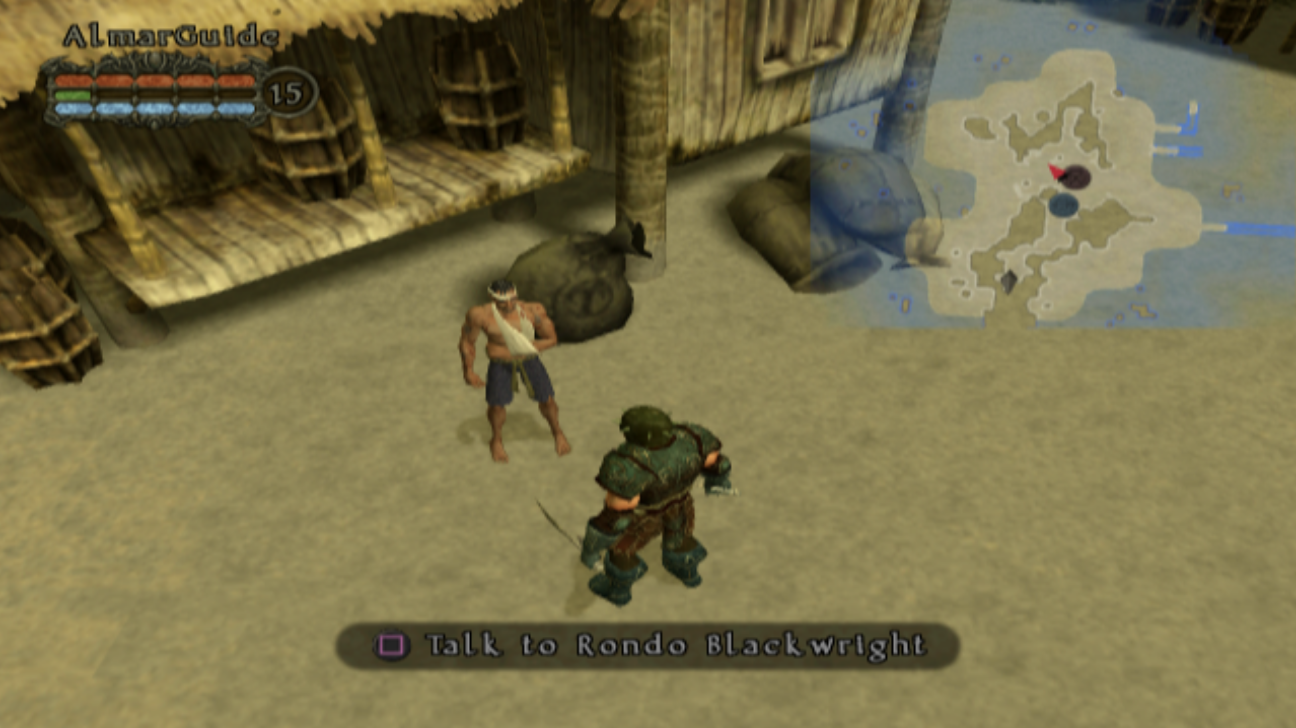
You begin this Act stranded on an island with Davel Grom; talk with Davel to get your first objective for this Act. What you'll want to do is run around in the ocean surrounding this island, you'll find a path between 2 rocks that you can follow to an adjacent island. As of right now this island will be deserted but you will find a Portal in the middle of it along with a nearby cave that you'll want to go inside of.
Like most dungeons in this game the cave will be extremely linear and will lead you straight to a broken Portal Stone and someone named Rondo. There will be a short scene with Rondo once you rescue him, when you're ready to proceed go through the broken Portal Stone to the next area. Just get near these broken Portal Stones and they'll give you a one way trip to your next destination.
One thing to mention is now that Rondo is free he'll be your vendor for the rest of this Act. You can use the teleport to town (Square + Select) command and sell any unused items to him. After going through the broken Portal Stone you'll find yourself in the Hidden Shores map.
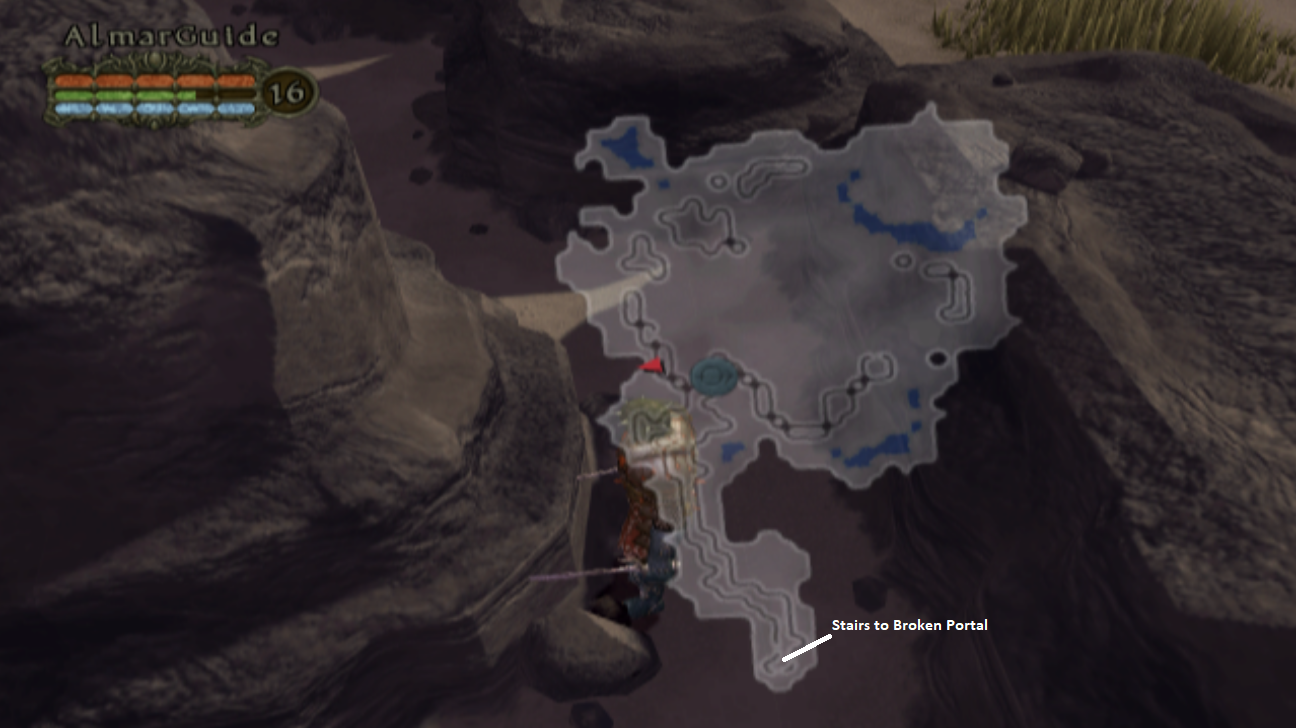
The Hidden Shores is a map I found to be very confusing at first, there is a very narrow path that you will need to follow when you reach the beach. I've included a screenshot below that points out this path as well as the two important locations on either side of it.
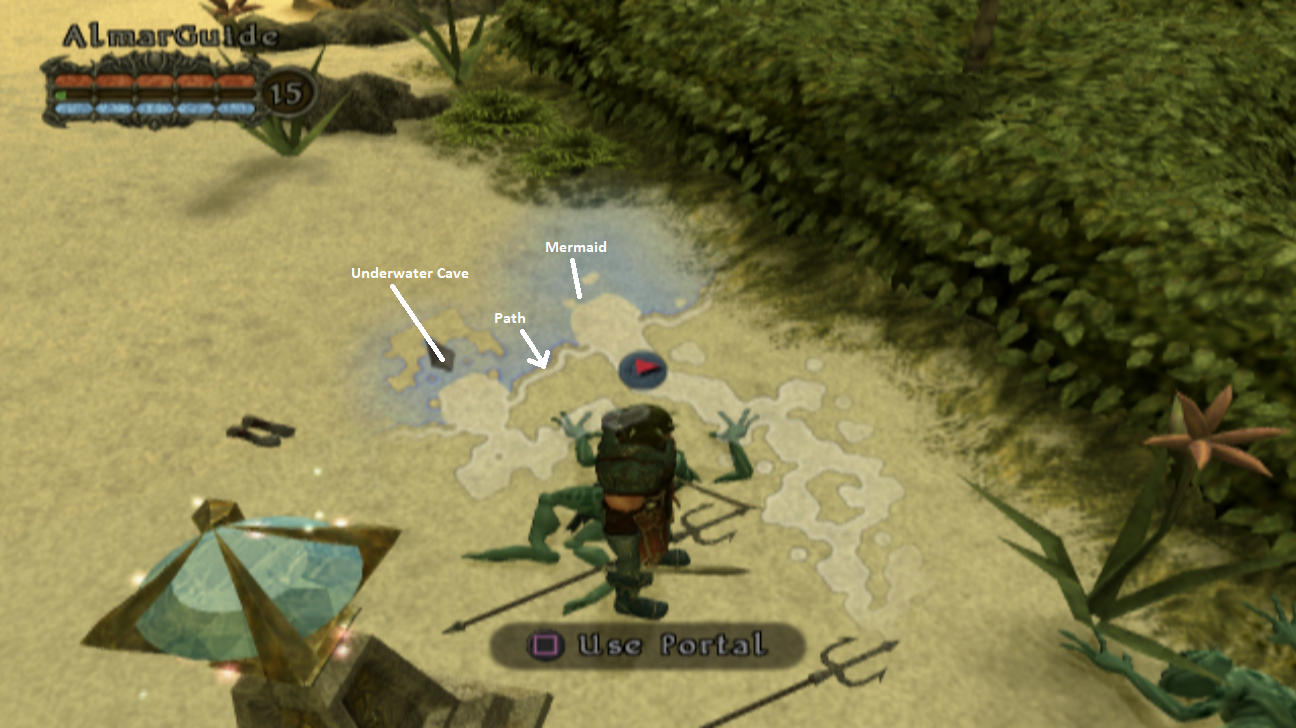
The narrow path you need to travel along in the Hidden Shores map
In the first beach area you will find an underwater cave that you currently can't enter into. On the next beach you come across after following the narrow path you'll find a Mermaid who will ask you to find a conch shell for her. When you return the conch shell to the Mermaid she'll give you a buff that allows you to go into the underwater cave. Keep this area in mind because we'll be returning to it in a bit.
Continue along the linear path and you will eventually come into contact with Seagorn, a giant beast that protects the entrance to a cave. Seagorn will be your next boss fight but he isn't too challenging if you're a ranged character. Those of you who are melee will have a tougher time with him - my advice will be to block a lot and buy a ton of Health Potions.
Once you've eliminated Seagorn enter the cave he was protecting and proceed through it. Much like the other cave we went through this one will be extremely linear. The cave will lead you to a place called the Western Island where you will meet Babik Nurn for a second time. Babik will be locked inside of a cage and will ask you to eliminate every slaver on the island before he will come out.
You'll find numerous slavers above ground on this island along with 2 different caves that will have some slavers inside of it as well. As you probably already guessed you'll have to thoroughly clear out both caves and the entire above ground area to find all of the slavers.
After you've eliminated all of the slavers return to Babik Nurn inside his cage. If you've forgotten where Babik's cage is - search around the cave entrance near the Western Island Portal Stone. With all of the slavers defeated Babik will leave his cage and return to the small town where Rondo Blackwright is (pictured below).
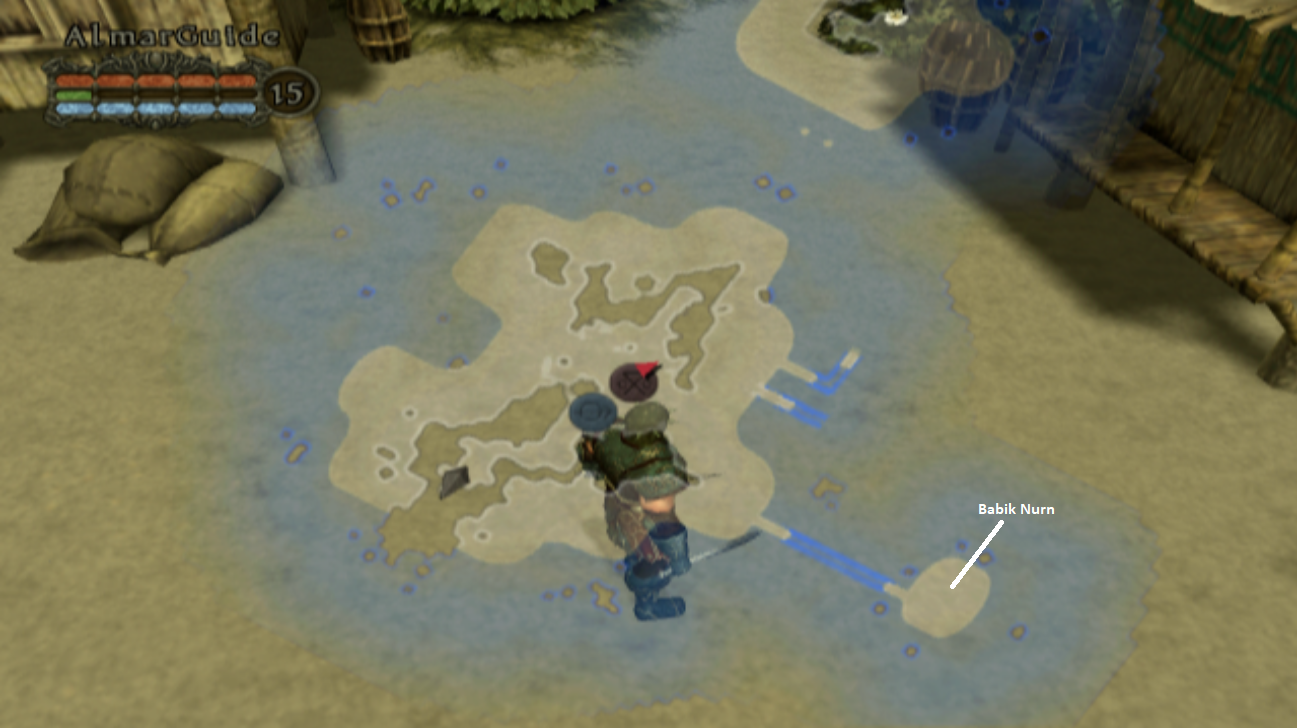
Location of Babik Nurn once you've freed him
Babik's new location is a small island next to the large island with Rondo. To get back to this location you will either want to use a Gate Scroll (Square + Select) or take the Portal to the Water's Edge destination. When you speak to Babik Nurn at this location he will give you a Conch Shell item.
If you remember from earlier a Mermaid asked you for a Conch Shell in the Hidden Shore map. Use the nearby Portal Stone and teleport over to the Hidden Shores where you'll want to give the Mermaid the Conch Shell. As aforementioned the Mermaid will give you a buff that allows you to breath underwater in "the pit" as she calls it.
On the other beach nearby this Mermaid you'll find a cave entrance underwater that you'll now be able to go inside of. This underwater cave is linear, follow it to the end and you will run into a broken Portal Stone which will teleport you to the Ashen Plain once you get close enough to it.
The Ashen Plain is a very large open desert that has many enemies throughout. One of these enemies is a new caster that will very often resurrect fallen allies if their bodies are within radius - this will be extremely annoying to deal with for the next few maps.
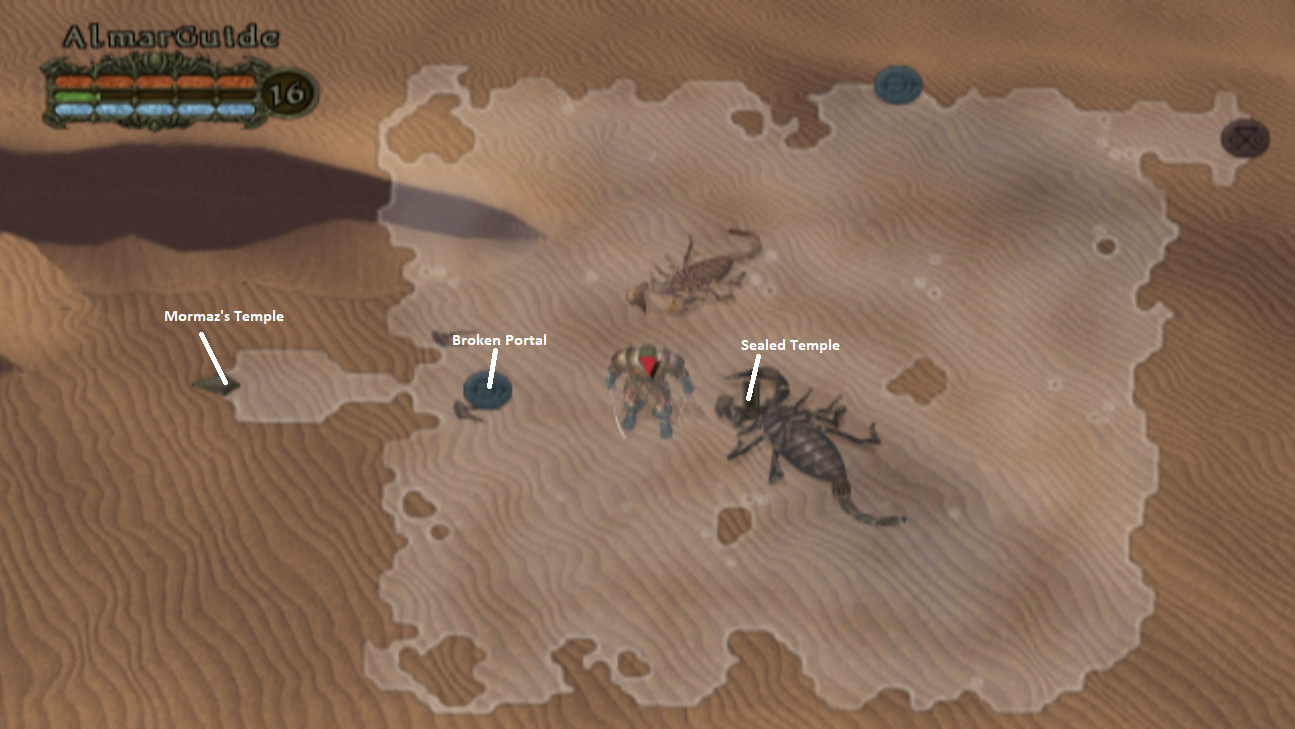
The Ashen Plains Map Locations
What we need to do on this map is a big confusing so I have created an easy list for you to reference and follow. Essentially the first thing we need to do is speak with Mormaz inside his temple then go through 2 broken Portal Stones to get inside the Sealed Temple. Once inside the Sealed Temple you'll need to extinguish all the brazier's then return to Mormaz.
1. Enter Mormaz's Temple & talk with him
2. Visit the broken Portal Stone outside Mormaz's Temple
3. Navigate the Grass Sea & take the broken Portal Stone
4. Extinguish all Braziers inside of the Sealed Temple
5. Return to Mormaz's Temple and speak with him again
If you're stuck in the Grass Sea map looking for the route to the broken Portal Stone - I got you covered! The Portal Stone is sitting ontop of a rock platform that you can only reach by traveling along the platform all the way 'south' until you reach the end of it (pictured below). Here you will find a small path that will allow you to walk ontop of it - then you have to back track to the Portal Stone.
The path leading to the Portal Stone in the Grass Sea
As previously stated taking the broken Portal Stone in the Grass Sea map will put you inside of the Sealed Temple. You'll be tasked with extinguishing all 22 braziers in this zone; I thought about making a map for this part but decided against it because all of the braziers are out in the open. Also, there's no way to see which ones you've extinguished and which are still lit.
If you missed a brazier it's typically best to start at one point in the zone and run through the entire thing again checking each area until you find the one you missed. After you've extinguished every brazier the exit door will open and you'll be allowed back into the Ashen Plains map. Return to Mormaz's Temple and speak with him inside to continue with the story.
Make sure you are properly prepared before speaking with Mormaz again because he'll want to fight you once you've returned to him. The boss fight with Mormaz will begin the moment the dialogue ends.

Mormaz is a pretty easy boss fight, he will spin his staff while standing in place and teleport around the room during your fight. He will also summon allies (one melee and one caster) which will aid him in battle. I'm honestly not sure if Mormaz has any attacks of his own, I ran around for a few minutes and tried to provoke an attack out of him but he only ever did defensive abilities.
One thing to note is that Mormaz can teleport into an area that you can't reach. Much like with all enemies in this area sometimes they'll teleport into a pool nearby in which case... you either have to reload or hit them with ranged attacks (if you have any). It's an annoying bug and is one of those things that lets you know this game didn't get much QA during production.
Defeating Mormaz will open the door behind him and allow you to proceed to the next dungeon of Act 3, the Tower of Clouds. Unlike most of the dungeons in this game the Tower of Clouds isn't mind numbingly linear; near the start of this map it'll branch into 2 paths - one will dead end and one will lead you to the boss of this area.
I'd recommend you fully explore the Tower of Clouds dungeon either way because you need all the EXP you can get in this game. When following the correct path through this dungeon you'll eventually run into a Portal Stone which is kind of your landmark letting you know you're going the right way.
Eventually you'll come across the boss of this area, the Cloud Giant King.
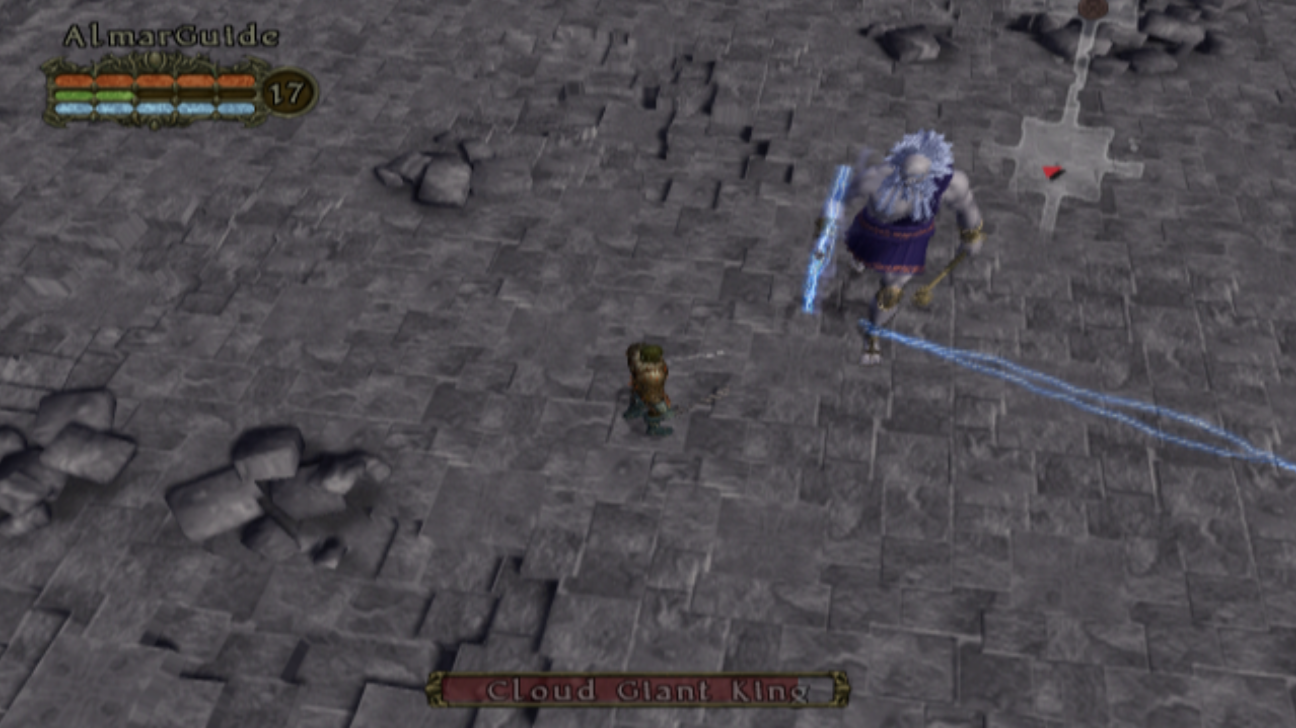
Mr. Cloud Giant King has all of the same attacks the other cloud giants in the area have (ground pound, massive melee hit, a kick and frost breath) along with a lightning bolt and a javelin attack. As with all bosses in this game, it's best if you avoid melee combat with this guy and take him out with ranged attacks. Most of his ranged attacks don't have a very far range which makes it even easier.
Once you defeat the Cloud Giant King you'll meet Lazlo (Rondo's brother) who will lead you to a Portal Stone that will take you to the next part of this Act. There is an optional area you can visit while following Lazlo too, leave him stand around for awhile as you go take your detour if you'd like.
Lazlo will take you to a map called the Frozen Sea and ask you to collect 5 Raft Parts from the surrounding area. I've included a map screenshot below which shows you where all of the Raft Parts can be found - once you have all 5 return to Lazlo.

The next map you visit will be called Bronzeholt and it's essentially just an icy glacier map that is very linear. Follow the path and you'll come across a dock where you can build your Raft and then embark. Your Raft will sink and your character will be swept away to the bottom of the ocean (again).
You will find yourself on the ocean floor on a map called The Depths. Our goal is to explore this map and find a cave which will take us to the next map (aptly named) Ocean Caves. Both of these maps are very linear - you shouldn't have much trouble navigating them and figuring out where it is you need to go.
Inside the Ocean Caves follow the path to the end and you'll find the final boss of Act 3 waiting for us, Gloomwater. This fight is actually extremely easy if you're playing a class that gets ranged attacks because there are numerous areas that you can get Gloomwater stuck and prevent him from even being able to attack you.
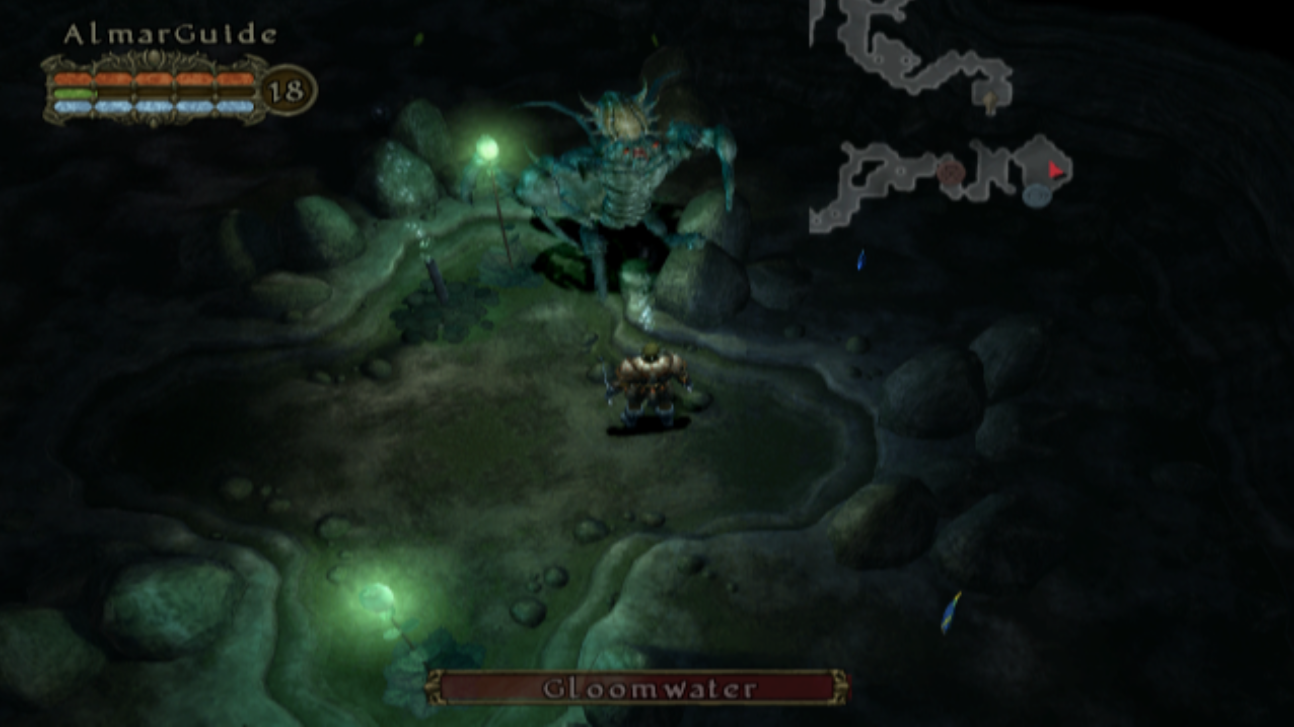
All of Gloomwater's attacks are melee attacks and none of them are anything you haven't already dealt with. Once he's dead be sure to loot the Horn of Ill Omen from his corpse and then use the Portal Stone nearby to return to Water's Edge (or just gate back to town).
Pick up any items that you're bringing with you and then return to Davel on the first island where we started Act 3 and speak with him. When you give him the Horn of Ill Omen you'll begin Act 4.
Continue to Act 4 of my Walkthrough for Champions of Norrath
Return to Act 2 of my Walkthrough for Champions of Norrath