
Persona 2: Innocent Sin Walkthrough (Chapter 4)
Demon Dialogue Choices for Mt. Katatsumuri Dungeon
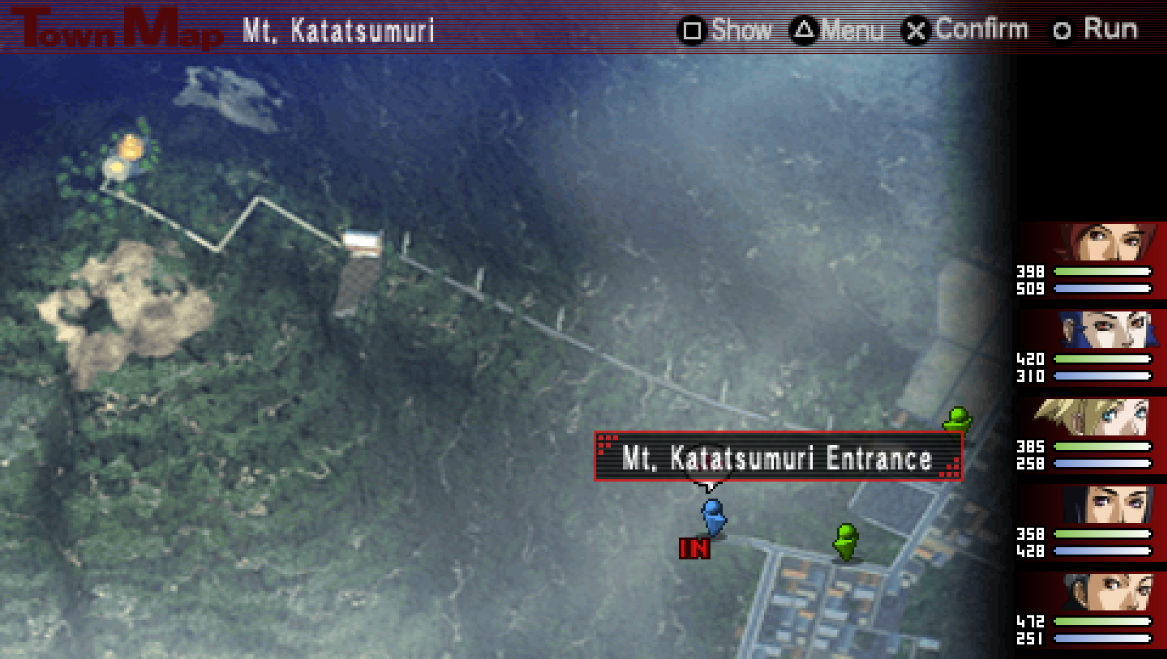
When you are ready to enter Mt. Katasumuri you'll need to enter via the entrance shown in the screenshot above your first time. Immediately upon entering you'll get a scene during which you will be asked if you want to bust through the front or go around. This single dialogue choice will result in a lot of frustration for you or none at all.
The best option to choose here is, "Bust right through." because all that you are required to do is follow a very linear path all the way up the mountain. You'll have to run through about 12 screens in total and fight random encounters along the way but that's it. All in all, it's very straight forward and easy.
Choosing the "We'll go around." dialogue option will force you to complete a very confusing maze dungeon to advance the story. Once you've chosen one of these dialogue options you'll be stuck on that route too so make sure you choose carefully. If you accidentally chose the "We'll go around." option during this conversation, first off, my condolences and second check out my Mt. Katatsumuri 2nd Route Walkthrough for information about how to complete that part.
Regardless of which route you chosen they will both end up at the same spot, a fork in the road with one path going to the Summit and the other to Goketsuji. You'll need to stop at Goketsuji first for a scene and some dialogue with the monks that are there.

At this point in time there is a new rumor/side quest available for us. In order to complete this rumor you'll have to back track out of the entire dungeon and talk to someone on the World Map outside. You're probably thinking, "what a terrible time to have to back track to complete a rumor" and I would completely agree with you.
For those of you who actually want to back track and do this rumor it's called the Jumping Geezer, you'll encounter him as an enemy in this dungeon. If you don't care about that rumor then return to the fork in the road before Goketsuji and instead of going up the stairs to Goketsuji head west up to the summit.
The path to the summit is very straight forward, it's just a few very linear screens with random encounters for you to travel through. When you make it to the summit there will be a scene during which you'll be asked who you want to fight with or if you want to fight a boss alone. Your choice during this dialogue doesn't matter, it only changes who you fight with during the upcoming boss fight.
When the boss fight is over you'll have another scene involving Yukki - your dialogue during these scene matters a lot. If you answer correctly you'll get a new Persona called Durga and Anna will survive during a scene in the next dungeon. The correct answer here is "You'd deny his last request...?"
Important! Make sure during your dialogue with Yukki you choose the answer, "You'd deny his last request...?" otherwise you won't be able to get the Durga Persona!
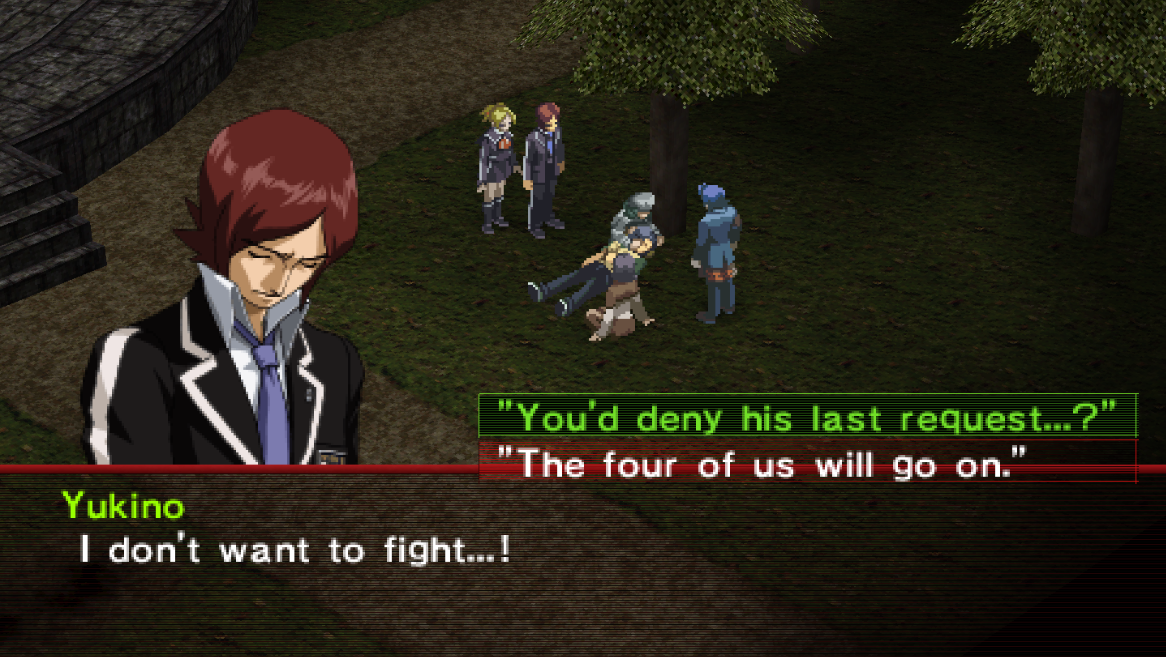
Make sure to choose the "You'd deny his last request...?" dialogue option if you want a new Persona
Once the scene with Yukki is done you'll want to enter the nearby dungeon, Caracol. I actually recommend you enter Caracol then immediately turn around to leave so that you find yourself back on the World Map. If you didn't turn in the Jumping Geezer Side Quest you can do so now. Also, now is a great time to hit up the Velvet Room to mess with your Personas/get new ones.
Like always, I strongly recommend you check out my Best Personas Guide for more information about which Personas are the best in this game and why. As I said at the end of the previous Chapter, things are about to start getting harder in this game from here on out. Specifically what I mean by that is many monsters will start using Light/Dark attacks which will instantly kill a party member (or multiple party members).
You can avoid getting one shot by summoning Personas with strong resistances to Light/Dark. Even better is if you can get a Persona that nullifies Light/Dark because then he'll never get one shot! The choice is entirely up to you, my job here is to give you options and advise you on what to do.
When you are ready to continue with the game return to Caracol - this time you can ride the cable car up the mountain and avoid the entire Mt. Katatsumuri dungeon (nice)!

Demon Dialogue Choices for Caracol Dungeon
Caracol is the last dungeon that Yukki will be in your party for, once we finish this dungeon Jun will replace her and he'll become a permanent part of your party for the rest of this game. As for the dungeon itself, it's pretty straight forward on the PSP version since you have a map. Press Square to open the map and you can use the automap feature to see where you haven't been.
Each floor of Caracol has a 'puzzle' of sorts, none of these puzzles are really that confusing or challenging but I will list them all below anyway. B2F has a minor puzzle involving moving floors, I have a screenshot of this puzzle below if you need some help figuring it out. Since I know those of you playing on the PS1 don't have a map I figured that would be more helpful than explaining things.
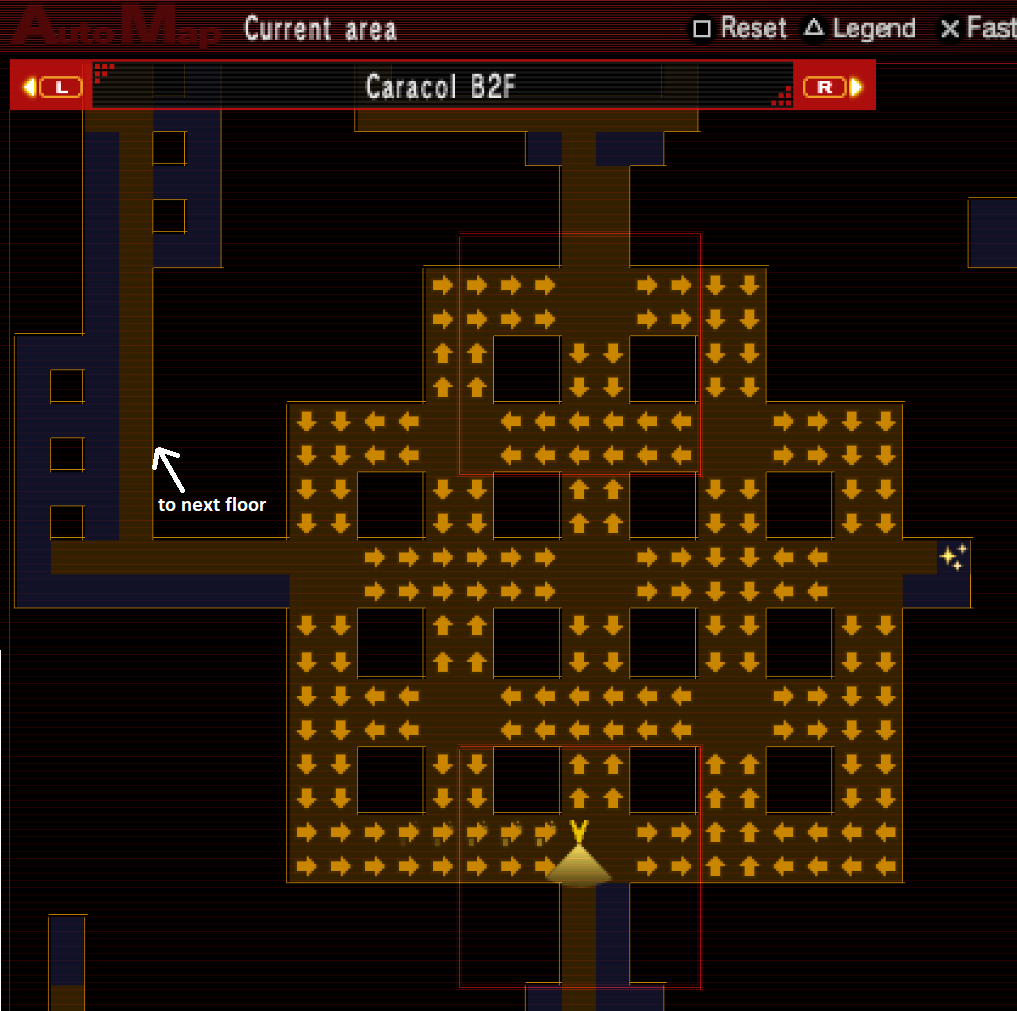
B2F Caracol Moving Floor Puzzle
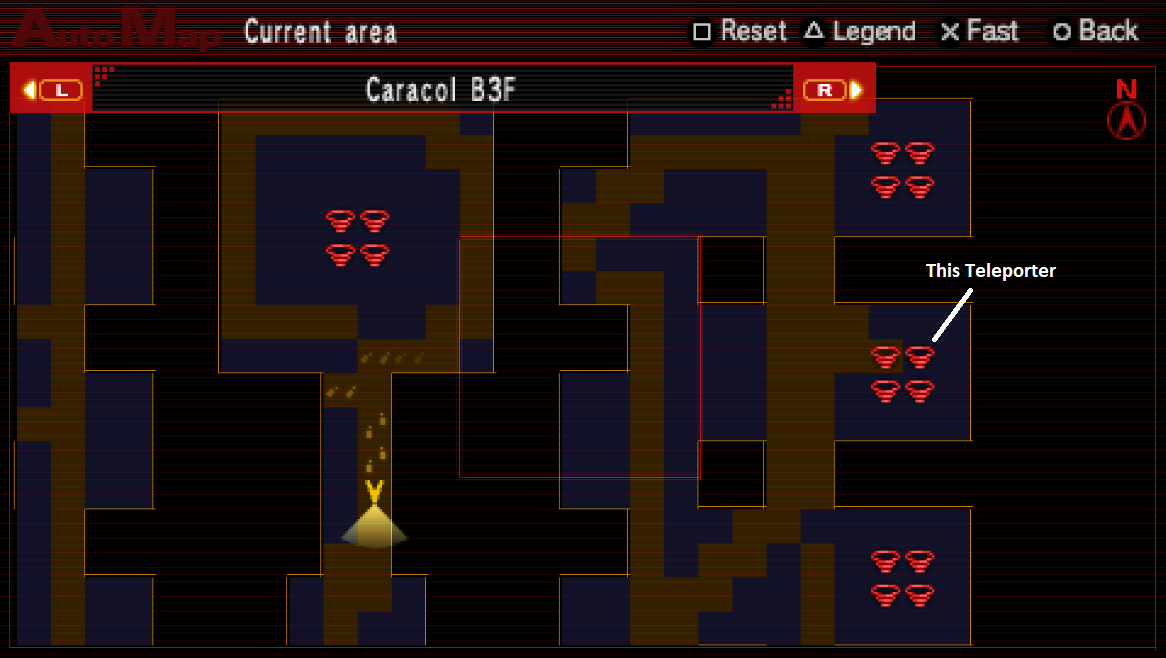
Caracol B3F Teleporter Puzzle
B3F has a teleporter puzzle of sorts, in the northern portion of this area you will find 6 teleporters. The teleporter that you need to take is the middle one on the right hand side - use my screenshot above if you're having trouble figuring out the correct one. After this 'puzzle' follow the linear path and you'll eventually run into a boss fight and scene involving Anna on B4F.
If you left Yukki behind earlier then how this scene plays out will be extremely different - other than this though it's just a standard boss fight against Longinus enemies. Yukki will leave your party forever after this fight if you didn't leave her behind previously. You can still swap out Personas with her after the fight if needed, but I think Jun inherits everything Yukki has when he joins after this dungeon.
The rest of this dungeon is pretty linear, there are some treasures you can go out of your way to find but the story route through the dungeon is very straight forward. Eventually on B6F you'll find a room called the Rings of Time, this is where the final boss fight of this dungeon will take place.
You'll meet Jun (Joker) and the Fuhrer inside of this room, after the scenes with these two you'll have two battles against Jun. These battles may be difficult depending on how prepared you are for them - but if I am being honest there isn't much in this game that is truly difficult in terms of the combat.
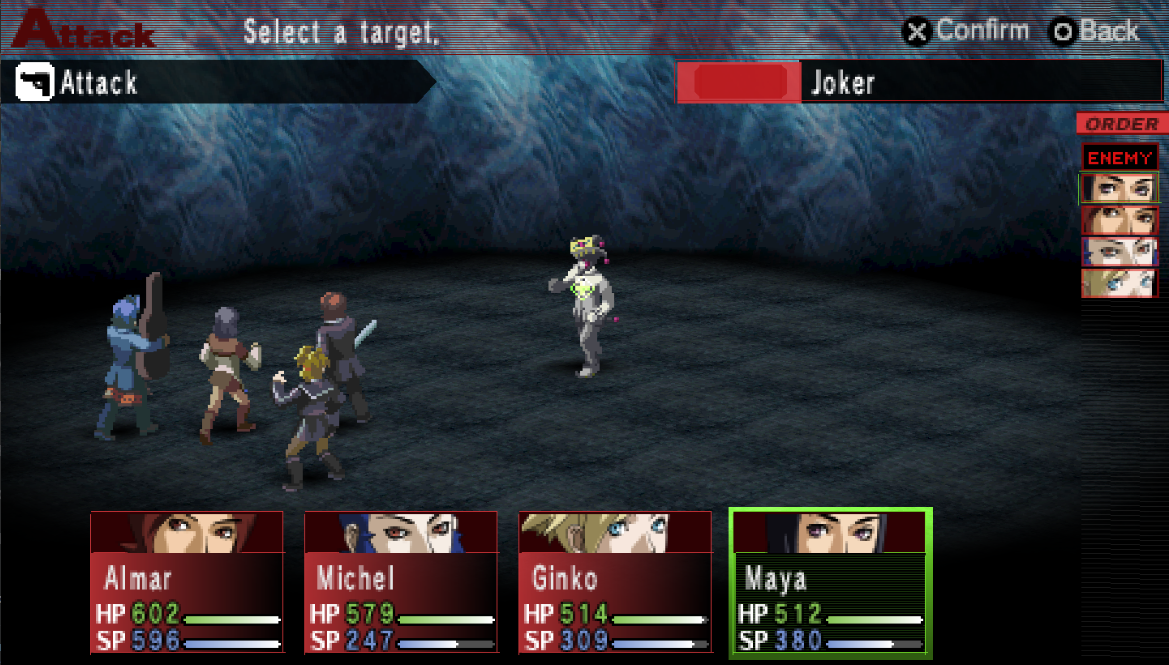
During the first battle it'll be your group of 4 against Jun. My advice to you is to unload on him using Fusion Spells that you have learned thus far. If you want to make the fight extremely easy then use party wide buff Fusion Spells such as Mediamai, Marakukaja and Masamakaja. Alternatively you can cheese the entire battle by having 3 of your characters spam Fusion Spells and the other character spam Media or Mediarama.
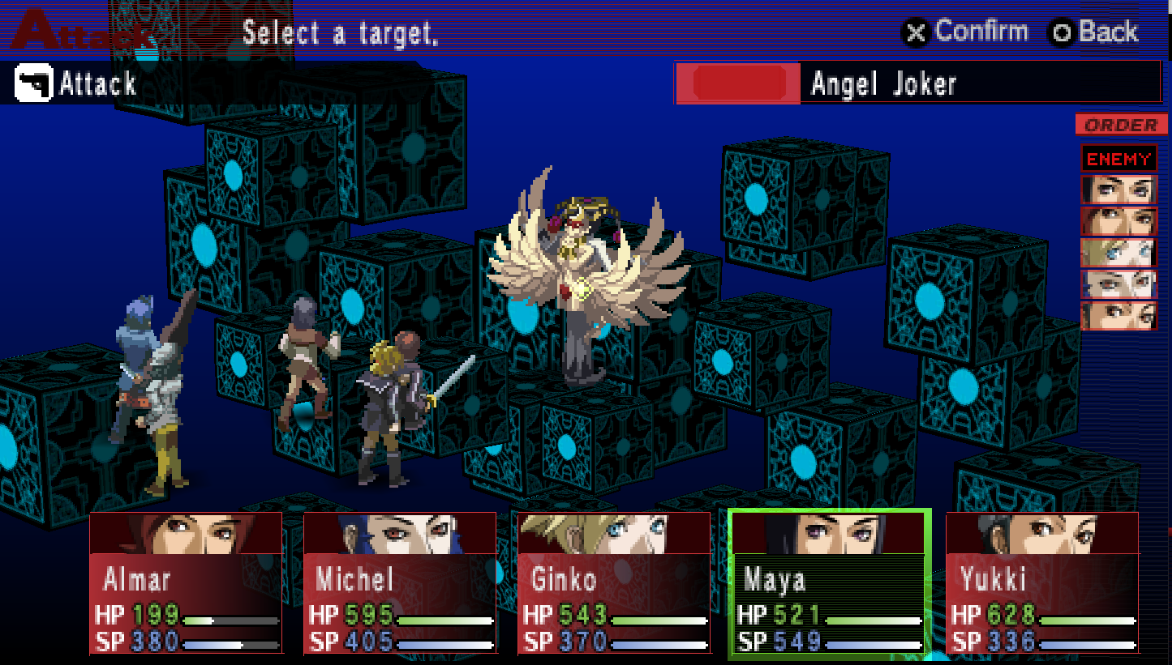
After you defeat Joker you'll get a scene during which Yukki shows up and a second fight will begin. This time you'll be fighting Angel Joker, he is only marginally harder than the first Joker. My advice for beating Angel Joker is to do all of the same stuff you did during the first battle; not much changes.
Note: If you struggle with either of these battles it's most likely because the Personas that you are using aren't very good. You may also be underleveled too, I was low 40s when I challenged this boss both times. For more information about which Personas are good and which aren't I recommend my Best Personas Guide.
When the battle is over there will be a scene during which you'll be teleported to Philemon's realm and everyone in your party may or may not be given new Stands... I mean Personas. During Chapter 3 if you took the time to collect each of your character's masks inside of Mt. Katatsumuri then they will be given a new Persona now. If you missed one of the masks then that character will not recieve an upgrade.

Below is a list of the Personas that each of your characters will get.
Tatsuya: Apollo
Michel: Hades
Ginko: Venus
Maya: Artemis
Jun: Hermes
Once this scene is over you will regain control of your characters at the Alaya Shrine in Rengedai. There are quite a few side activities that you can do right now before continuing with the main story - the first of which is shopping! Many of the old shops have changed their items, you can now buy much more powerful equipment at them!
Below are the three locations you should check out for new items.
Yumezaki (Tony's Shop & Anima Mundi)
Aoba (Clair De Lune & Rosa Candida)
Kounan (Jolly Roger & London Clothier)
Additionally, Mu Casino has a new set of prizes that you can purchase by using Coins too! For more information about Mu Casino and their prizes check out my Mu Casino Side Quest page. Since we have so much extra money at this point in the game I would recommend messing with the Sweepstakes Side Quest too if you haven't already. Both of these things are all RNG focused so I totally understand if it isn't your thing.
Next up is the final rumor that is available in this game, the Kudan Side Quest. The Kudan rumor takes place inside of the Abandoned Factory, you now have access to Room #5 which is the second to last room. I recommend you head over there now and collect the available treasure and grind EXP or Tarot Cards if needed.
When you are ready to continue with the main story you'll want to visit one of the four Zodiac Temple which have appeared around the city. It doesn't matter which Zodiac Temple you begin with, just keep in mind that once you begin a Zodiac Temple you need to finish it before you're allowed to enter the other ones. Also, depending on the order you do the Zodiac Temples in the layout(s) will change in minor ways.
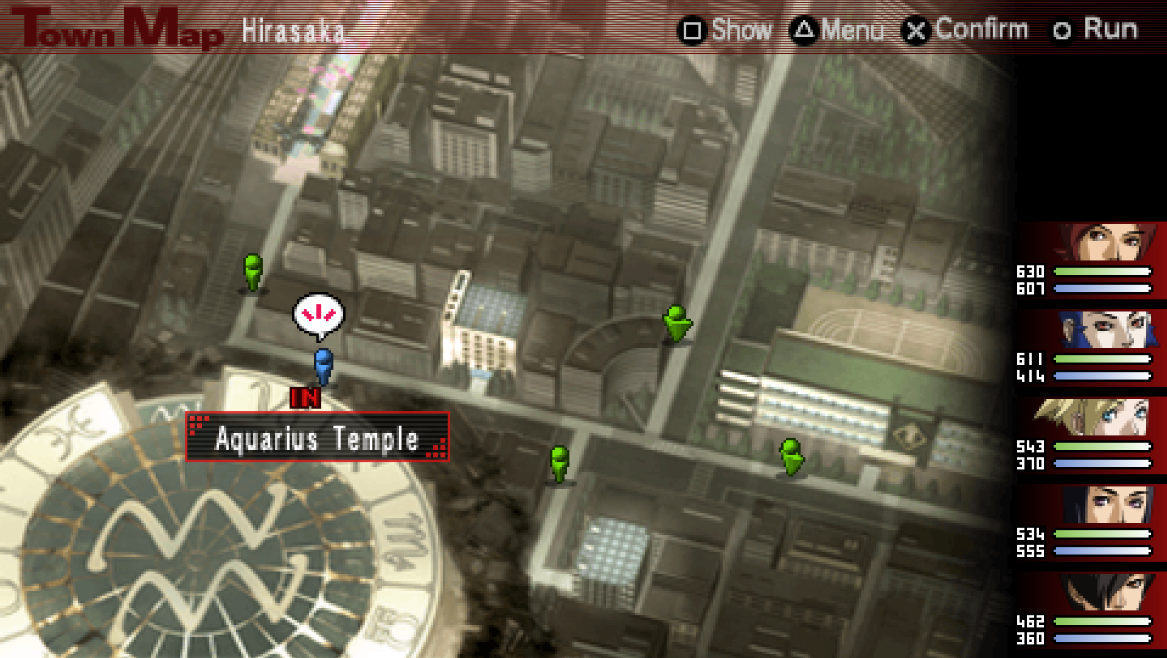
The first Zodiac Temple we'll do is my star sign, Aquarius.
Aquarius Temple: Aquarius
Scorpio Temple: Yumezaki
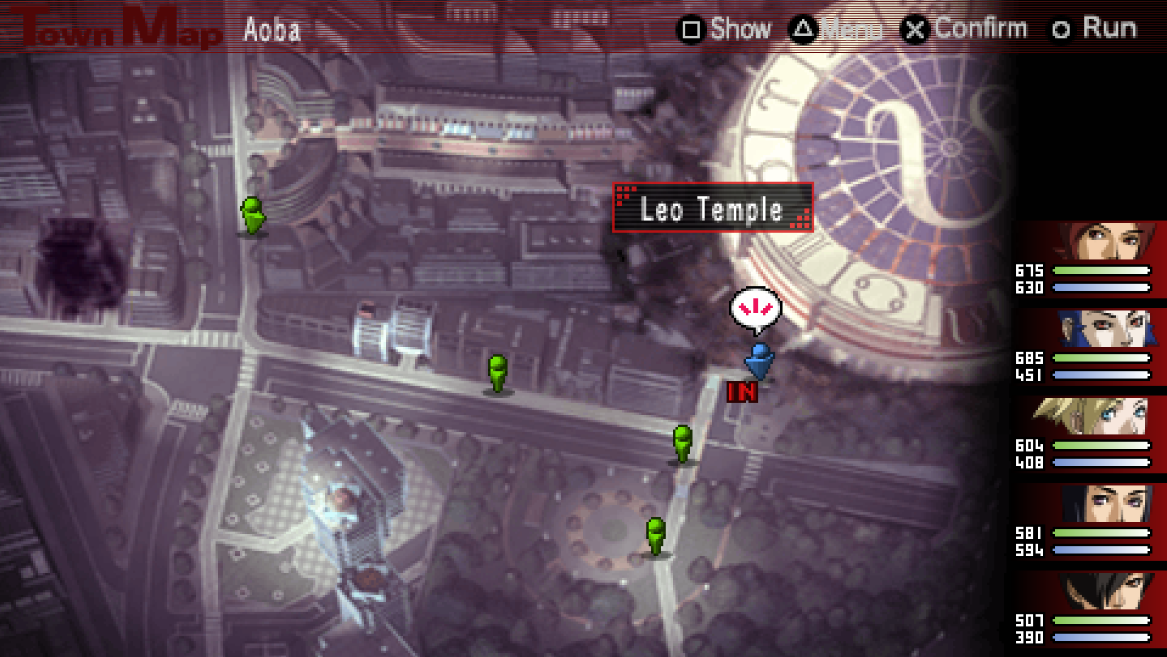
Leo Temple: Aoba
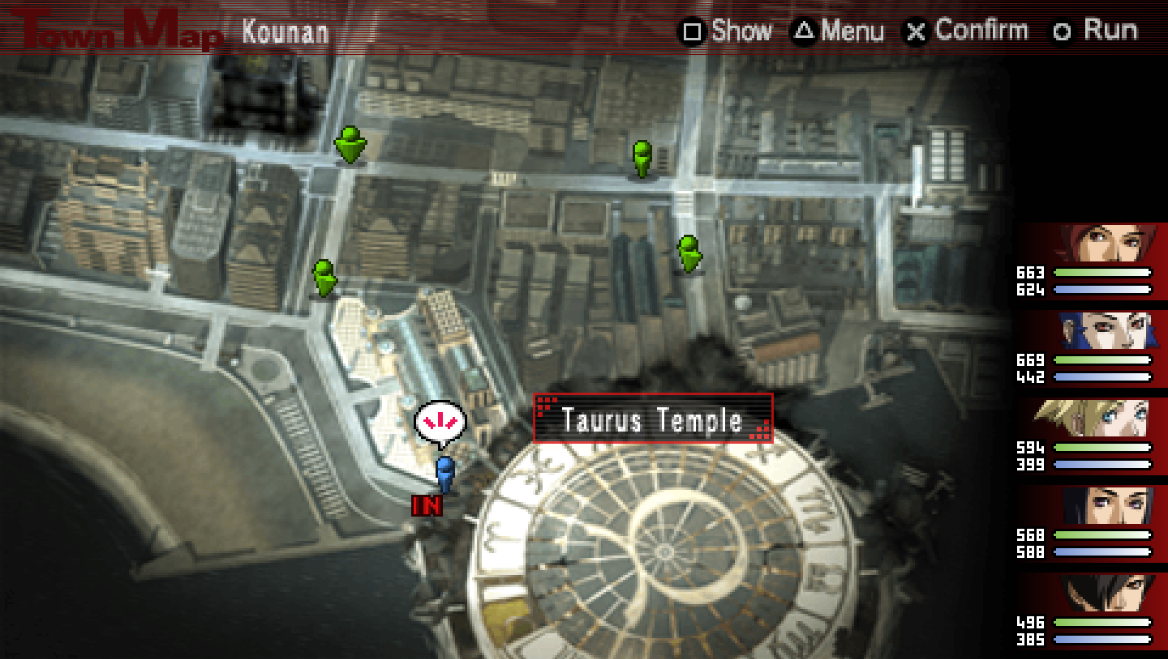
Taurus Temple: Kounan
Tip: When you're doing these Zodiac Temples I strongly recommend you do not use the Personas you just got from Philemon. Most of them are Weak to Dark spells which means that your characters will constantly get one shot while doing these dungeons. Take a look at my Best Personas Guide for more information about what Personas to use.
Demon Dialogue Choices for Zodiac Temples
Each of the four Zodiac Temples is laid out similarly to Caracol, what I mean by this is you'll get access to the dungeon in pieces. Much like in Caracol you'll often find small rooms called Relief Halls which separate the various parts of the dungeon from one another. As you're exploring through these dungeons you'll want to keep an eye out for these Relief Halls or for the stairs leading to another floor, both of these are indicators that you're on the right path.
On the 2nd floor of the Aquarius Temple you'll find pit fall traps that you'll have to avoid. A tip I can give you for avoiding the pit fall traps is to hug the walls as you navigate the rooms you know they're in. I rarely ever see pit fall traps next to the wall, they're always in the center of the room.
You'll find the boss of the Aquarius Temple on the 3rd floor of the dungeon, it's a group of Longinus enemies which are a little more beefy than before but have all the same moves that you're used to. After you defeat them you'll get a scene during which you'll be given the Wind Crystal Skull which is the item we came here for. When the scene is over you'll find yourself back in Hirasaka on the World Map.
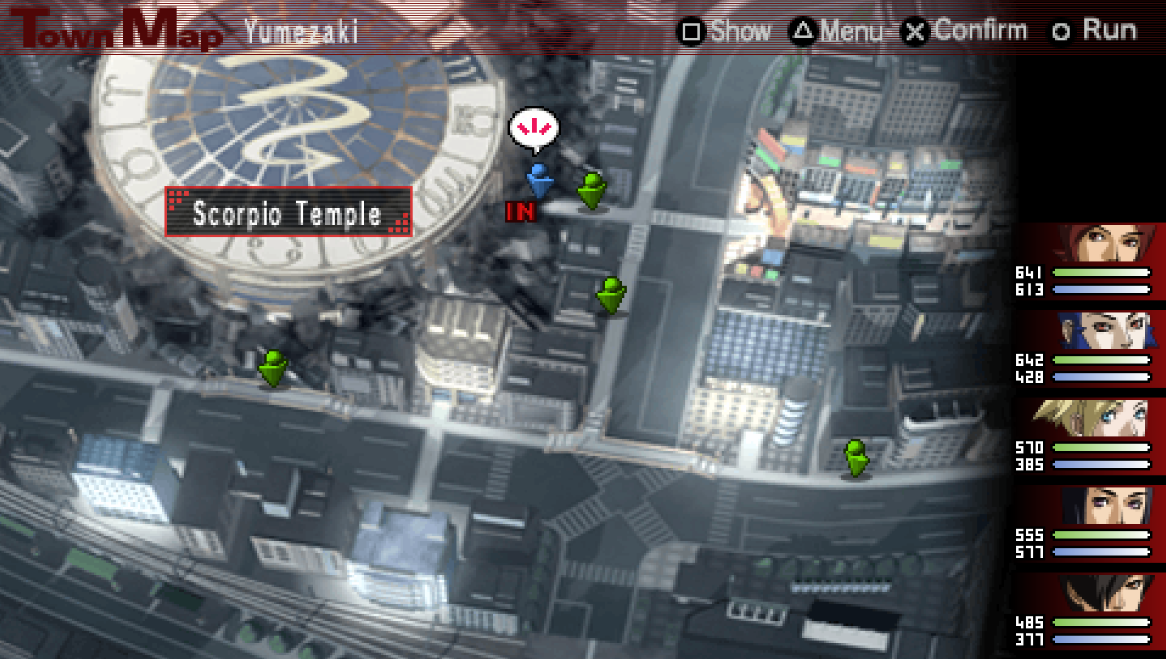
The next temple I recommend you visit is the Scorpio Temple which is located in Yumezaki.
Demon Dialogue Choices for Zodiac Temples
Scorpio Temple is a hard temple to explain in a guide since you will constantly be going up and down various stairs as you explore the place. Your entire time in this dungeon you'll be going back and forth between 1F and 2F up and down stairs over and over. Some of these stairs will lead you to treasures and a dead end whereas others will lead you to the end of the dungeon.
One tip I can give you for this dungeon though is you'll find puddles on the ground while navigating this place. When you step on one of these puddles they will reduce your SP and also disappear. There are a few treasures you can find by stepping on a puddle to make it disappear then checking out the hallway/room that it was blocking.
Don't forget that the Scorpio Temple will change layout slightly too if you don't do each of the Zodiac Temples in the same order I do them. With that in mind, below is the route I took to navigate this dungeon:
1. From Entrance go North up the stairs to the 2F
2. Follow the linear path to the first Relief Hall
3. After the Relief Hall go up the stairs to the 3F in the northeast
4. You can find the Scorpio Room southwest of where you enter the 3F
The 3F of this dungeon is quite big and confusing, there are also multiple ways to get to the 3F. If you did these temples out of order and your path is a little bit different than mine my advice to you would be to find the 3F then stay on it and run around until you find the Scorpio Room entrance. When you get close enough to the Scorpio Room Michel will mention the boss nearby (and you'll hear the loud moaning that boss rooms make).
Tip: Equip Eikichi with his Hades Persona for the final fight of this dungeon and you'll make the Persona stronger. This is a tip I will keep repeating for all of these dungeons, if you equip a character's Ultimate Persona before they fight their shadow then it'll remove some weaknesses from the Ultimate Persona.
Your boss in this dungeon is Shadow Eikichi, it's a pretty easy fight and doesn't require much explanation. When the fight is over you'll get a scene during which you'll acquire the Water Crystal Skull. The next temple that I recommend you do is the Taurus Temple which is located in Kounan prefecture.
Another Tip: Those of you playing Innocent Sin on the PS1 should definitely get a Persona that comes with Estoma. When you use Estoma you'll be able to avoid all random encounters which makes navigating these dungeons a billion times easier. For more information about which Personas get Estoma check out my Best Personas Guide.
Demon Dialogue Choices for Zodiac Temples
The Taurus Temple is similar to the Scorpio one in the sense that there are multiple routes that you can take to get to the final room. You'll notice on the first floor alone there are numerous staircases you can take leading up to the 2nd floor, some of these will take you to a dead end area with treasure and others will take you the correct route to complete this dungeon.
In my experience no matter what stairs you take they will always lead you to a Relief Hall after which you'll find a small sand escalator puzzle. The sand escalators is this dungeon's gimmick and you'll encounter a bigger puzzle involving these on the third floor. After you complete the sand escalator puzzle there will be stairs leading down back to the 1F; both of the routes you can take will converge at this location.
You'll be in a new section on the 1F and in the north-central part of this area you'll find a Trish's Spring. To the east of Trish's Spring you will find stairs leading up; the stairs will lead you to a small room which has another staircase leading you to the 3F.
On the 3F you'll find numerous sand escalators and some treasures if you do some exploring. The location of the Taurus Room is actually just south of the staircase that we took to get up here. However, in order to reach the Taurus Room you'll have to first go around the entire 3F in a counter clockwise motion. What I mean is, from the stairs you entered at go west first then south then east and finally back north.
Tip: Equip Ginko with her Venus Ultimate Persona before fighting Shadow Ginko! This will remove some of the weaknesses on Venus and make it a better Persona overall.
This time our boss is going to be Shadow Ginko; unload on her using your strongest Fusion Spells and she should go do pretty quick. After she's defeated there will be a scene during which you'll be asked a question by Ginko and you'll be presented with multiple options (pictured below).
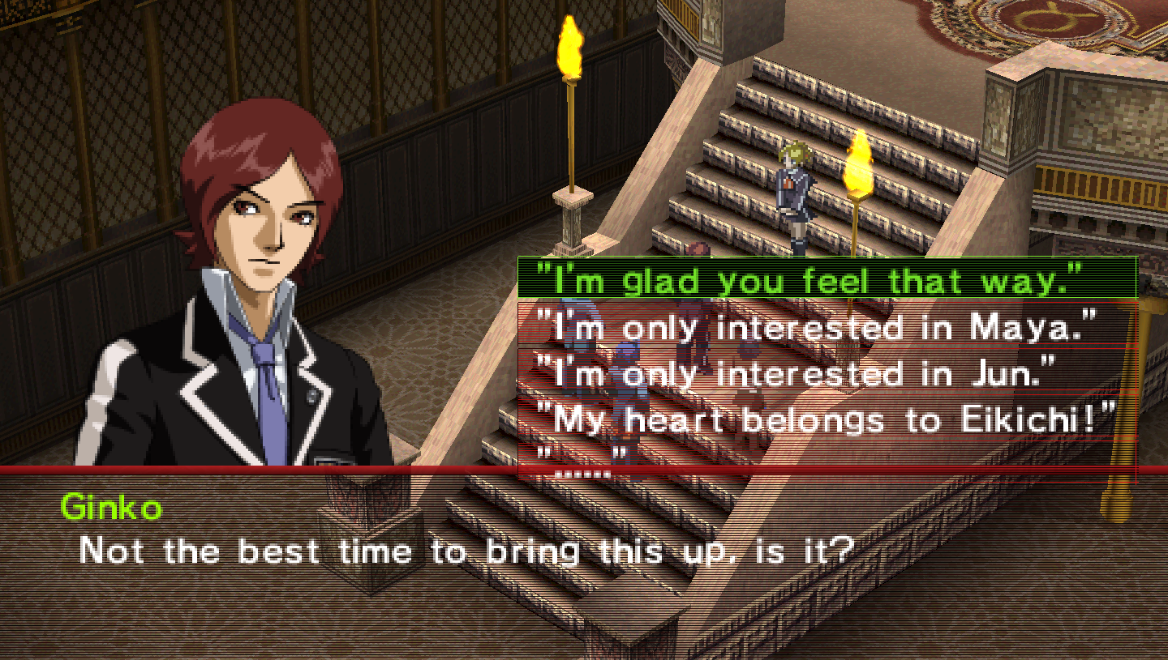
Depending on how you respond you'll get a unique Group Contact with that party member - unless you say that your heart belongs to Eikichi in which case you get nothing. For those of you who don't know, a Group Contact is essentially an additional scene that you can get when selecting two characters at a time during the Contact mini game in battle.
None of the Group Contacts will make any difference in the story of the game nor will they serve any purpose aside from flavor text really. What option you choose is totally up to you.
"I'm glad you feel that way." - New Group Contact with Ginko
"I'm only interested in Maya." - New Group Contact with Maya
"I'm only interested in Jun." - New Group Contact with Jun
Once the scene is done you'll acquire the Earth Crystal Skull and you'll officially be done with the Taurus Dungeon. The next and final Zodiac Temple that we'll be clearing is the Leo Temple which you'll find in the Aoba prefecture - so head over to there next!
Demon Dialogue Choices for Zodiac Temples
Leo Temple is one of the easier temples to navigate because the dead ends in this dungeon are all obvious and short. On the first floor you'll find numerous stairs leading up but the one we want to take is in the northwest. Before heading up these stairs though I recommend you grab the Dordona's Oar item which is an item that lets you summon a new Persona in the Velvet Room. You can find this item a little west of the stairs in the north.
After you take the northwestern stairs to the 2nd floor the rest of the dungeon is pretty simple. Like I always tell you, you'll know that you're going the right way when you find the Relief Hall, all of the "wrong ways" will lead you to a dead end but the correct way leads you to the Relief Hall.
Once you go through the Relief Hall on the 2nd floor you'll want to take the stairs which are in the north. There is another staircase in the northeast but they will lead you to a dead end. You'll know that you went up the right staircase if the first thing you see on the 3rd floor is Trish's Spring. From Trish's Spring you'll find another Relief Hall directly south - go through there and you will find yourself in the final part of the Leo Temple.
I recommend you explore the 3F a bit and collect the available treasures, when you are ready to finish this dungeon you'll find the Leo Room in the north next to Trish's Spring. Of course you'll have to take a round about way to get here, but it's pretty easy to find. If you want directions, after you go through the 3F Relief Hall you'll want to go west as far as you can go, then north as far as you can go followed by as far east as you can go.
Tip: Equip Tatsuya with his Apollo Persona! When you beat Shadow Tatsuya with this Persona equipped it'll remove some of the weaknesses and make the Persona stronger overall.
Shadow Tatsuya will be our boss for this dungeon, he shouldn't be an issue for you considering he's about the same strength as all of the other Shadow doubles that we've faught so far. During the dialogue with Shadow Tatsuya before the fight you'll be asked a question about Jun (pictured below). What choice you select when answering can get you a new Group Contact with Jun.
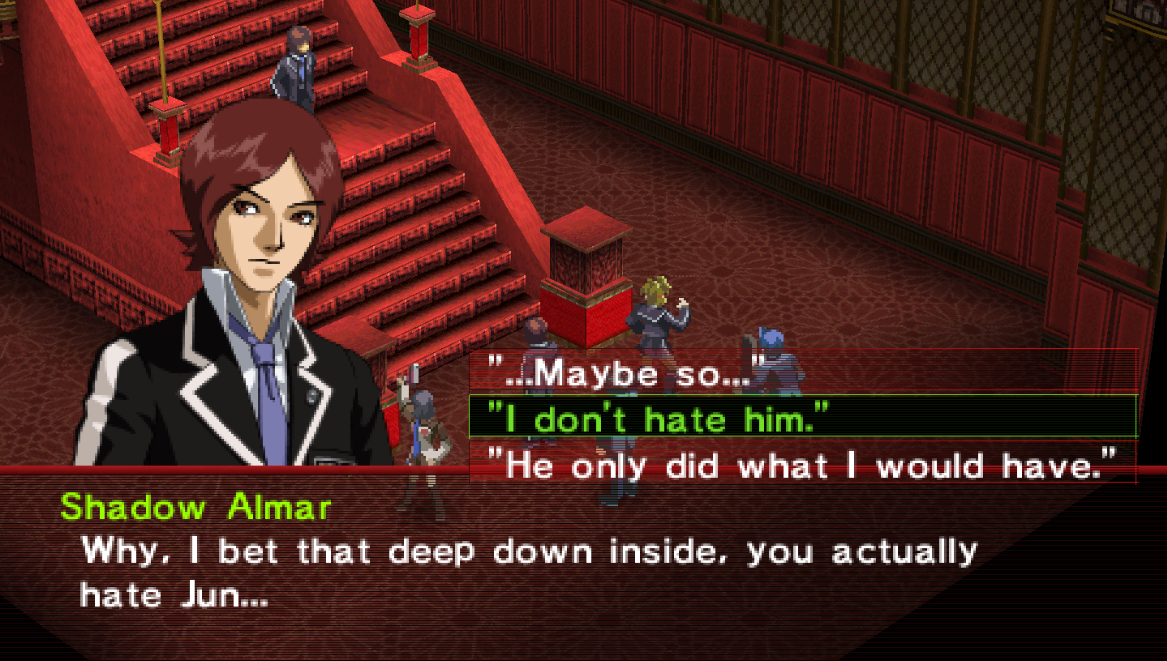
If you want a new Group Contact with Jun you'll want to select either #2 or #3. Choosing #1 means you won't get the Group Contact. Like I said earlier, for those of you who don't know a Group Contact is essentially an additional scene that you can get when selecting two characters at a time during the Contact mini game in battle. All in all the Group Contacts are not that important and add nothing but flavor text.
Once you've defeated Shadow Tatsuya you'll pick up the Fire Crystal Skull and you'll now be finished with all four Zodiac Temples. You'll regain control of your characters back on the World Map, now is a good time to do some side activities since we're about to do the final two dungeons in the game!
Continue to Walkthrough Chapter 5
Return to Walkthrough Chapter 3