
How to use Cheat Codes with the ePSXe Emulator
Using CodeBreaker or Gameshark cheat codes with the ePSXe emulator is extremely easy! Choose the game you want to play and fire that bad boy up. Once you're in game exit out of the emulator as if you were closing the program (use the X in the upper right hand corner) and it'll close out that screen but not the entire emulator.
If you do this correctly (it's literally just clicking the X) you'll find yourself with the ePSXe box similar to what's shown in my screen shot below, also the same box that you saw before you chose which game you want to play. Now use the toolbar at the top, click Options and go down to Cheat codes, shown in my screen shot below.
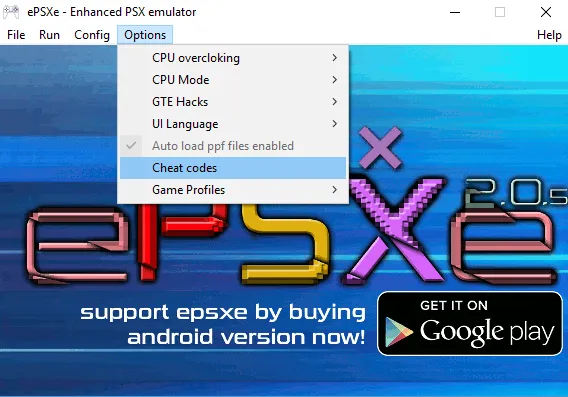
Click on Cheat codes to bring up the next box which is in the other screen shot below. Your boxes will be blank until you click on the 'Download' button in the bottom right hand corner of the box. Assuming that you're connected to the internet it will download all of the saved cheats for your game....
Keep in mind though - these are not ALL of the available cheats, only the ones that the author took the time to put in. If you want to add more cheats to this list then keep on reading!

Adding cheats to the ePSXe emulator is pretty straight forward. First up, find the folder that you have the emulator saved in. It may be in My Documents or under My Programs, it depends on where you saved it. As you can see below, mine is in Downloads - only because that's where I saved it.
Inside the ePSXe folder you'll find another folder named cheats, open that up and you'll see some text files in there. If this is your first time doing this part you'll only see one text file in there, the one with the game you're playing. Those of you who have clicked 'Download' on multiple games will have multiple text files. In this case, sort by Date modified to find your game.
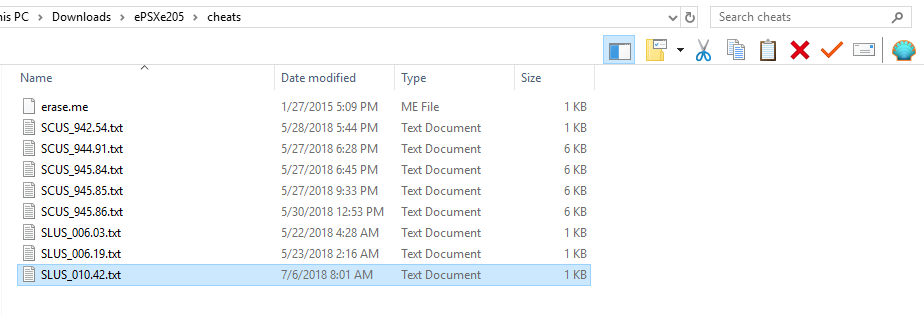
The way these files are organized is by the games ID when it was manufactured. There's two different types of games that you may be familiar with, NTSC commonly refers to games that are made for USA/America. Whereas PAL is used to refer to games that were made for the UK or European countries. Typically the PAL games have multiple language settings whereas NTSC games only have English.
Below I have included a quick list for you on the different types and what they mean.
SCUS: (NTSC) Sony Created USA
SLUS: (NTSC) Sony Licence USA
SCES: (PAL) Sony Created Europe
SLES: (PAL) Sony Licence Europe
If you can't figure out which game is the one you want to add codes to, the only other way to figure it out rather than sorting by Date Modified is by googling the SCUS, SLUS, SCES or SLES and the numerical value. This will tell you what game it belongs to.
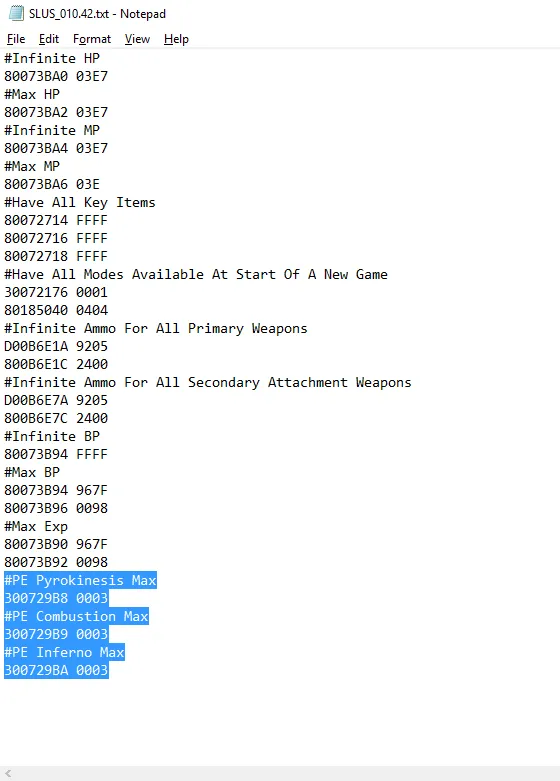
Assuming that you've figured all that good stuff out, let's talk about the last step of the entire process - how to add your code to the list of codes in the ePSXe. First thing is first, double click the notepad file which corresponds to your game to bring up the list of codes.
Notice the format that the codes in this document share...
#Name of Code
0000000 0000
#Name of Code
0000000 0000
In order to add your own codes to this list, you'll want to mirror this format. In the screen shot that's shown above you'll notice the highlighted codes are the ones that I have personally added, the rest of the codes came with the game when I hit the Download button we talked about before.
Pretty easy, huh? This last part is the most important part of it all... Once you've added your codes to the Notepad file and saved - DO NOT HIT DOWNLOAD AFTER YOU'VE ADDED YOUR CODES!!! This will erase any codes that you added and redownload the default list. In order to get the game to update with the new codes, exit out of the game completely then load it back up. Your new codes will be there.
That's all there is to it! Head on back to my Playstation 1 Guides Index.