
Final Boss Fights - FF8 Guide
At the top of every page of my Final Fantasy 8 Walkthrough I will have a list of the most important GF Abilities for you to learn as well as my personal preference for who to junction GFs to for this part of the story. The game's auto order for GFs learning abilities is extremely terrible so it's strongly recommended you interfere and do the abilities in the order I provide here.
Throughout the game you can also refine Cards into Items and then those Items into magic. I've provided a list of the refinements that you can do for the cards that you will most likely have in your possession at this time during the story below as well. This same information will be provided at the top of every page during the full walkthrough, keep checking it as it'll change as the story progresses.
GF Junctioning:
Squall: Siren, Brothers, Carbuncle, Leviathan, Tonberry, Eden
Zell: Shiva, Diablos, Pandemona, Doomtrain, Bahamut
Irvine: Ifrit, Quezacotl, Cerberus, Alexander, Cactuar
(Or whomever you choose as your party; junction them as you see above)
This guide is for the final portion of Ultimecia Castle which you can complete after defeating all of the previous bosses. If you've found this page prior to beating those bosses then please return to Ultimecia Castle Part 1 Walkthrough or Ultimecia Castle Part 2 Walkthrough.
Note: If you don't have the Rosetta Stone from Ultimecia Castle yet, you may want to grab that before continuing with the dungeon too.
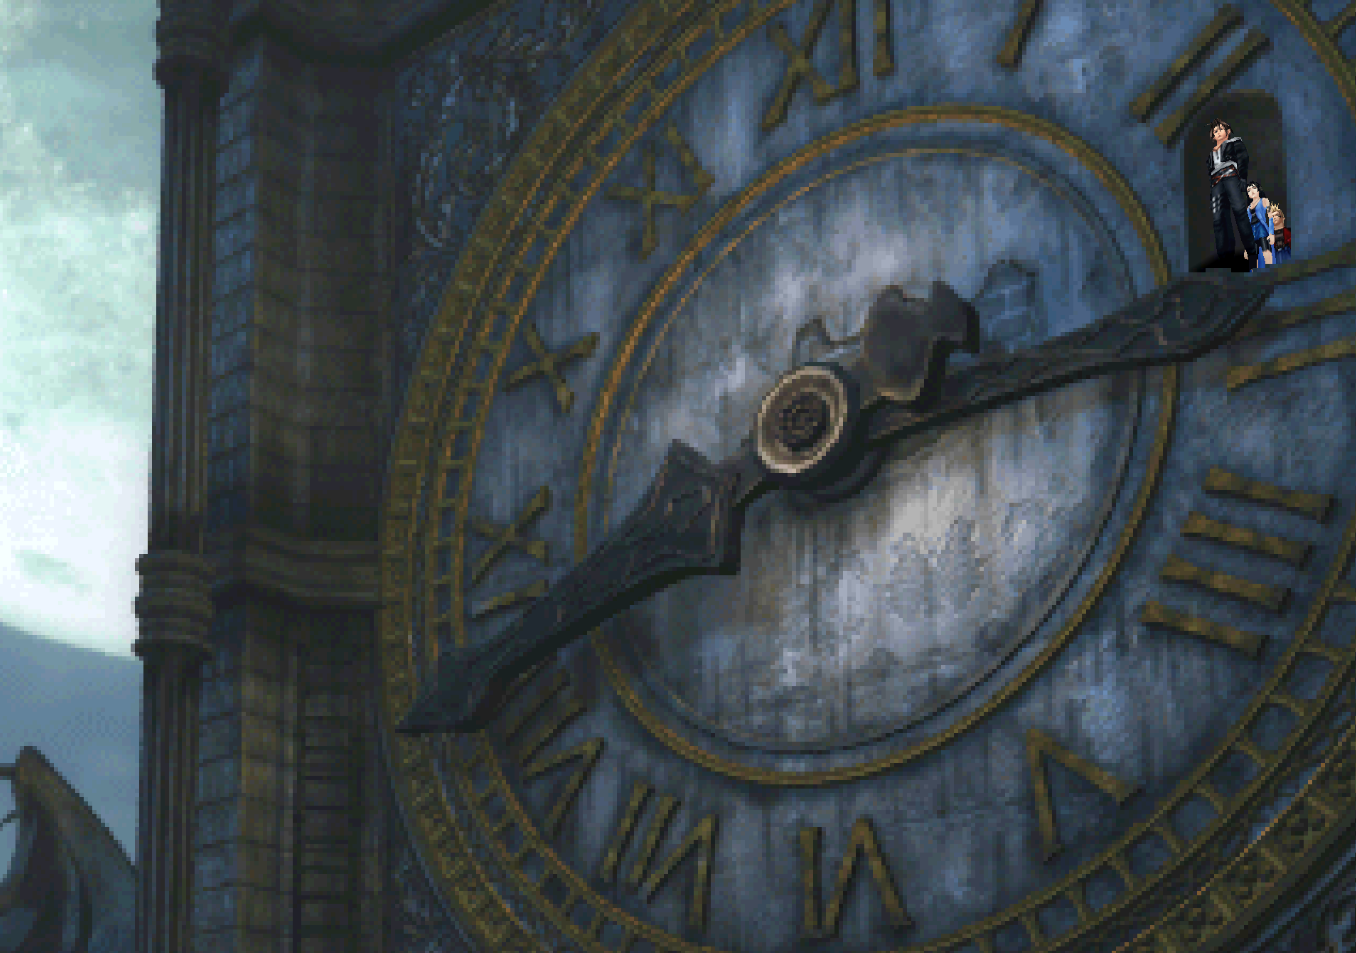
To reach Ultimecia and the final bosses of this dungeon you'll want to head up to the top of the same clock tower you found Tiamat in (pictured above). Run across the clock hands then climb down both ladders until you find yourself on a long walk way with a Save Point at the end.
When you approach the door near the Save Point you'll get a dialogue pop up that warns you Ultimecia is ahead (pictured below). Obviously you'll only want to proceed once you're ready to fight this boss, first let's go over the proper Junctions to put on your party and explain how this fight works.
Ultimecia Elem-Atk Junctions: Water or Wind
Ultimecia Elem-Def Junctions: Defend against as many elements as possible
Ultimecia St-Def Junctions: Stop, Pain, Curse and Slow are the main things you will want to protect against (Note: If you use Auto-Haste you don't need to protect against Slow)
Ultimecia Ability Junctions: Auto-Haste, Auto-Shell and Auto-Protect along with Spr+40% or Spr+60% if you have it
Item Tip: Card Mod Bahamut and put the 100 Megalixirs in one of your top inventory slots. Also if you have any Holy War items make sure they are easily accessible too
The way these fights work is 3 characters from your party are chosen randomly to battle. If one of them gets KO'd then you have about 10 seconds to revive them before they're "absorbed into time". When this happens you will no longer be able to revive that party member and one of your other party members will replace them.
If you let too many characters be absorbed and no one is available to replace them, then you'll have to fight the battle with less than a full team. Additionally, it's recommended that you put Tonberry on someone in your party other than your main 3 characters. You never know who you're going to start the battle with and it's helpful to have 4 characters with battle commands just incase.
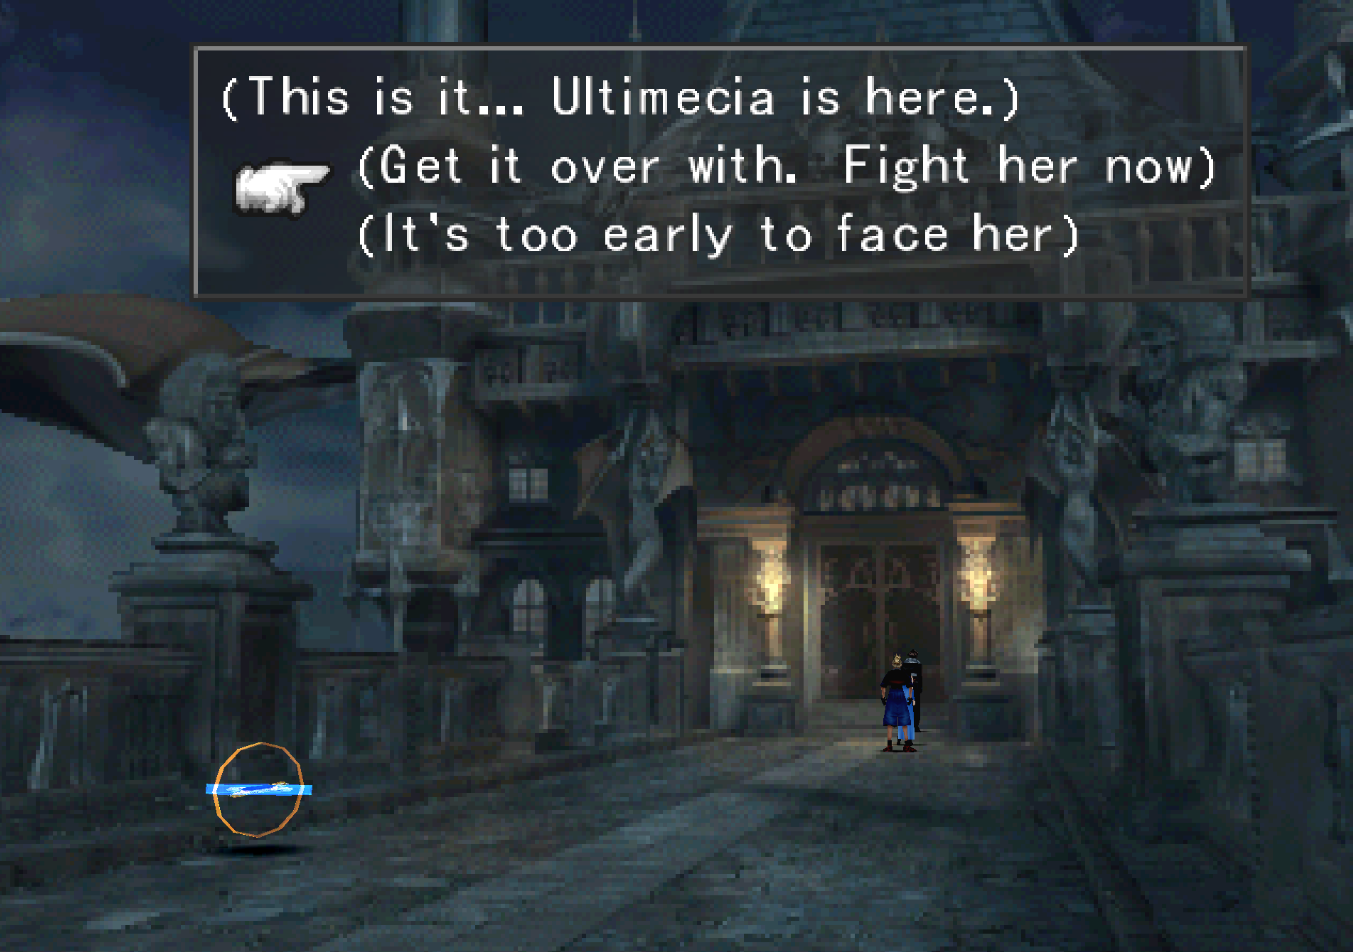
Finally, once you're ready to proceed with the final boss fights of the game, approach the door and select "Get it over with. Fight her now" to enter into the room and begin the first of four final boss fights. As aforementioned your entire party will be chosen randomly.
If you don't get the party members you want then you can either reset the game and start the fight again or let someone in your party die and a new member take their place.
Fight One - Ultimecia
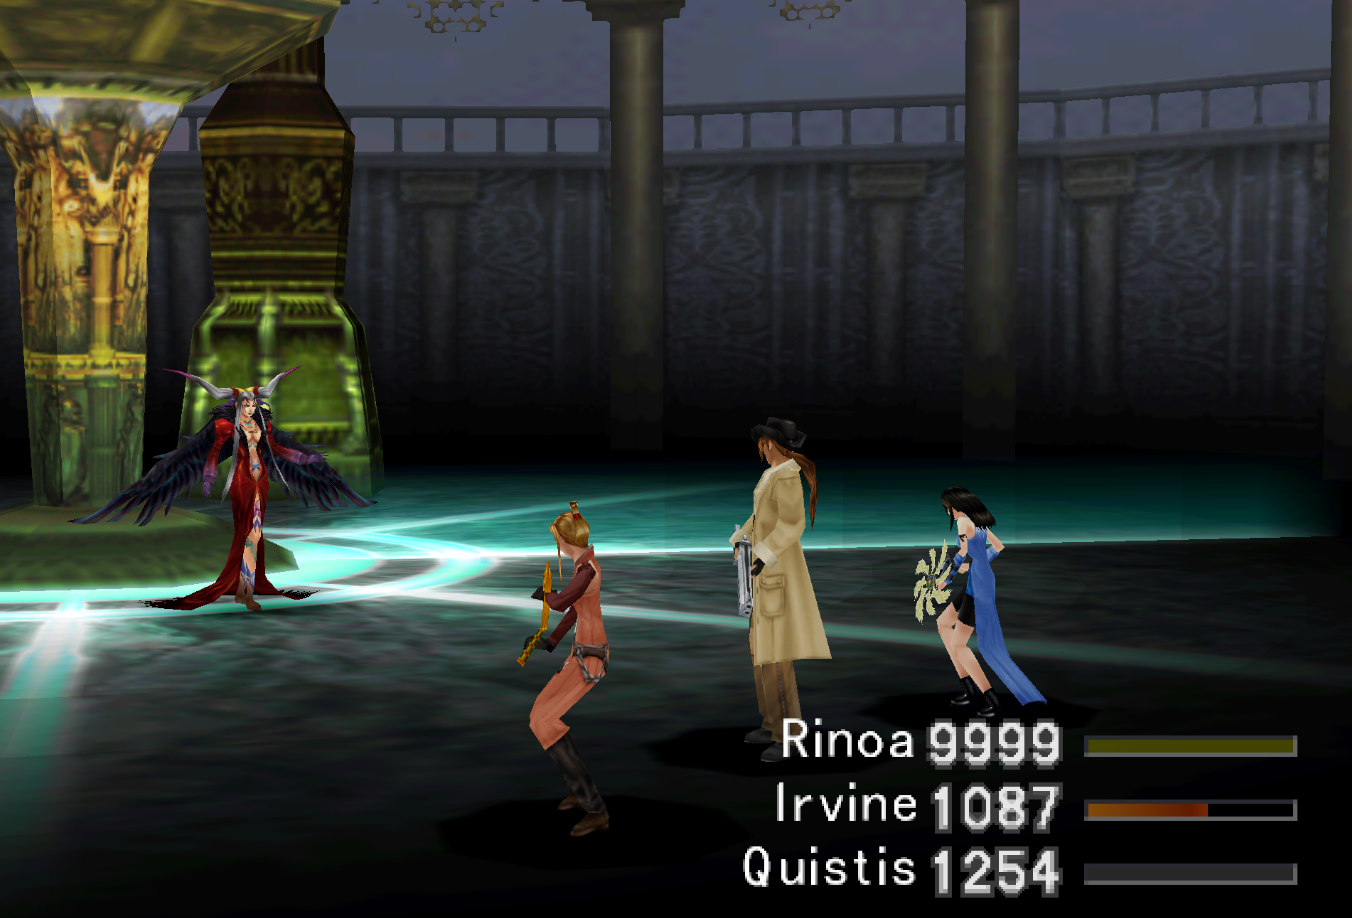
Ultimecia will use a lot of high level magic against you and your party during the first round as well as some status ailments such as Meltdown or Stop. She has one especially damaging ability called Maelstrom which decreases your party's HP by 75% and has a chance of inflicting Slow and Curse on your party.
One thing you should keep in mind for this fight too is don't use any GFs otherwise Ultimecia will go out of her way to defeat it during her next turn. Also if she uses Double on herself it's recommended that you Dispel it to reduce the damage you take.
All in all this fight is extremely easy compared to the ones we're about to do. After defeating Ultimecia there will be a brief scene before you're thrown into battle against the next boss, Griever.
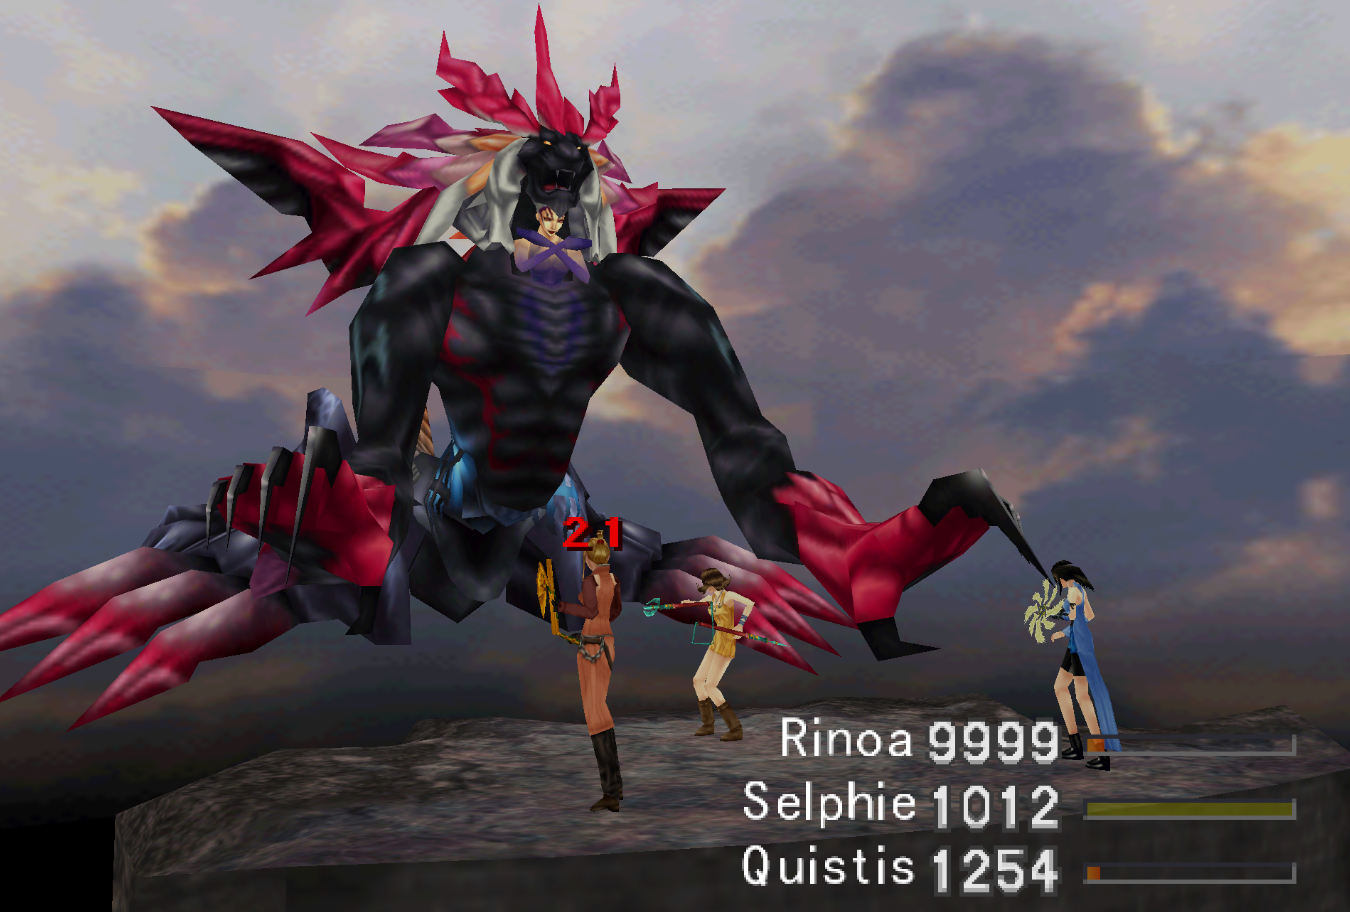
Fight Two - Griever
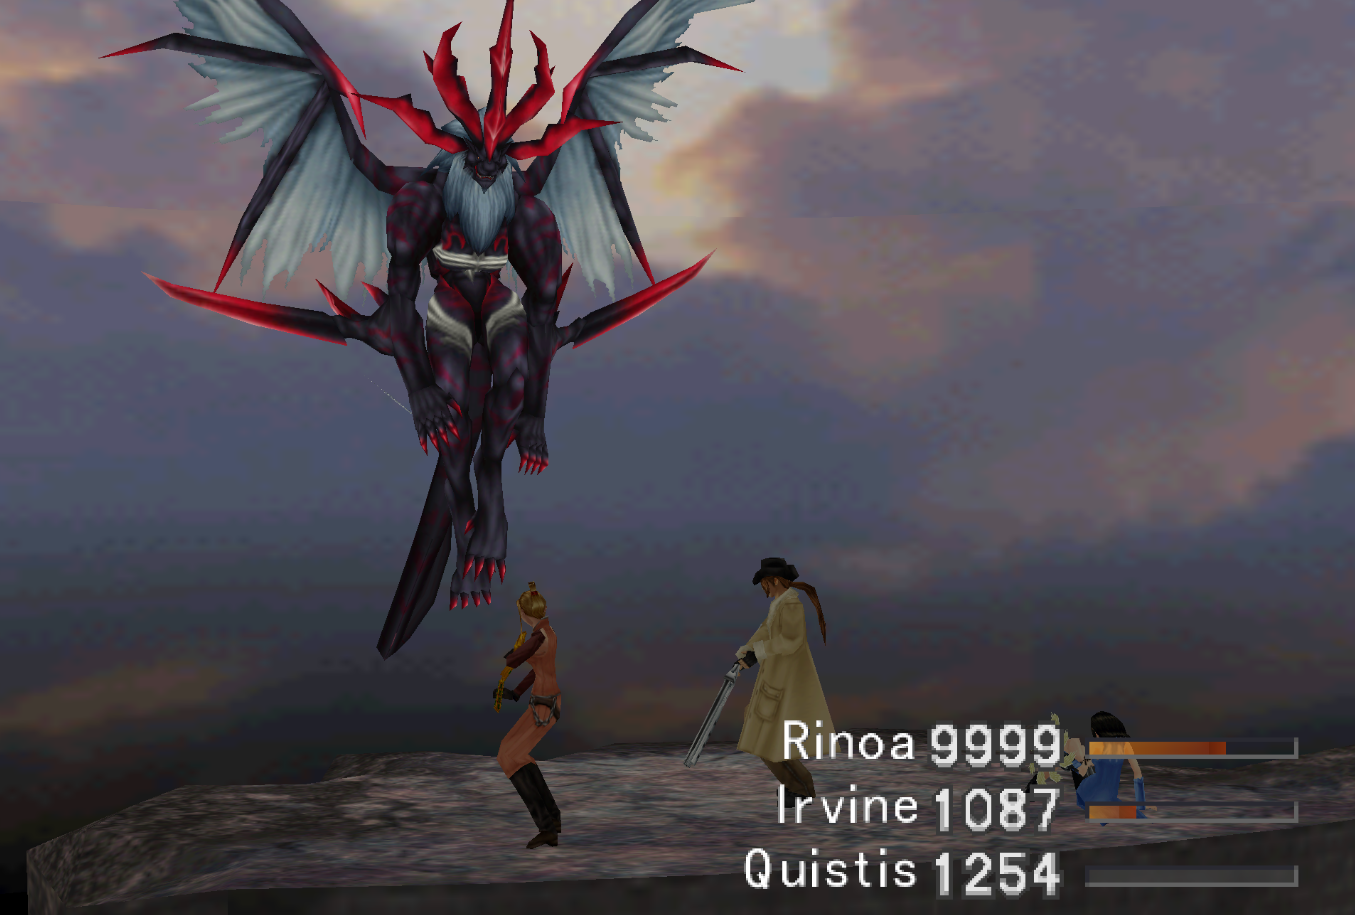
Compared to the previous fight, this boss is an actual challenge. He has a few abilities that will put some serious hurt on you and your team such as Gravija, Doom and Shockwave Pulsar. He also has another extremely annoying ability which will destroy a random magic stock on your character... Yes, even Junctioned magic. This ability has no name, when it's used you'll see a notice saying "<Character Name> has had their <Magic> stock blown away".
For this reason you'll want to end this fight as quickly as possible and if too many of your best magic stocks gets erased.... Maybe reset and try these encounters again. To explain his abilities in more detail I have organized them below.
Doom: Use Elixir, Megalixir, Treatment or Remedy+ to remove it
Draw + "Magic Abolition": One of the worst things this boss does is occasionally Draw magic from someone in your party as well as completely erase an entire stack of magic that someone has. There is no defense against this and if he erases a spell like Ultima, well, you'll just have to deal with it.
Shockwave Pulsar: He only uses this a single time throughout the fight and it deals a lot of damage to the whole party. If you defeat Griever before he has a chance to use this ability he will end the fight with it. Note: A high Spr stat as well as Shell will drastically decrease the damage you take from this ability
Triple: If Griever uses this be sure to Dispel him quickly. If you have a high Spr stat on everyone though his magic likely won't hurt you very much anyway
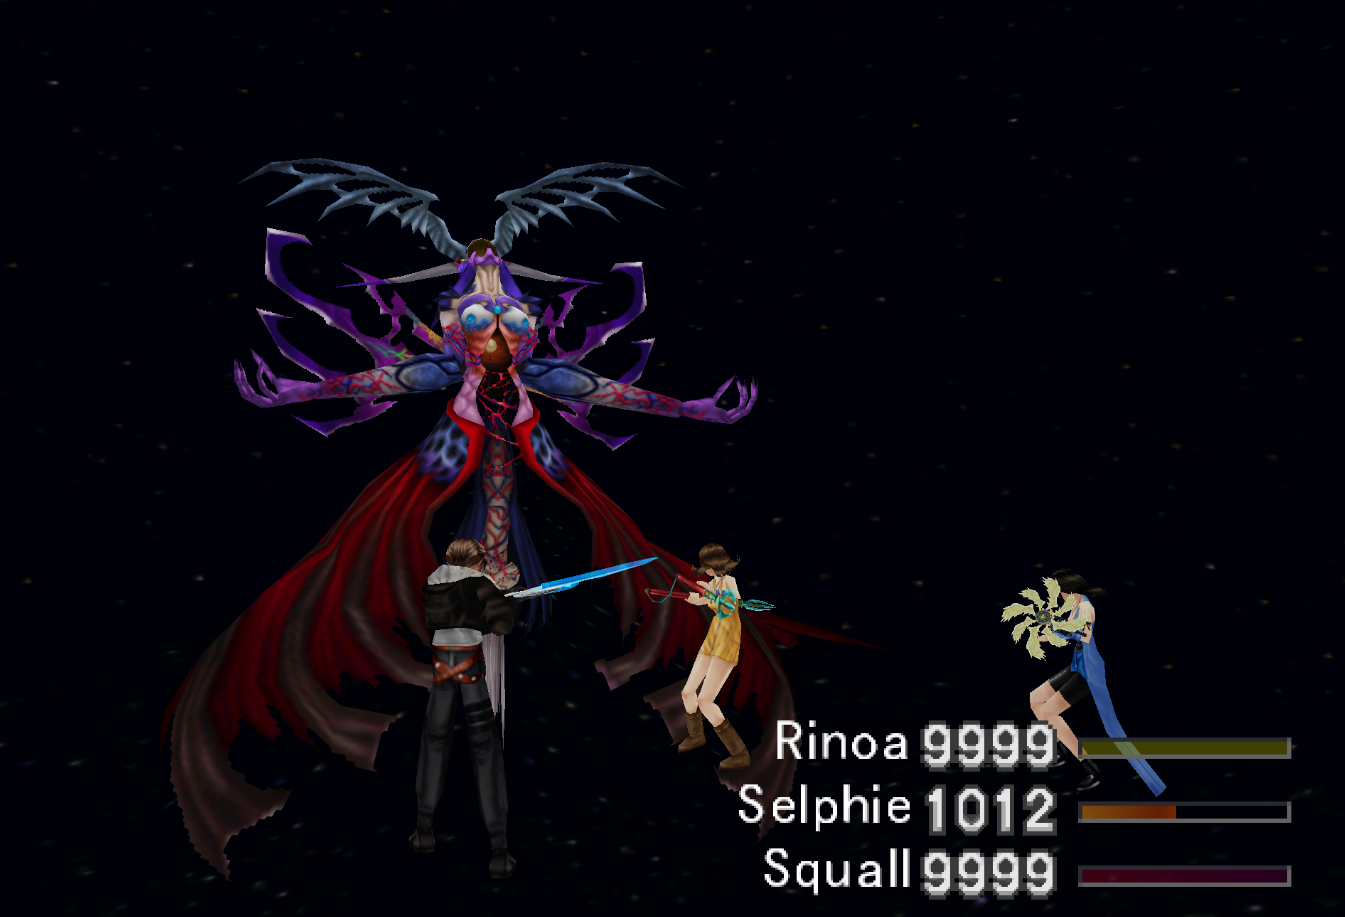
Fight Three - Ultimecia & Griever Combined
This battle is divided into two parts, the first part lasts until Ultimecia loses her tail, which happens when she has about 45% total HP left. The second half of the fight is everything that happens after this point. Between the two, the first part is the harder one.
Ultimecia will use Holy, Quake, Tornado and Dispel on your party during the first phase as well as summon two Helix enemies (appear as floating crystals). The first Helix allows Ultimecia to cast the Ultima spell while the second Helix allows her to use Meteor.
With both Helix enemies alive she will also use the Greater Attractor ability every other turn which deals heavy physical damage to the whole group. For this reason you'll want to make sure you knock out at least one, but preferably both Helix enemies when they're summoned. Both Helix enemies disappear when Ultimecia transitions into her second phase too, so if you think she is getting low on health just ignore them.
Second Phase: Keep your HP up and DPS Ultimecia down until this fight ends
Final Fight - Ultimecia
The final fight against Ultimecia is actually much easier than you'd imagine it to be. Much like with the previous fights most of the damage Ultimecia deals will be magic damage... So as long as you have a high Spr stat you won't take much damage from her spells.
If you try to use a GF against Ultimecia she will destroy it during her next turn (much like the previous fight against her). Ultimecia also comes equipped with some of Griever's abilities, such as his Draw and his magic abolishment ability. Since this is the final fight of the game it doesn't matter as much if your good Junctioned magic gets blown away - but it can still be really annoying.
Ultimecia also has a new ability called Hell's Judgement which will reduce everyone's HP to 1 in your party. You can't block against this ability and you'll just have to quickly heal on the next turn before Ultimecia blasts you with a powerful spell.
At some point during the fight you'll be able to target Ultimecia's Lower Half and she will start using a spell that you've never seen before called Apocalypse. You can actually even Draw Apocalypse from Ultimecia's Lower Half and stock the magic... However since this is the final fight you'll never be able to Junction it or use it outside of this battle.
Apocalypse hits for anywhere between 4000 - 8000 damage depending on your Spr stat. Destroying the lower portion of her body means she won't cast Apocalypse at all for the remainder of the fight.