
Final Fantasy IV Walkthrough - Chapter 9 (Underworld Start & Side Quests)
Everything we're about to do in this chapter is completely optional. You'll be visiting some of the locations on this page throughout the game's story but going out of our way to collect everything right now is much more beneficial to use in the long run.
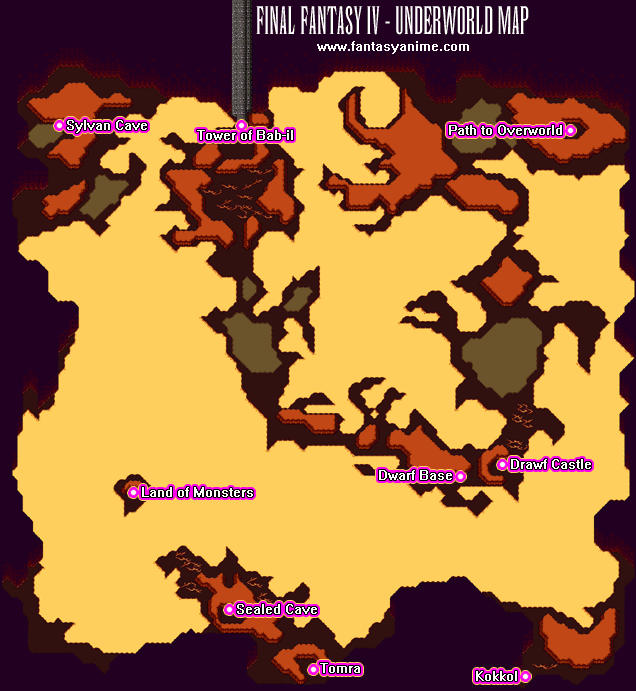
To make things easier for you, below is a world map of the Final Fantasy IV Underworld. All credit goes to the original artist. I googled for a map of the Underworld and chose the best one. If you're having any trouble viewing the map, click to enlarge it.
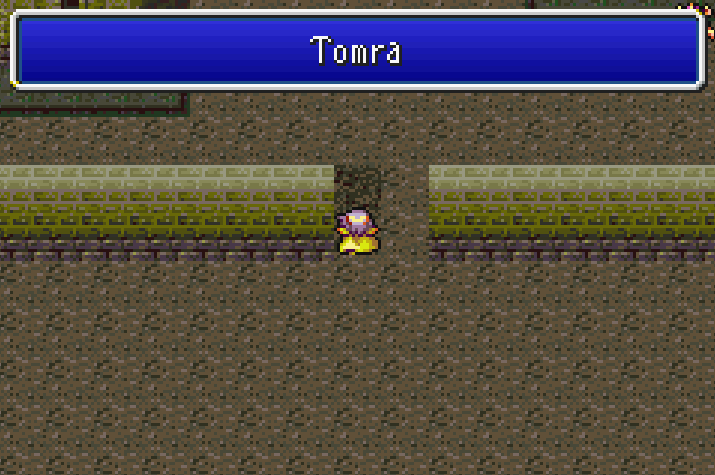
Our first stop is going to be the town of Tomra in the southern most portion of the Underworld. This is a town and there is quite a bit for us to do here - including upgrading our gear. You probably won't be able to afford all of the upgrades you can buy in Tomra but you should but whatever you can since the stuff here is very nice.
In Tomra you'll want to make sure to upgrade all of Cecil's armor but not Kain's... Unless you really have an abundance of Gil. Kain will leave your party soon and all equipment on him will be lost when he does. If you do buy him gear, make sure to unequip him when he leaves or you're going to lose a lot of cash!
Another piece of advice for while you're here is sell anything and everything in your inventory that you aren't using or don't plan to use. We're going to be getting a lot of stuff coming up and your inventory space in this Final Fantasy game is extremely limited.
Tomra Treasure Chests:
All the treasures are found in the northwestern most building.
Dry Ether
Bomb Fragment
Antarctic Wind
Rage of Zeus
Bestiary
2000 Gil
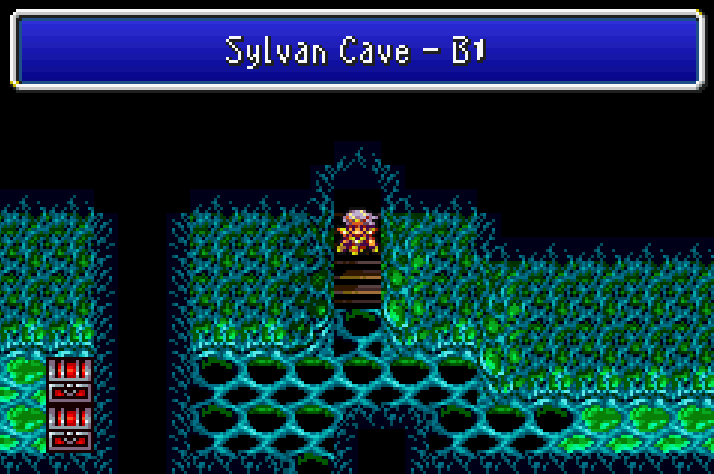
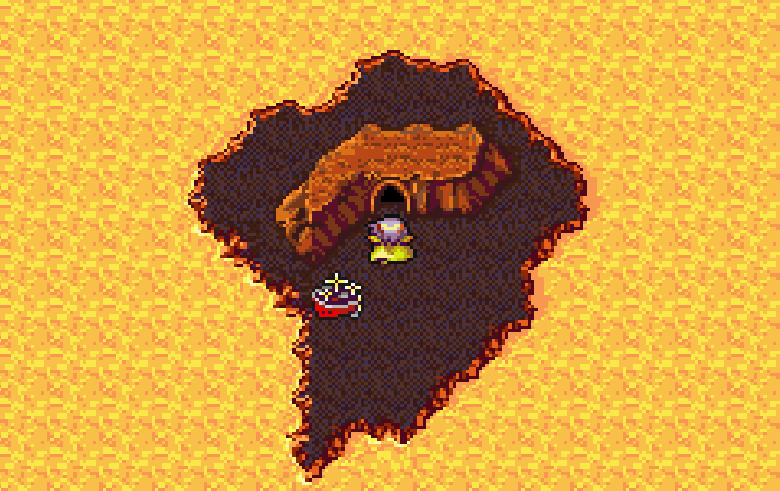
When you're done in Tomra our next destination will be Sylvan Cave in the far northwest of the Underworld (pictured above). This is a pretty long dungeon and it'll be a whole lot easier if you know Float on Rosa. If you don't know Float on Rosa now is when you'll want to stop and grind until she is level 35 and learns Float.
Honestly level 35 won't even be enough to tackle this dungeon (unless you use cheats for No Encounters). The Malboro enemies here are a total pain in the butt and if you plan to collect all of the chests, even the ones guarded by monsters, you'll have to fight some Malboros.
My team was level 45 - 50 when I completed this dungeon and it was definitely a challenge for me, I had to consume a lot of Ethers and other items to make it all the way through. Don't worry about having to grind so much to tackle these dungeons now, we'll need the levels for later anyway.... There's still quite a bit more game to do!
Since this dungeon is so confusing I have broken it up into two parts, the first of which is B1 - B3 and the Hidden Room. You'll be teleported out of the dungeon after completing the Hidden Room anyway so I felt this was appropriate.
Sylvan Cave B1 Treasure Chests:
Angel Arrow
Bestiary
Sylvan Cave B2 Treasure Chests:
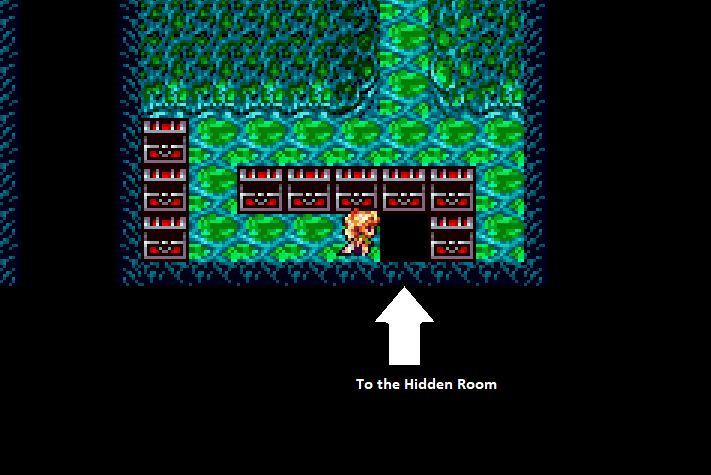
For our first trip through this dungeon you'll want to take the northern exit on B2. This will take you to a small dead end on B3 that has a hidden passage that brings us back to B2. This will allow you to collect all of the treasures that are mentioned below.
Remedy (Reached from a secret passageway from Sylvan Cave B3; pictured below)
Bomb Core (Reached from a secret passageway from Sylvan Cave B3; pictured below)
2000 Gil (Reached from a secret passageway from Sylvan Cave B3; pictured below)
3000 Gil (Reached from a secret passageway from Sylvan Cave B3; pictured below)
Bestiary (Reached from a secret passageway from Sylvan Cave B3; pictured below)
Emergency Exit (Reached from a secret passageway from Sylvan Cave B3; pictured below)
Maiden's Kiss (Reached from a secret passageway from Sylvan Cave B3; pictured below)
Maiden's Kiss (Reached from a secret passageway from Sylvan Cave B3; pictured below)
Ether (Reached from a secret passageway from Sylvan Cave B3; pictured below)
In the same room as 5 of the treasure chests you'll find a hole in the ground (pictured below). Fall down this hole to be taken to the Hidden Room which has 6 additional treasure chests in it - all of which will be guarded by monsters.
Sylvan Cave B3 Treasure Chests:
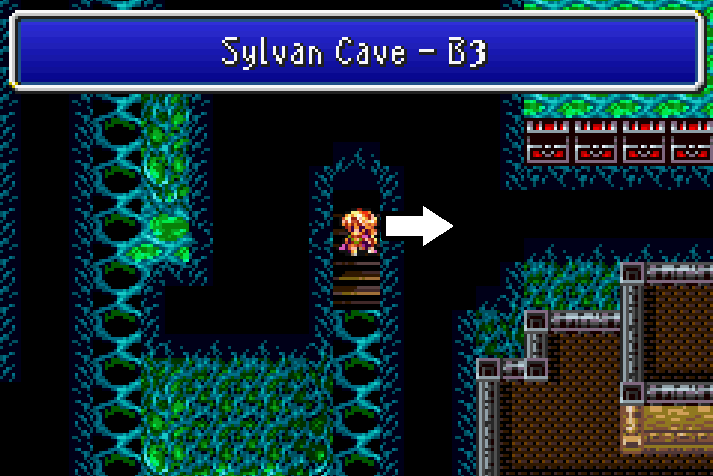
Hi-Potion
Maiden's Kiss
Fairy Rod (Hidden passage below the chest with Maiden's Kiss)
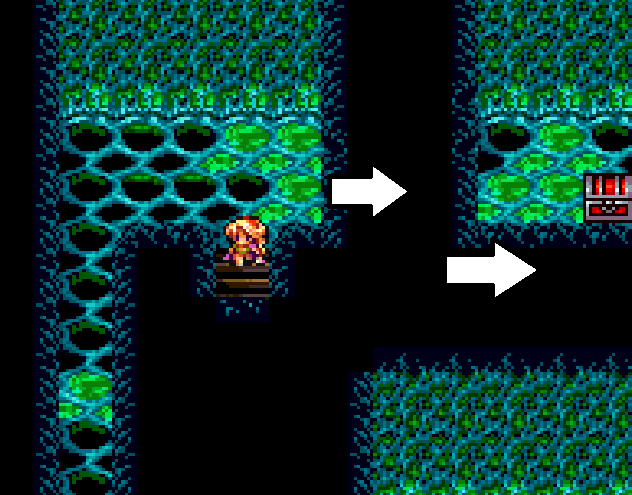
When you first enter this floor you're going to want to go around the linear path to grab the three treasure chests mentioned above. Then, before leaving go to the right (where you see my arrow in the screenshot above) near where you zoned into this area. This will lead you into a secret passage that takes you to a total of 10 chests on B2. It also leads to the Hidden Room location which is mentioned below.
Sylvan Cave Hidden Room Treasure Chests:
Each of the treasure chests in the Hidden Room have Monsters inside of them so you'll want to heal up before opening every single one of the treasure chests in here. When you're done you'll want to take the gray panel in the east side of the room to be teleported outside.
Red Fang
White Fang
Blue Fang
Full Moon
Avenger
Medusa Arrow

After completing the Hidden Room you'll want to rest using a Cottage or Tent outside. It's also highly recommended that you save your game before going back inside. This time at the intersection on B2 you'll want to go south instead of going north.
South takes you to the second half of the dungeon which is what I am going to be covering with this half of the Sylvan Cave guide.
Sylvan Cave B1 Treasure Chests:
Run into the northeastern most wall that's in the "dead end" above the Tent/Cottage area. You'll find a hidden passage which takes you to the Elven Bow. Every other treasure on B1 is fairly straight forward to obtain.
Elven Bow (Hidden Passage Northeast of the Tent/Cottage point)
1000 Gil (Northeast of Tent/Cottage Point)
Cottage (Northeast of Tent/Cottage Point)
Thunder Arrow (Central stairs up from B2)
Ice Arrow(Central stairs up from B2)
Fire Arrow(Central stairs up from B2)
Ether(Central stairs up from B2)
Hi-Potion (Central stairs up from B2)
Sylvan Cave B2 Treasure Chests:
Mage Masher (East of the northern stairs down to B3; go through the hidden passage)
Sylvan Cave B3 Treasure Chests:
Inside the building with the Cat Claw and Hell Claw you'll find Yang lying on the bed. You can speak to him but he won't awaken at this time. Remember his location though as we'll definitely be back later to pick him up!
Elixir
Cat Claw (Inside house with Sylphs)
Hell Claw
(Inside house with Sylphs)
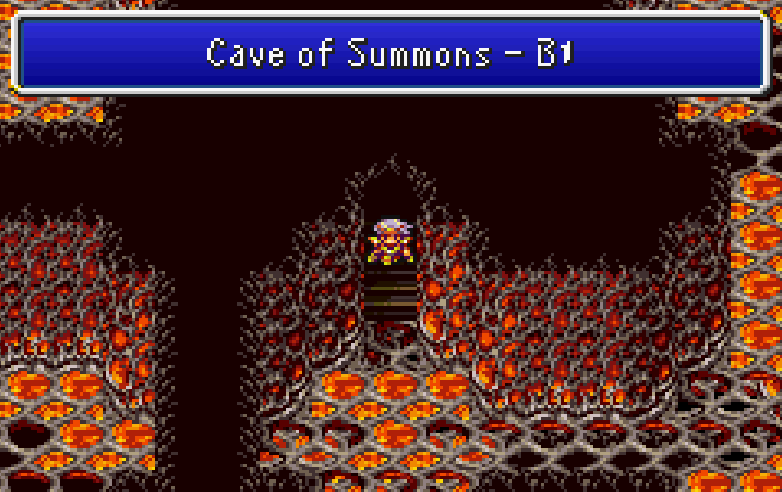
This completes the Sylvan Cave. Go up the stairs and onto the platform to be teleported outside the dungeon. Our next destination is The Cave of Summons which you can find west of the Dwarf Castle, also southeast of where we are now. It's a solitary cave on a small island out in the middle of the lava.
Your first time entering the cave will get you some dialogue from Rydia, she mentions that she passed through here earlier and that maybe you can get Leviathan to aid your party. While getting Leviathan's help is not required, nor is any of this cave, it's highly recommended.
The Cave of Summons B1 Treasure Chests:
Phoenix Down
Ether
Hi-Potion
The Cave of Summons B2 Treasure Chests:
Cottage
Hi-Potion
The Cave of Summons B3 Treasure Chests:
Phoenix Down
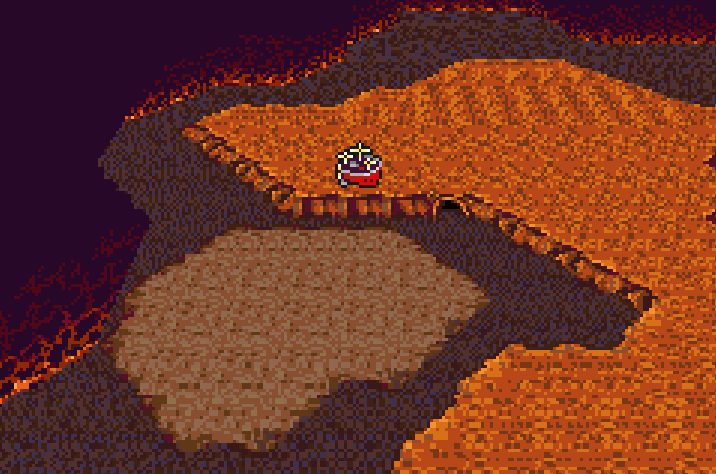
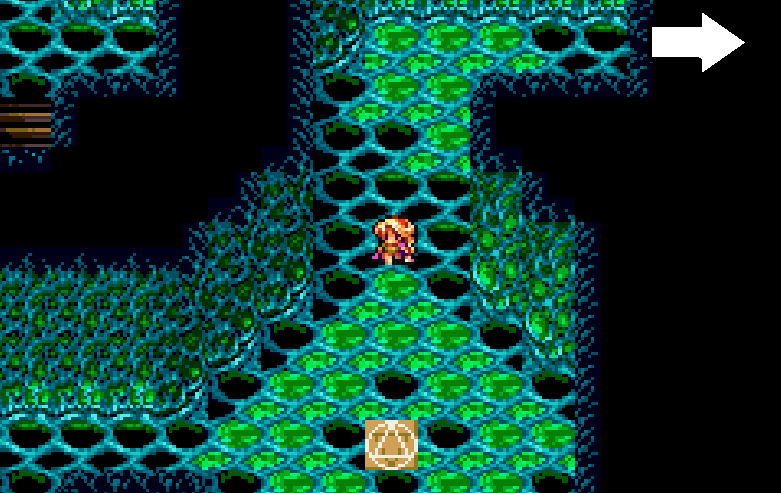
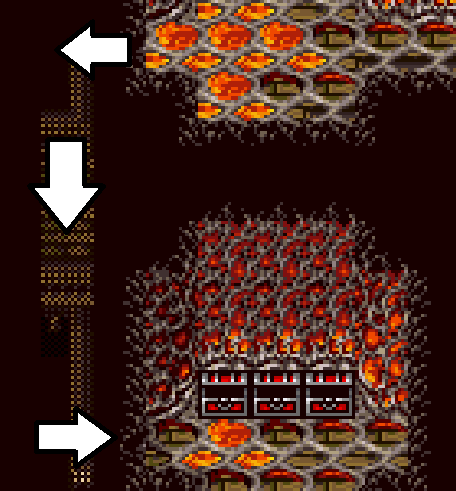
Poison Axe (Hidden path which is accessed in the area above the treasure chests; pictured above)
Kikuichimonji (Hidden path which is accessed in the area above the treasure chests; pictured above)
Hi-Potion (Hidden path which is accessed in the area above the treasure chests; pictured above)
Bestiary
Defender Sword (Guarded by monsters, found up north around the lava floor)
Cave of Summons B4 Treasure Chests:
Ether
Bestiary
5000 Gil
6000 Gil
Rat Tail (Take the teleporter once then use it to return here, then grab this chest)
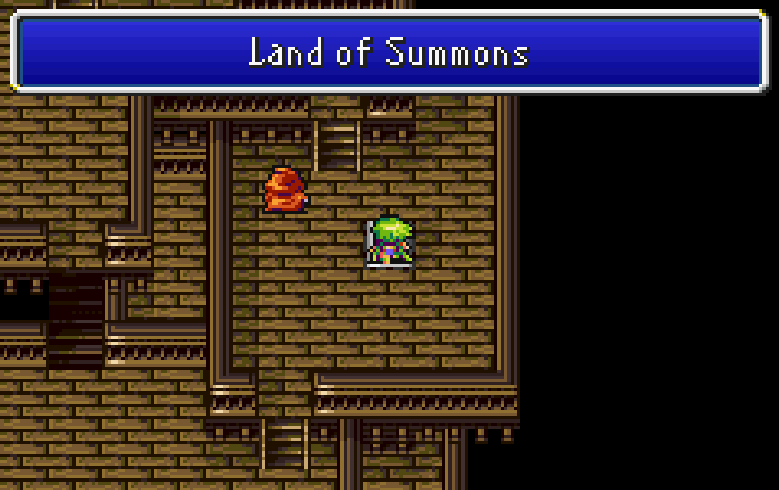
At the bottom of the Cave of Summons you'll find a teleporter which takes you to the Land of Summons. This area has no enemies which means you can roam around freely. As aforementioned there are a few things that we are going to want to accomplish here before leaving. Also, unless your party is on average level 50 the upcoming fights may be too challenging for you.
If these two fights are too difficult you can either return to the Cave of Summons/Underworld and grind or, once you get a better airship, return to this area and complete the side quests then. For more information on both of these fights, follow the links below.
FF4 Leviathan Summon Side Quest
Note: Use a Cottage on the Save Point instead of the Inn, it'll save you a ton of Gil
To reach both of the bosses in Land of Summons you'll want to go into the Library and take the portal on the lower floor. The room you appear in has a man and female that are dressed like royalty, different from the other NPCs here. Speak with the woman to trigger the first fight, then with the man for the second.
Land of Summons Treasure Chests:
Phoenix Down (House with the Save Point)
Bestiary (House with the Save Point)
Yoichi Arrow (Four chests at the hidden area, mentioned below)
Elixir (Four chests at the hidden area, mentioned below)
Dry Ether (Four chests at the hidden area, mentioned below)
Yoichi's Bow (Four chests at the hidden area, mentioned below)
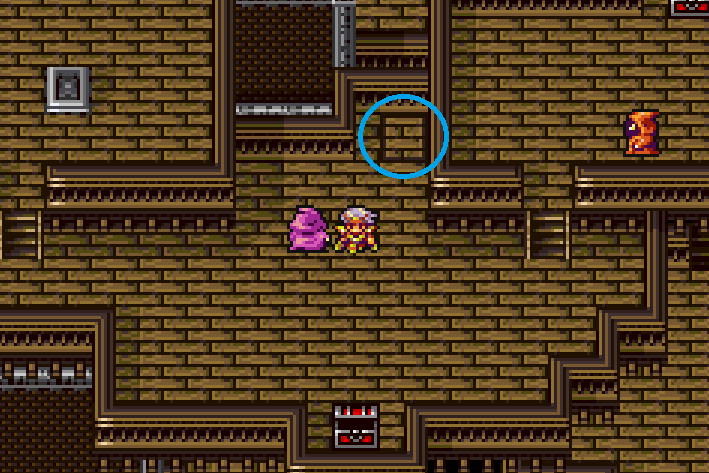
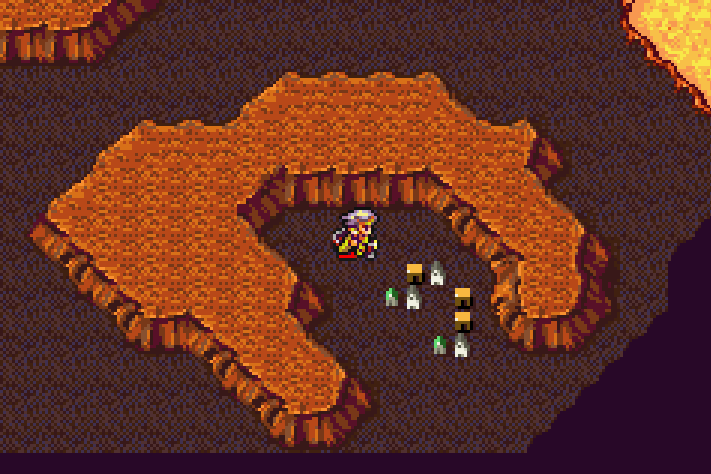
Once you've defeated both Asura and Leviathan there is only one more thing to do here - collect the four treasure chests that you constantly see below you while traveling through this town. To reach these treasure chests you'll want to head over to the area shown in my screen shot above. It's back where you entered the Land of Summons at, by the chest with 6000 Gil and the teleporter to the Cave of Summons.
At this location you will want to step on the block that is a different color than the rest. It's circled in the screen shot above and stands out like a sore thumb once you notice it. This will take you down to the area with the four chests that you can see below you from throughout the Land of Summons.
With those treasures in hand, our next destination is the Sealed Cavern. You can use Teleport to leave this dungeon or go to the area south of the four treasure chests and instead of going back up, take the different colored panel at the southern most end to be teleported out of the dungeon.
Continue to Chapter 10 (Sealed Cavern & Leaving the Underworld)
Return to Chapter 8 (Eblan Cave, Tower of Babel, Underworld/Dwarf Castle)