
Neverwinter Nights Main Campaign Chapter 4 Walkthrough

Chapter 4 is the final Chapter of the Main Campaign and it takes place in the same town our adventure began, Neverwinter. The main quest of this chapter is titled The Final Battle, I will be covering that entire quest on this page since this whole chapter is extremely linear.
At the start of this chapter you can talk with Haedraline if you'd like some more backstory about everything going on, she's found in the basement under Castle Never. However, talking to her is completely optional. The first thing you should do is go out to the City Core map and pick up the only 2 available side quests for this chapter:
I'd recommend you do some shopping while you're in town too, all of the vendors are found in the same locations they were during Chapter 1. When you're ready to proceed with the story you'll want to exit the City Core map to the southeast. This will put you into the War Zone map where both of the aforementioned side quests can be completed.
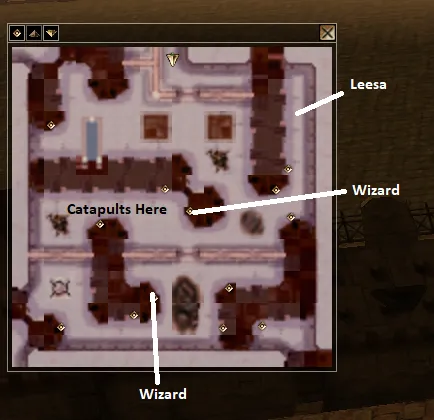
Below is a map screenshot from the Neverwinter Under Siege side quest page, it details pretty much all you need to know about the War Zone map. To proceed from this map to the next you'll want to enter thelcoation marked 'House Entrance' in the bottom right hand corner. You'll be able to go out the back door of this house into the alleyway behind it which is marked 'Strange Courtyard' on the map.
You'll face a Half-Dragon Baalor in the courtyard, it'll be a pretty tough fight but nothing you can't manage by this point in the game. Once the Baalor is defeated a Portal will appear in the courtyard that will take you to Maugrim's Sanctuary when you interact with it. In the first room of this new dungeon you'll find Aribeth the Blackguard - with a spiffy new weapon and everything.
Aribeth will attack you and you'll have no choice but to fight back. When she gets low on health she'll surrender to you and you'll have some more dialogue with her. During this dialogue you can convince Aribeth to give up and surrender herself to you/Lord Never or you can kill her. If you completed the Aribeth's Tale Side Quest during Chapter 2 then you'll be able to convince her to surrender easily by showing her the ring she gave to you. Alternatively, the only way to make her surrender is to successfully complete a [Persuade] check during dialogue with her.
If you convince Aribeth to surrender then you'll find her in the prison of Castle Never back at the City Core. She'll be in a jail cell right next to Haedraline.

Regardless of what happen with Aribeth, when you're ready to proceed continue through Maugrim's Sanctuary until you run into Maugrim himself in the northern portion of the map. Maugrim will be a much harder fight than Aribeth since he's a caster with access to the highest level spells in the game.
Once you've defeated Maugrim loot the Word of Power from the chest in his room and use the Stone of Recall to return to the City Core. Before doing this next part I strongly recommend you do some vendor shopping and more importantly stock up on potions, healing kits and whatever else you need.
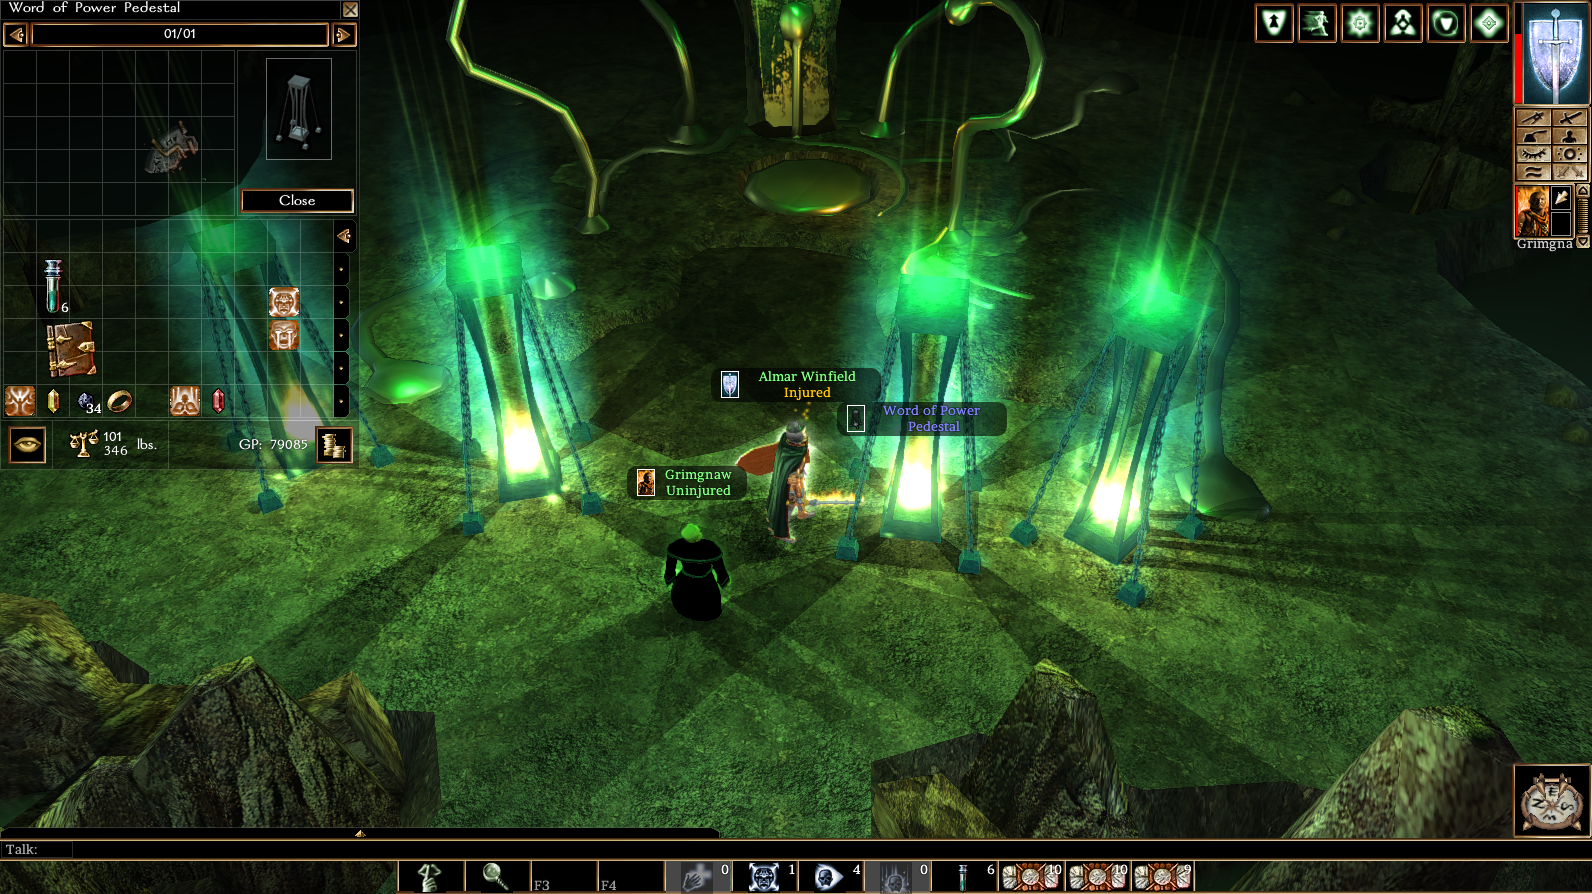
When you're ready to proceed into the final dungeon head into the basement of Castle Never and interact with the Word of Power Pedestal (pictured below). Drag and drop the final Word of Power into the pedestal and you'll activate a Portal on the gold saucer thing.
After placing the Word of Power into the pedestal all that's left is to click on the gold saucer thing to be teleported inside the Source Stone dungeon. Near the entrance of this dungeon you will meet someone named Asheera who is essentially Aribeth from another world/timeline. Asheera will give you Asheera's Amulet which is a pretty good amulet with some nice resistances and an AC bonus against Reptilian enemies.
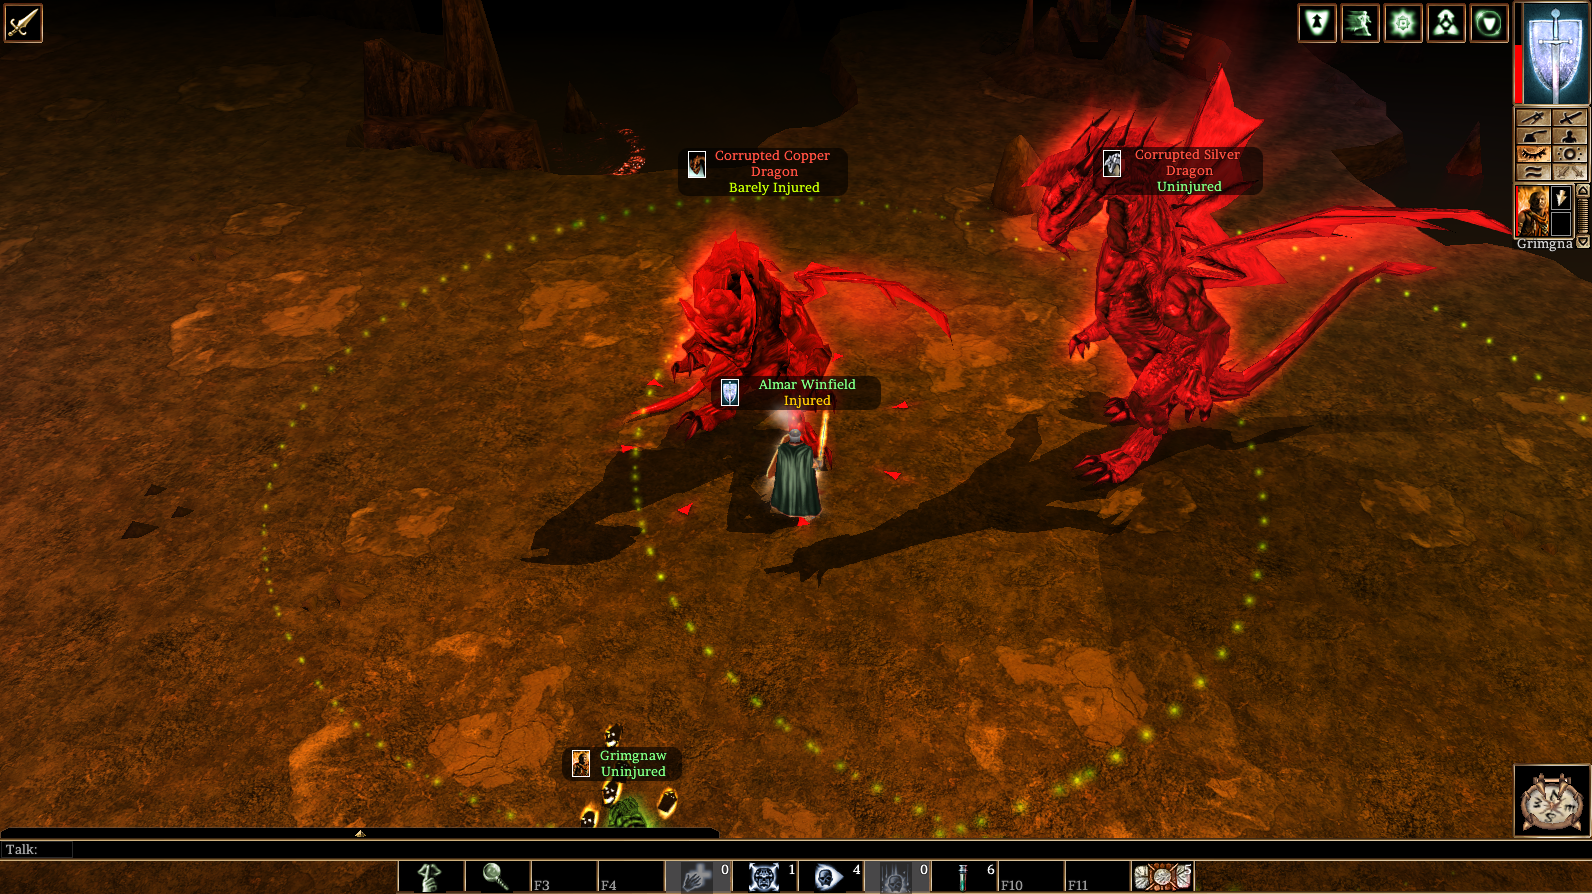
You have the option of attacking and killing Asheera if you want or just accept the necklace from her through dialogue. Either way continue through the linear dungeon until you come across a portal in the central portion of the map. This portal will teleport you into a room with 2 dragons (pictured below). It's strongly recommended you buff up and make sure you're prepared before going through this portal as this will probably be the hardest fight you've had up until this point in the game.
I recommend making sure you have a Clarity Potion active to make yourself immune to fear (or wear a belt that does) and also have a stack of Heal Potions ready to go. Heal Potions will heal you to full health each time you use one which is important for this fight because we'll waste a ton of potions if we have to drink 3 or more each time we have to heal.
Tip: Don't forget you can use Stone of Recall to rest inbetween Dragons if you need to! Also remember that you can give your Henchman all the same buff potions you drink too!
Warning! Once you're inside the Inner Sanctum you will no longer be able to use the Stone of Recall to return to the Temple of Tyr.
The dragons will drop a Guardian Key, each key will unlock one of the 2 doors in the north leading to the Source Stone Inner Sanctum. You will have one battle against a group of Morag's Chosen in the Source Stone Inner Sanctum before the final battle against Morag herself.
Make sure you loot the key from one of the Morag's Chosen enemies, you'll need it to unlock the door to Morag's Chambers. I am not going to give you the same advice over and over for these fights so, all the same advice I gave for the dragons still applies here.
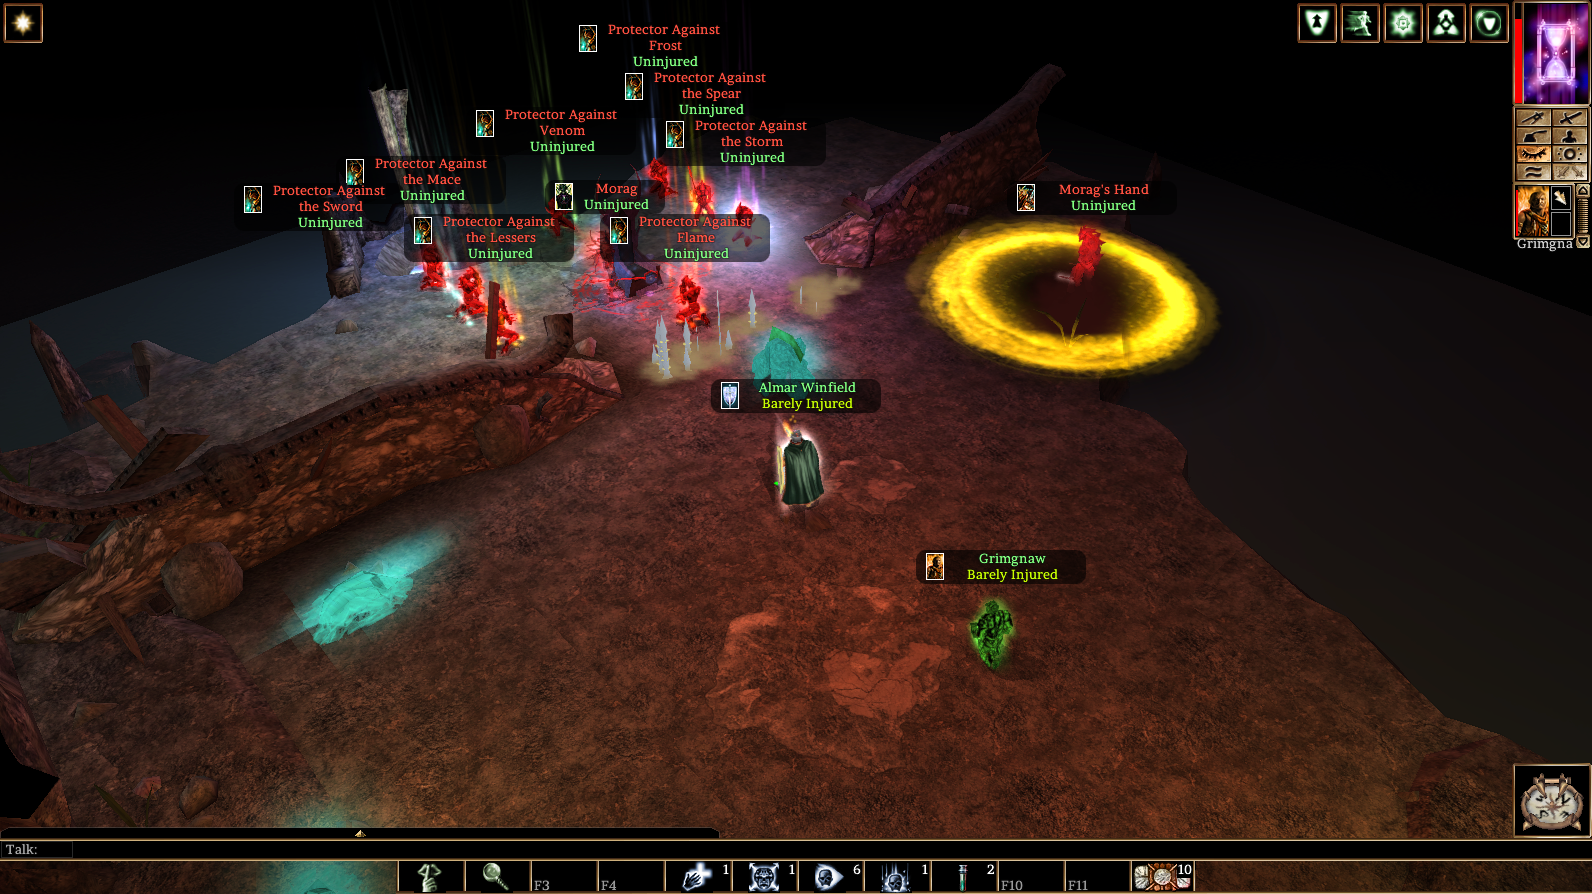
As you may imagine for the final boss in a game like this the fight with Morag won't be straight forward. Morag is a caster and will be immune to all damage until you defeat a specific "Protector Against <Damage Type>". There are a group of these protectors surrounding Morag's Throne, as shown in the screenshot above.
To reach Morag's Throne safely you will have to destroy the Statue infront of the blade trap on the ground. Sometimes it will say Weapon Ineffective and make it seem like you can't damage this Statue but you can. It may take awhile to actually destroy the Statue, in the mean time you have to eat all of Morag's spells. Destroying this Statue will disable the blade trap which will allow you to safely reach and attack the Protector Against <Damage Type> enemies.
You only need to defeat a single one of Morag's Protectors - specifically whatever one protects against the damage type that you are using. If you're finding this fight to be extremely difficult my recommendation to you would be to do your best to survive until Morag runs out of high level spells. After about 2 - 3minutes of chain casting high level spells at you Morag will run out of spell slots and the fight will become significantly easier from that point forward.
Once Morag is defeated all that's left is to go through the portal that opens up and speak with Haedraline inside the Astral Pocket. She will give you some details about what happened and why you're now here; when you're done talking to her and ready for the credits exit through the nearby portal.
With that, my good friends, you will officially be finished with the NWN Main Campaign!