
Mission 3: Scuttle Das Boot - Medal of Honor Walkthrough
Medal of Honor is broken up into 7 different missions, each of which have multiple levels. This mission has a total of 4 levels, some of which are starting to get long with many objectives. Our first level of this mission is the hardest stealth level of the game, you won't get much ammo during the level so if you plan to use a weapon headshots are mandatory. Aside from this level, the rest are long but straight forward.
Mission 3 Walkthrough Youtube Video (Levels 1, 2, 3 and 4)
Level 1: Escape the Wolfram
Objective 1: Gain Access to Promenade
Objective 2: Gain Access to Bridge
Objective 3: Find Wrench
Objective 4: Gain Access to Engineering
Objective 5: Jam Engine
Objective 6: Exit Ship Through Cargo Hold
This is the first real big level of the game (the boat is huge) and navigating it is a bit of an annoyance. You're expected to be stealthy but I find it to be difficult since some enemies will immediately attack you if your cover is insufficient. I strongly recommend you take the "headshot everyone" approach to this level instead of trying to be stealthy. Run around with your pistol and just aim for enemies noggins.
Our first goal on this level is to get the General Pass item (pictured below), this item is really only required if you plan to be stealthy. This item will give us access to more parts of the ship; across the hall from this item is the Promenade too for the first objective.
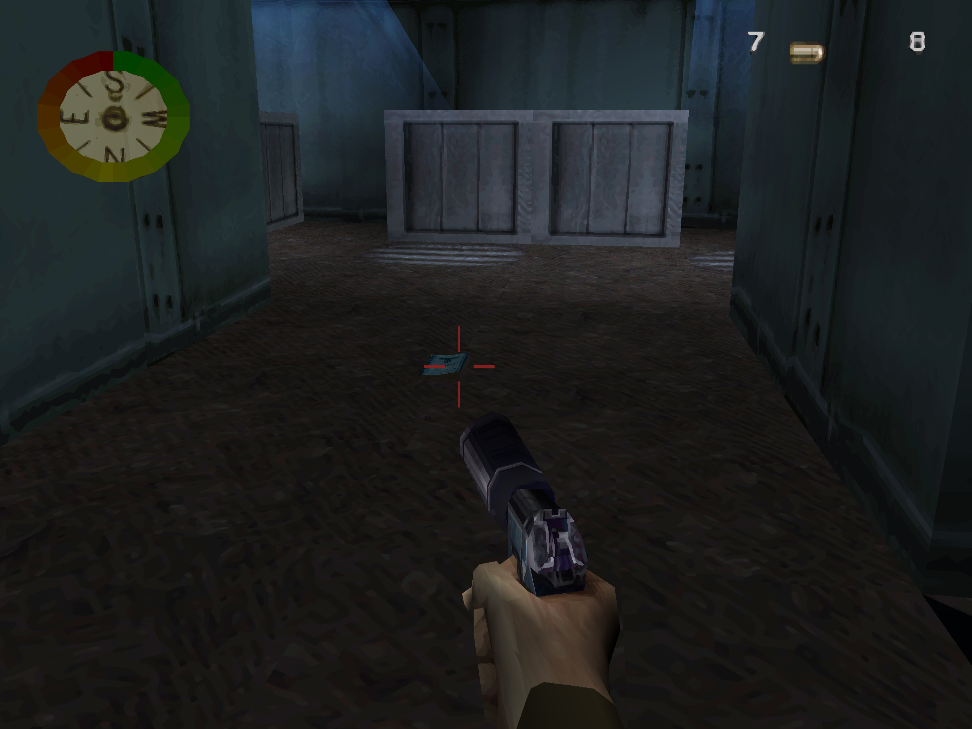
General Pass Location
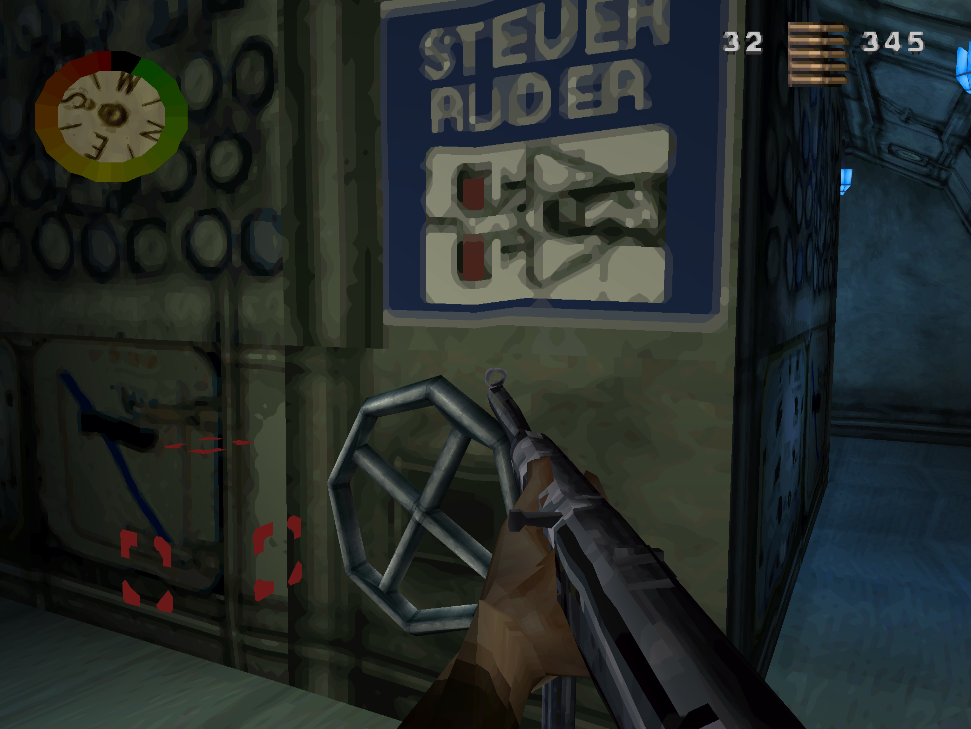
In the promenade the route will split, you'll see a big sign on the wall at this split. Right will have the picture of a ship's steering wheel (this goes to the Bridge) and left will have a picture of a rudder (this goes to Engineering). Our first destination will be the Bridge, so go right. There will be a ladder to climb and then some tight areas to navigate before the bridge.
Note: If you're being stealthy you'll need to get the Pass to the Bridge first by going left towards Engineering and then another left into the first room on your left.
When you get there make sure you grab the Pass to Engineering which drops from the guard next to the wheel. You'll also want to grab the Wrench item while we're in this area. The Wrench is not found on the bridge itself, you'll need to exit the bridge and go to the other side of the ship. One side will go back downstairs the way we came and the other side has two dead ends, one of them has the Wrench (pictured below).
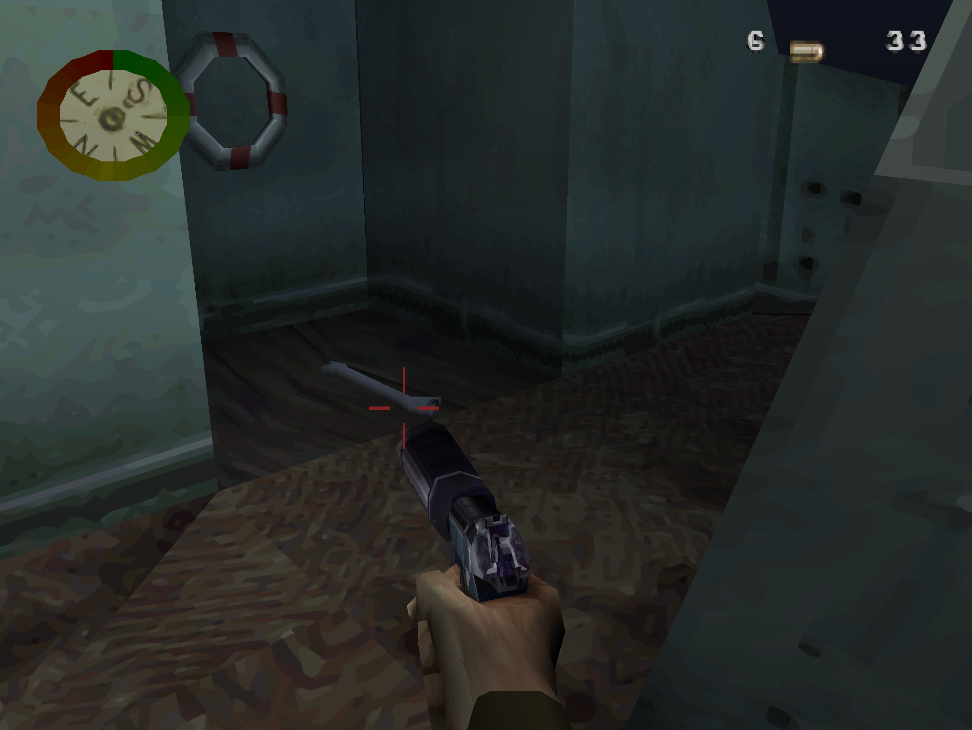
Wrench Location
Head back downstairs and go towards Engineering, you'll complete Objective 4 when you enter the room shown below. As for Objective 5, approach the engine pictured below and use the action button to destroy it. Once that's done all that's left is to exit the level. Remember the area we got the General Pass earlier? There was a door in this hallway called Cargo Hold, head there and open it to leave. The door is one of those large gray wall-looking things.
Level 2: The Rooftops of Dachsmag
Objective 1: Locate Smuggled Weapons
Objective 2: Secure Deployment Timetable
Objective 3: Blow up Truck With Demo Charges
Objective 4: Find Hatchway to Production Facility
Immediately in front of you at the start of this mission you'll find Objective #1, it's a box with a rifle inside. Our next objective is found below us, the Deployment Timetable is a small white note found on a wall inside of a room (pictured below). The building with this timetable is a smaller building which is detached from the larger one you started on.
Right outside of the building with the Timetable you'll find a truck, this is the truck we need to blow up for Objective #2. Place the charges on the front of the truck where you see the red box, once that's done return to the rooftops by climbing a ladder behind one of the buildings.
On the rooftop you will be able to jump from one crate to another crate, this will put you next to another ladder you can climb. This next part of the level is a bit confusing, you will have a maze like alley to navigate before you come to a larger room with a truck parked in the middle of it. Find the ladder in this area and climb to the roof, you'll be able to see the pipe in my picture below.
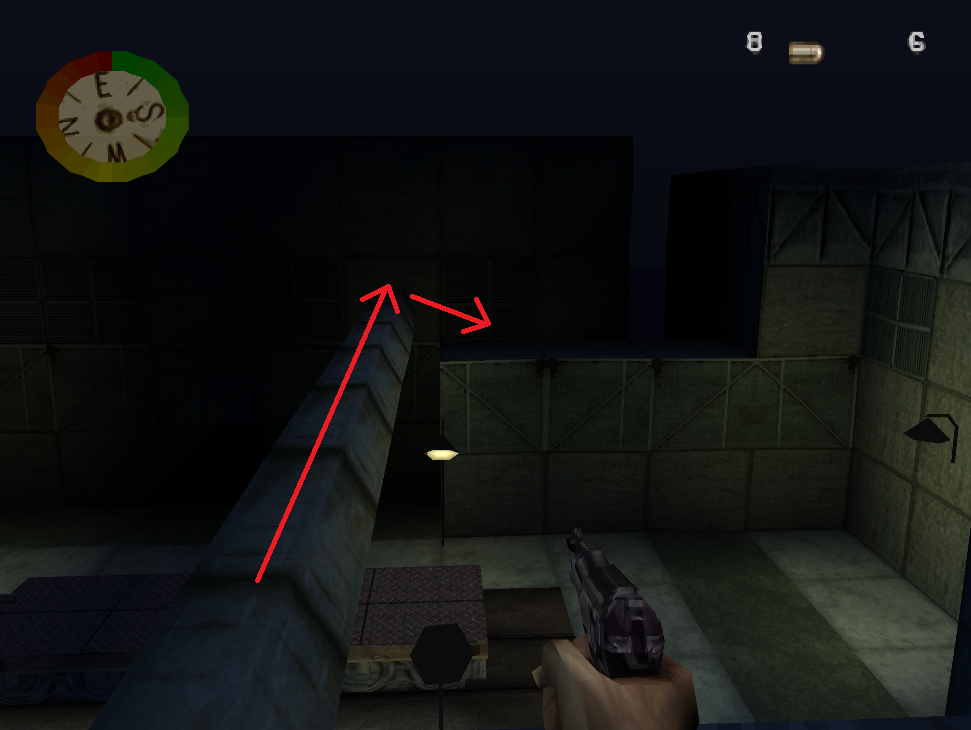
Run across this pipe and jump to the area shown, there will be a short tunnel before the path splits. Go right and climb the ladder that's here, you'll need to jump across two roof tops and also climb a ladder before you reach the hatch which completes the mission.
Level 3: The Hunter's Den
Objective 1: Find Engine Specs
Objective 2: Find Hull Blueprints
Objective 3: Destroy Sea Door Controls
Objective 4: Locate and Board U 4901
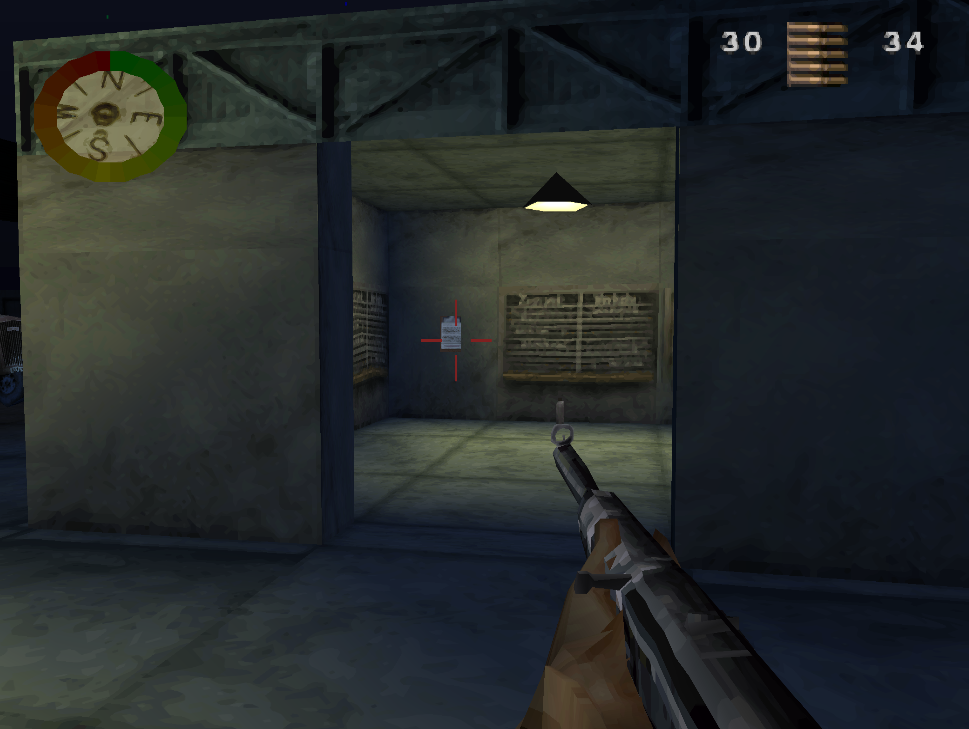
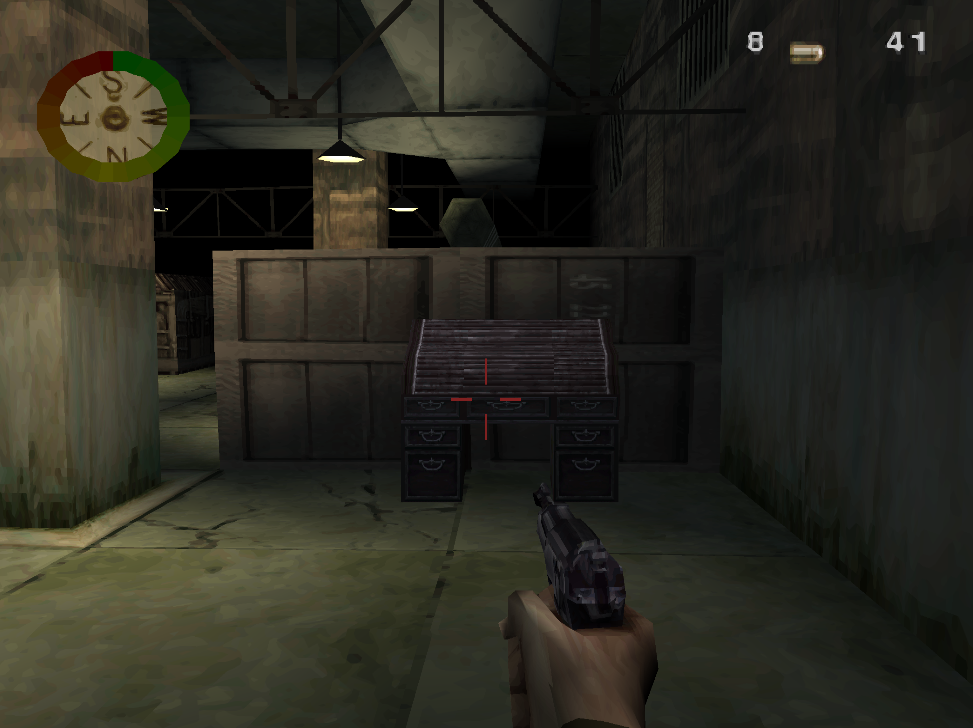
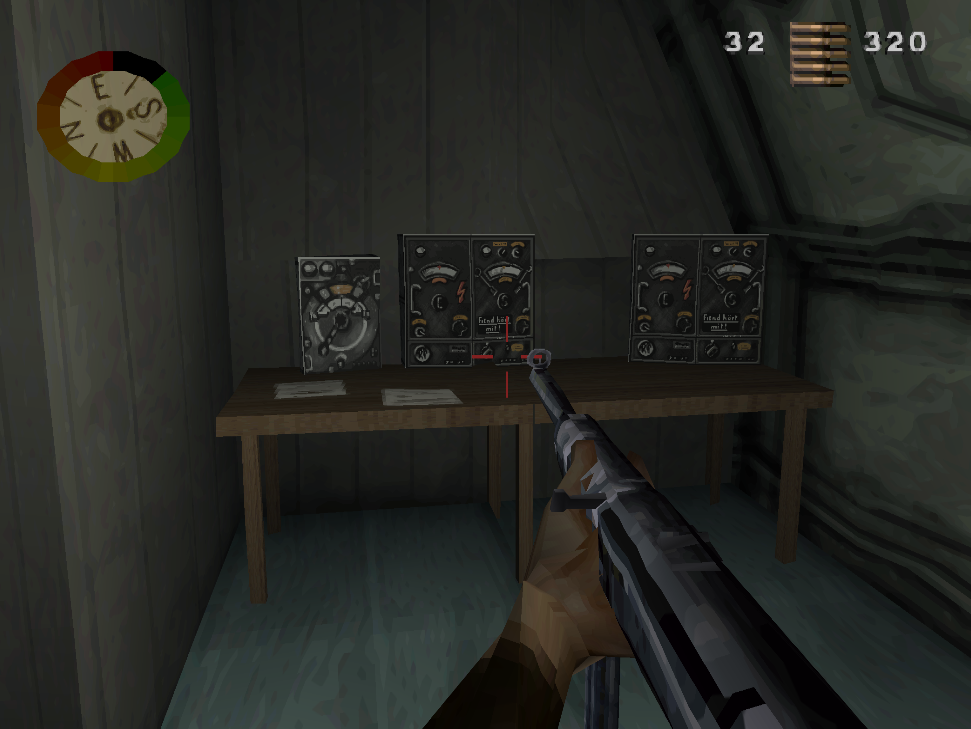
If you follow the main route through the mission you will come to a large room that looks like the picture below. Search this room to find the red desk in the picture to the left, open it and grab the Engine Specs to complete the first objective. The second objective is two rooms down from this one, you'll find a large room with a table and ontop will be some blueprints (pictured below). Grab the blueprints to complete the second objective.

On the opposite side of the room from the Hull Blueprints you'll find a narrow hallway with some red lights hanging from the ceiling. Head down this hallway to continue with the mission. The hall will split in two midway down, left goes to the computer room where you'll find Objective #3 and right goes to the Uboat which we need to board. Go left first to destroy the computer then backtrack and go right to finish the mission. The first uboat room you come across is not the right room, continue across the paths to find a second room. Board that uboat and go near the open hatch to finish the level.
Level 4: Dive!
Objective 1: Radio Coordinates to HMS Belfast
Objective 2: Lock Fins to Dive Setting
Objective 3: Destroy Fin Controls
Objective 4: Blow Ballast To Surface Boat
Objective 5: Find Exit Hatch
This is another level that is extremely linear. Follow the only path through the mission until you reach a small pocket of rooms with a lot of enemies. In one of the rooms you'll find some devices which you'll use to complete our first objective (pictured below). In the room right after you find this device you'll find two more mission objectives, this is also pictured below (on the right).
Use the valve to complete Objective #2 and then plant a bomb next to the valve to complete Objective #3. In the very next room on the wall you'll find another picture, this one says "Ballast Freigabe" and it has two large levers next to it. Pull these levers to complete Objective #4. In the very next room you'll complete Objective #5, climb the ladder to finish the mission.
Continue to Mission 4 Walkthrough
Return to Mission 2 Walkthrough