
Kitty Catering - Galdin Quay

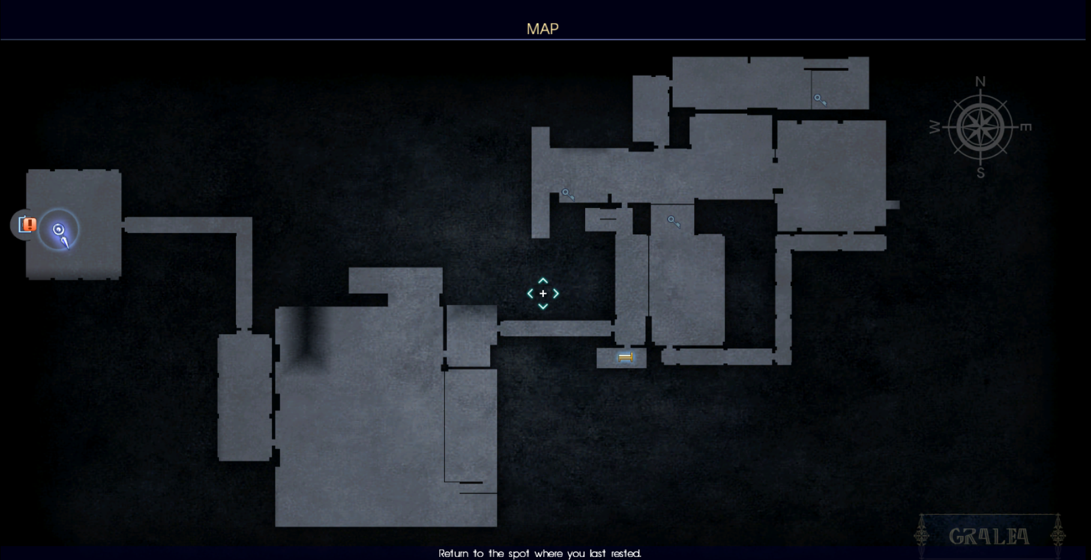
This chapter begins with you having to flee from the daemons on the train then drive the Regalia to the end of the tracks before the timer runs out. When you finally regain control of Noctis you'll want to grab a few treasures before proceeding forward with the main quest again.
Oracle Ascension Coin: Turn around and go directly east along the train tracks until you run into this item.
Mythril Shaft: West from where you crashed the Regalia.
When you go far enough West (shortly past the Mythril Shaft item) a train cart will collapse and separate Noctis from Gladiolus and Ignis. Those of you playing on the version with all of the DLC will be given the option to follow Noctis or Gladiolus and Ignis, for this guide I chose Noctis.
For Noctis you will have a brief part of the dungeon where you'll need to out run daemons again before he finally summons the strength to put on the Ring of Lucii. For the rest of Gralea you're going to be using this ring to defeat the daemons that you encounter, the next little bit of Gralea will be your tutorial on how to use it.
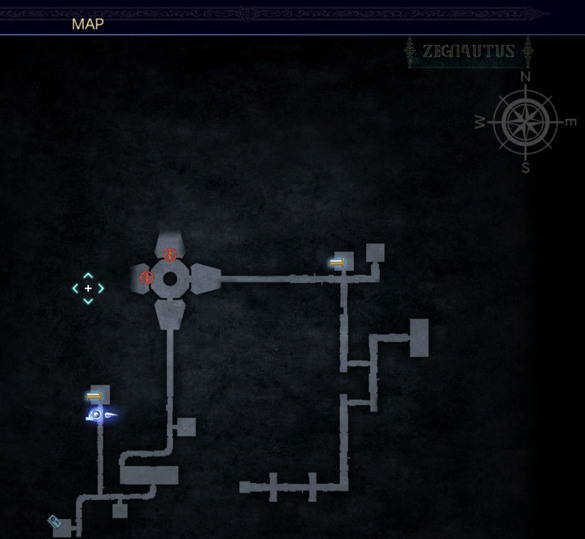
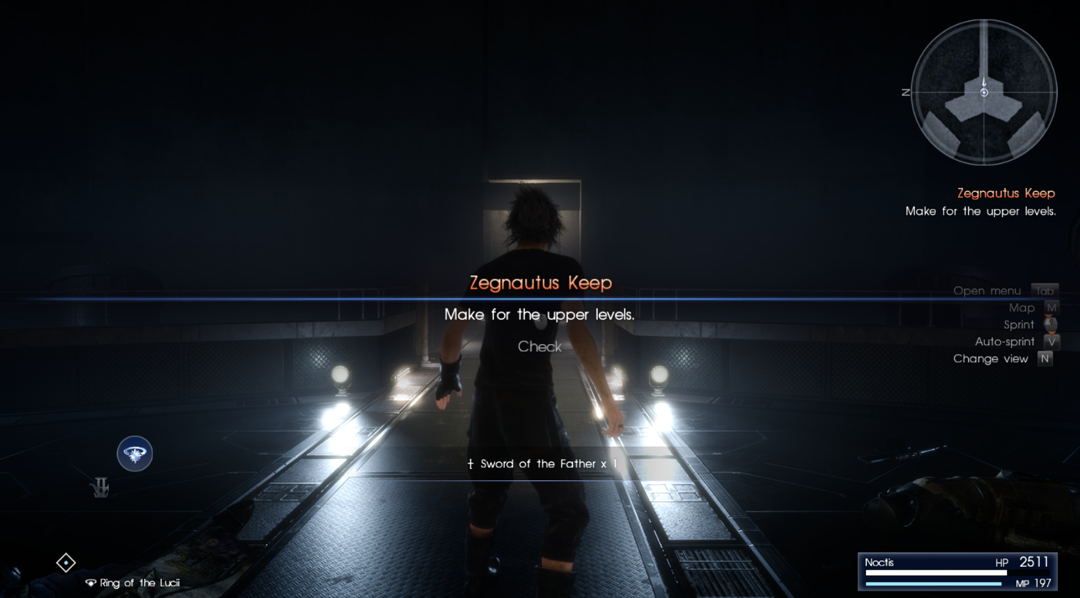
At the end of Gralea you'll ride an elevator up into a new dungeon called Zegnautus. There will be four floors of this dungeon that you must clear with only the Ring of Lucii to protect you. Just follow the quest markers on your map as they update and you'll find your way through Zegnautus without any issues at all. You should go out of your way every chance you get though to explore for items.
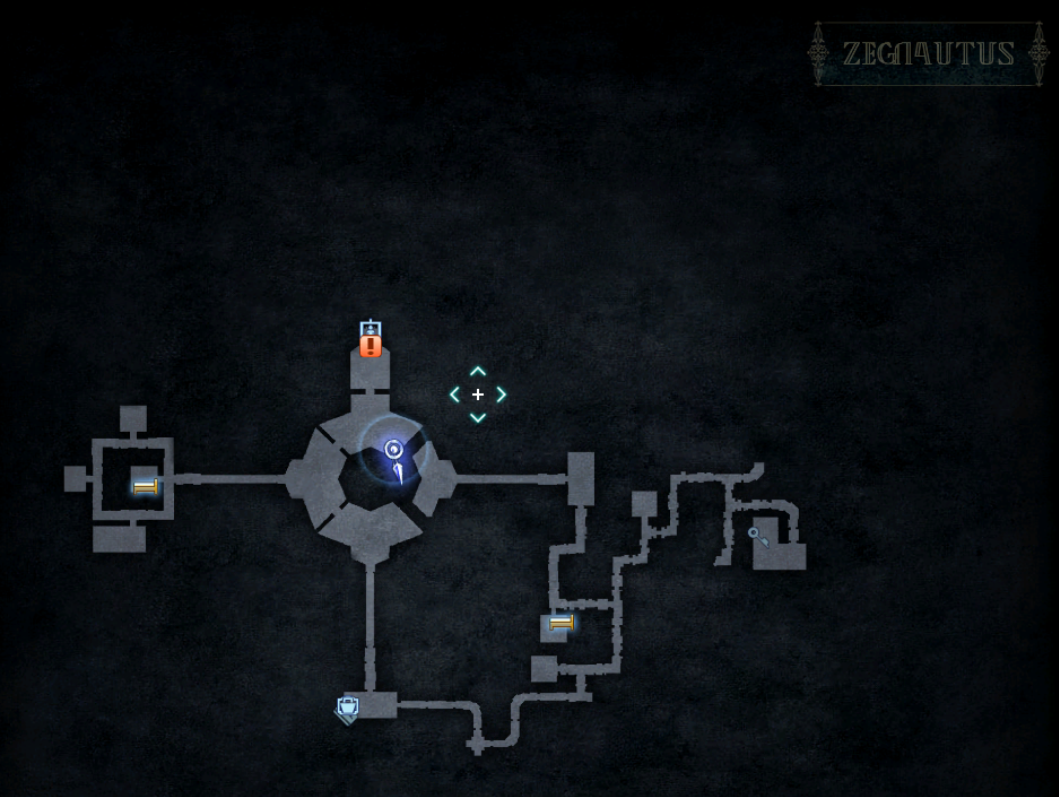
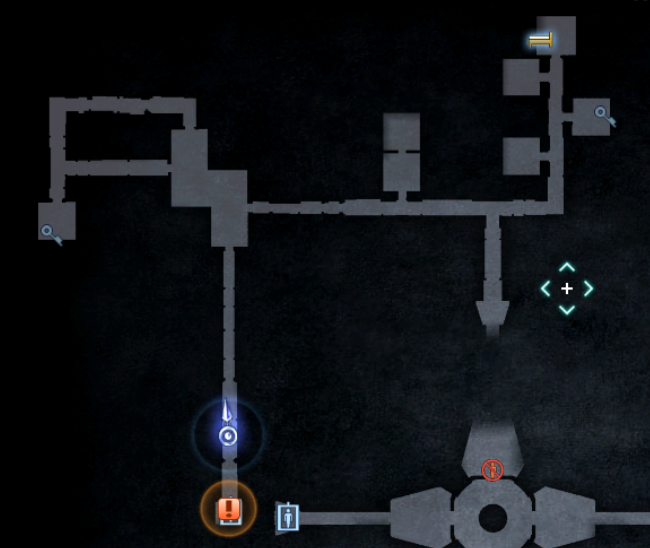
Throughout Gralea, Zegnautus and Zegnautus Keep there are a TON of goodies for you to find. Use my screen shots for better help locating all of the items scattered throughout the dungeon. If you'd like to see a version of these maps without any of the item drops marked on them, check out my Chapter 13 Clean Maps page <Add Link>.
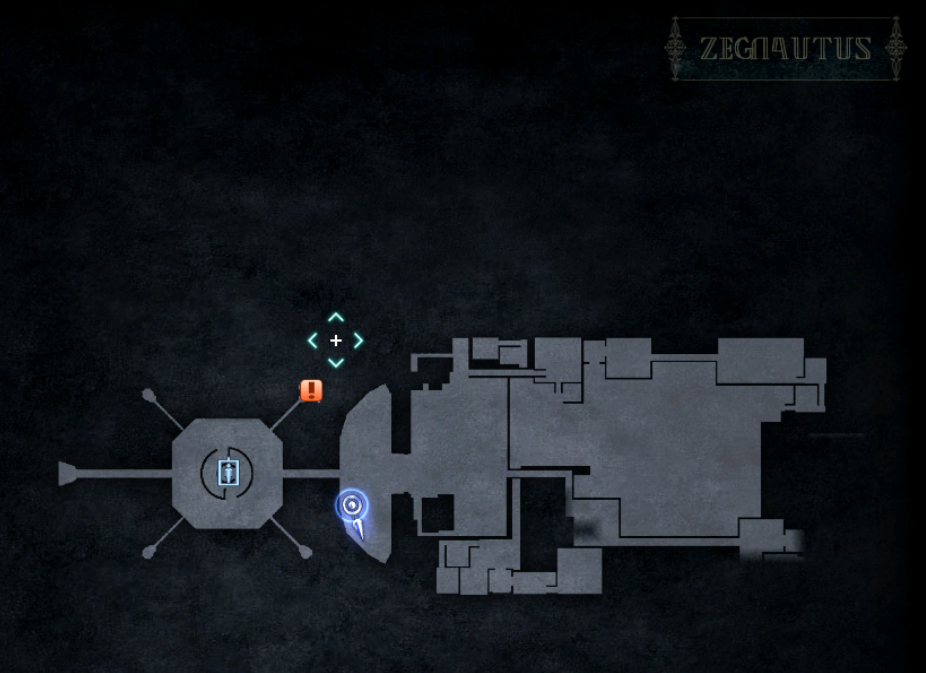
This portion of Zegnautus ends when you travel out to the quest marker shown on my map above. After you update your quest here you'll fall to a lower level floor and you'll complete the current main story quest. In addition to this you'll find the "Sword of the Father" weapon on Ravus which gives us something other than the Ring of Lucii to protect ourselves.
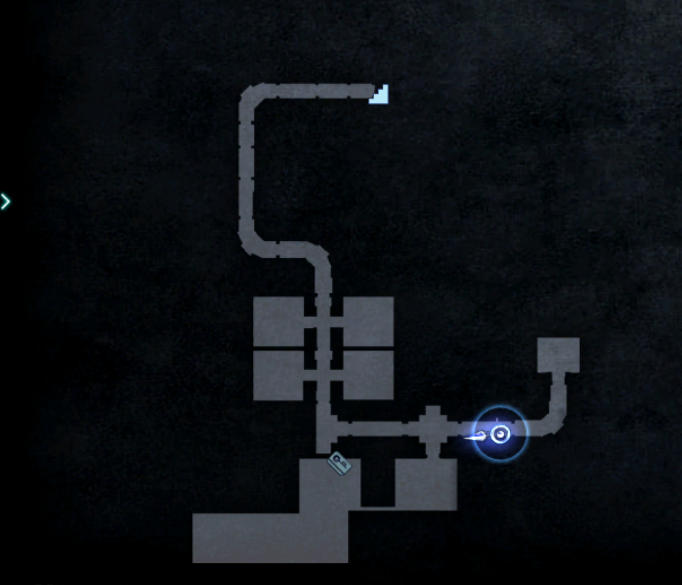
Much like before, follow the quest marker to find your way through this dungeon - it basically holds your hand the entire way. Do - however - go out of your way as much as possible to collect all of the available treasures. There are quite a few of them to find. Use my screen shots below for additional guidance with locating all of the available treasures.
Important: If you don't have a healthy supply of Elixirs, Hi-Elixirs, Hi-Potions, Remedys and Phoenix Downs I strongly recommend you purchase as many as you can afford at the shop next to where you upgrade your Keycard to Level 4. We're going to be using the Sword of the Father weapon for awhile and since it is a Royal Arm it consumes our health with each strike.
At the end of the floor we're on now (the one shown in the screen shot below) you will battle a Faras daemon as you wait for the elevator. You're not supposed to defeat it, instead you're supposed to dodge everything it throws at you until the elevator arrives then hop on. While you're on the next floor this same Faras will attack you and you're supposed to flee from it.
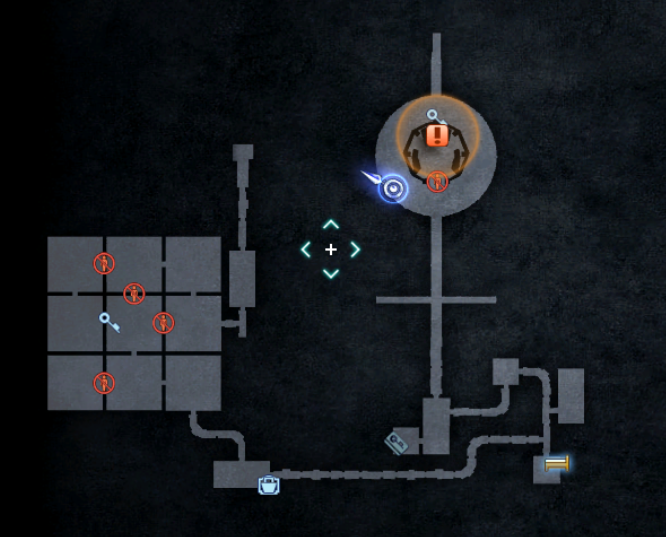
The 9 square rooms on the left side of the map is the 'computer puzzle' area.
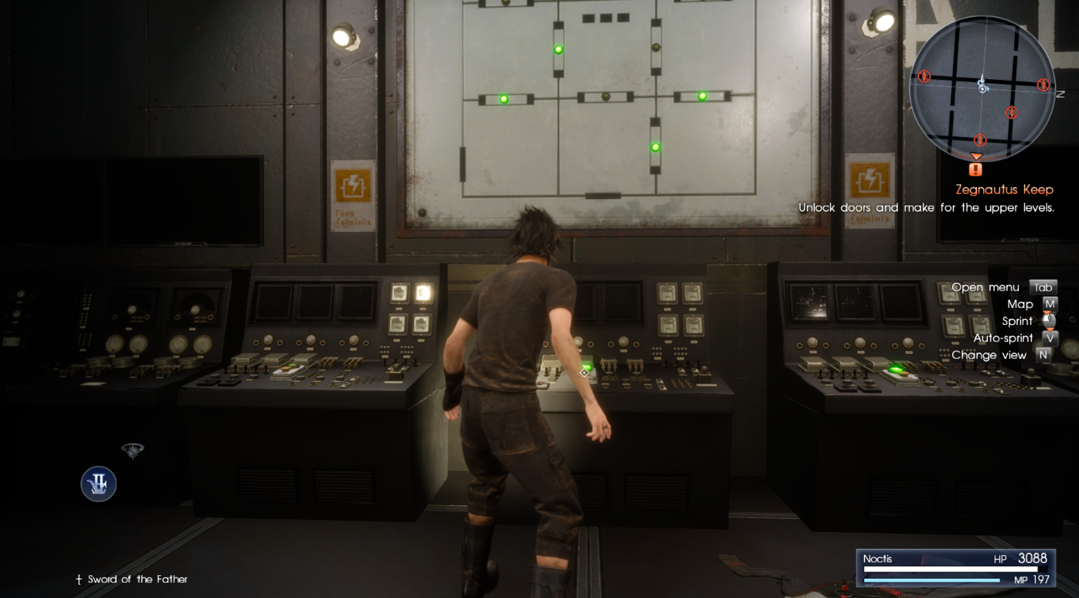
Eventually while making your way through Zegnautus Keep you'll come across a room with computers and a bunch of locked doors (shown in the screenshot above). This barely even constitues a puzzle it's so easy to figure out; for those of you interested I have listed below each of the items you'll find with which two switches active.
Switch A + B: Mega-Potion and Hydraulic Cylinder
Switch A + C: Muscle Stimulant
Switch B + C: Gralean Medal of Distinction + Path to rest of dungeon
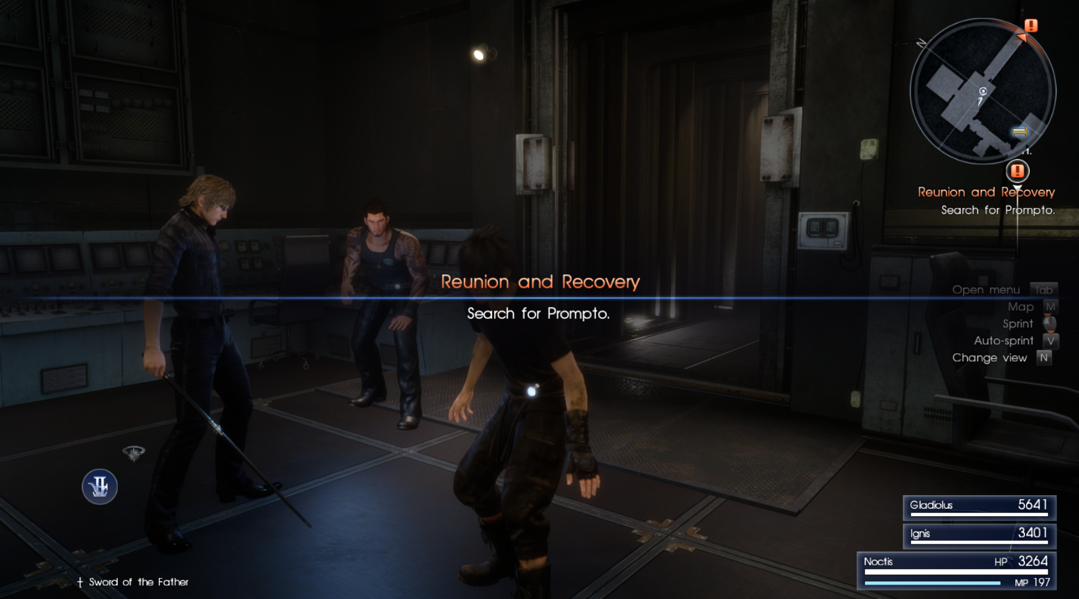
When you're ready to proceed just activate switches B and C then follow the quest marker on your map. There will be little bit more dungeon for you to clear before you're reunited with Gladiolus and Ignis and your main story quest completes. Our next story quest is called Reunion and Recovery and the first objective is to find Prompto - let's get on it!

On the map above you'll see a room with different magic draw points as well as two different shops. This will be your last chance to stock up before the big boss of this chapter which is coming up on the next floor. Buy any curatives that you may need as well as many Remedy items.
A tip for this upcoming boss fight too is to equip Noctis with a Golden Hourglass, or if you were lucky enough to get one, a Ribbon. The upcoming boss inflicts Stop as a status ailment and you'll want to protect yourself against it. Chances are though if you did a lot of the earlier side quests in the game you're so over leveled all of this is a piece of cake.
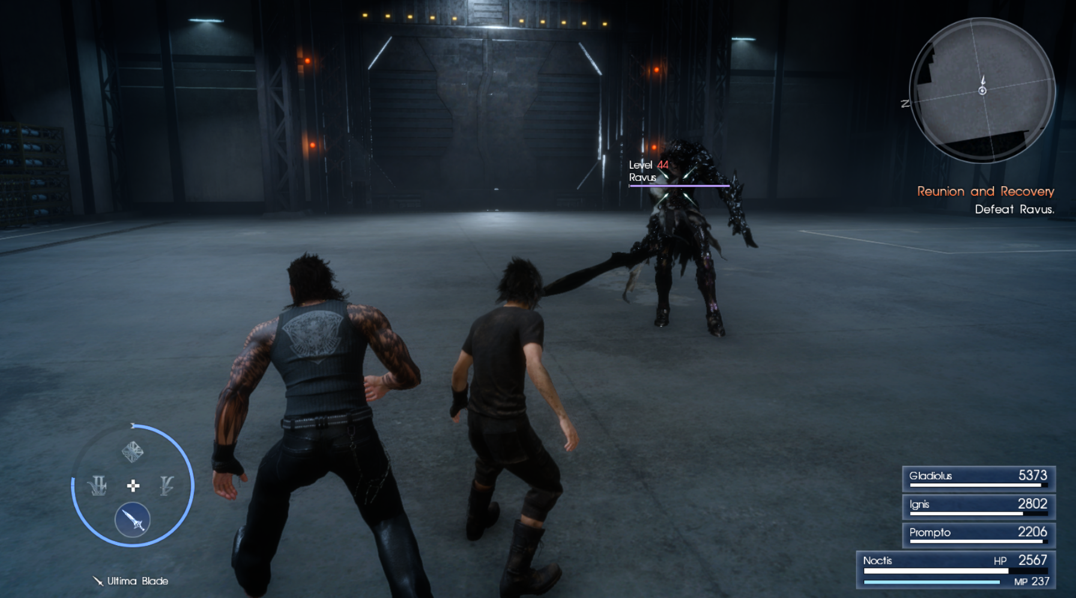
Ravus has a ton of HP and almost all of his attacks deal a serious amount of damage. For the most part he likes to charge across the battle field at someone, doing damage to everyone around him as he charges. Once you learn his attack animations you'll be able to avoid his attacks easier.
I've given this tip to you several times already but it's worth repeating. Keep in mind that using Tech abilities such as Prompto's Piercer and Gladiolus' Dawnhammer makes you immune to damage during the attack animation. You can use this just the right time to not only deal good damage to the boss but also avoid an entire attack or barrage of attacks.