
Mission 7: Escape from the V-2 Rocket Plant - Medal of Honor Walkthrough
Medal of Honor has 7 missions in total, with each of them having 3 or 4 unique levels. This is the final mission of the game and it's actually easier than the previous mission since there are less Bazooka enemies for you to worry about. Both of the first two levels are long but the third and final level of the game is rather short.
Mission 7 Walkthrough Youtube Video (Levels 1, 2 and 3)
Level 1: Buzz Bomb Assembly
Objective 1: Find V1 Target List
Objective 2: Destroy V1 Launch Control System
Objective 3: Open Blast Doors
Objective 4: Locate Emergency Hatch
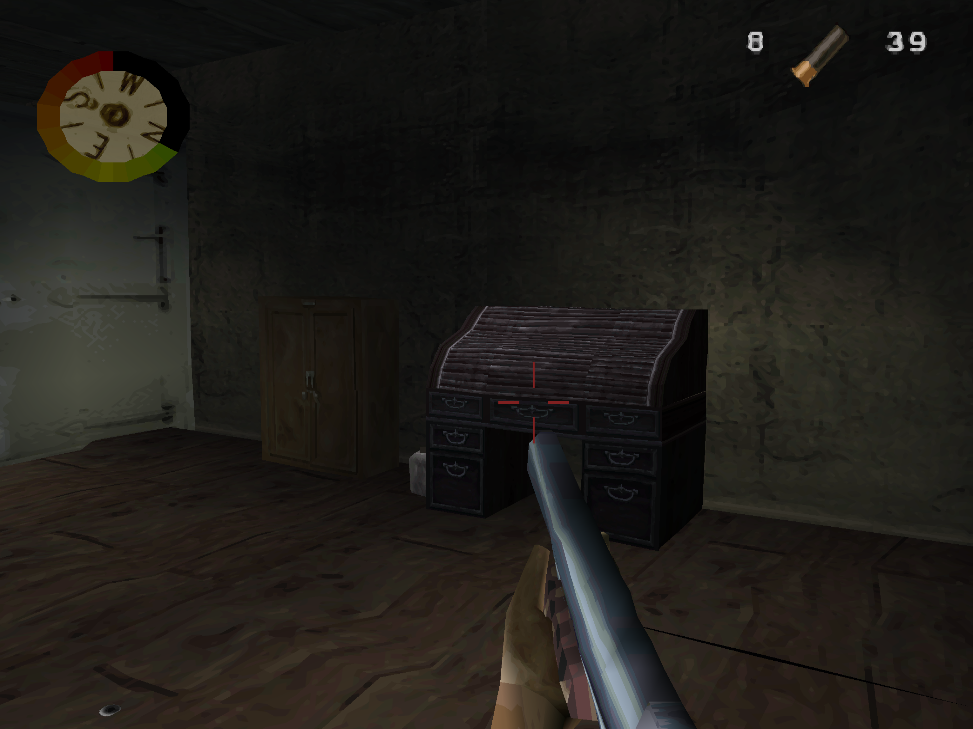
The first bit of this mission will be just enemies, you won't find the first objective until you make it into the hallway with all the side rooms that have file cabinets. In one of these side rooms you'll find a desk which you can interact with and get the V1 Target List (pictured below).
After getting the target list continue downstairs and follow the linear path until you reach a large computer room. You can place some explosives on the main computer terminal and blow it up, this will complete Objective #2. Next to this computer terminal you'll also find a valve, interact with it to complete Objective #3: Open Blast Doors.
Return to the part of this mission where you could jump down onto the tracks by the immobile cart, follow the tracks down to the room we just opened with Objective #3. You'll find the exit to this mission in this area.
Level 2: Vengeance Production
Objective 1: Find Scientist Roster
Objective 2: Acquire V2 Schematics
Objective 3: Gain Access to Guidance Lab
Objective 4: Sabotage Gyro Guidance System
Objective 5: Find Launch Area
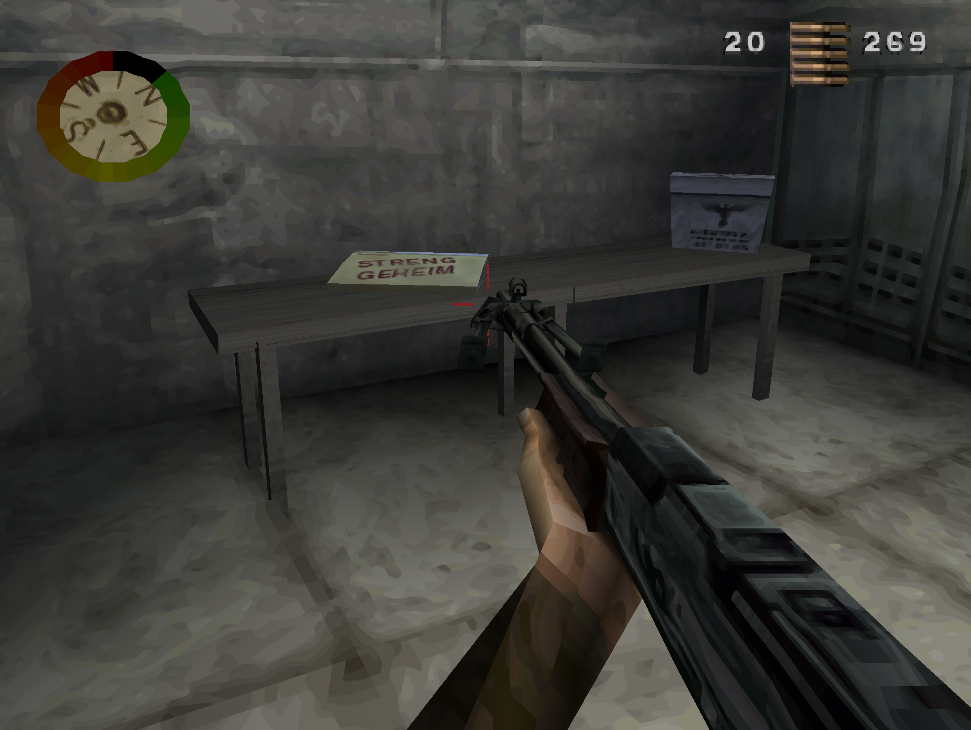
The first objective is found in a small room a little way into the mission, you're looking for a folder with some writing ontop of a table (pictured below). You'll find this room just off the main path through the mission, it's only a few second detour.
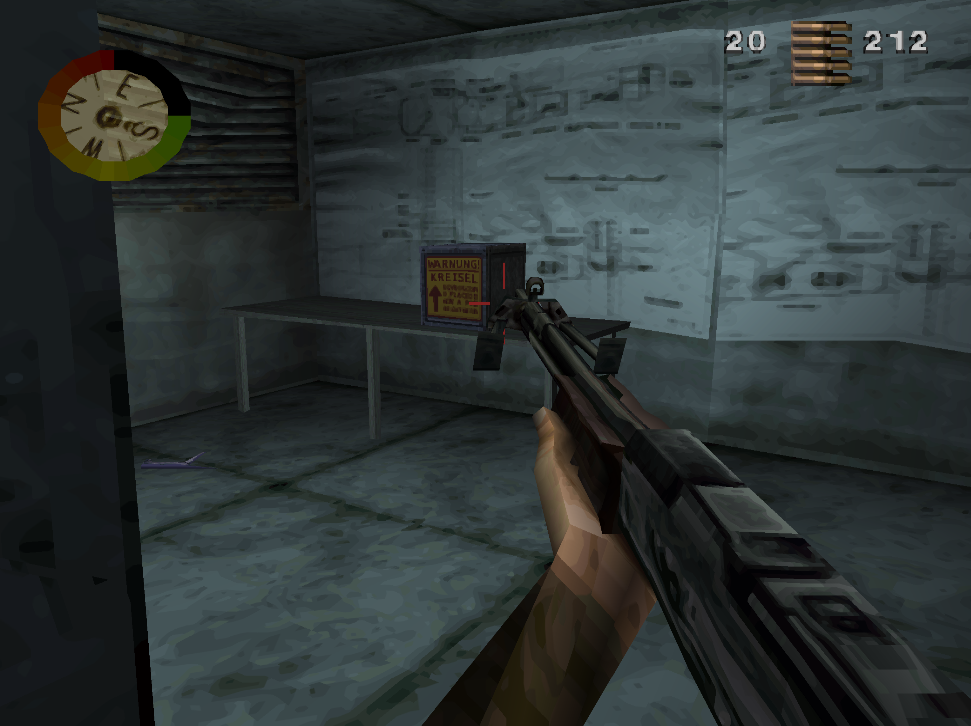
Keep following the main path and you will hit a dead end in a room with a bomb, a ladder and a table that has the V2 Schematics for Objective #2. Grab the schematics then climb the ladder to continue with the mission. It won't be long until you come across an area with two desks, one has a typewriter ontop. Next to one of these desks is a door, when you step inside you will complete Objective #3. As for Objective #4, it's sitting on a table in this area (pictured below). Interact with the device to complete the objective.
Like a broken record my advice is going to be keep following the main path down the tracks, you'll eventually find the Launch Area and the door which completes the mission.
Level 3: Gotterdammerung
Objective: Launch Sabotaged V2
This level is more or less all combat, I hated it. You have to deal with tons of Bazooka enemies and the worst part is you have a small arena to fight in and they will respawn within this area (multiple times). So, again, the difficulty all comes down to learning when Bazooka enemies spawn and which direction they're coming from.
My big piece of advice to make this part easier is to stand back in the tunnel and use your Bazooka. The enemies will spawn and run into the middle of the area before looking around for you. If you stand just far enough back to still see them but not close enough for them to see you, it's much easier. Don't bother trying to use the gun nest. Also, try shooting into the darkness where you know enemies spawn at, this will help hit them before you can even see them.
At the end of the mission you'll find a giant rocket and a small room that you can drop into right next to it. Interact with the computer in this room to launch the rocket and finish the game.
Return to Mission 6 Walkthrough