
Mission 5: The Rjukan Hydro Plant - Medal of Honor Walkthrough
Medal of Honor has 7 missions in total, each with 3 or 4 unique levels. This mission has 4 levels to complete and it's the last set of levels that are enjoyable without being frustratingly difficult. During the last level, Heavy Water, you'll start to get Bazooka enemies. These enemies are frustrating to deal with because in these old FPS games you have to stop to aim which leaves you vulnerable. If a bazooka shot hits you, it's an instant game over... Even if it hits a wall or the floor near you, it's usually still game over.
Really, the only thing you can do to properly deal with these enemies is to learn where they spawn on the map and to be cautious in those areas. In my opinion, that is not good game design.
Mission 5 Walkthrough Youtube Video (Levels 1, 2, 3 and 4)
Level 1: The Roaring Penstocks
Objective 1: Stop Water Flow In Center Pipe
Objective 2: Destroy All Power Relays
Objective 3: Shut Down Main Power Grid
Objective 4: Enter Hydro Plant
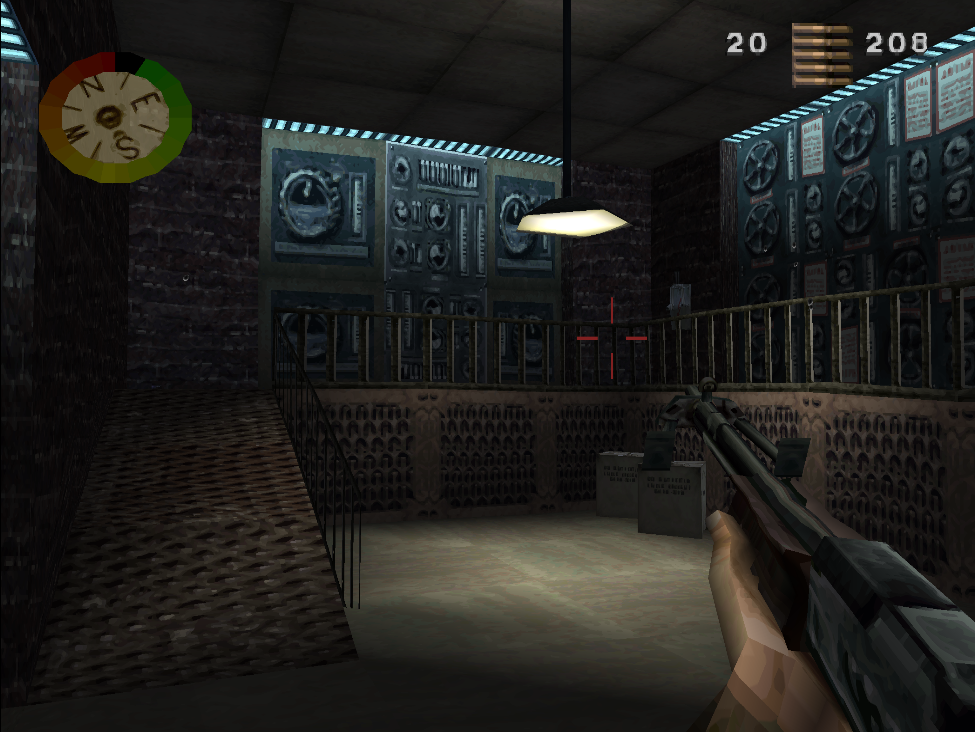
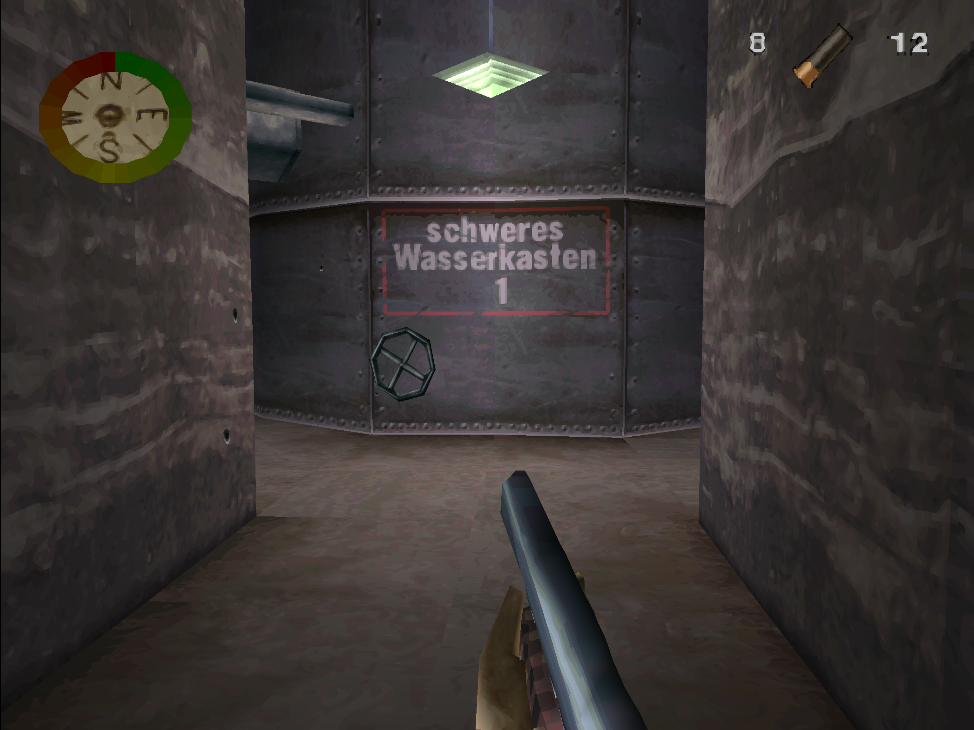
You will find the first objective at the start of this mission, interact with the valve to complete Objective #1. There is another valve nearby which will open the door we need to proceed further into the level, so use that one too. Our next objective takes place throughout most of the level, in total there are 6 Power Relays and you'll need to destroy all of them. A picture of a Power Relay is shown below, so you know what it is you're looking for.

The first two Power Relays are found by the start of the mission, the path will split and you can climb through an air vent or go down a hallway. The air vent leads directly to them, if you go down the hall you'll have to go a little bit out of your way to find them. Further up from these relays is a ladder you climb up which has an air vent on a small platform; this leads to the rooms that look like engineering.
After you crawl through a few air vents you'll come to a medium sized room with another Power Relay inside. This is a fun room because there is an enemy that will crawl through the vents behind you and start shooting at you. The next Power Relay is shortly after this room, there will be a hallway you can jump down into from your ledge, the relay is in a cubby in this hallway.
Our last two Power Relays are found at the end of this mission next to Objective #3 (pictured below). Place bombs next to the final two relays and then use the switch on the wall to shut down the main power grid. Once that's done all that's left is to escape!
Keep going through the level and you will automatically complete Objective #4, shortly after that you will find a ladder which leads to the next level.
Level 2: Generators of Destruction
Objective 1: Disable All Generators
Objective 2: Shut Down Flow To Heating Tanks
Objective 3: Destroy All Research Files
Objective 4: Locate D20 Output Report
Objective 5: Locate Elevator
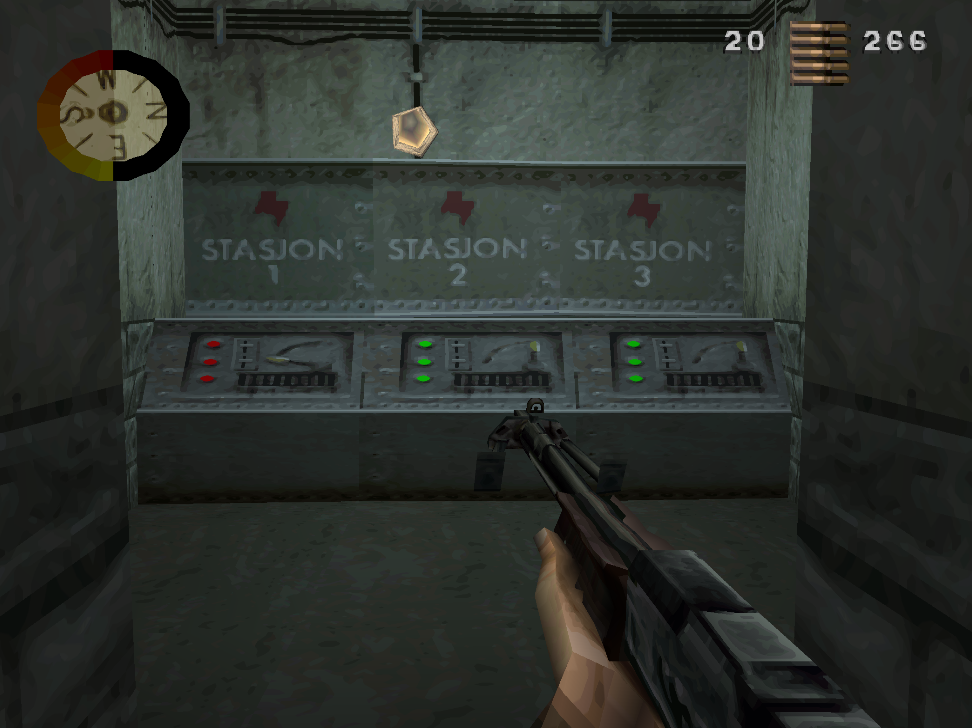
Our first objective of this mission is near the start inbetween stations 2 and 3, you'll find a small side room (pictured below) with computers. Interact with all 3 computers to turn off the generators and complete this objective.
Not much further into the mission you will find a room with some tanks and a valve, interact with the valve to complete half of Objective #2. The other half of this objective is in the adjacent room, but a hallway with a gun nest separates you. As always my advice is to fire at the gun nest from a distance, this one doesn't start with an enemy so if you're fast enough you can prevent one from getting there. On the other side of this gun nest you will find another room with more tanks and a valve, use it to complete the second objective.
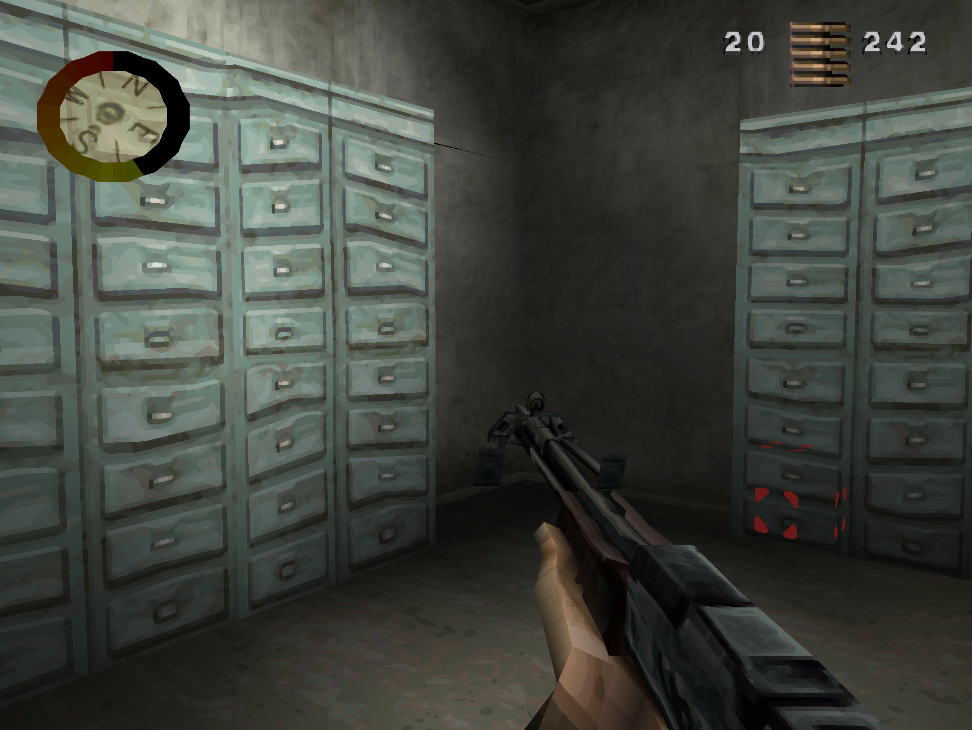
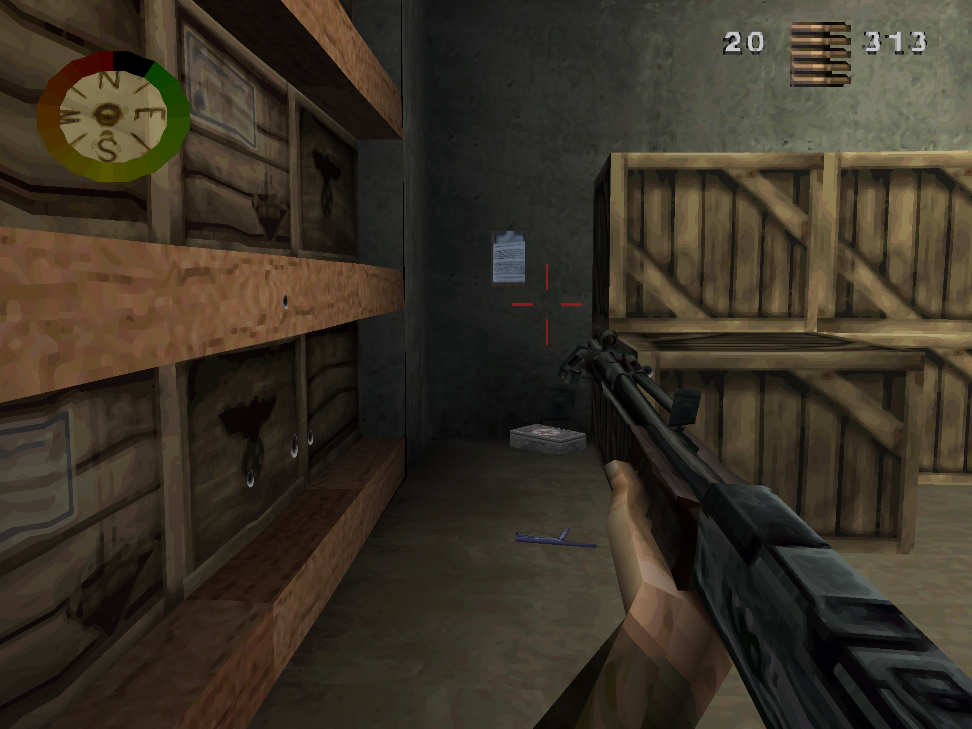
In the next hallway you will find our third and fourth objectives, there will be numerous rooms with walls of research files (pictured below). Plant bombs on all of the file cabinets you see to complete Objective #3 - you need a total of 6. Near the very first pair of file cabinets you'll also find Objective #4, it's a leather satchel sitting on top of a table (also pictured below). Click on either picture if you need to blow it up and see better.
All that's left to finish this mission is locate the elevator, it's at the far end of the research file hallways.
Level 3: Betrayal in the Telemark
Objective 1: Open Emergency Release Valve
Objective 2: Divert Heavy Water Vats
Objective 3: Acquire Delivery Schedule
Objective 4: Locate Garage
Objective 5: Disable Truck
There will be a few detours at the start of this mission but the only path forward will lead you straight to the area pictured below. You will be visiting multiple rooms that look like the picture below and you'll have to use the valves in all of them.
Inbetween vats 2 and 3 you will also find the Emergency Release Valve for Objective #1. Climb the ladder and run along the ledge to reach a valve on the wall, hit it to complete the objective. After closing the last vat and completing Objective #2 climb the ladder ontop of the vat to find a stash of goodies.
Follow the train tracks down and make sure to collect the Delivery Schedule for Objective #3 from inside of a small room just off the tracks (pictured below). Once this is done continue down the tracks until you reach the Garage and complete that objective.
As you could probably imagine you will find the Truck that you need to destroy inside of the Garage. Plant some explosives on the front of the truck and then exit the level through the doorway nearby.
Level 4: Heavy Water
Objective 1: Disable Both Trucks
Objective 2: Disable Power Station
Objective 3: Sabotage Ferry
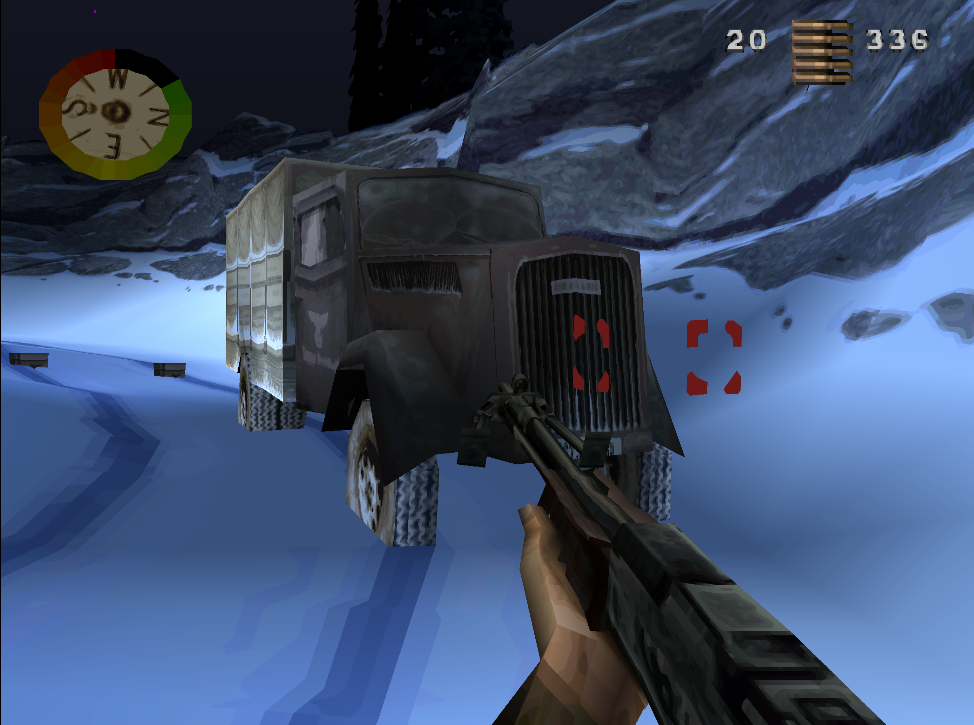
When the mission begins you will be under attack, defend yourself and then plant explosives on the truck next to you to destroy it. Continue down the road and you will find the second truck to destroy which will complete Objective #1 (pictured below).
Keep following the road and it will eventually lead you to a gate with an electrical symbol on it. Turn down the side road and you'll find a Power Station at the dead end which you can plant some explosives at and blow up. Doing this completes Objective #2 and it also will allow you to safely open the gate.
From here on out it's pretty straight forward, the Ferry is right on the other side of the gate and next to that is the level's exit. Plant the bombs on the Ferry and dip through the dark alleyway.
Continue to Mission 6 Walkthrough
Return to Mission 4 Walkthrough