
Final Fantasy IV Walkthrough - Chapter 12 (The Cave of Trials)
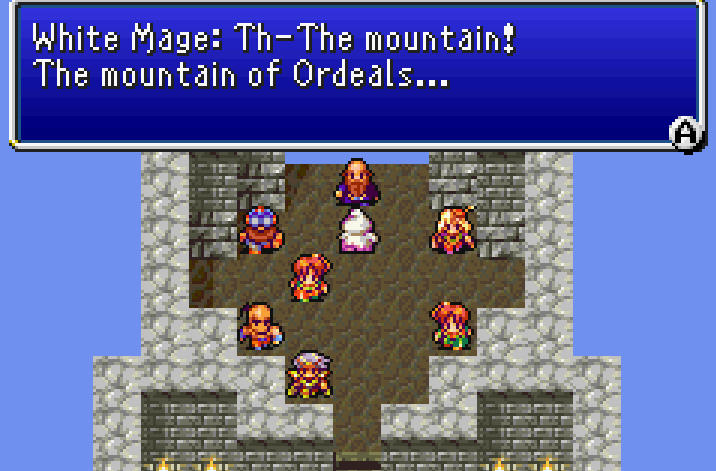
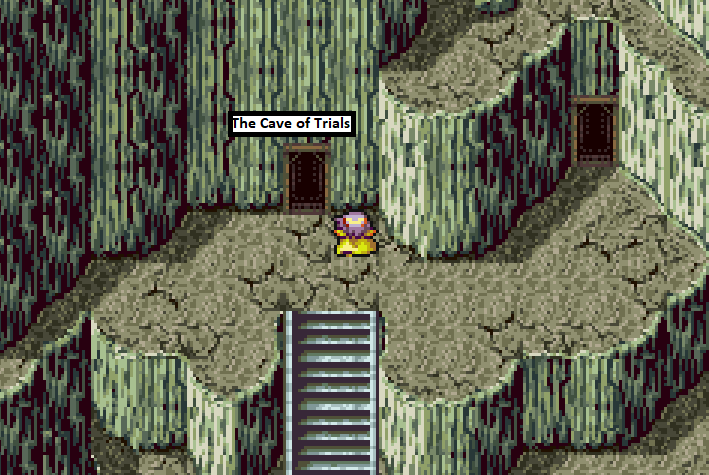
After defeating the Giant of Babel and freeing Kain from his mind control for the final time you'll be able to tackle the first optional dungeon the GBA version of this game. On the GBA version you'll be able to return to Mysidia and enter the Hall of Prayers (shown above) where you can find all of your previous party members.
Speak to any one of them to get them to join your party. You'll need to give them some gear and weapons since the majority of them will start out naked. The dungeon we're going to next has their Ultimate Weapons inside of it, however you'll need something to hold them over until then.
How this upcoming dungeon works is pretty unique... On the final floor there will be multiple bosses that hold a specific character's Ultimate Weapon. You can only fight the boss if you have the required character in your party and since there are 5 characters you can have join you in this room and 4 open party slots - it means two trips to this dungeon!
Cave of Trials B1 Treasure Chests:
X-Potion
Red Jacket (between the two rocks, just south of the X-Potion chest is a hidden passage that leads here)
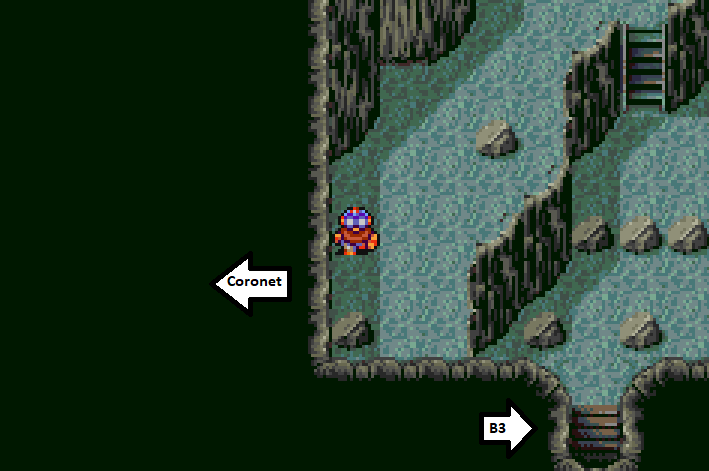
Cave of Trials B2 Treasure Chests:
Remedy
Phoenix Down
Coronet (Hidden room, use screen shot above)
Cave of Trials B3 Treasure Chests:
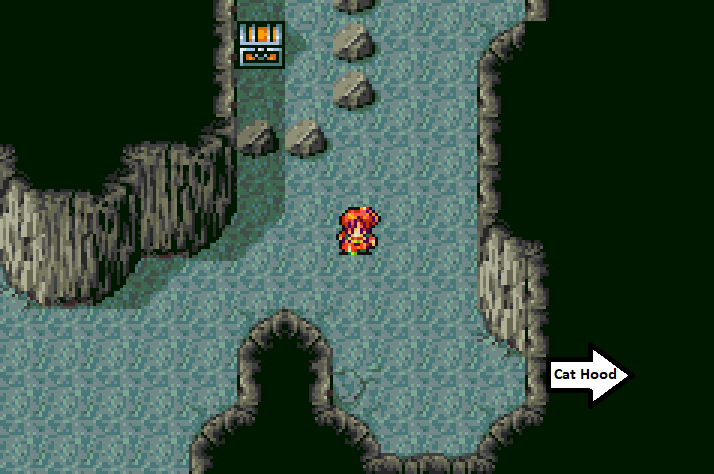
Cat Hood (Hidden passage just south of where you enter)
Remedy
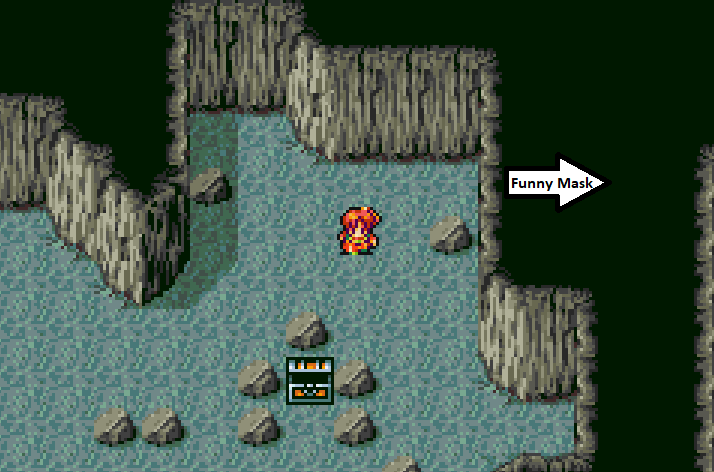
Funny Mask (Hidden passage just north of Remedy)
Cave of Trials B4 Treasure Chests:
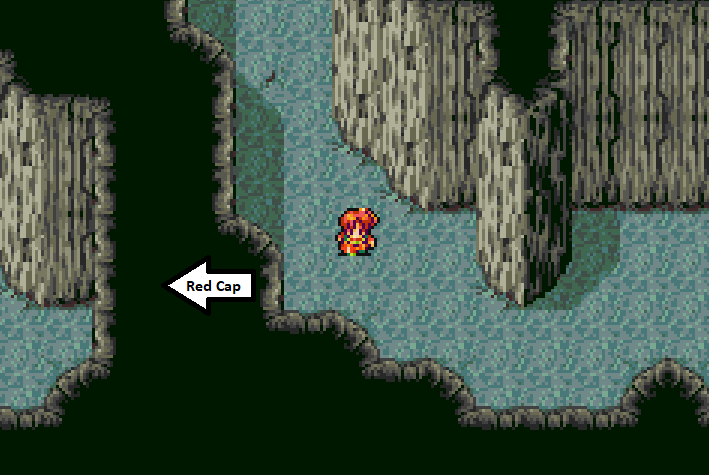
Red Cap (Hidden passage west of Cottage)
Cottage
Siren
Courageous Suit (Hidden passage directly east of the stairs to B5)
Cave of Trials B5 Treasure Chests:
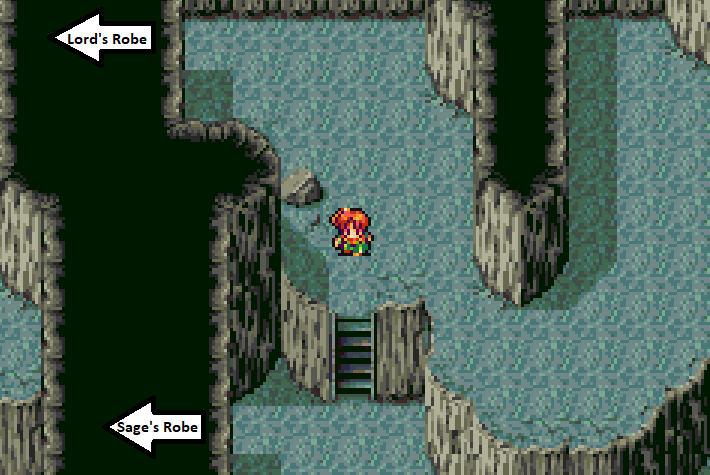
Remedy
Siren
Lord's Robe (Hidden passage in western portion of area)
Sage's Robe (Hidden passage in western portion of area)
Cave of Trials B6 Treasure Chests:
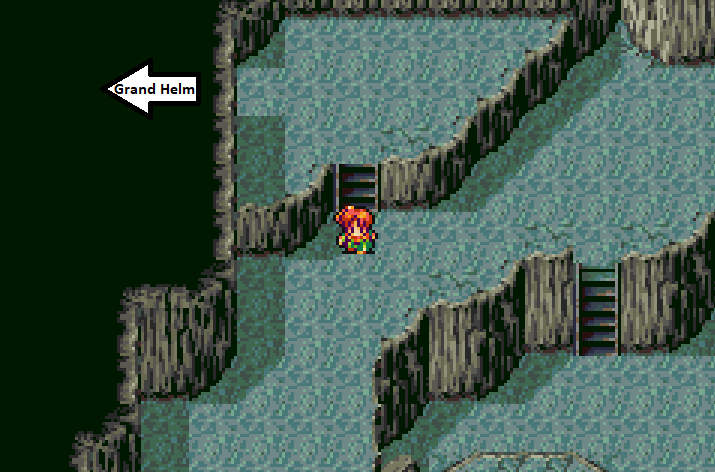
Grand Helm (Hidden passage in the northwestern portion of area)
Grand Armor (Hidden passage southeast of the Grand Helm; very hard to miss)
Dry Ether
Cave of Trials B7 Treasure Chests:
The right and left paths will take you to Megalixirs, the central path to proceed forward through the dungeon.
Megalixir
Megalixir
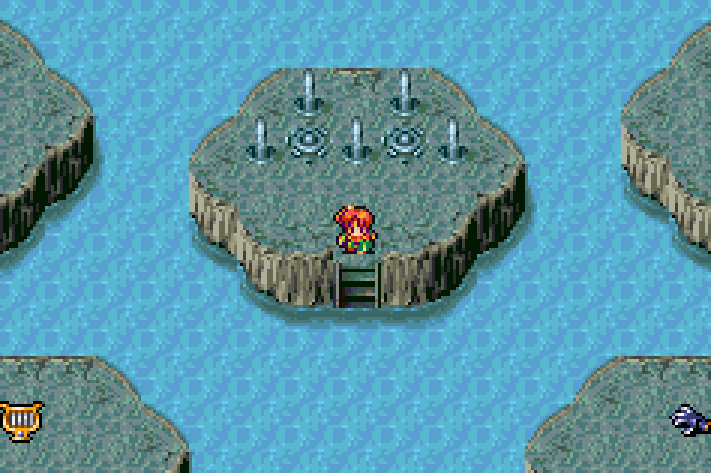
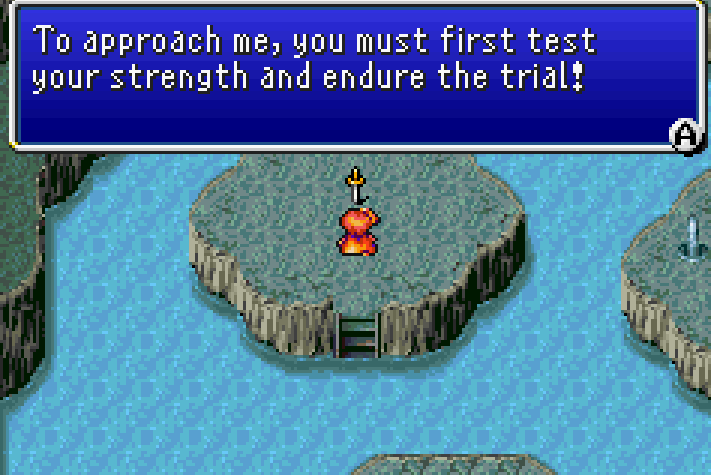
At the bottom of the Cave of Trials (pictured above) you'll find two panels on the ground. One of them acts as a Save Point and allows you to use Cottages/Tents to restore your HP/MP and the other panel will teleport you out of the dungeon.
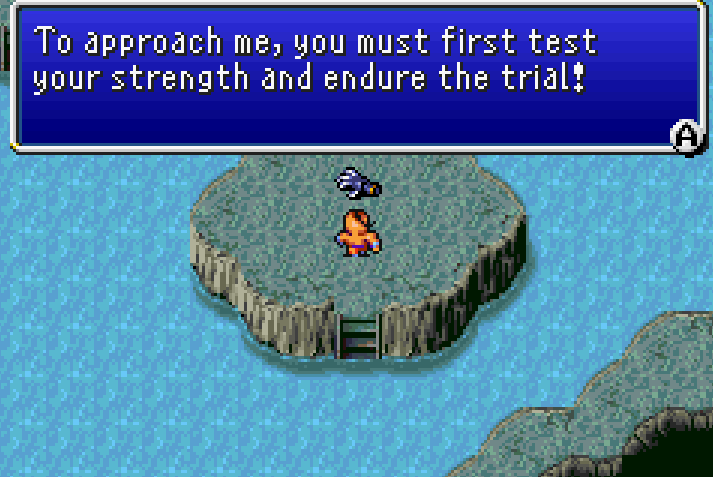
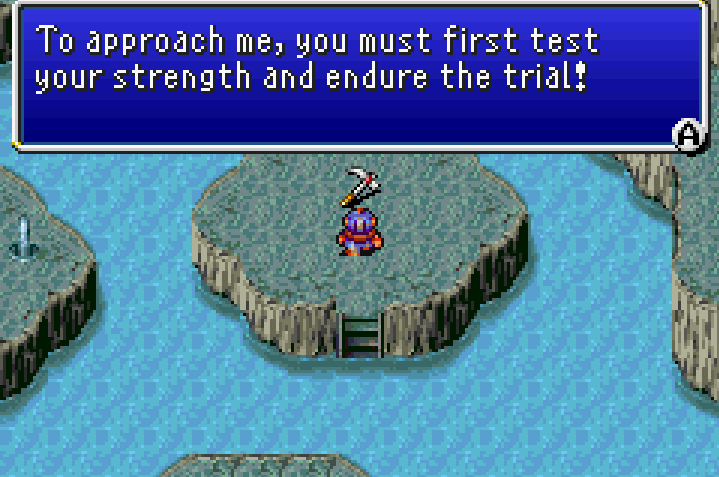
Throughout this room you'll find islands each with a weapon sitting in the center of them. Each of these weapons is its own boss battle and inspecting the weapon will activate the fight. However, there is a single catch to this! Unless you have the character in your party that the corresponding weapon is for - you won't be able to challenge the boss.
In order to get all of the available weapons you'll need to run through the Cave of Trials at least two times. There are 5 weapons and only 4 open party slots, since Cecil can't leave your team. Below you'll find a strategy for each of the five different bosses you'll be facing off against in the Cave of Trials.
Tip: Some of these bosses will be the hardest ones you've fought yet! If you've having trouble with them, instead of grinding, try turning down the ATB/Battle Speed all the way down. It will actually make the enemies attack you less often!
Storm Dragon - Hand of the Gods

HP: 40,000
Weakness: Ice
Storm Dragon is one of the easier bosses here that drops a really good reward. Yang already has a really high damage output and this weapon just makes him all the more awesome. As for the fight itself, the Storm Dragon is definitely no push over.
When he does a round of physical attacks he will strike twice, dealing a good chunk of damage if he hits one of your casters. In addition to his physical attacks he also uses abilities like Tornado and Maelstrom; both of which will leave your team with critical HP.
Use the strongest Blizzard spells you have against this foe while beating on him with both Cecil and Yang. If you wipe, try again until you get lucky enough. I lost the first two times I fought this boss because I got super unlucky (he kept one shotting my casters and Maelstroming/Tornadoing me before I could recover) but the third time I beat him without even having to heal much at all.
Death Mech - Thor's Hammer
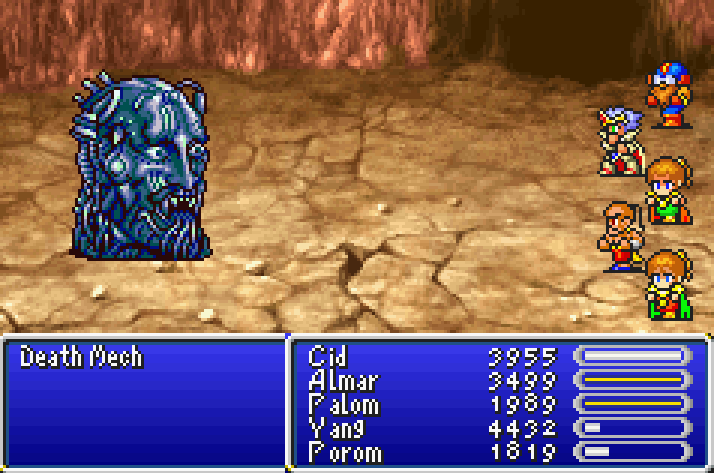
HP: 50,000
Death Mech has three abilities that are worth mentioning, Globe 199 which you may remember from the CPU boss in the Giant of Babel. This ability hits someone for 9999 damage, killing them in one hit. His other abilities are Piercing Laser and Flame; Laser will deal a couple thousand damage to a single target and Flame deals about 1000 damage to your whole party.
The upside of this boss is that he attacks slowly and that should give you enough time to rez/group heal inbetween each of his onslaughts. While this boss has no weaknesses to any magic, he is also not resistant to any either. Unload on him with all of your high level magic spells and you'll take him down pretty quickly.
T-rex - Seraphim's Mace
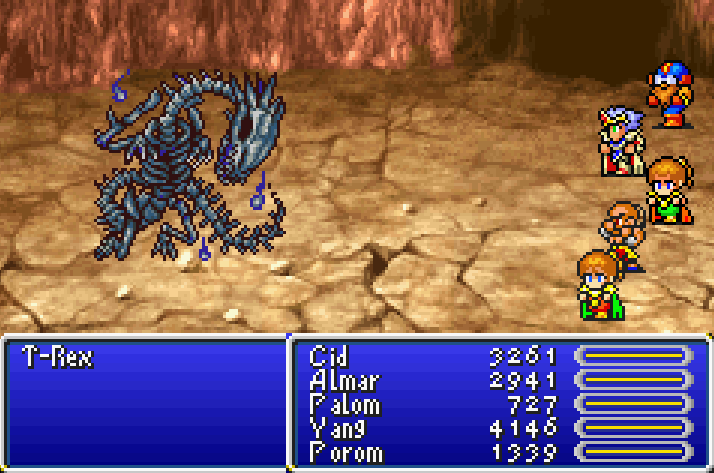
HP: 60,000
Weaknesses: None/He retaliates all elemental spells with the opposite element. Use Flare instead
Before you challenge this boss you'll want to cast Float on your entire team, it'll allow you to avoid the worst of T-rex's attacks. T-rex likes to counter all magic you throw at him with magic of his own so I recommend you don't use any elemental spells for this fight. Instead, on Rydia or Palom use the Flare spell. T-rex will not retalitate when hit with this.
Despite appearing undead, this monster is not undead so don't try to damage him with Cure/rez. All in all this is a pretty straight forward fight aside from what I have already said.
Master Flan - Triton's Dagger
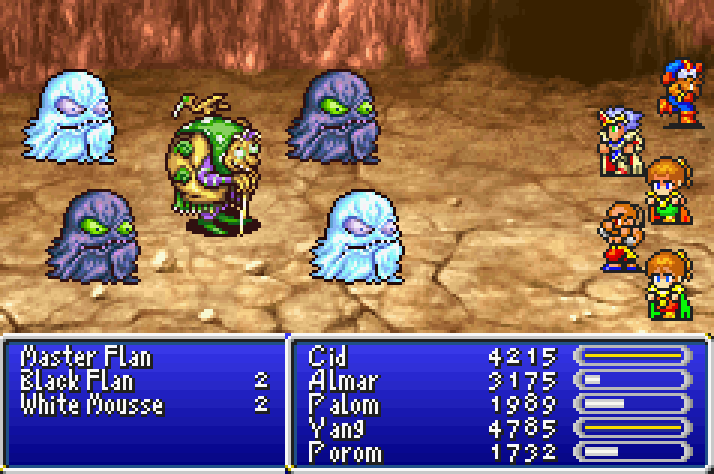
HP: 35,000
Weaknesses: None (Master Flan Reflects)
The Master Flan appears in battle alongside two Black Flans and one White Mousses. In order for you to hit the Master Flan with any abilities, you'll need to defeat at least one of his allies in the battle first. If you defeat all of them, Master Flan will regenerate them using Re-form.
I'd recommend against using any spells on the Master Flan as he'll keep Reflect up as a buff the entire time. Your strategy will be opening the battle with a high level Firaga spell on the entire enemy team, a small portion of it will be reflected back but it'll take out some of the enemies too.
Defeat every flan except one Black Flan with the Master Flan. Once you've done this focus all of your attacks on the Master Flan.
Gigas Worm - Apollo's Harp
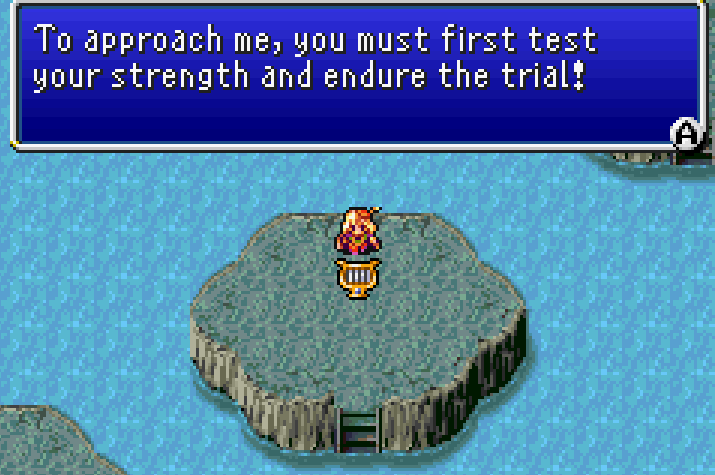

HP: 55,000
Weaknesses: None
Most of the damage that the GIgas Worm will deal to you is physical and he has an insanely fast attack speed. If all you have is one White Mage you'll want to use Curaja on your entire party every round. Typically the Gigas Worm gets in three attacks on my party between each group heal.
The only unique ability that the Gigas Worm will use is called Vampire, each time I saw him use it though it only did about 200 damage and it didn't even heal him. I've read in guides that it typically heals him but generally it doesn't heal for a lot, or deal a lot of damage.
Out of all the bosses in the dungeon this one is definitely one of the easier ones. The worst part about this boss is probably having to bring Edward in your group here to trigger the encounter!
With all 5 of the weapons in hand you're officially done with the Cave of Trials. Technically all that's left with the actual game is one final dungeon and the last boss, Zemus. Now is our last opportunity too to complete all of the available side quests in the game, which are listed below.
How to obtain the Asura Summon
How to obtain the Leviathan Summon
How to obtain the Bahamut Summon
How to obtain the Sylph Summon
Complete the Excalibur Side Quest
To proceed with the game's story you'll want to hop back onboard the Lunar Whale and inspect the crystal that takes you to the moon. Our destination is the Lunar Palace yet again but this time we're able to go much deeper inside.
Continue to Chapter 13 (Lunar Subterrane & Final Boss)
Return to Chapter 11 (The Moon & Giant of Babel)