
Pre-Combat Buffs to Use - Baldur's Gate 2
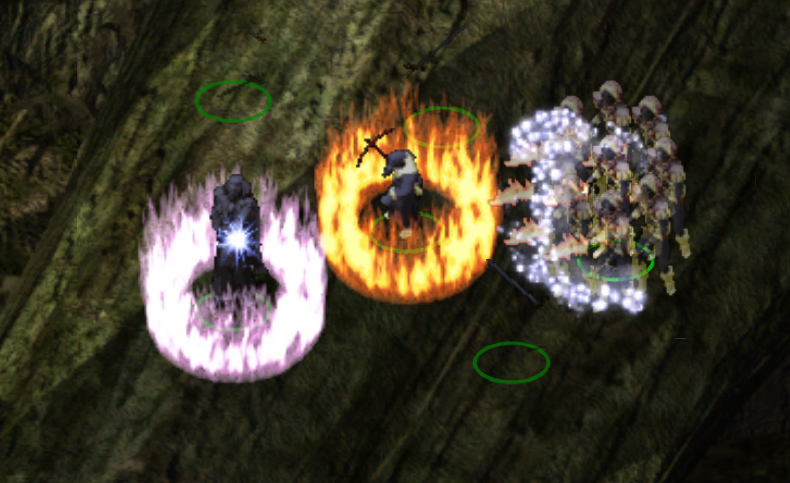
Much like with the first Baldur's Gate game the most important thing you can do to make fights easier is to buff up. Buffing in this game is extremely important and will make the difference between you winning a fight or losing. For those of you that don't know which buffs stack and which don't - or even which buffs are worth using - you'll find this page extremely helpful.
When I first started playing BG1 and BG2 I was completely clueless as to what spells were worth using and why. This ignorance made me dive into AD&D mechanics and learn as much as I possibly could about all of the spells in the game and which ones were useful and which were not.
This guide is a culmination of all that knowledge I have gained about this series. If you'd like a more noob friendly version of this information I recommend you check out my Best Pre-Combat Buffs - BG1 Beginner's Guide. That guide is written moreso for lower level players and less experienced players. Since BG2 is essentially a continuation of that game and builds off of it, I figured I would make this guide more advanced.
All Priest Buffs Before Combat:
- Bless
- Aid
- Remove Fear (if needed)
- Chant
- Free Action (only if needed)
- Protection Against Evil 10' Radius
- Defensive Harmony
- Chaotic Commands
- Negative Plane Protection (against Vampires or anything that Level Drains)
- Animate Dead (Pet)
- Armor of Faith
- Conjure Animals (Pet)
- Shield of the Archons
All Wizard Buffs Before Combat:
- Blur
- Mirror Image
- Haste
- Spirit Armor
- Improved Invisibility
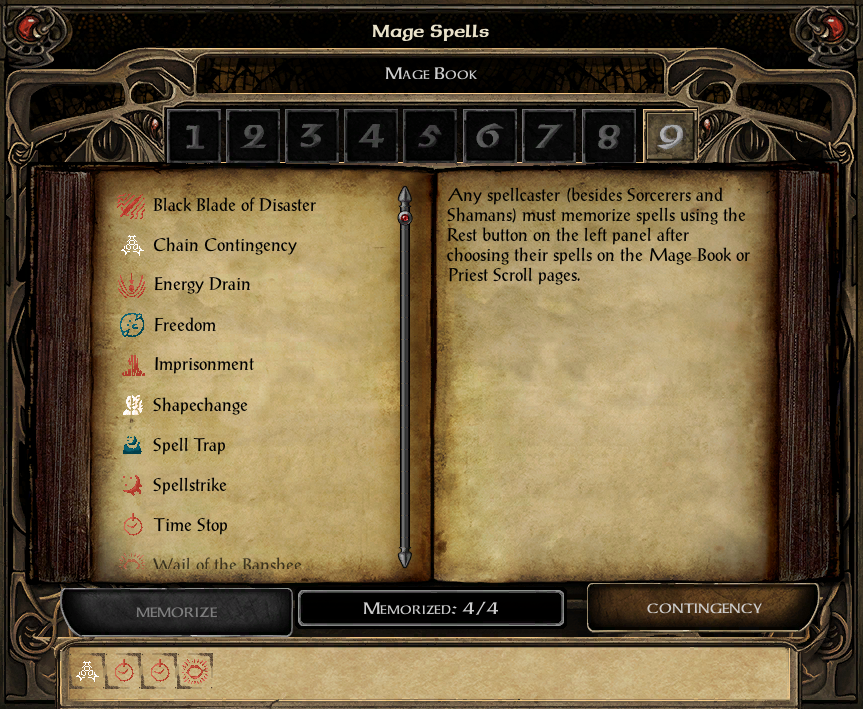
- Minor Sequencer, Spell Sequencer, Spell Trigger, Contingency, Chain Contingency
- Stoneskin
- Spell Immunity
- Spell Shield
- Improved Haste
- Spell Trap
- Mislead, Project Image or Simulacrum
- Animate Dead (Pet)
As I said in the BG1 version of this guide, not every single spell on this list is worth using before combat. Some fights are easier than others and don't require you to go all out. Other fights will either be melee or caster heavy fights which means you'll have to use different protections for each of them. You will typically have to gauge the difficulty of a fight yourself to know what is required buff wise.
The buff list that I have on the BG1 Pre-Combat Buffs Beginner's Guide page is still relevant for all of BG2. I have copy pasted that buff list below so you can see it here too. These are the buffs I found myself using throughout all of BG2 and Throne of Bhaal before any fight that I thought would be moderately difficult.
0. Stoneskin, Spell Shield
1. Animate Dead on Wizard/Cleric
2. Bless and/or Aid (Priests)
3. Mirror Image or Blur (Wizard) and Armor of Faith (Priests)
4. Chaotic Commands (Cleric; cast this on the tanks)
5. Protection Against Evil 10' Radius (Cleric)
6. Remove Fear (Cleric; if needed)
7. Haste (Wizard)
8. Chant (Cleric)
If you'd like to learn about each of these spells and what they do I recommend my BG1 Pre-Combat Buffs Beginner's Guide page. On that page I give a very detailed rundown of each and every spell in this list and why I cast it along with what it does. As aforementioned on this page I am going to give you a bit more of an advanced approach to things so I won't cover that basic info again here.
The main thing that BG2 added as far as Pre-Combat Buffs go is Sequencer and Contingency spells. Both of these spell genres are unique to Wizards so Priests will not get access to them and they are insanely overpowered when used correctly. I cover this a little bit in my TL;DR portion of the BG2 Beginner's Guide but I will cover it more indepth here.
First though let's take a look at the other extremely important spells that BG2 added.
(Wizard) Improved Haste: This is a new spell added in BG2 and it's a single target haste only but it's way better than Haste. I typically use this spell on my tanks/melee DPS on harder fights. What I usually do is Improved Haste my melee then cast Haste for the rest of my group. In my experience so long as you cast Improved Haste first the regular Haste will not overwrite it. Alternatively, what I do is use Haste on easier fights and save Improved Haste for the more difficult encounters.
(Wizard) Simulacrum: Simulacrum allows you to create a duplicate of yourself that has access to (almost) all of your spells, all of your HLAs (High Level Abilities) and even the items you have on your quick bar. This is one of the most over powered spells in the entire game when used correctly. If you're smart you can also heavily abuse this spell and cheese almost every encounter. All spells used on the Simulacrum will not cost a spell slot on your main character.
(Wizard) Mislead: Unlike Simulacrum this spell creates a duplicate of you that can't do anything... However the Wizard will be under an invisibility spell and unable to be targeted until their Mislead image is destroyed. This can be easily exploited by a Mage/Thief combo for unlimited backstabs. You can also use Mislead to put your clone in a save spot then attack with your Wizard without enemies knowing what is even happening.
(Wizard) Project Image: Project Image works a lot like Simulacrum with a few slight differences. This spell creates a duplicate of the Wizard and roots the "main" Wizard in place. You'll be able to control the duplicate Wizard which will have access to all the same spells, HLAs and items on your quick bar. Unlike Simulacrum your Projected Image is the same level as you. All spells used with your Project Image will not cost a spell slot on your main character. One thing to note is that Project Image is vulnerable to Dispel and Remove Magic along with True Sight. For this reason you'll typically want to use Spell Immunity (Divination & Abjuration protections) on your Projected Image.
(Wizard) Spell Trap: It will absorb spells cast at you and restore lost spell slots for the day. This is an amazing spell that will protect your Wizard from other pesky Wizards.
There are many other useful spells added with BG2 but these are some of the more powerful ones that I felt deserved to be called out. Now, let's take a look at another batch of insanely powerful Wizard spells - the Sequencer and Contingency chains. Both of these spell chains do kind of the same thing but slightly different.
Sequencer allows you to store 2 to 3 spells and fire them off - instantly - whenever you wish. Depending on what level Sequencer you're using the spells you'll be allowed to choose from will vary. Minor Sequencer, for example, lets you pick spells from Level 2 or below. Spell Trigger (the highest level one) allows you to pick spells from Level 6 and below.
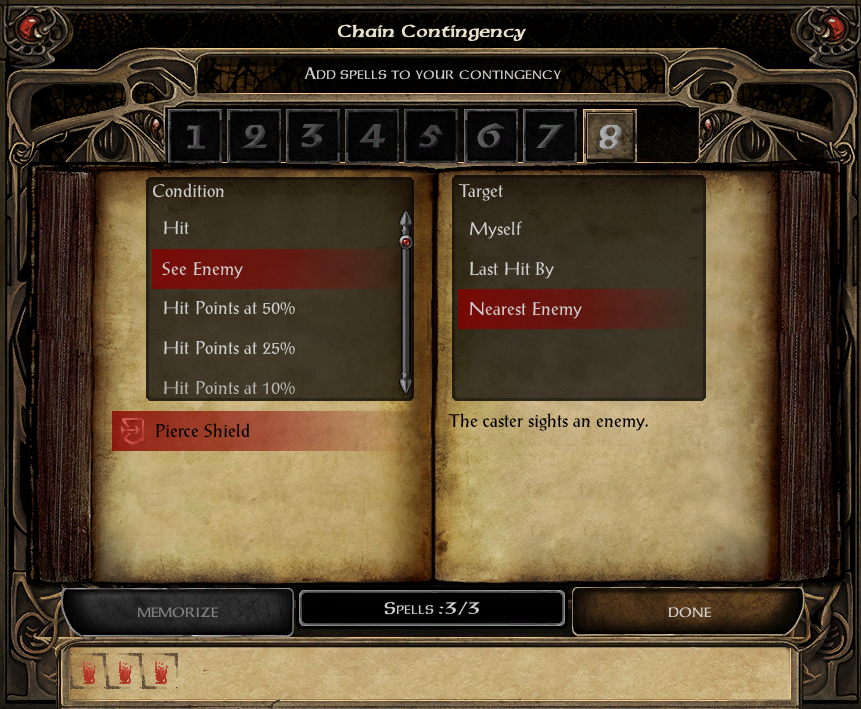
Contingency also allows you to store 2 or 3 spells that will fire off - instantly - when a certain condition is met. I have provided a screenshot that lists off all of the conditions below. Most commonly I use Wizard is helpless or Wizard sees enemy; each are for different things. The Wizard is helpless condition is for defensive spells like Protection from Magical Weapons, Stoneskin, Improved Invisibility etc etc. As for the Wizard sees enemy, this condition is mostly for very hard battles that I want to end extremely quick with high damage spells or debuffs.
Below you'll find a list of different Sequencer combinations that I use along with different Contingency combinations. Much of this information is copy and pasted from the TL;DR section of my BG2 Beginner's Guide main page. I've added a bit more information below than is on the TL;DR page since that page is a TL;DR.
Minor Sequencer: Magic Missile x2, Blur and Mirror Image, Web x2 -- (Cleric/Mage) Doom & Magic Missile
Spell Sequencer: Lower Resistance x2, Great Malison is a good combination that I use frequently. For pure damage I would recommend Skull Trap x3 or Flame Arrow x3 if you want to make it single target. When it comes to protections Fireshield Blue and Red with Improved Invisibility works good, that will mostly deal damage to your attackers though and not protect you as much. This is also operating under the assumption that you already have Mirror Image and Blur up otherwise you'd want to use that instead. (Defensive - against casters) Minor Globe of Invulnerability, Improved Invisibility, Minor Spell Deflection -- (Cleric/Mage Debuff) Doom, Greater Malison, Lower Resistance
Spell Trigger: (Fighter/Mage) Stoneskin, Protection from Magical Weapons, Improved Haste -- (Against Mages/Bosses) Pierce Magic x2 + Breach // Lower Resistance x2 + Breach -- (Defensive) Spell Immunity (Abjuration) and Spell Deflection -- (Fighter/Mage) Improved Haste, True Sight, Mislead -- (Crowd Control) Greater Malison, Chaos, Chaos -- (Crowd Control x2) Greater Malison, Chaos, Slow -- (Defensive & Damaging) Animate Dead x3 -- (Defensive/Damaging) Stoneskin, Fireshield Red & Blue
Contingency: (Mage - Protection) Stoneskin -- Improved Invisiblity -- Minor Spell Deflection -- Mirror Image. (Mage/Cleric Buff) Bless, Chant, Remove Fear are all good to use with See an enemy conditions.
Chain Contingency: (Mage - Protection) Protection from Magical Weapons, Spell Turning, Spell Shield -- (Mage - Damaging) 3x Abi Dalzim's Horrid Wilting when see an enemy -- (Cleric/Mage) Heal @ 25% Health Trigger along with 2 buff spells you also like -- (Mage Protection/Damage) 3x Mordenkainen's Sword when Helpless -- (Defensive) Protection from Magical Energy x2, Protection from Magical Weapons
As you can probably surmise what I have above is not a complete list of all the possible combinations. It's up to you to experiment and come up with the perfect combinations that work for your play styles. Keep in mind too that you're able to have multiple Sequencers and Contingencys active at one time. What I mean is, you're able to have a Spell Trigger, Spell Sequencer and Minor Sequencer active all at once... but you can't have 2 Spell Triggers, for example.
The same is true for Contingency. You're allowed to have 1 Chain Contingency and 1 Contingency active at a time on the same character. Another thing to keep in mind is that when you Rest these spells do not fade. You're able to fully stock Sequencers then rest to recover your spells - this should be something you always do as well.
Spell Sequencer I typically almost always use for debuffing enemies. Spell Trigger has a variety of different uses depending on what character I am using it on and where I am in the game. As for Contingency and Chain Contingency, I typically use these to save my characters when they get low health or when they enter the Helpless state.
If I know an extremely hard fight is coming up I will load up Chain Contingency with 3 Abi Dalzim's Horrid Wilting and set the condition to "Sees enemy" so I can watch it eat away most of the enemies health in an instant. An example of a fight I do this for are Dragons and Lich enemies such as Firkraag, Thaxll'ssillyia, Kangaxx and various fights in Watcher's Keep or Throne of Bhaal.
Below are some of my favorite combinations for Sequencers and Contingency spells. Some of these are already mentioned above in the list.
Almar's Favorite Combos:
Spell Sequencer: Lower Resistance x2 and Greater Malison -- This is typically the combination I have my characters memorize right before a boss fight.
Spell Sequencer: Skull Trap x3 or Flame Arrow x3 -- When I have a lot of trash mobs to clear and no really tough fights coming up, I will use this combination.
Spell Trigger: (Fighter/Mage) Protection from Magical Weapons, Improved Haste, Globe of Invulnerability -- I typically don't use Stoneshield in this combo and use Globe of Invulnerability instead because Stoneshield is cast automatically by the AI.
Spell Trigger: Animate Dead x3 -- This is a good "oh crap" button since it'll allow you to drop some extra helpers into the middle of the battlefield. Your undead compadres will eat damage for you and also deal damage for you making this a great trigger to use.
Spell Trigger: Pierce Magic x2 + Breach -- I call this the "I am impatient and don't want to wait for your immunities to wear off" button. Great spell for harder enemies who like to buff up a lot.
Contingency: When Helpless trigger -- Stoneskin, Improved Invisibility, Mirror Image any of these will work
Contingency: See enemy -- Chant, Bless
Contingency: At 25% Health -- Improved Invisibility
Chain Contingency: 25% Health or Helpless (Defensive) 2x Mordenkainen's Sword + Mass Invisibility -- Gives enemies something to fight while your party gets invised.
Chain Contingency: 25% Health or Helpless (Defensive) Symbol of Stun, Spell Shield, Improved Mantle -- It will stun everyone around you and grant you some protections so that you hopefully survive
Chain Contingency: See an enemy -- (Offensive) 3x Abi Dalzim's Horrid Wilting -- You will see this Chain Contingency mentioned a lot as people's favorite and it's for good reason... It'll decimate the next enemy (or group of enemies) that you see.