Weapon Customization/Leveling Up
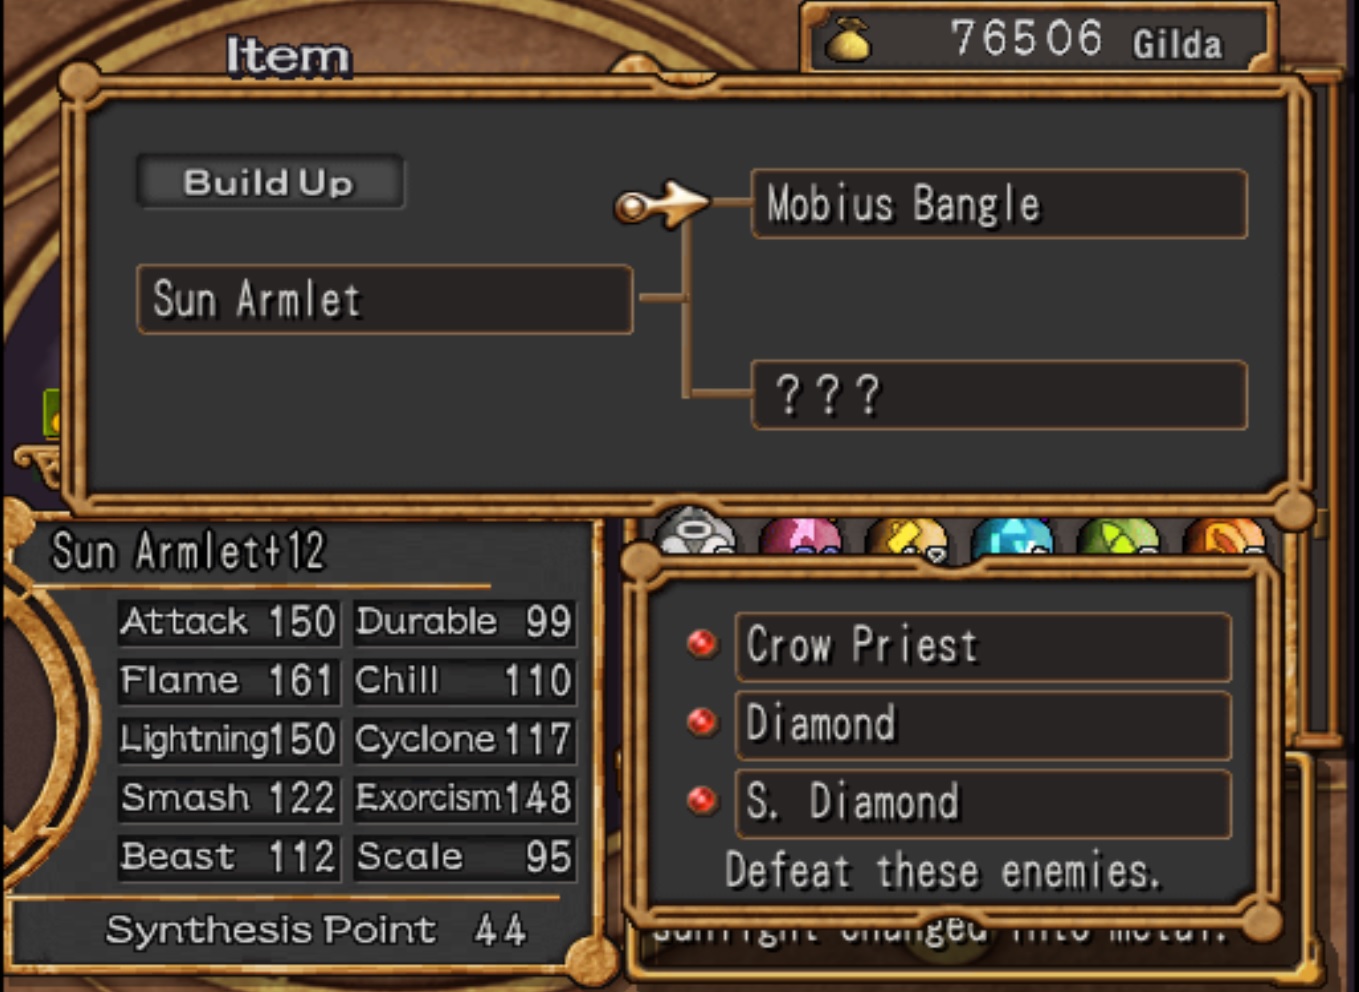
If you've played Dark Cloud 1 (and remember it) you'll notice the Weapon Customization in this game is slightly different than its predecessor. In order to upgrade a weapon you'll usually need to raise its stats before getting the "Build Up" option to become available. You can Spectrumize Crystals to increase your weapons potential, other weapons (that have +5 or greater) or gems which are pretty rare finds from dungeons and can be purchased later in the game during the final Chapter.
In order to Spectrumize a weapon and have it still be useful as aforementioned you'll need to make certain it has at least a +5 or greater level. You won't gain the full benefit of each weapon you spectrumize, only some of the stats will be carried over. It's also worth mentioning that when you spectrumize a weapon if it has any bonuses attached to it, they'll carry over onto the new weapon. Example, you could spectrumize a weapon with 'Wealth' on it and slap that on a different weapon, having it carry the 'Wealth' effect with it.
Being able to carry over the special attributes of each weapon is really awesome considering it means you could load up Max's weapons with every bonus there is. To toss it out there, I strongly recommend you focus on Max's weapons more than Monica's since Monica is unavailable for Chapter 8, which one could call 'bonus content'.
The last thing I feel I need to talk about with Weapon Upgrading in this game is that certain weapons require you to kill monsters before being able to upgrade them. These monsters start appearing usually in Chapter 6 but most of them appear in Chapter 7, in the Moon Flower Palace dungeon.
Below you can find a list of all the monsters required for upgrading all the different weapons in Dark Cloud 2. They are sorted by dungeon which should make things easier for you. Keep in mind that these mobs won't be in the regular route in the dungeons. The ones in Rainbow Butterfly Woods/Ocean's Roar Cave, Starlight Canyon and Mount Gundor are all found in the part of the dungeon that unlocks during Chapter 6 once you have the Star Key.
Rainbow Butterfly Woods
Spirit Flyer - Looking for the Earth Gem dungeon floor
Sylph - Something Rare here dungeon floor
Starlight Canyon
Heat Fairy - Looking for the Wind Gem dungeon floor
Balalla - Looking for the Wind Gem dungeon floor
Iron Mask - Evil Spirit in the Valley dungeon floor
Mummy - Evil Spirit in the Valley dungeon floor
Blumo - Brave Warriors in the Valley dungeon floor
Sleeber - Brave Warriors in the Valley dungeon floor
Ocean's Roar Cave
All of these mobs are on the dungeon floors that lead to the Water Gem Altar that opens up during Chapter 6. They aren't found in the traditional Ocean's Roar Cave.
Blackbeard - Looking for the Water Gem dungeon floor
Star Tortoise - Looking for the Water Gem dungeon floor
Zombie Pirate - Looking for the Water Gem dungeon floor
Fat Naga - Pirates' Revenge dungeon floor
Pirate Eye - Pirates' Revenge dungeon floor
Mount Gundor
Rifle Wolf (First floor of Mount Gundor, can be found in Chapter 5)
Living Armor - Looking for the Fire Gem dungeon floor
Rolling Rocks - Crazy Mountain dungeon floor
Fire Spirit - Explosive Hot Spring dungeon floor
Flaming Nail - Explosive Hot Spring dungeon floor
Ice Spirit - Explosive Hot Spring dungeon floor
Triple Cracker - Explosive Hot Spring dungeon floor
Arthur - Crazy Mountain dungeon floor
Moon Flower Palace
Bundy - Ancient Wind dungeon floor (Start of dungeon before the intersection)
Castle Eater - Ancient Wind dungeon floor (Start of dungeon before the intersection)
Count Balloon - Ancient Wind dungeon floor (Start of dungeon before the intersection)
Silver Gear - Ancient Wind dungeon floor (Start of dungeon before the intersection)
Club - Card Warriors Gather dungeon floor (Start of dungeon before the intersection)
Diamond - Card Warriors Gather dungeon floor (Start of dungeon before the intersection)
Heart - Card Warriors Gather dungeon floor (Start of dungeon before the intersection)
Joker - Card Warriors Gather dungeon floor (Start of dungeon before the intersection)
Spade - Card Warriors Gather dungeon floor (Start of dungeon before the intersection)
Evil Performer - Dangerous Treasure dungeon floor (Start of dungeon before the intersection)
Crow Priest - Zombie Zone dungeon floor (Start of dungeon before the intersection)
Fire Drake - Zombie Zone dungeon floor (Start of dungeon before the intersection)
Moon Goyone - Feeling out of Place & Living Statue dungeon floor (Garden Wing)
Guardia - Living Statue dungeon floor (Garden Wing)
Ice Drake - Danger Zone dungeon floor (Garden Wing)
Miss Gourgon - Scary Women dungeon floor (Garden Wing)
Moonflowephant - Lonely Machine dungeon floor
Skull Chief - Lonely Machine dungeon floor
Rain Ghost - Raging Spirits dungeon floor
Storm Ghost - Raging Spirits dungeon floor
Thunder Ghost - Raging Spirits dungeon floor
Vanguard Mk2 - Lonely Machine dungeon floor
Moon Joe - Nobility dungeon floor
Clock Knight - Palace Watchdog dungeon floor
Toy Rock - Palace Watchdog dungeon floor
S. Club - Final Trump Card dungeon floor (In the final part of Moon Flower Palace dungeon)
S. Diamond - Final Trump Card dungeon floor (In the final part of Moon Flower Palace dungeon)
S. Heart - Final Trump Card dungeon floor (In the final part of Moon Flower Palace dungeon)
S. Joker - Final Trump Card dungeon floor (In the final part of Moon Flower Palace dungeon)
Lancer - Wandering Knight's Soul dungeon floor (In the final part of Moon Flower Palace dungeon)
Evil Nail - Final Battle dungeon floor (In the final part of Moon Flower Palace dungeon)


